
Access control entries define the security configuration for a given tree node – account, printer, print queue, server, or service. Each entry consists of the security role and a user or group to which this role is granted when accessing this particular tree node. For example, if an access control entry with user admin and role Administrators exists, it means that user admin has full administrative permissions on that tree node.
Default settings
Access controls are inherited by default so that all sub-elements of the tree acquire the same configuration. Inherited access controls are greyed out and cannot be modified or deleted. You can override inherited access controls in the child nodes or add more entries for users from sub-accounts.
The following screenshot shows how the access control list is displayed on the Customer 1 node for the user from Acme Corporation vendor:
Which access controls are displayed depends on the user viewing the current node. Given the following hierarchy,
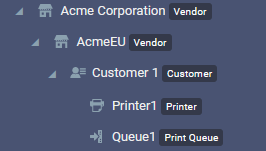
the top-level administrator of the Acme Corporation vendor can see all access control definitions for all the nodes. The users who are logged in for AcmeEU account will not be able to see, change, or override access control definitions inherited from the parent Acme Corporation node. The users from Customer 1 account will only see and be able to manage access controls defined in that account.
Changing default inheritance of access controls for child nodes
Be careful when changing the default inheritance for the access controls. Make sure you understand the effects of this action beforehand.
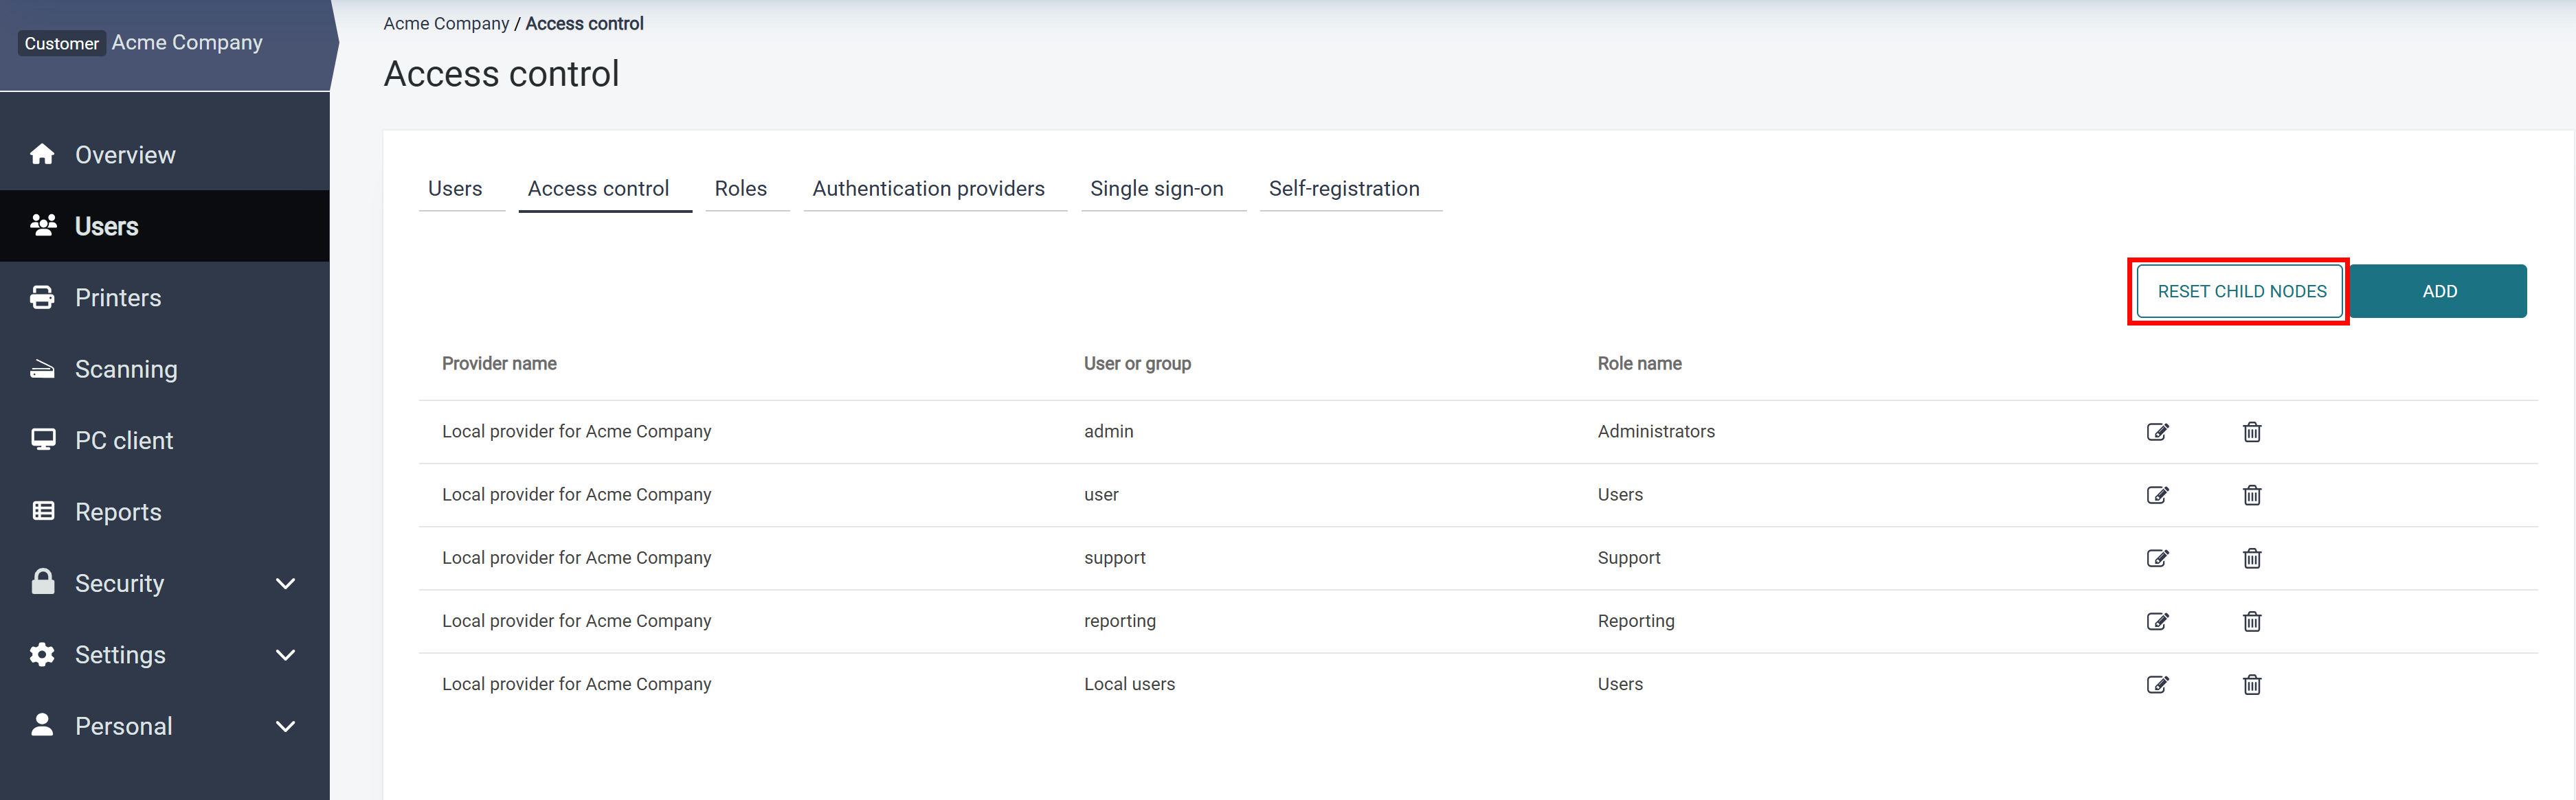
You can restore the default inherited access controls on customer account child nodes by clicking Reset child nodes.
To see this button in Access Control, you must have the PropagateAccessControl permission.
Reset child nodes
The reset child nodes action will remove overridden access controls from child nodes.
Following up on the example above, in the Customer 1 node, click Reset child nodes and confirm the action. You will then see that the access controls originating in the Customer 1 node are now inherited, as per default:

Creating Access control records
If the authentication provider you want to assign security roles to is configured to use OIDC authentication, you can search for authenticated users (and their assigned groups), or you can enable Search in external identity management to search for any user or group in your external identity provider.
Perform the following steps to assign a role to a user or a group:
-
On the Users page in Access control tab, click Add to create a new Access control entry. A new dialog window will open.
-
In Authentication provider, select the authentication provider for which you want to create the new access control entry.
-
In Security role, select the role that you want to assign to your users or groups. For creating, editing, or deleting roles see Roles. The roles available by default are:
-
Users
-
Support
-
Reporting
-
Administrators
-
-
You can assign the Security role either to a particular user/group or to all authenticated users:
-
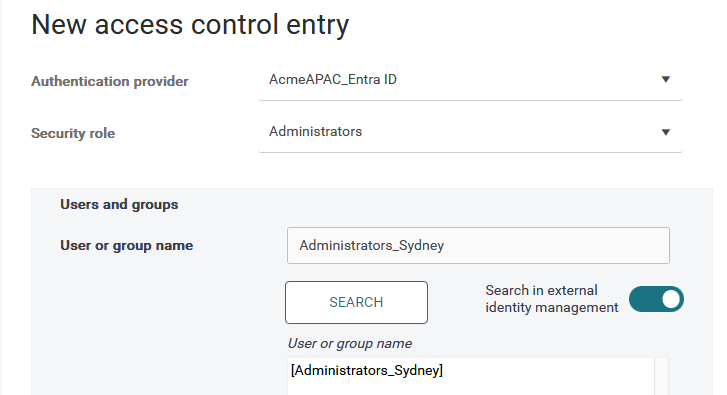
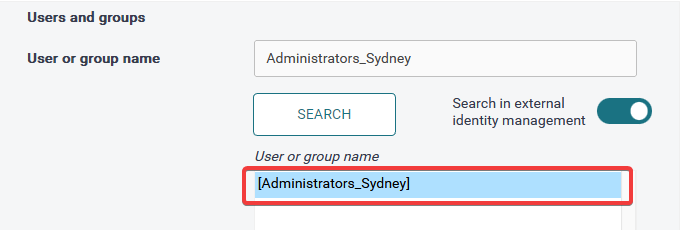
If you wish to search for a particular user or group in your external identity provider, enable the Search in external identity management toggle and enter the user or group name in the User or group name field. In the following example, you have a group called "Administrators_Sydney" in your identity provider, and you wish to assign the Administrators role to its members.
Search in external identity management toggle is shown only for providers relying exclusively on OIDC authentication - i.e. with "Service Account" authentication disabled.
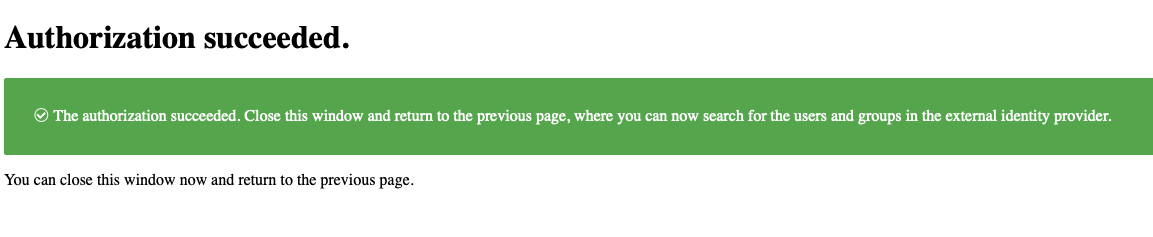
The first time an administrator searches externally, they will be prompted to authorize additional delegated permissions in their Identity Provider. This process may require the authorizer to have administrative rights in the Identity Provider.
The additional permissions required for each provider are:
Identity Provider
User Search Permission
Group Search Permission
Microsoft Entra
user.read.allgroup.read.allOkta
okta.users.readokta.groups.readGoogle
https://www.googleapis.com/auth/admin.directory.user.readonly
https://www.googleapis.com/auth/admin.directory.group.readonly
-
In the following example, you wish to assign the Reporting role to all authenticated users. In such case, leave the User or group name field blank and click Search.

-
-
Click Search.
-
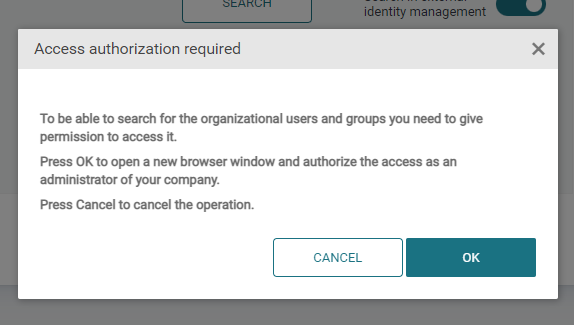
If you enabled Search in external identity management, you will need to give permission for the search. Confirm your action by clicking OK.
-
Log in with a user account that has the necessary privileges to fetch all users and groups from your external identity provider.
-
After successful authentication, close the browser tab, and click Search again to complete the access control mapping.
-
Select the user or group that has been found.
-
Example for Administrators:
-
Example for all authenticated users:

-
-
Click Save to create the access control record.