
Relevant Products
API keys are available in BREEZE MFD pro print pro mfp
API keys in YSoft SAFEQ Cloud server are required to access various server functions using API calls. Please refer to separate API documentation for a full description of the available API endpoints and how to use them.
By default, there are several API keys predefined for each customer account which are used by various clients connecting to SAFEQ Cloud server, for example, the SAFEQ Cloud client or a Chrome browser extension.
For security reasons, we recommend you to use a custom API key instead of the predefined ones and disable the predefined keys. A custom API key can be specified during SAFEQ Cloud client or SAFEQ Cloud gateway installation.

Access to the API key section in the SAFEQ Cloud Web UI is controlled by ModifyApiKey, ViewApiKey, and DeleteApiKey permissions set in the user roles. API keys are inherited from top-level vendor nodes. If an API key is defined on a vendor account level, it can be used to access API functions across all sub-accounts associated with that vendor.
Creating an API key
-
In the SAFEQ Cloud Web UI, click Security > API keys.
-
Click Add.
-
Fill in the required properties.
-

-
Type
-
General – The default type. You can set all the permissions according to your needs.
-
Embedded – Used in Embedded configurations. Use the raw value if you wish to install a terminal via Manual operations (see Embedded Terminals' configuration and Terminal Deployment Tool).
-
Chrome – Used for Chrome extensions. If you wish to use the one that is created by default, regenerate it to see the value behind the hash.
-
Edge – Used for Edge devices such as the OMNI bridge. When you add a new edge device, a new value is added to this default Edge API key.
-
-
Name – a descriptive name of the API key.
-
Value – an automatically generated unique value associated with the API key.
-
Active – a flag indicating whether this API key is active.
-
Allow unauthenticated requests – if this option is enabled, it is possible to send API requests without acquiring the user token first.
-
Allow untrusted endpoints – if this option is enabled, it is possible to perform login operations and acquire a user token for insecure login types without completing the device registration workflow. Insecure login types include Session user, Session user + domain, and User principal name. See the API documentation for more information.
If both unauthenticated requests and untrusted endpoints are enabled, the API key can be used without any authentication and a leaked API key could result in unauthorized access to the system.
When configuring the SAFEQ Cloud Client with a custom API key, we recommend you to keep Allow unauthenticated requests and Allow untrusted endpoints turned off. If both of these options are disabled and an insecure authentication type is used, you must enable the Enable secure login for session authentication types option in the SAFEQ Cloud Client configuration.
-
Automatic endpoint trust – if this option is enabled, SAFEQ Cloud Clients, secondary gateways, printers, and other endpoints will be automatically authorized when they use this API key for registration. Note that this grants them access to company data; therefore, we recommend enabling this option only for selected keys and only for the necessary duration.
-
Automatic endpoint deletion - if this option is enabled, endpoints registered with this API key will be automatically deleted after the specified period (in hours). It can be used when endpoints are periodically re-imaged, for example Citrix server instances that are re-provisioned each week or client workstations that are re-imaged with a specified interval.
-
Expiration date – an optional field indicating the date when this API key expires. If not set, the key does not expire.
-
Allowed IPs – a list of whitelisted IP addresses from which API requests are allowed for this key. If not specified, all IPs are allowed.
-
Advanced API permissions – if this option is enabled, it allows you to additional special permissions required for specific API calls. See the API documentation for additional details.
-
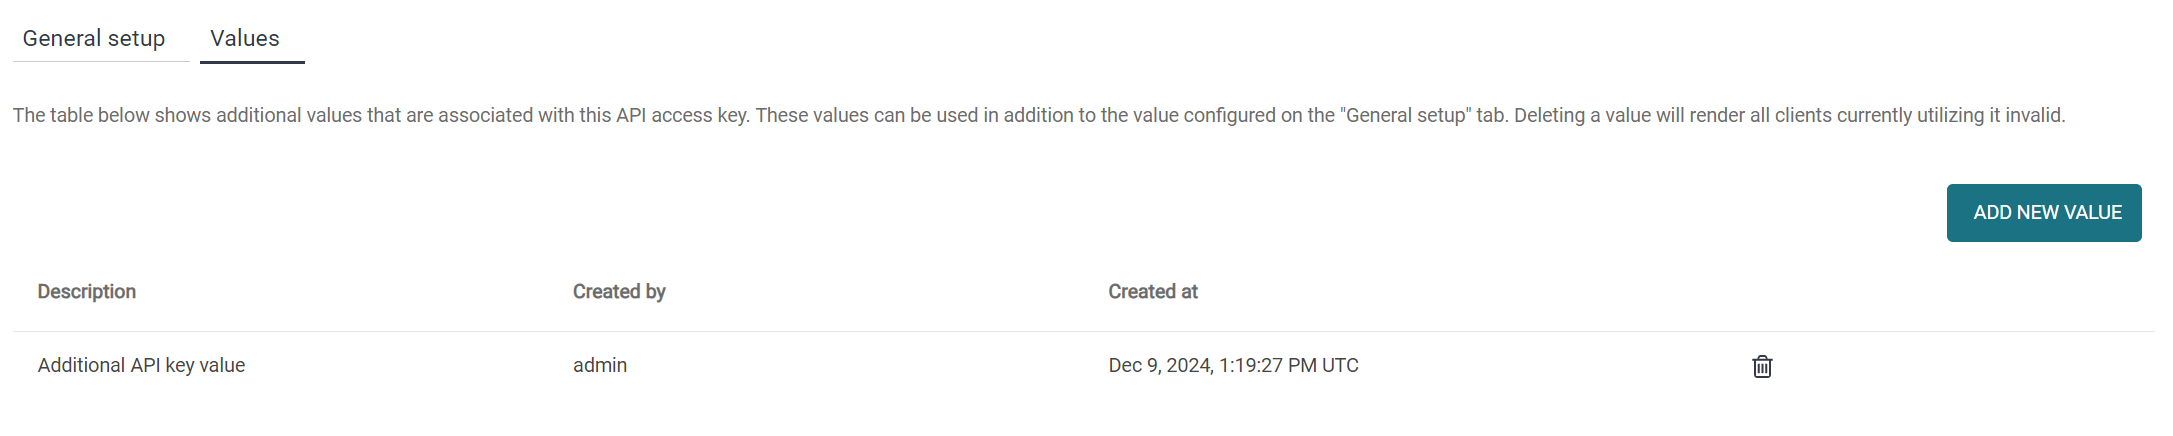
Additional values associated with the API key are present in the Values tab at the top of the configuration form.
-
Note that for the predefined key Default key for client and gateway or for a custom key which is intended to be used by the SAFEQ Cloud Client or SAFEQ Cloud gateway, you must enable the Allow unauthenticated requests and Allow untrusted endpoints flags. Otherwise, you won't be able to install or use the SAFEQ Cloud Client in the local storage mode, and to install the secondary SAFEQ Cloud gateway.
Creating additional values for an API key
-
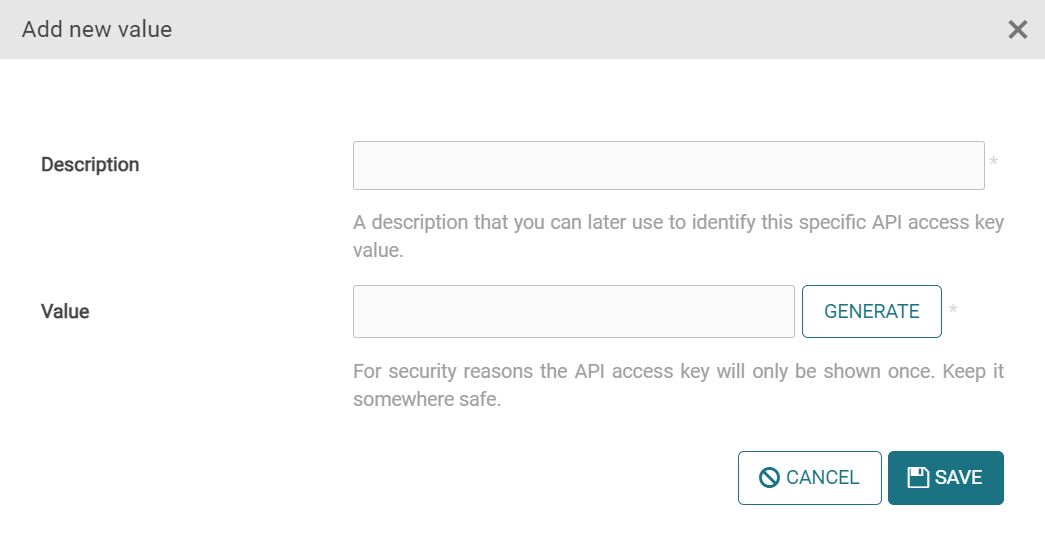
After you have created and saved your new API key, click the edit icon to edit it. Go to the Values tab and then click Add new value.
-
A new dialog window will open.
-
In the Description field, enter a description that you can later use to identify this specific API access key value.
-
Click Generate to generate a unique value associated with the API key.
All other properties are inherited from the associated API key.
-
Click Save.