
Relevant Products
Widget status is available in BREEZE PRINT BREEZE MFD PRO PRINT PRO MFD
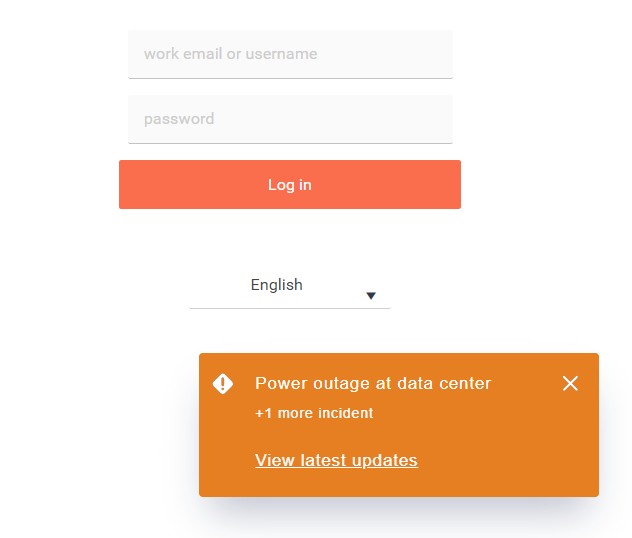
This guide is for creating your own cloud status & maintenance notification widget for your primary server. Whenever there is a cloud incident or a planned maintenance, the widget will be displayed to all users on SAFEQ Cloud Web UI login page and Web UI homepage.
To create the widget, you need to edit the application.conf file. Note that this setting applies to the whole production environment, so you must have admin rights for the whole environment to set it up.
The notification widget is based on statuspage.io. This is a platform that allows companies to create and maintain a public status page for their online services, displaying real-time updates about the status of their systems, such as service outages, scheduled maintenance, or performance issues.
Prerequisites
You have your own SAFEQ Cloud production environment with its own application.conf file.
How to
By default, the cloud status and scheduled maintenance notifications are not enabled. The process of enabling them consists of setting up your own statuspage.io account, creating a script, which will generate a frame version of the embed version of your status page, and modifying the primary server configuration to enable the notifications.
Perform the following steps:
-
Go to statuspage.io and set up your own account.
-
Create a script which will be pointing to the embed version of your status page. You can set the position and transition of the cloud status embed widget. Make this script publicly accessible. Example: https://[address-of-status-script-page]/embed/script.js.
(function(){ var frame = document.createElement('iframe'); frame.src = 'https://[your-status-page].statuspage.io/embed/frame'; frame.style.position = 'fixed'; frame.style.border = 'none'; frame.style.boxShadow = '0 20px 32px -8px rgba(9,20,66,0.25)'; frame.style.zIndex = '9999'; frame.style.transition = 'left 1s ease, bottom 1s ease, right 1s ease'; frame.title = 'YSoft SAFEQ Cloud Status'; frame.ariaHidden = true; var mobile; if (mobile = screen.width < 450) { frame.src += '?mobile=true'; frame.style.height = '20vh'; frame.style.width = '100vw'; frame.style.left = '-9999px'; frame.style.bottom = '-9999px'; frame.style.transition = 'bottom 1s ease'; } else { frame.style.height = '115px'; frame.style.width = '320px'; frame.style.left = 'auto'; frame.style.right = '-9999px'; frame.style.bottom = '60px'; } document.body.appendChild(frame); var actions = { showFrame: function() { frame.tabIndex = '0'; if (mobile) { frame.style.left = '0'; frame.style.bottom = '0'; } else { frame.style.left = 'auto'; frame.style.right = '60px' } }, dismissFrame: function(){ frame.style.left = '-9999px'; frame.tabIndex = '-1'; } } window.addEventListener('message', function(event){ if (event.data.action && actions.hasOwnProperty(event.data.action)) { actions[event.data.action](event.data); } }, false); window.statusEmbedTest = actions.showFrame; })(); -
Open your application.conf file located at /opt/safeqcloud/conf/application.conf.
-
Edit the cloud-status section as follows:
cloud-status { embed-script-url="https://[address-of-status-script-page]/embed/script.js" custom-script-src-directive="https://[address-of-status-script-page]" custom-frame-src-directive="https://*.statuspage.io" }-
embed-script-url – The URL of the status embed script. You can obtain this in the statuspage.io administration and customize it.
-
custom-script-src-directive – The script-src directive in Content Security Policy (CSP). This specifies the valid sources from which scripts can be loaded on a web page. It should contain the server address where the script is hosted.
-
custom-frame-src-directive – The frame-src directive in Content Security Policy (CSP). This specifies the valid sources from which frames or iframes can be embedded into a web page. It must contain the server address of the statuspage.io, where the frame will be taken from.
-
-
Save the file.