Relevant Products
Creating containers are available in BREEZE PRINT BREEZE MFD PRO PRINT PRO MFD
To create a new container, perform the following steps:
-
Click Create new... at the top of the SAFEQ Cloud Web UI.
-
From the drop-down menu, select Container.
-
Enter the following information:
-
Name: Visible name of the container
-
Domain: A DNS name by which this container can be accessed (Optional). The domain name can contain letters, numbers, hyphens, and periods. Any part of the domain name (separated by a period) should begin and end with a letter or a number.
-
Default location: This location is used as default for all printers and print queues.
-
-
Click Save.
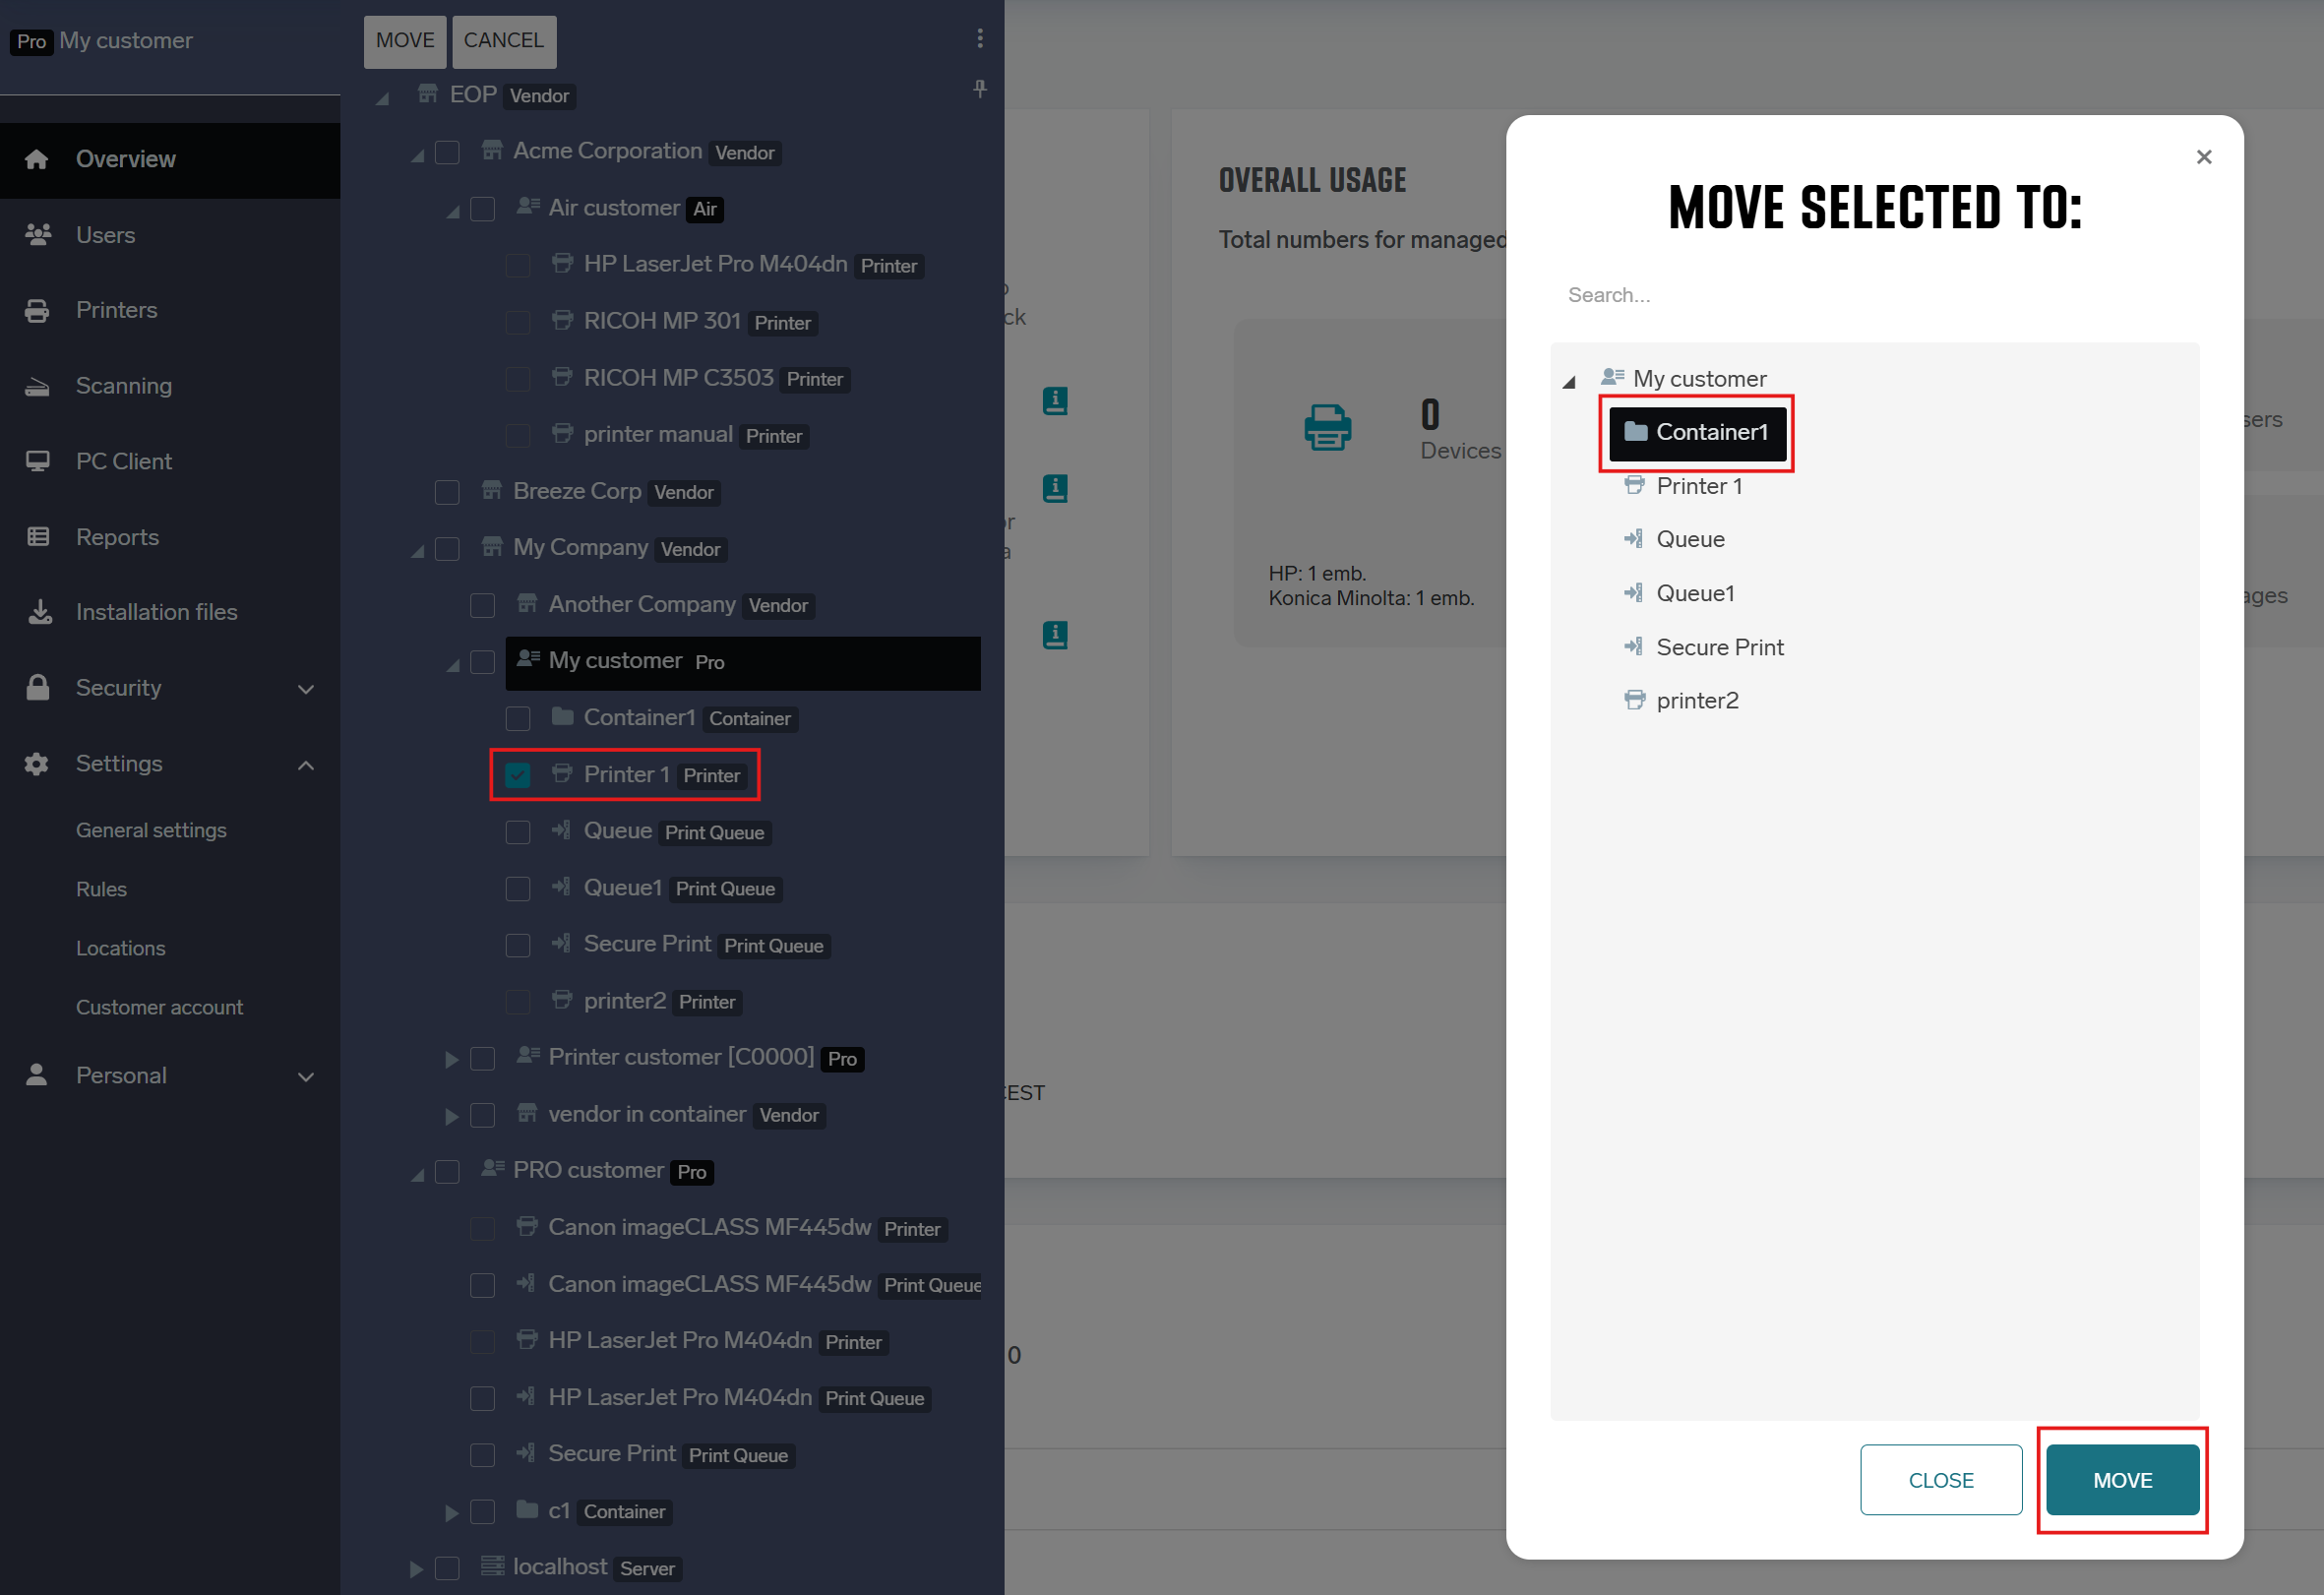
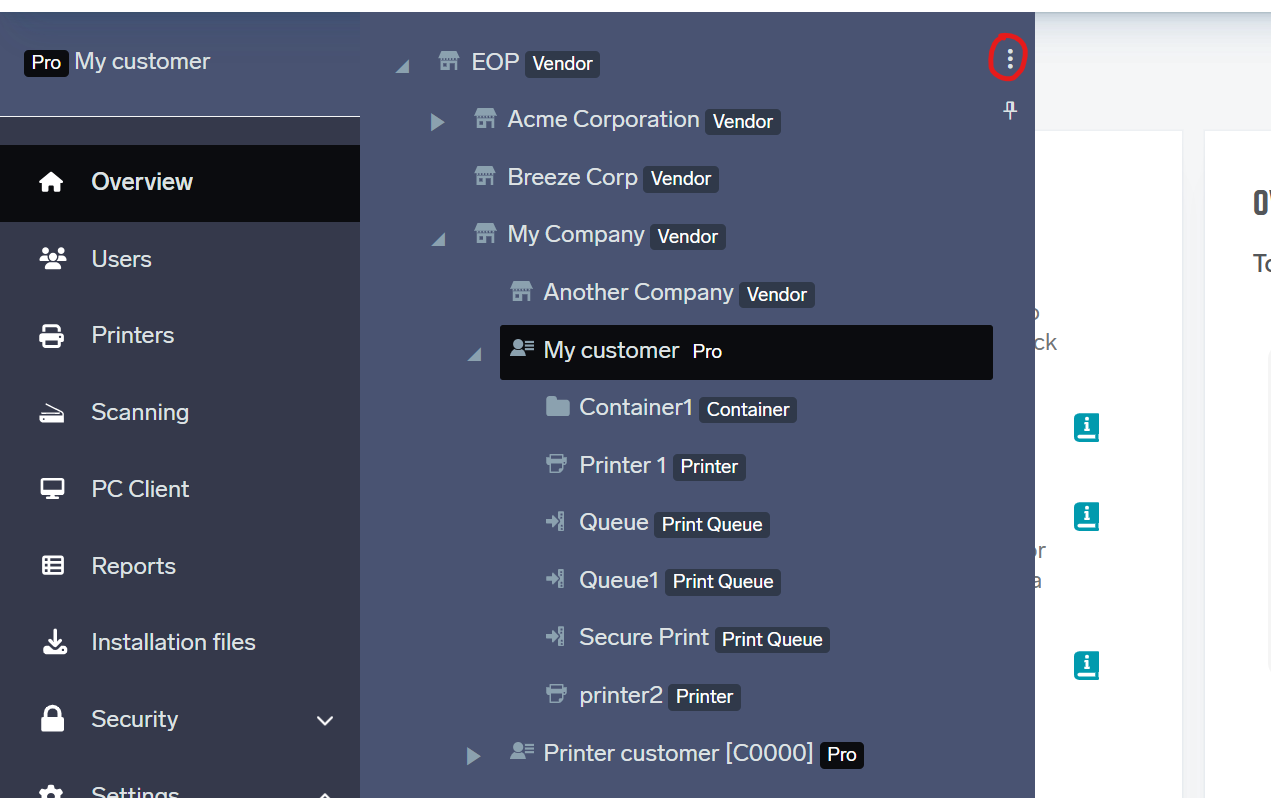
Moving existing configuration items into containers
-
Click the three dots at the top-right of the navigation tree. Then click Organize tree.
-
Select the item that you wish to move.
-
Select the container where you want to move it. Click Move.