
Relevant Products
Pure cloud terminals are available in BREEZE MFD pro mfp
Terminals that require a secondary gateway (Non-Pure cloud terminals) are available in pro mfp
Prerequisites
-
Make sure that you have Cloud Terminal Integration enabled. For information on how to do this, see Enable Cloud terminal integration.
-
Make sure that you have a signing certificate selected. To check this, log in to SAFEQ Cloud Web UI and navigate to Security > Security options > scroll down to PKI and encryption. The Signing certificate field must not be blank.
Limitations
General
-
To install, uninstall, or reinstall a device, it must be in power saver mode.
-
If the device is in sleep mode, swiping a card at the card reader will not authenticate the user.
-
Username information is not propagated when printing a job. This means that all print jobs printed on the MFD/SFD are printed under Local User. This behavior is consistent across the whole solution, for all vendor terminals.
Cloud Print
Finishing options:
-
Booklet bind direction Left to Right is always used.
-
Only Output trays 1-4 are supported.
-
Supported paper sizes: A3, A4, A5, B4, B5, LEGAL, LETTER.
-
Media type (type of paper) is not supported.
-
Landscape page orientation is not supported.
-
DPI is not supported.
-
If a job is sent via a custom driver, finishing options are not supported.
Advanced finishing options:
-
Only Stapling and Punching options are supported (saddle stapling is not supported).
Scan
-
Scan Mixed Size Originals are not supported.
-
Scan Workflows with JPEG output format will result in a TIFF output file if the color was set to Black and White or the color was Auto and the MFD detected a black and white document.
-
The Merge originals feature is not supported.
-
The scan file size is limited to 18 MB when using scan delivery via email. If the scan file size is larger, the email is not delivered. There is no extra notification of such an event.
Copy
-
Due to our current Fujifilm BI Cloud architecture design and Fujifilm device platform limitations, automatic redirection from the native Copy screen back to the embedded Cloud Terminal application immediately after copy completion is not supported.
Accounting
-
If a Cloud print job is still in progress (“printing”) when a user logs out, the terminal reports the number of pages based on what was requested to print, not what the device actually printed. The job remains in the print queue.
-
If the Cloud Terminal connection is lost while a Cloud print job is in progress (“printing”), the accounting data is preserved in the device’s local storage and automatically sent during the next print operation, even if it occurs in a different user session.
-
If a scan or copy operation is still in progress when a user logs out, the terminal will only report information that has already been processed.
-
If a user logs out while scanning or copying is still in progress and then logs back in before the job is finished, the job will be reported twice.
-
USB print accounting is not supported.
ApeosPort devices support
Only devices with the following specifications are supported:
-
XCP SDK Platform 2.0.0 or newer
-
AiP7 compatible FW
-
EWB v5 and newer
Signature validation is not supported on ApeosPort devices.
Custom logo
-
Formats other than JPEG, JPG, PNG, and GIF are not supported.
-
Images over 12 kB will be resized and compressed.
-
GIF images over 12 kB will be turned into still images.
Device setup
During the configuration, MFD sometimes requires a reboot. When prompted for reboot, follow the instruction displayed either on the web browser or on the MFD operation panel.
General configuration
General settings
-
On the MFD panel, log in to MFD as a system administrator and go to the Device settings.
-
Go to Device > System Settings > System Clock / Timers.
-
Configure date and time:
-
Set Time Zone.
-
Set Date.
-
Set Time.
Set these options in the aforementioned order, because the Time Zone setting has an effect on the Time setting.
-
-
Optionally, configure NTP:
-
Set NTP time synchronization to On.
-
In Time Server Address, fill in your chosen NTP server address.
-
-
Security settings
Enter the IP address of the MFD in your web browser to access the MFD's web interface and log in as administrator. Configure the following:
-
Administrator user ID and password:
-
Go to Administrator > Profile.

-
Click Edit. On the edit screen, enter a new username for Administrator and click Save.
-
Click Change password, enter a new password, and click Save.
-
Log in to the MFD's web interface with your new admin username and password.
-
-
Machine digital certificate:
-
The certificate is installed by default. You don't need to generate a new one.
-
-
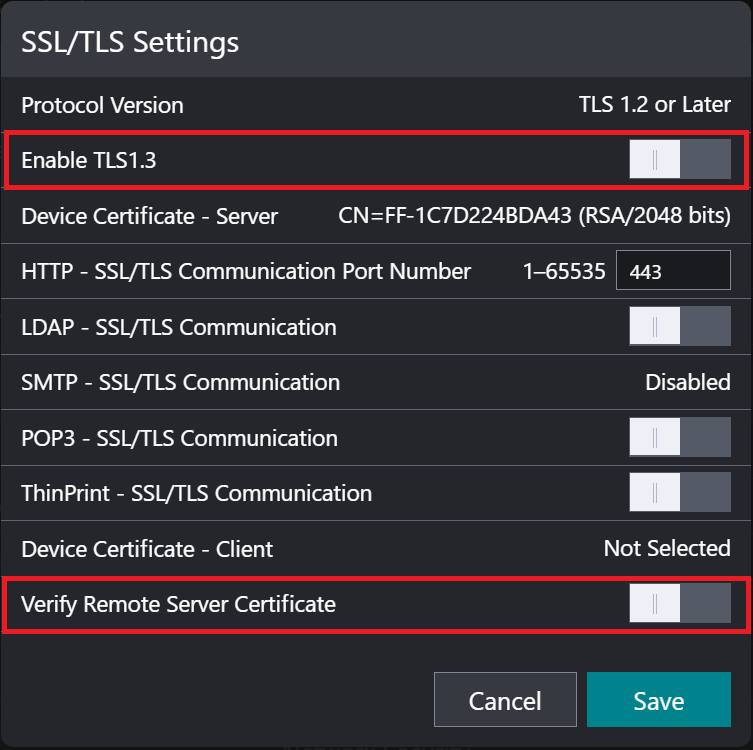
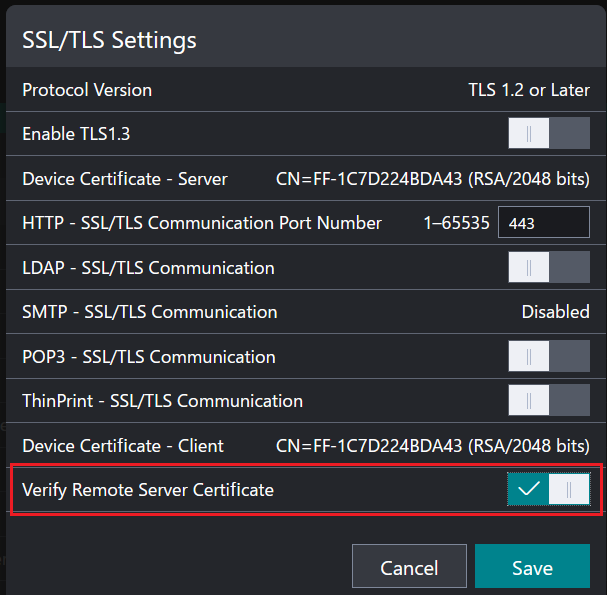
SSL/TLS:
-
Apeos has TLS 1.2 enabled by default.
-
Make sure that Verify Remote Server Certificate is disabled. Otherwise, users would get an error message when opening the SAFEQ Cloud application on the MFD panel due to an untrusted certificate.
-
Setting up trust between the server and MFD/SFD
To secure the communication between the server and MFD/SFD by certificate validation, you must import the relevant certificate authorities into the device, and enable server certificate validation.
FUJIFILM BI devices come with a pre-installed list of globally trusted Certification Authorities. However Let'sEncrypt authority used as a default authority for SAFEQ Cloud servers is not included.
Obtain the relevant certificate authorities:
-
If you are using your own certificate and domain, you will need to get your issuing Certificate Authority in PEM format. See Certificates.
-
If you are connecting to a secondary SAFEQ Cloud server, OMNI Bridge, or to a primary server that is hosted on-premise, make sure that the destination has a valid certificate tied to a domain. See Certificates.
-
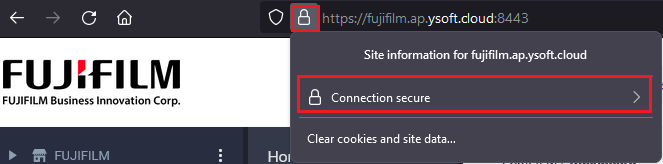
If you are using the default certificates of SAFEQ Cloud, you will need to obtain these in the following way:
-
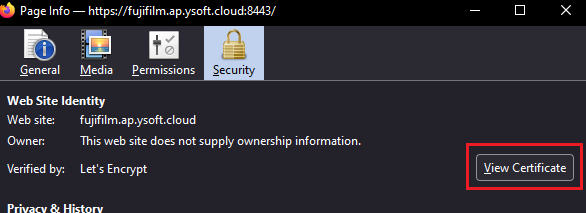
Navigate to your SAFEQ Cloud instance and click the lock icon next to the address bar in order to view the certificate information.
-
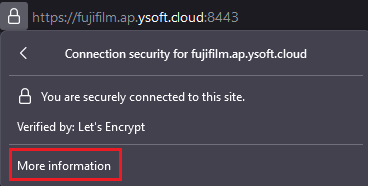
Click More information. A new window will appear.
-
Click View Certificate.
-
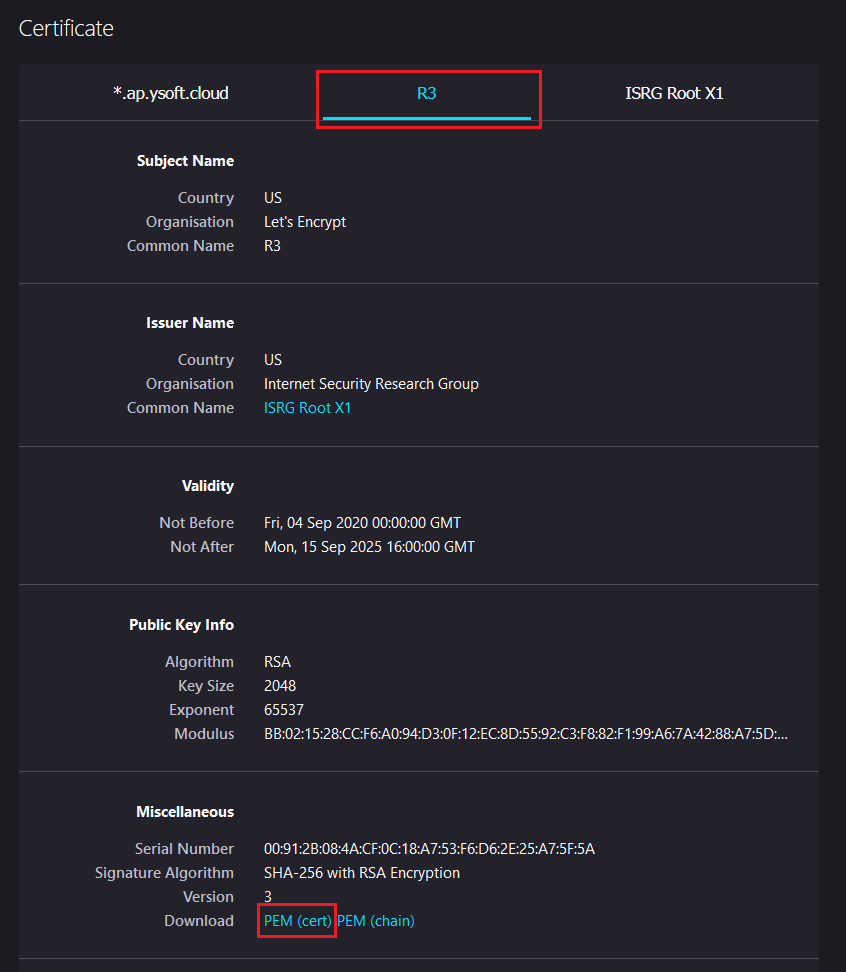
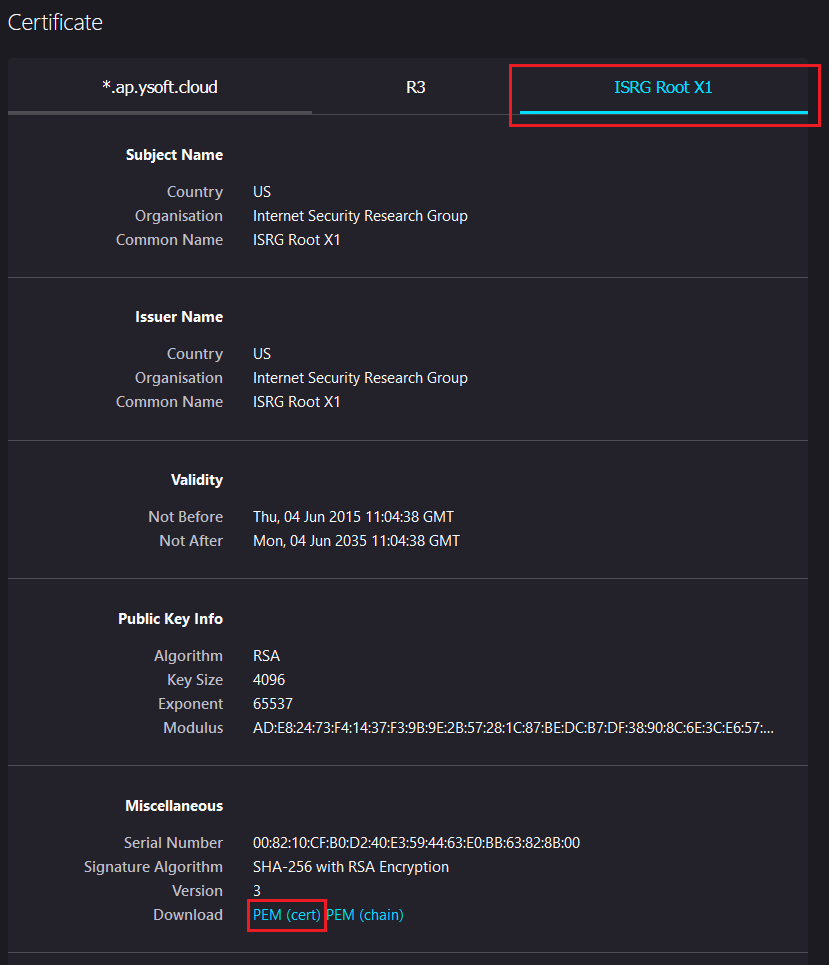
In the new window, navigate to both tabs marked below and download the certificate in PEM format.
-
Importing certificate authorities to the MFD/SFP:
-
Log in to your MFD's web interface as an administrator.
-
Navigate to System > Security > Certificate Settings.
-
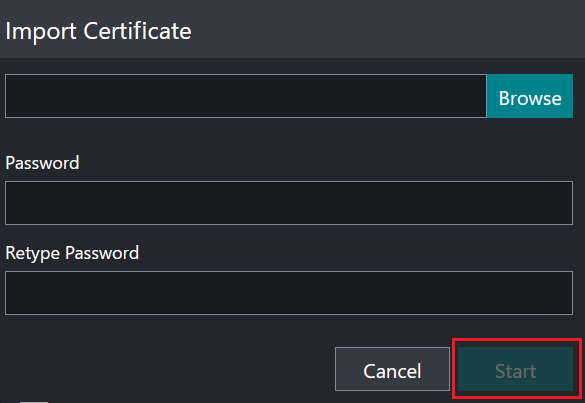
Change the selection to Trusted Root CA Certificates and click Import.

-
Find the obtained Certificate Authority in PEM format, fill in the admin password, and click Start.
-
Repeat the process for all the Certificate Authorities in the chain (each PEM file that you obtained).
Enable server certificate validation:
For server certificate validation to work, the server must have a certificate issued for the domain and not an IP address (or local host). Otherwise, the machine will reject such certificates even if proper Certificate Authorities were imported.
-
Log in to your MFD's web interface as an administrator.
-
Navigate to System > Security > SSL/TLS Settings.
-
Enable Verify Remote Server Certificate and click Save.
Plug-in settings
-
Go to System > Plug-in Settings.
-
Enable Embedded Plug-ins.
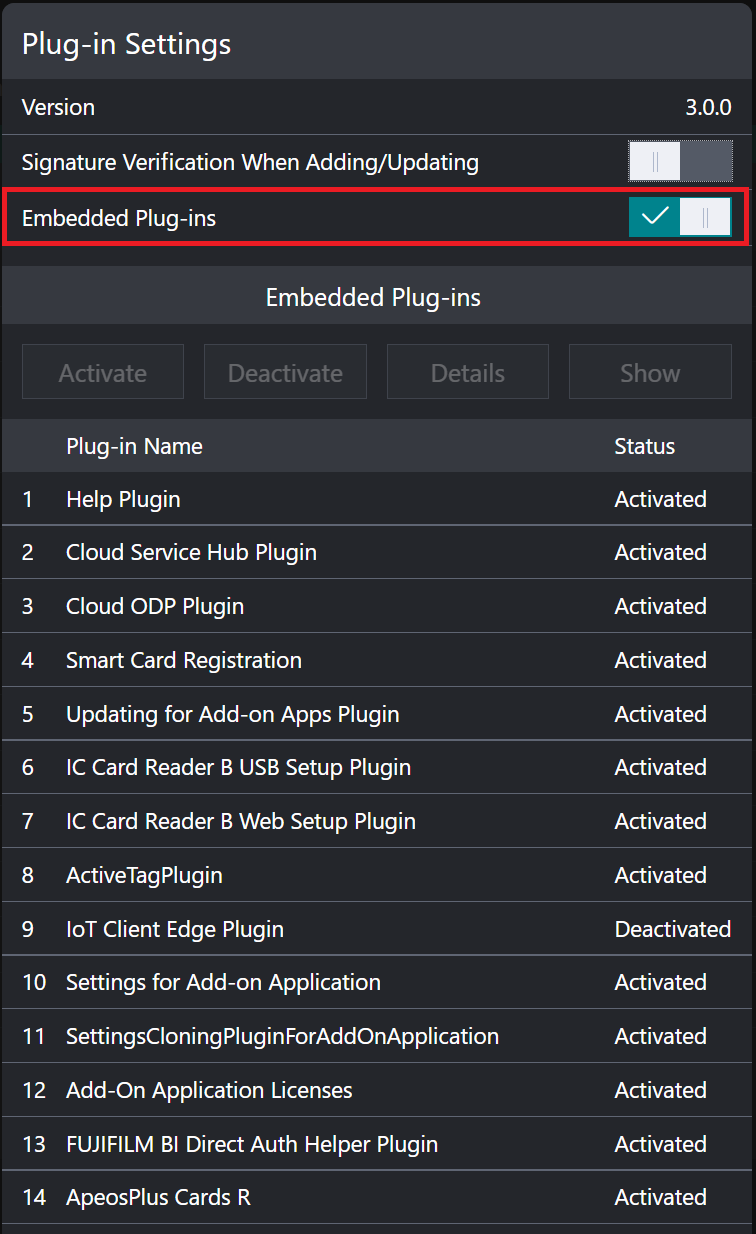
The Signature Verification when Adding/Updating option will not be visible on production models. You can safely ignore it.
For ApeosPort devices, the Signature Verification when Adding/Updating option will be visible, but it should be disabled due to limitations.
Web browser settings
-
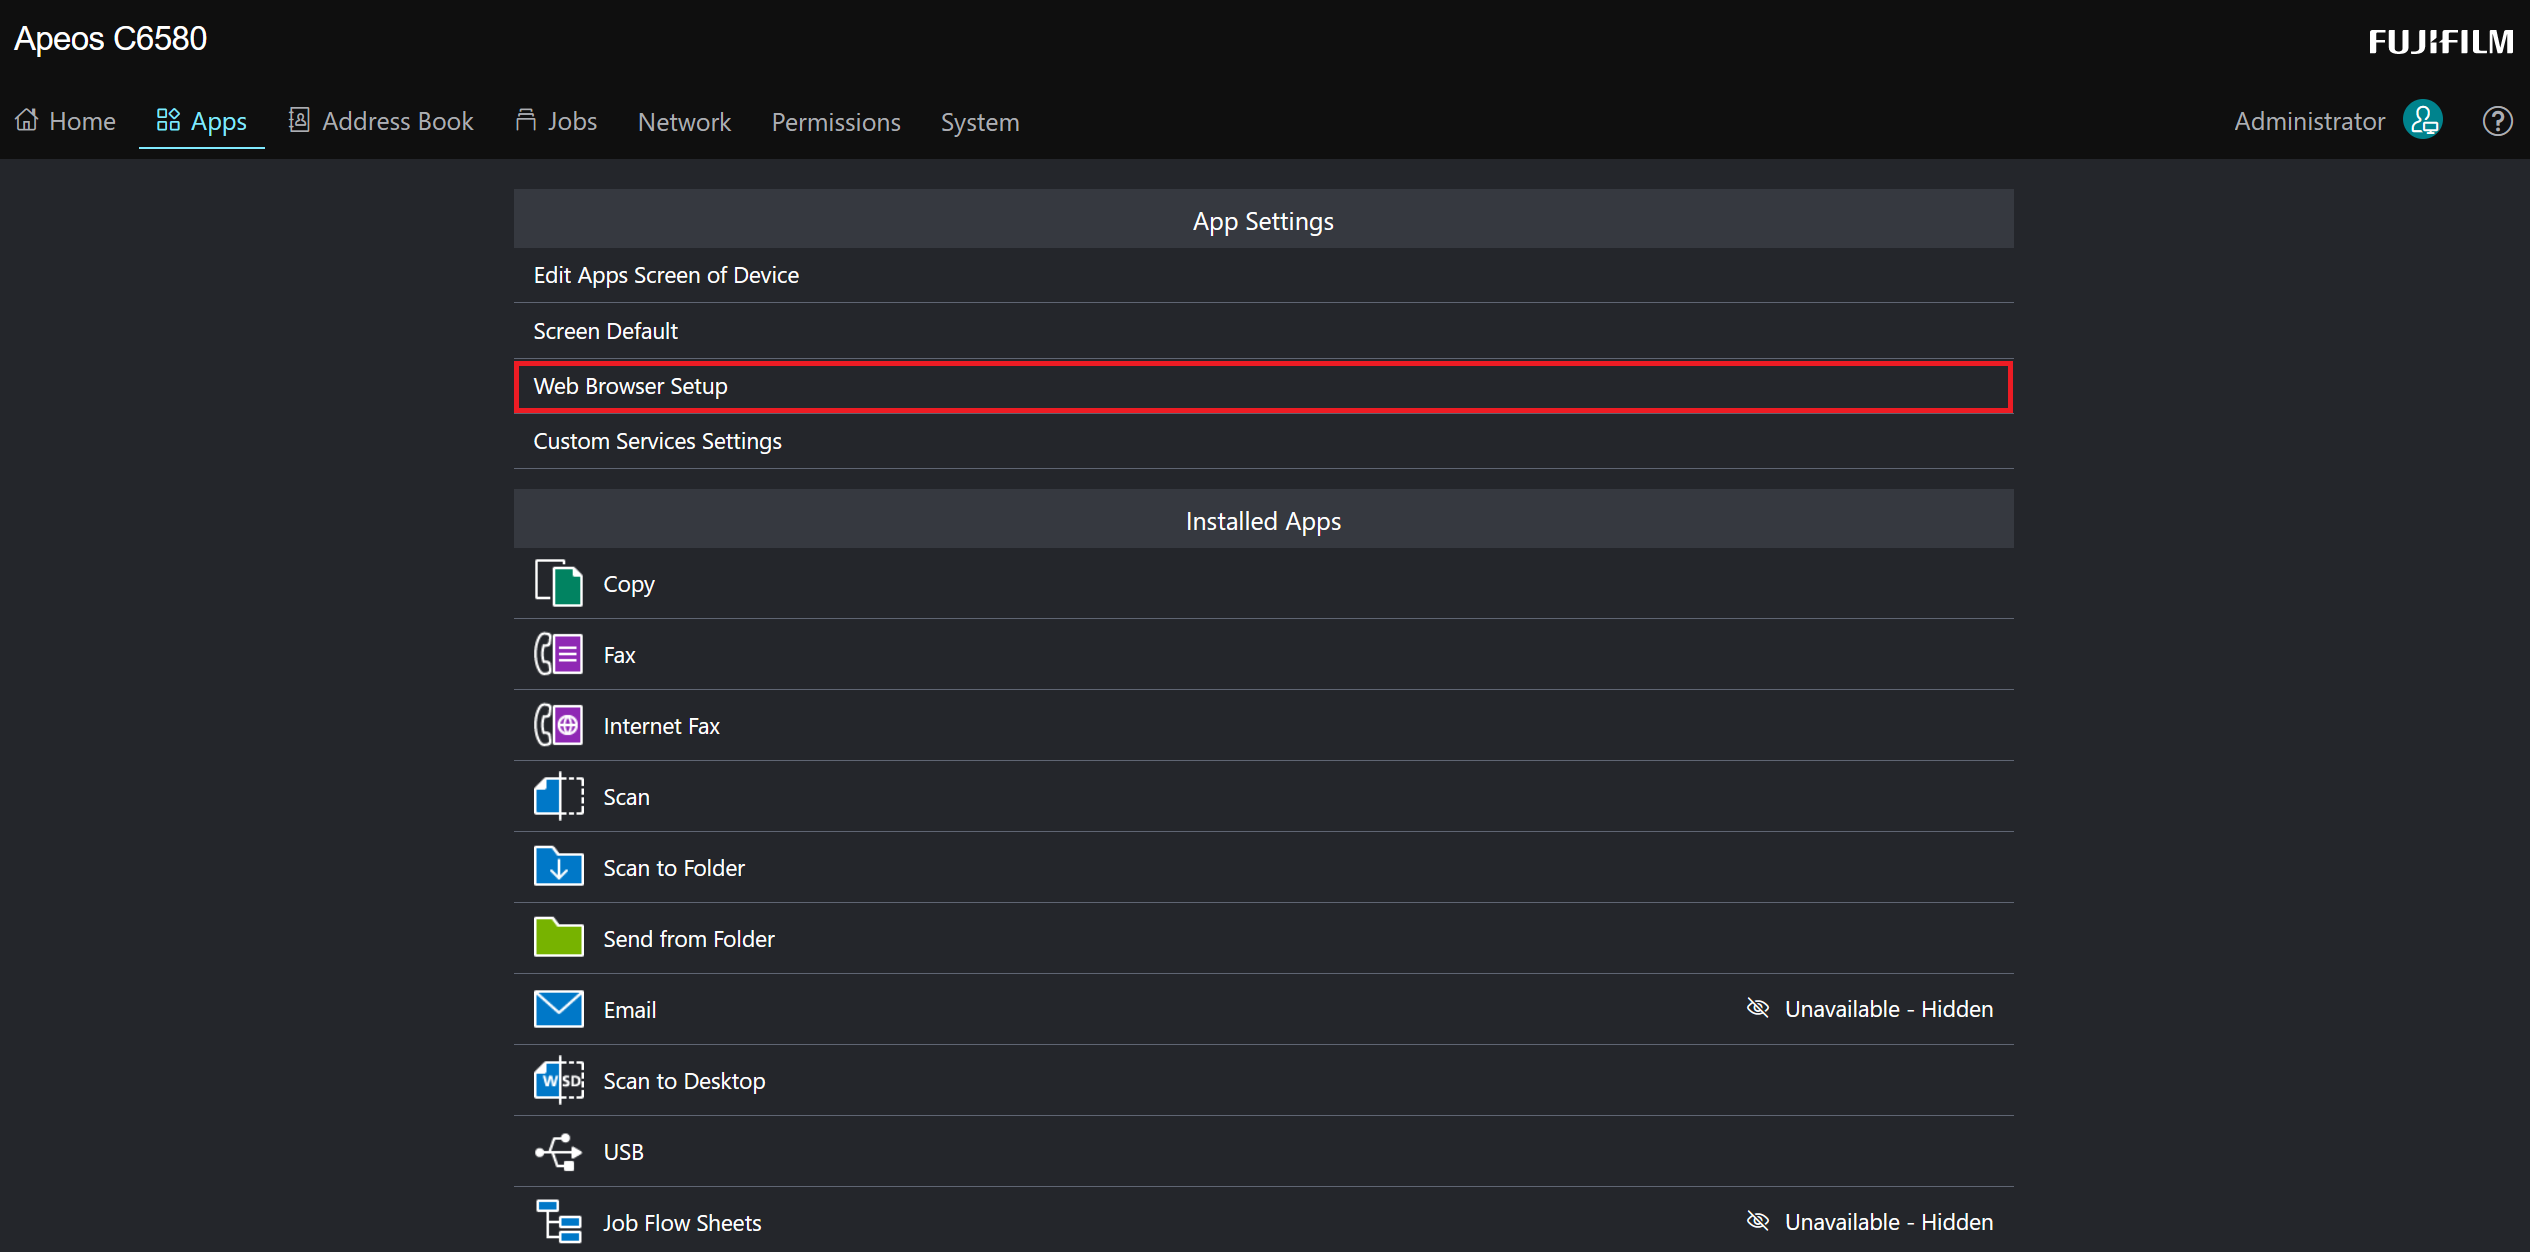
Go to Apps > App Settings > Web Browser Setup. In case of ApeosPort devices, go to Permissions > Authentication > Advanced Settings.
-
Ensure that Web Application Version is set to V5.
If the "Web Application Version" parameter is missing, "V5" should be the default value.

Protocol settings
In the MFD's web interface, configure the following:
-
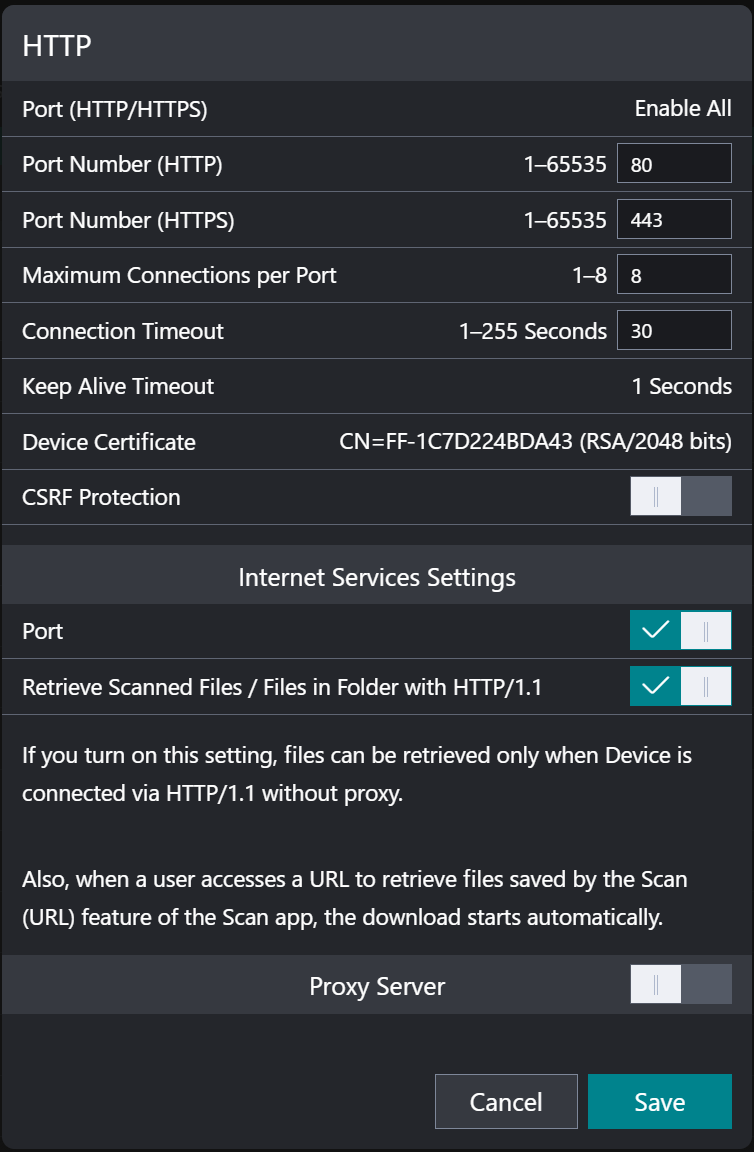
Go to Network > Network settings > Protocols.
-
Check that Port (HTTP/HTTPS) is set to Enable All. You can also set it to Enable HTTPS Only, which disables the HTTP port.
-
IPP – To receive print jobs via IPP/IPPS, IPP must be enabled.
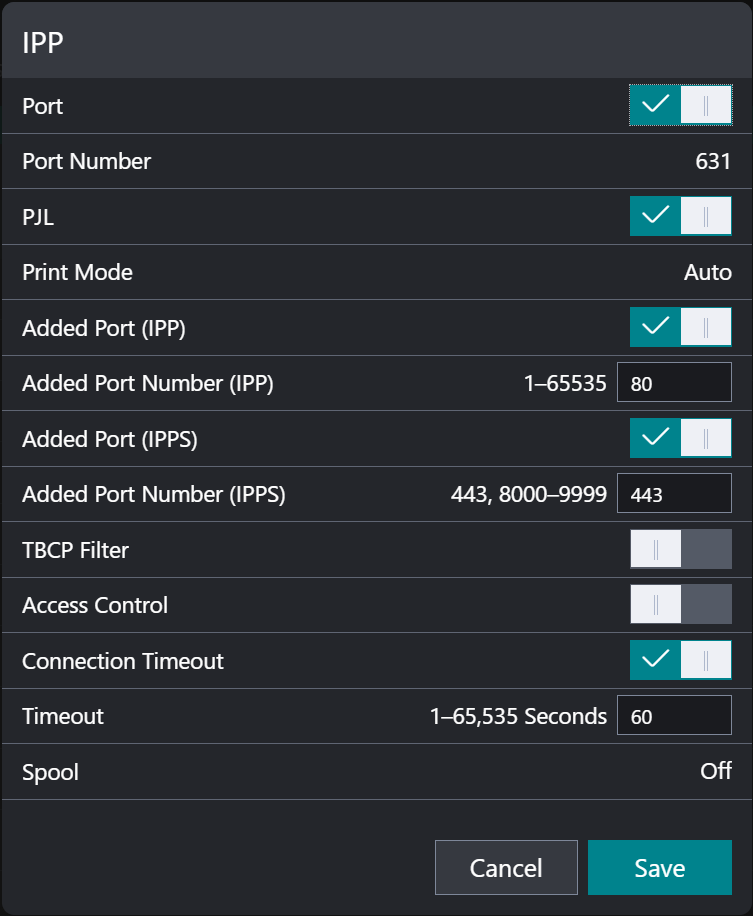
-
Port 9100 – To receive print jobs via TCP/IP RAW, Port 9100 must be enabled.
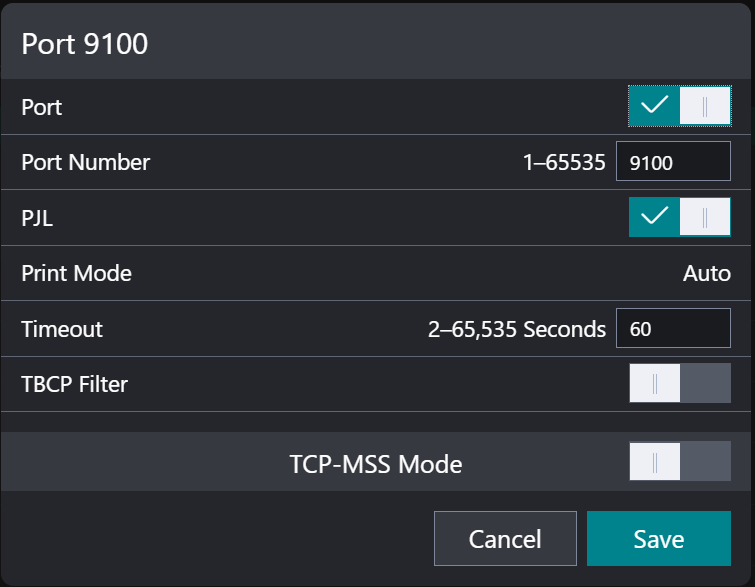
If you keep port 9100 disabled for security reasons, be aware that you must enable it before MFD firmware upgrade.
Card reader settings
-
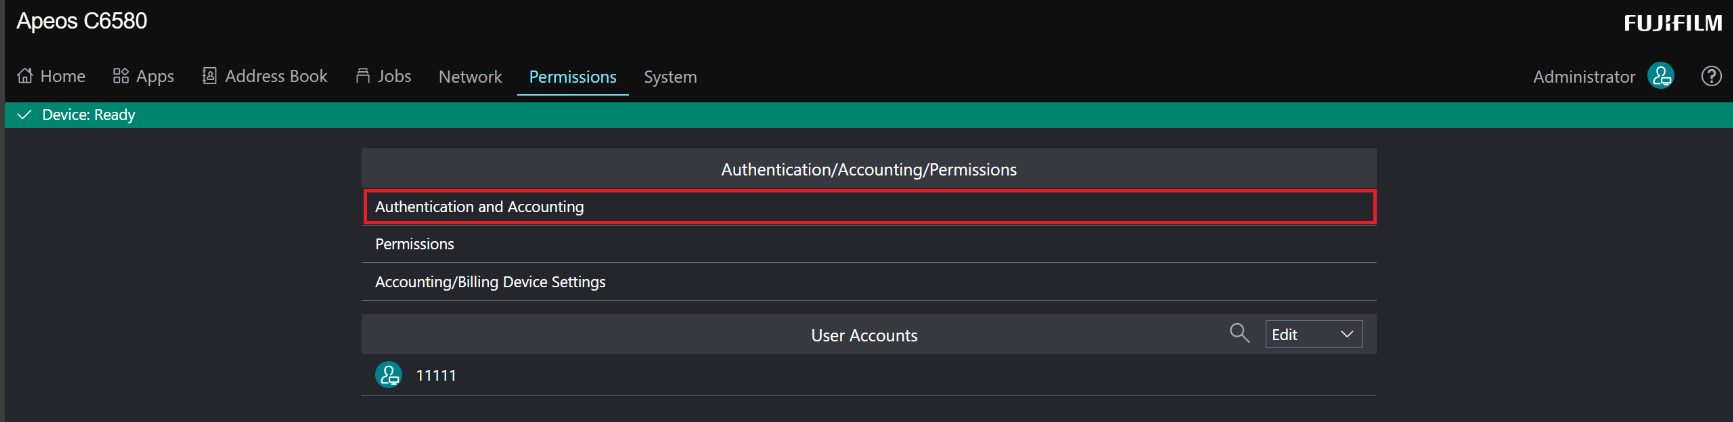
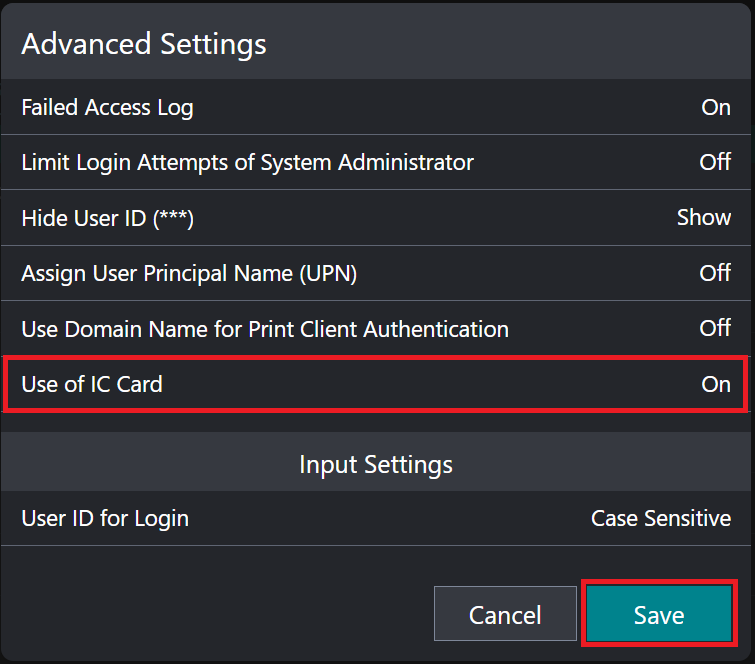
To enable Enable Card Reader support, go to Permissions > Authentication and Accounting > Advanced Settings.
-
Set Use of IC Card to On.
-
Click Save.
-
For ApeosPort devices, set Use of Smart Card to On and click Save.
Do not enable Use of IC Card with no card reader connected; otherwise, you will not be able to authenticate with a card.
Scan related settings
To enable the auto-completion of email addresses in the native scanning application, perform the following steps:
-
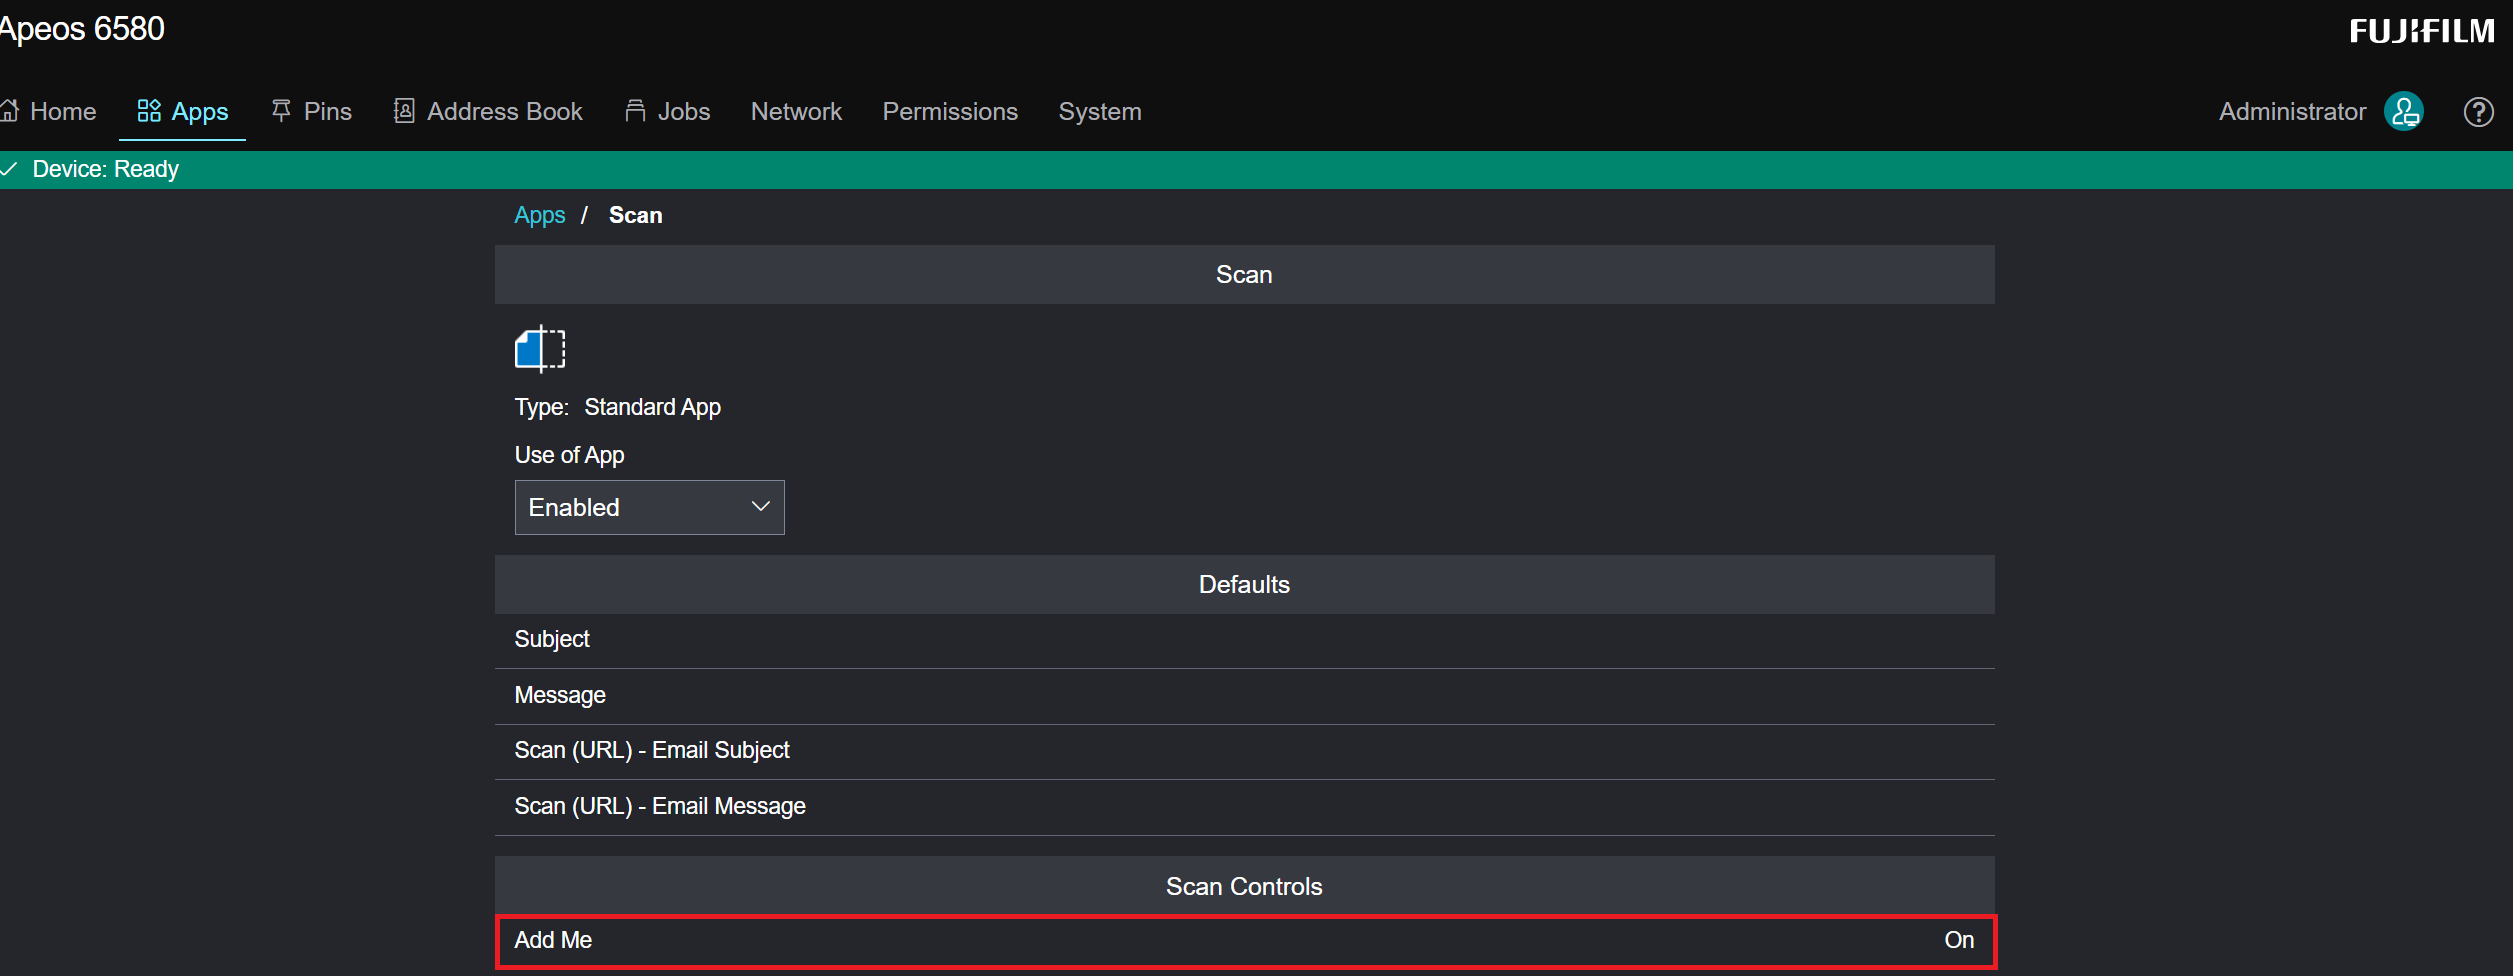
Go to Apps > Scan > Add me.
-
Switch it to On.
-
Click Save.
-
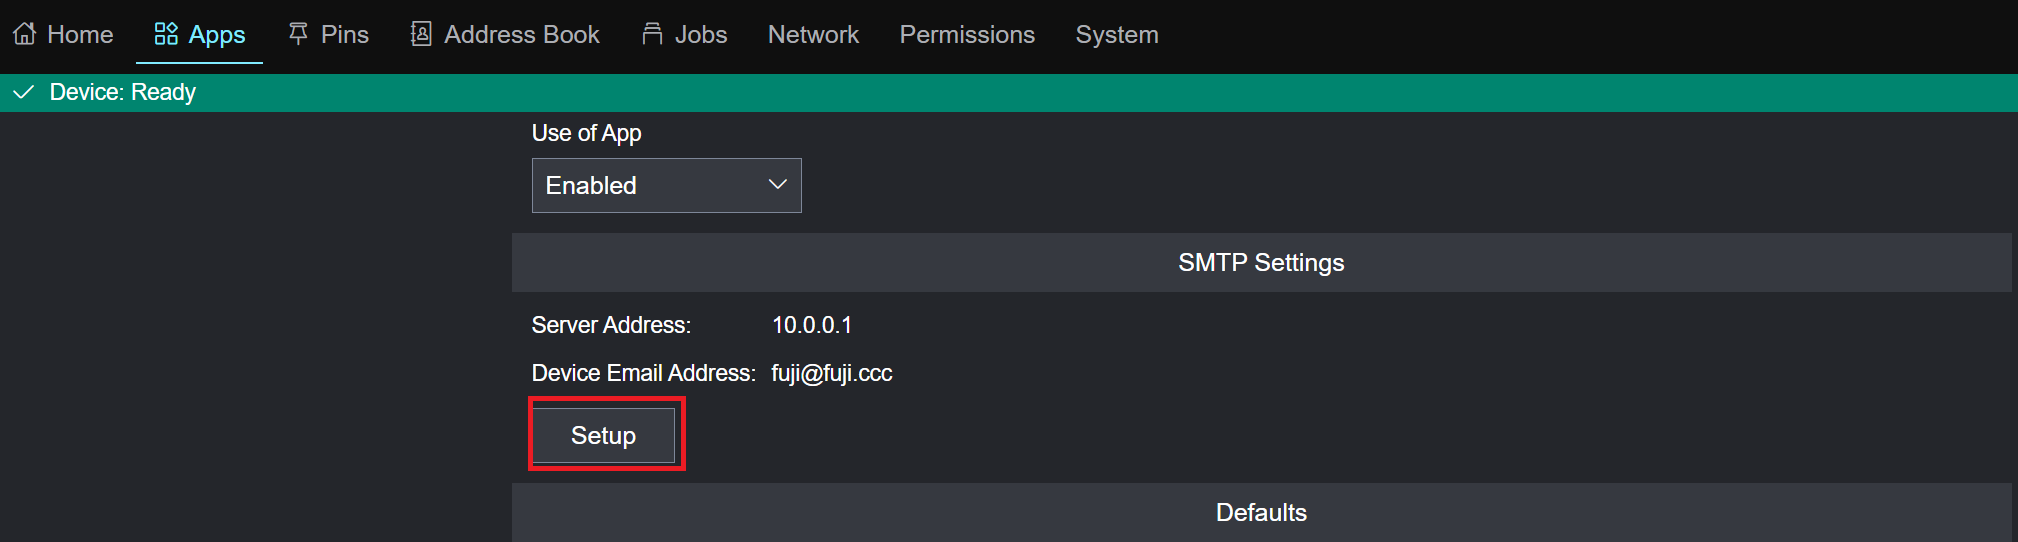
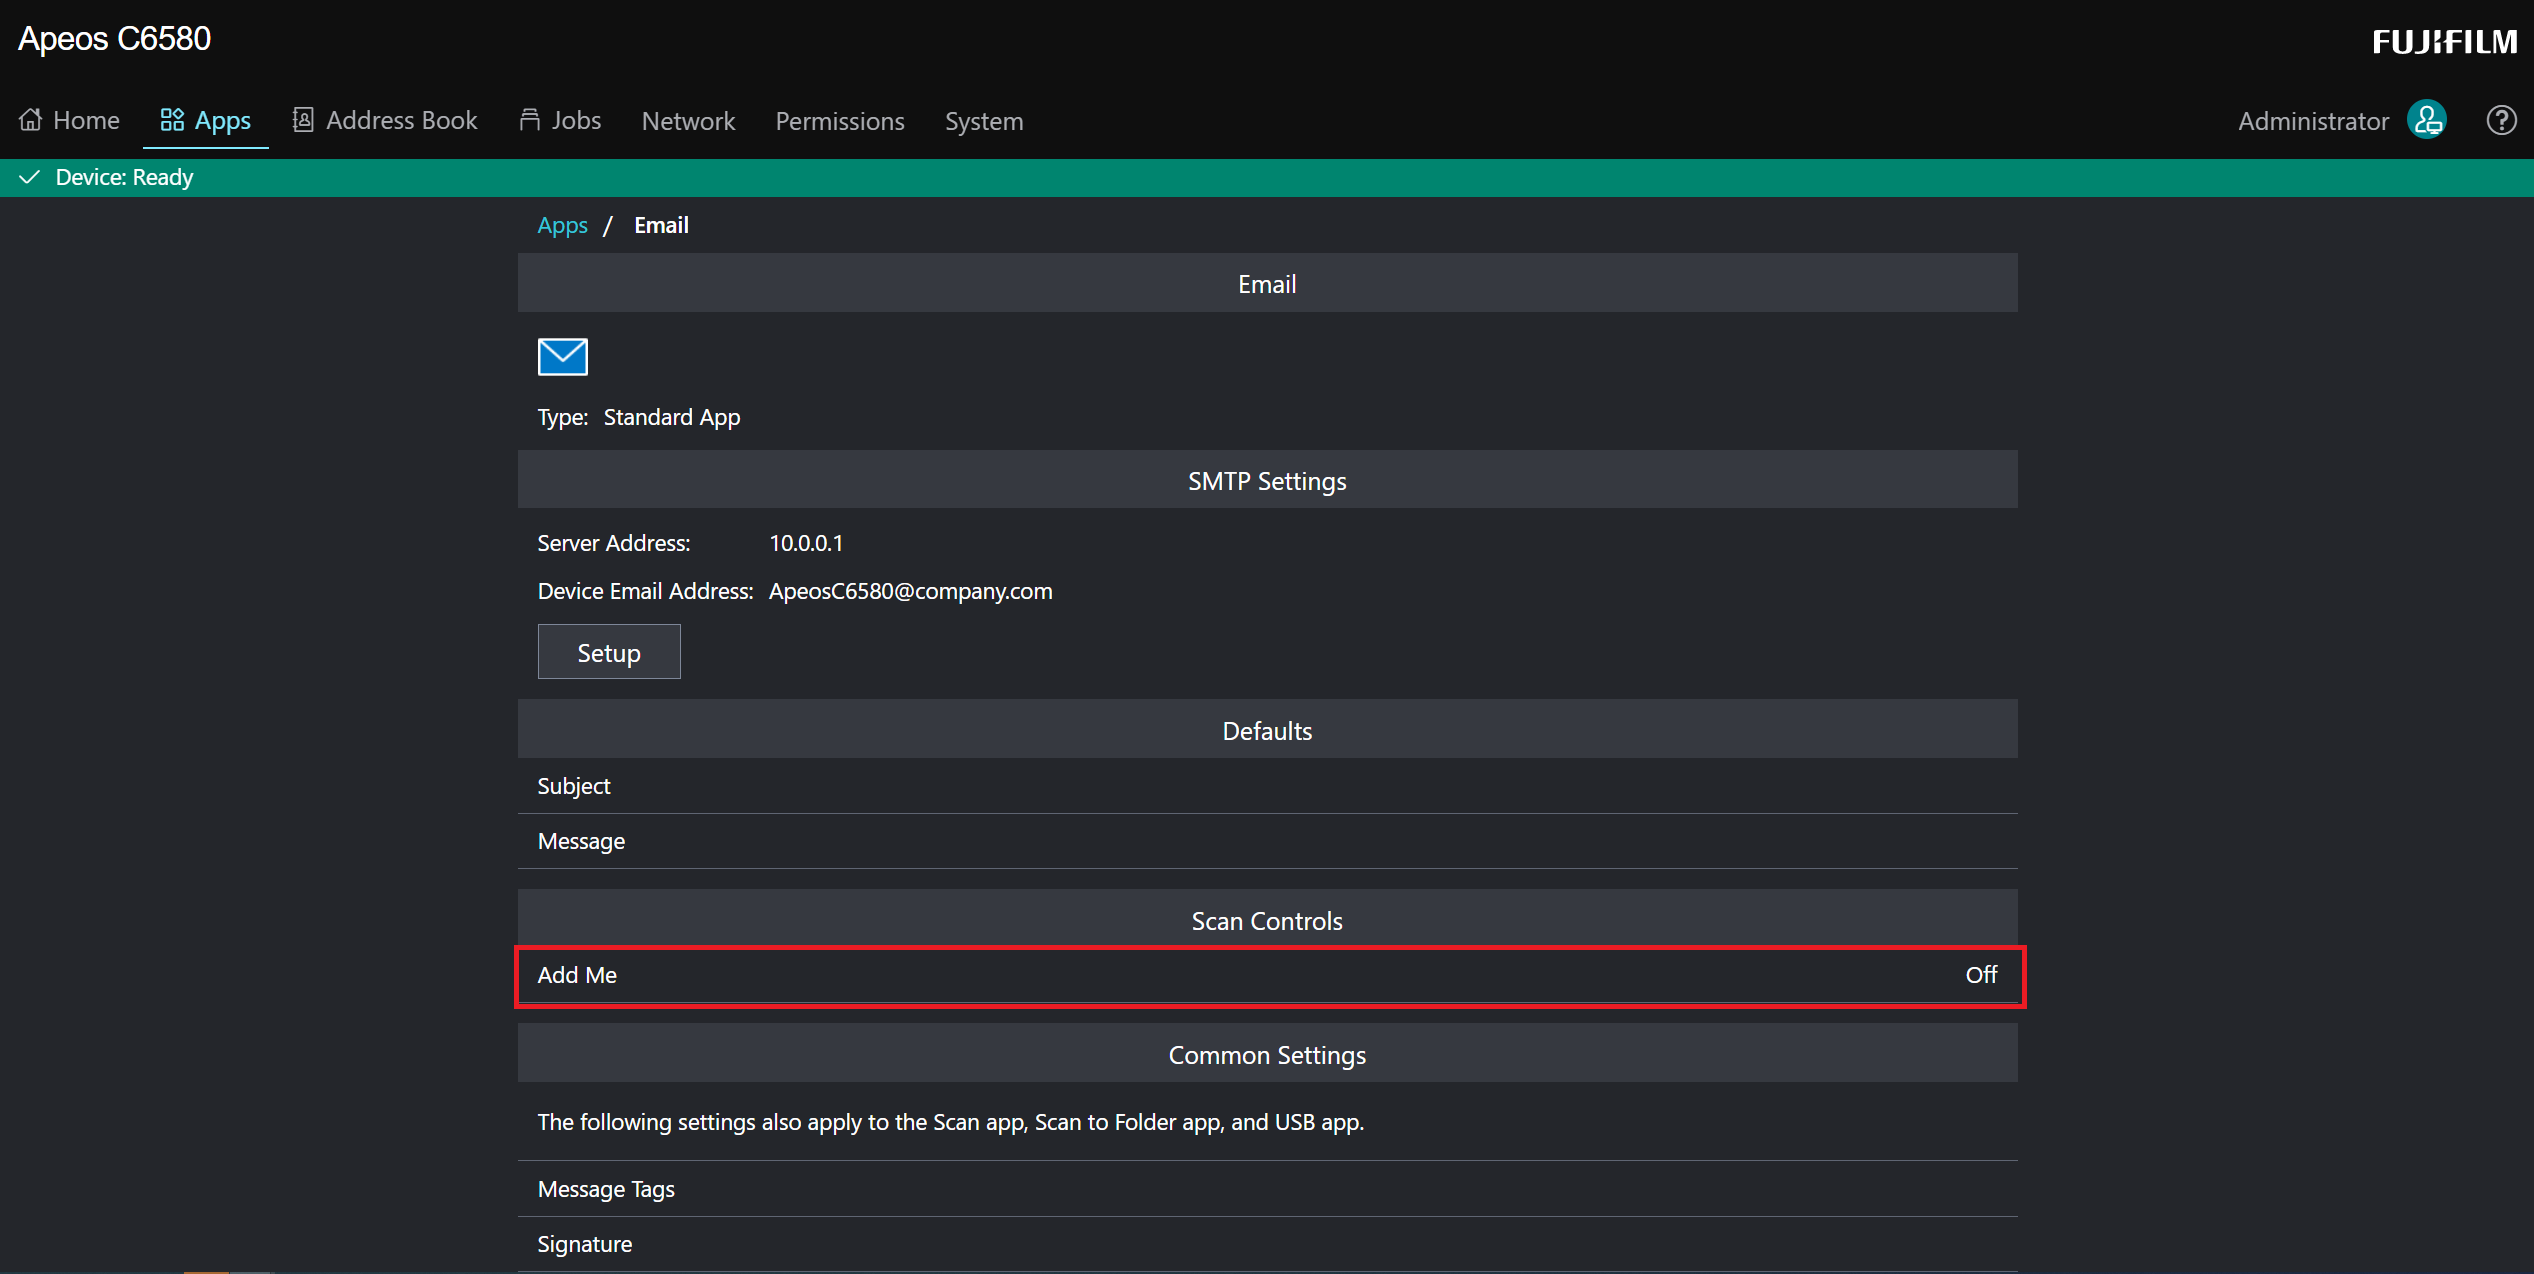
Go to Apps > Email > SMTP Settings > Setup.
-
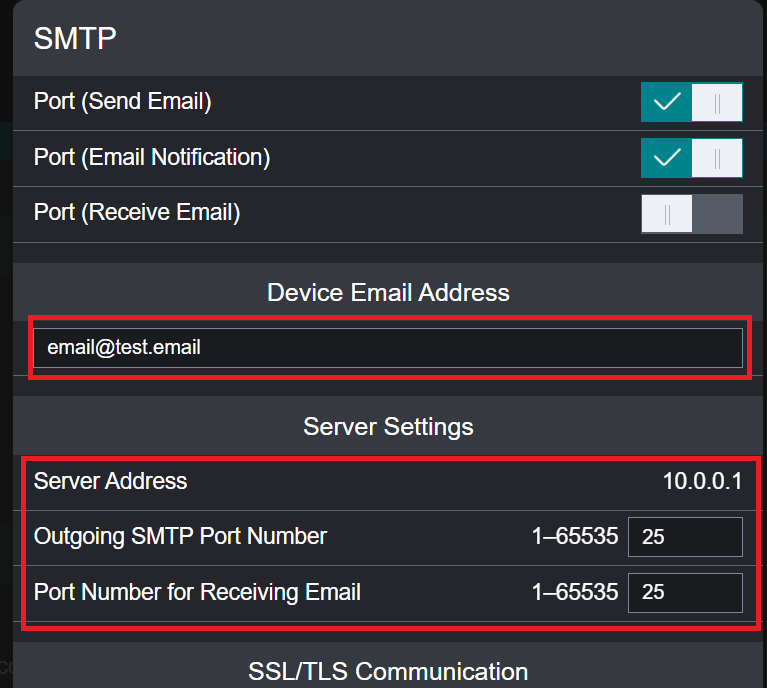
Set the Device Email Address and Server Settings.
-
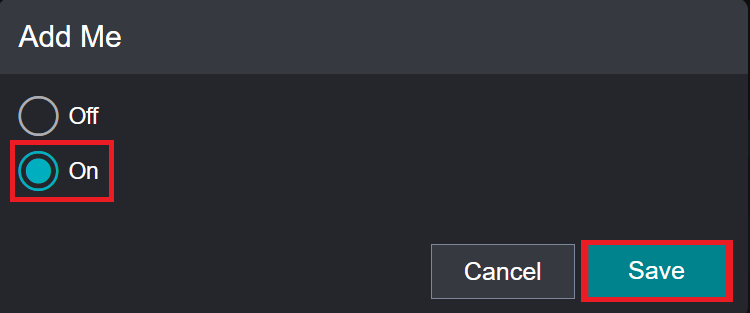
In Scan Controls, click Add Me.
-
Select On and set Add to: to To or Cc.

-
Click Save.
-
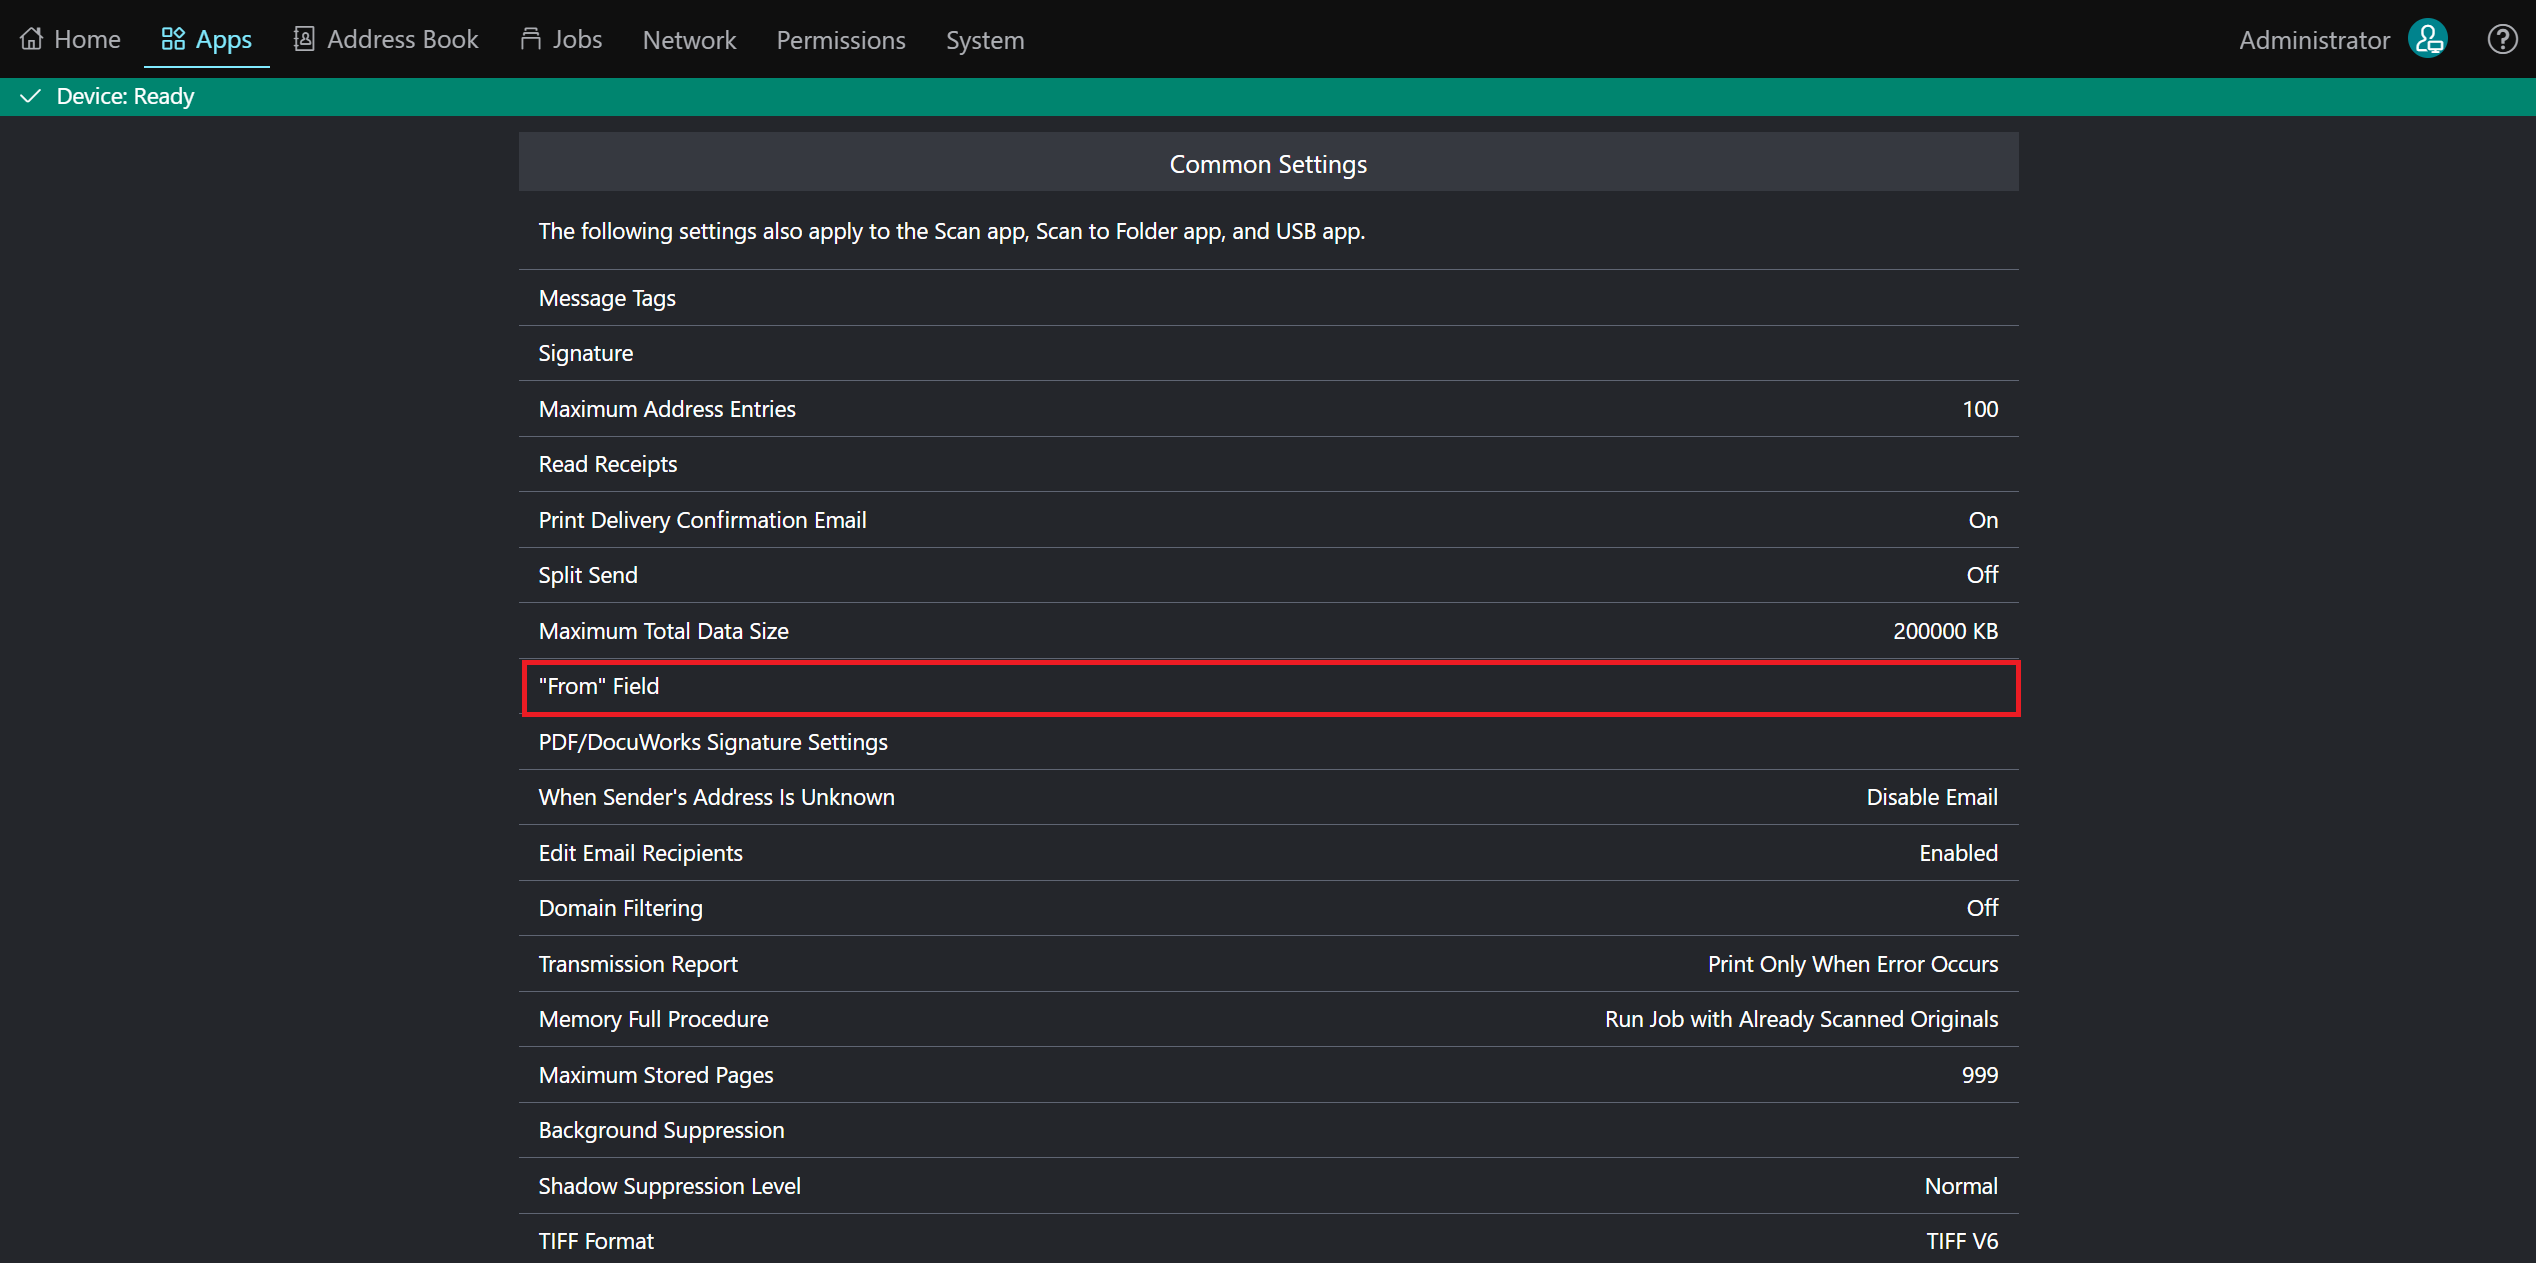
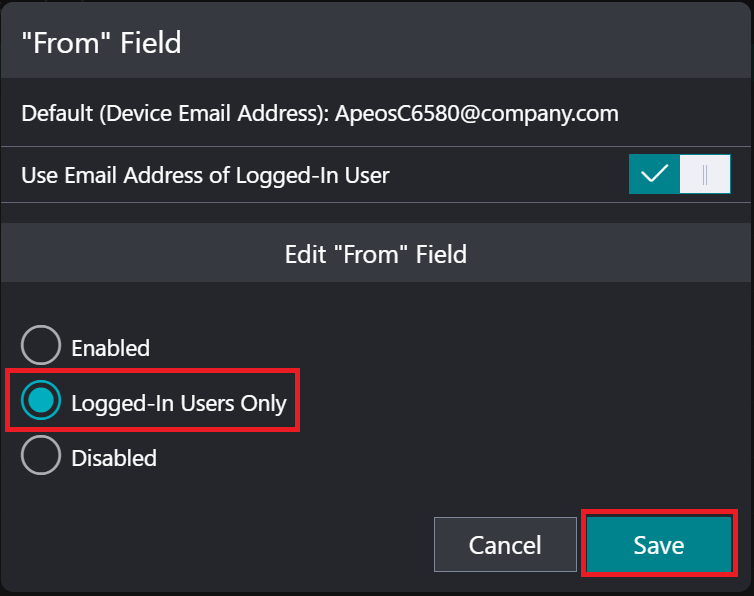
Configure the "From" Field (optional):
-
In Common Settings, click "From" Field.
-
In Edit "From" Field, select Logged-In Users Only and click Save.
-
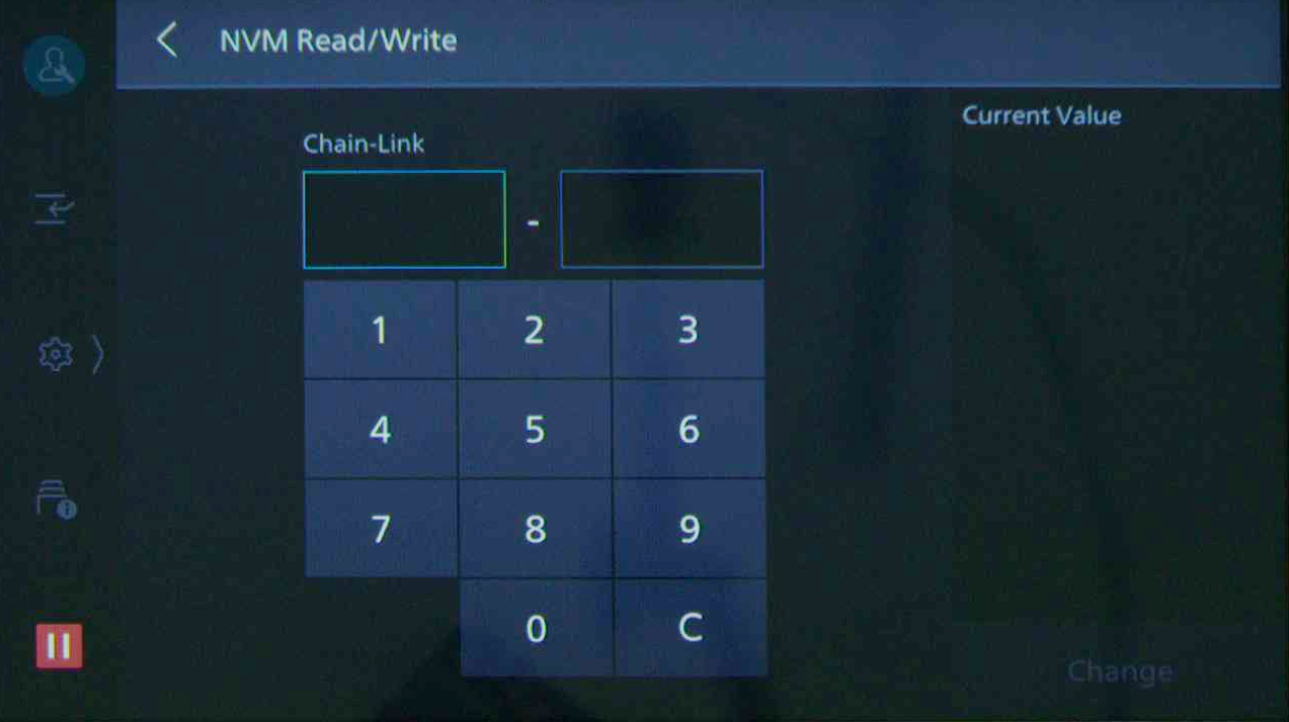
Device NVM setup
The NVM setup can be done only by the FUJIFILM BI partner engineer on-site. It is necessary for Apeos to report the accounting of print jobs to SAFEQ Cloud. If not done, Apeos will require authentication for print requests and store print jobs without authentication information in the internal storage.
Accounting settings: The FUJIFILM BI partner engineer has to navigate to the NVM Read/Write screen, enter Chain-Link 701-436 and set the value to 0.
Installing and uninstalling FUJIFILM BI Cloud Terminal
When reconnecting FUJIFILM BI Cloud Terminal between servers (for example, between Cloud primary and OMNI Bridge), the terminal must be uninstalled and installed again.
Using Terminal Deployment Tool
Using Terminal Deployment Tool for installing FUJIFILM BI Cloud Terminal is possible only with MS Windows.
-
After adding the printer and Embedded configuration (see section Adding FUJIFILM BI printer and Embedded in SAFEQ Cloud below), go to Printers > Embedded templates and open the newly created Embedded.
-
Click Manual operations.
-
Follow the instructions in the modal dialog shown below:
The example commands are generated regardless of the operating system.
For Windows, the full file name should be used in the command so that each command starts with
./terminaldeploymenttool.bat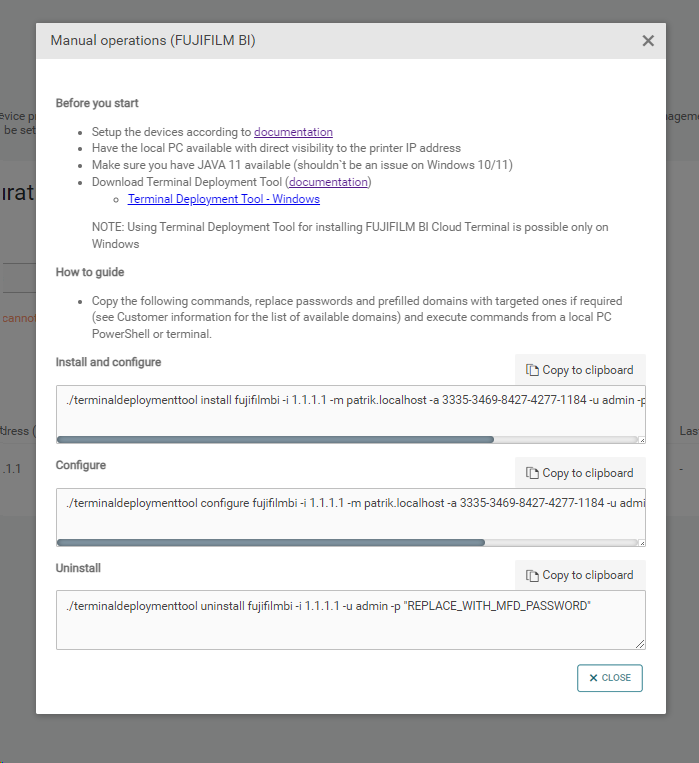
You can also use configuration web UI to configure FUJIFILM BI Cloud Terminal as described in the following section.
Using Configuration UI
Using Terminal Deployment Tool is the recommended way for installing and configuring FUJIFILM BI Terminal.
-
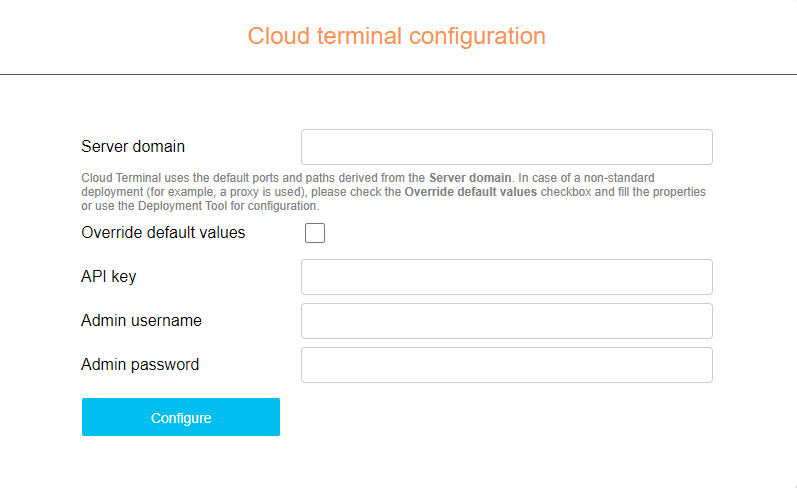
To access the configuration web UI, enter the following URL in your browser: https://<device IP>:58070/configuration
-
To configure the device, fill in the following fields:
-
Server URL – address of the SQTS, Idm, and scan server (for ex. https://rnd14167.rnd.local)
-
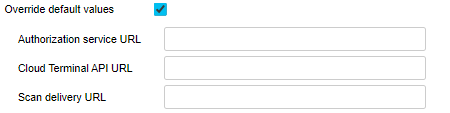
In case of a non-standard deployment (for example, a proxy is used), check the Override default values checkbox and fill in all properties.
-
API key – API access key set up in SAFEQ Cloud.
-
Admin username/password – login credentials set up in the MFD.
-
URL addresses of the SQTS, Idm, and scan server are automatically created from the Server URL by suffixing the respective ports to it. For a custom deployment (for example, with a proxy), use Terminal Deployment Tool.
Registering Cloud Terminal in the SAFEQ Cloud web interface
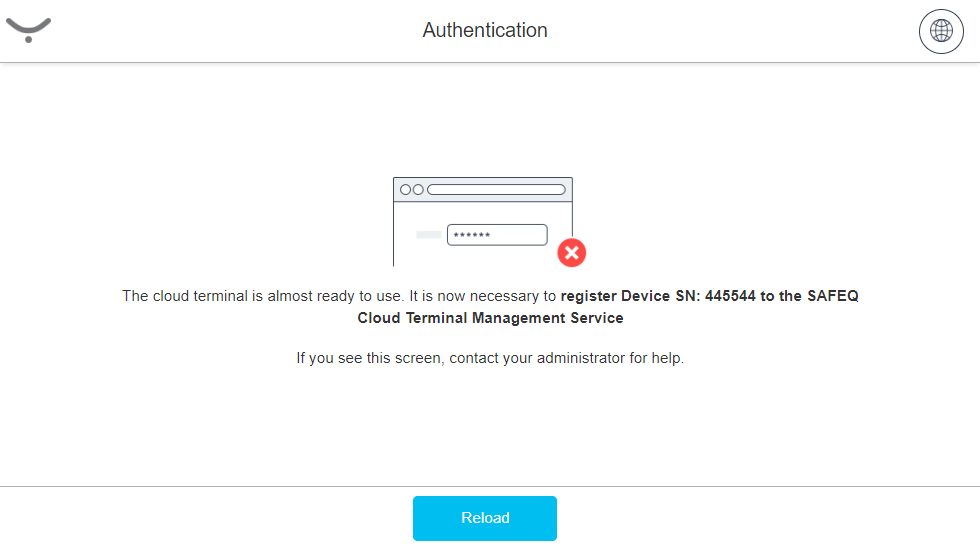
-
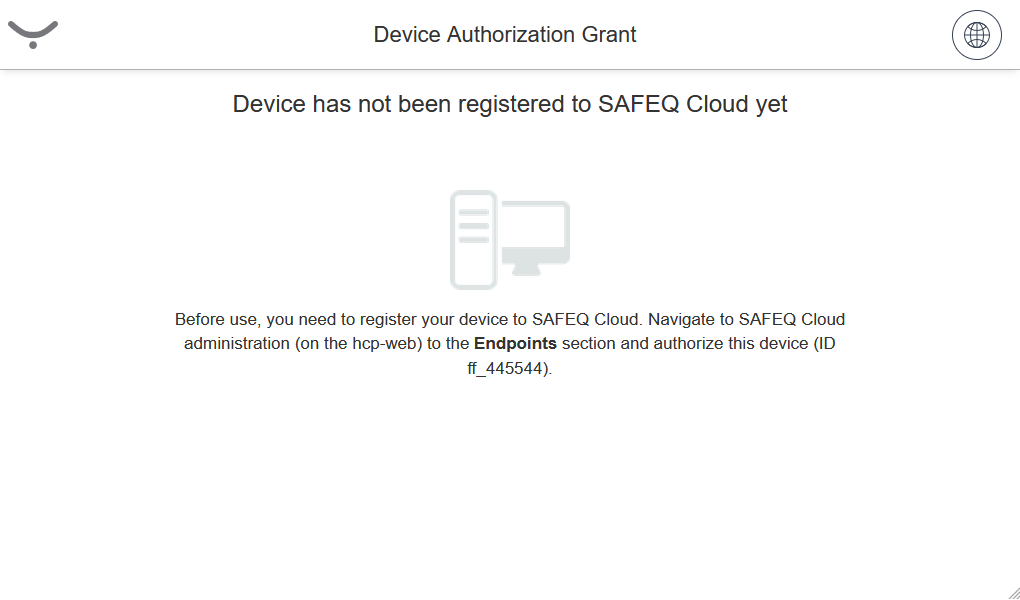
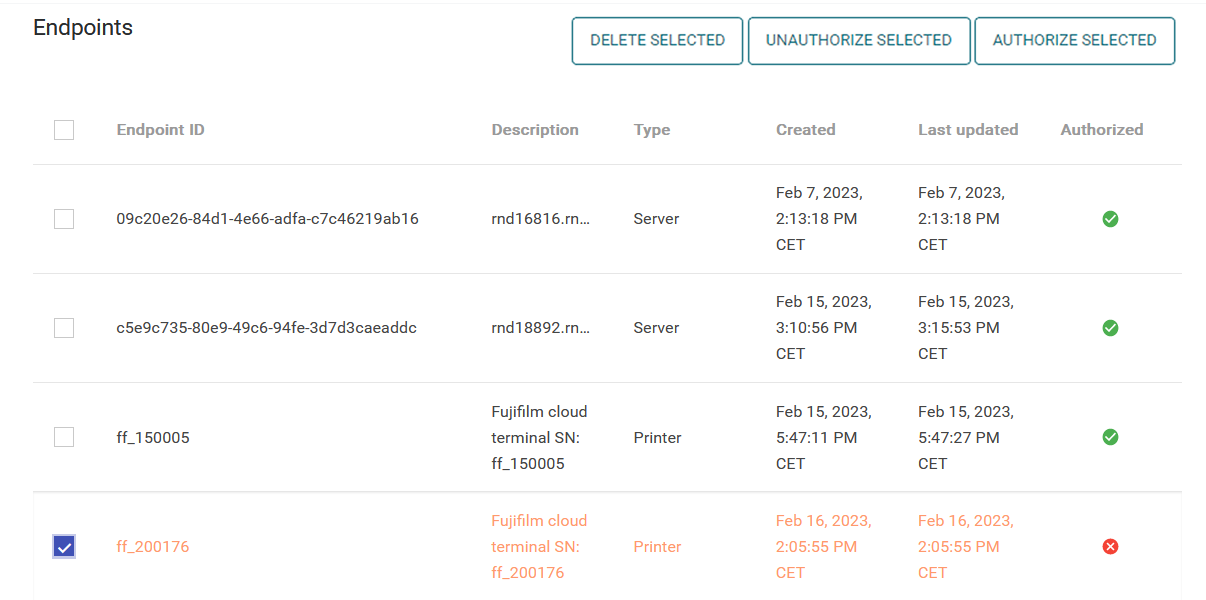
Upon installing the terminal on the MFD, you will see a screen with the ID of the device (prefixed with "ff_"). Note the ID number.
-
In SAFEQ Cloud web UI, go to Security > Endpoints and find the entry with ID number that you noted in the previous step. Select the entry and click Authorize selected.
-
Back on the MFD, you will see the following screen:
Adding FUJIFILM BI printer and Embedded configuration in SAFEQ Cloud Web UI
-
In the SAFEQ Cloud Web UI, go to Printers > Embedded templates.
-
If not done already, create an embedded configuration for Fujifilm BI by clicking Add.
-
In Vendor, select Fujifilm BI.
-
Fill in the rest of the configuration according to your needs and click Save. For more information on embedded configuration, see Embedded Terminals' configuration.
-
Go to Printers.
-
Click Add.
-
In Vendor, select FUJIFILM BI.
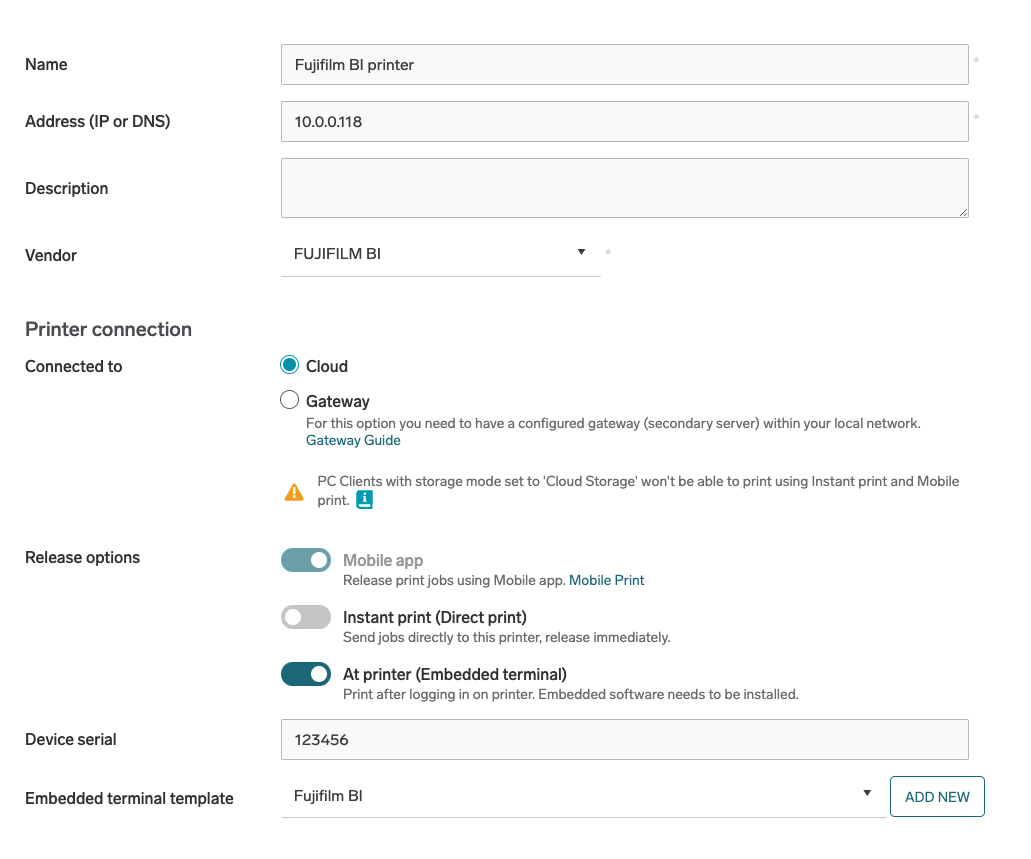
-
In Device serial, enter the serial number which was presented on the MFD and which you noted down as ID.
-
Fill in the rest of required information according to your needs.
-
In Embedded configuration, select your Fujifilm BI embedded configuration from the list.
-
Click Save.
-
The MFD will now display a login screen with your chosen authentication type.
Logging in with the machine administrator account
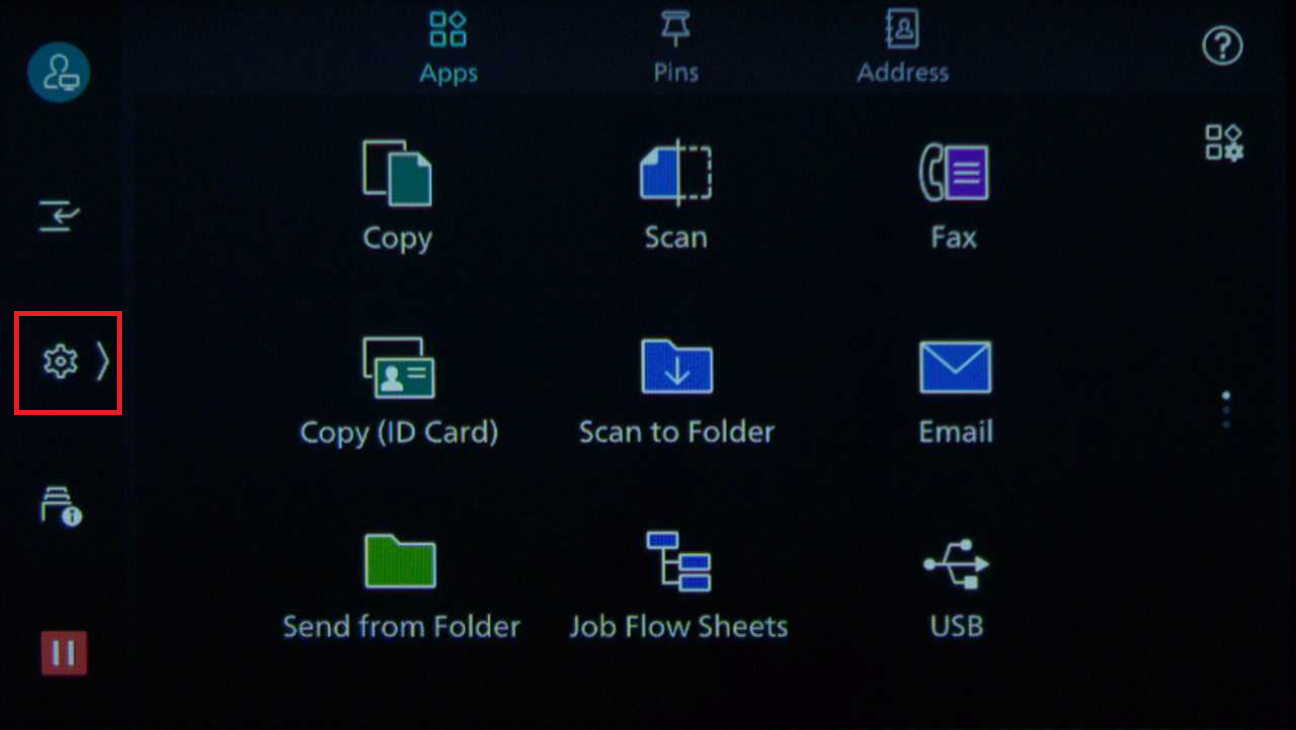
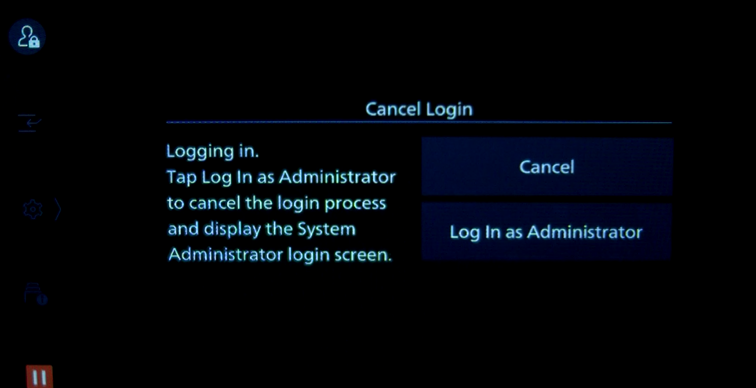
To change settings and configure the device, you can log in as a machine administrator from the authentication screen or device code flow screen or error screens that can appear instead of the authentication screen.
-
Tap the logo in the upper left corner and hold it for at least 5 seconds.
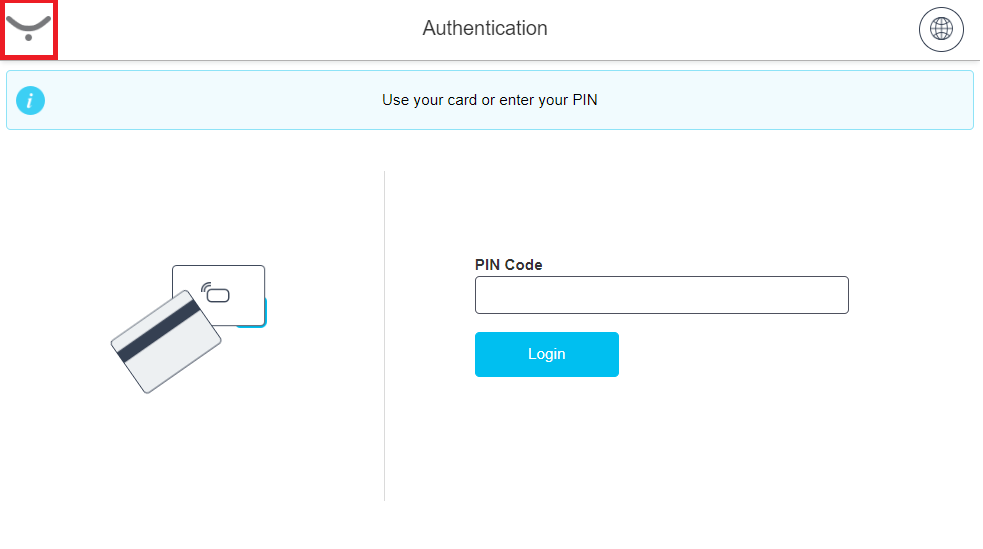
-
Tap Log In as Administrator and enter the administrator credentials.
Finishing device setup after cloud terminal installation/configuration
After finishing the Cloud Terminal installation, you must do additional configuration steps in the MFD's web interface.
Do the following actions in the exact order in which they are listed.
Turn on custom service authentication on the device
-
In the address bar of your web browser, type
https://<DeviceIP>. -
Log in as administrator.
-
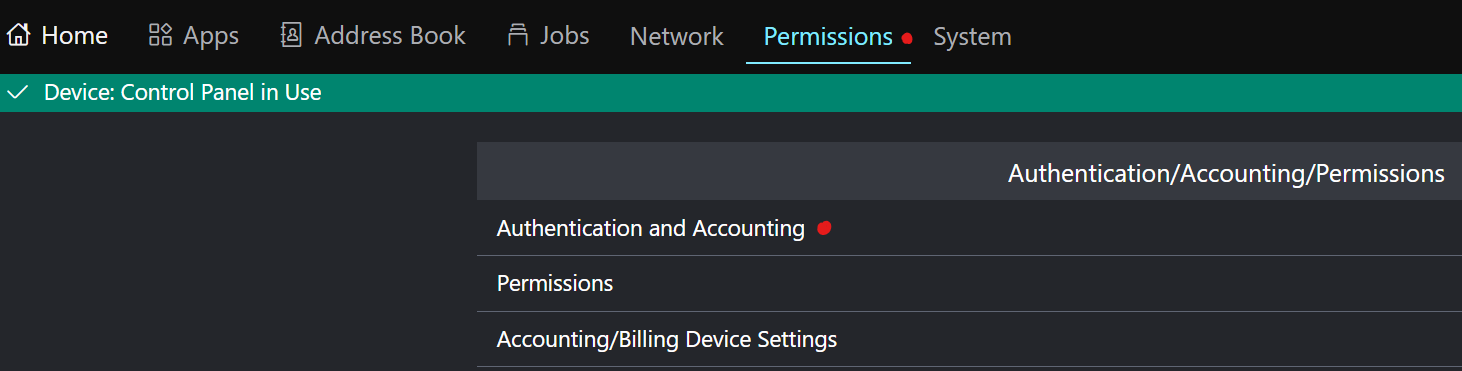
Go to Permissions > Authentication and Accounting.
-
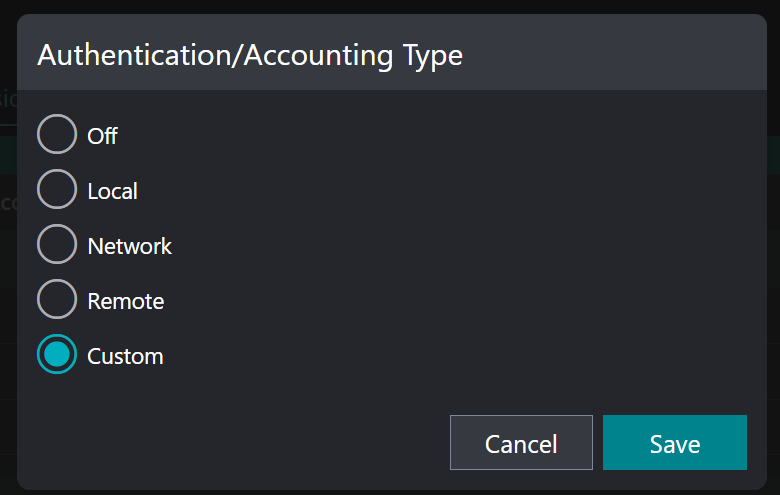
Click Authentication/Accounting Type.

-
Select Custom and click Save.
Configure access to the device functions
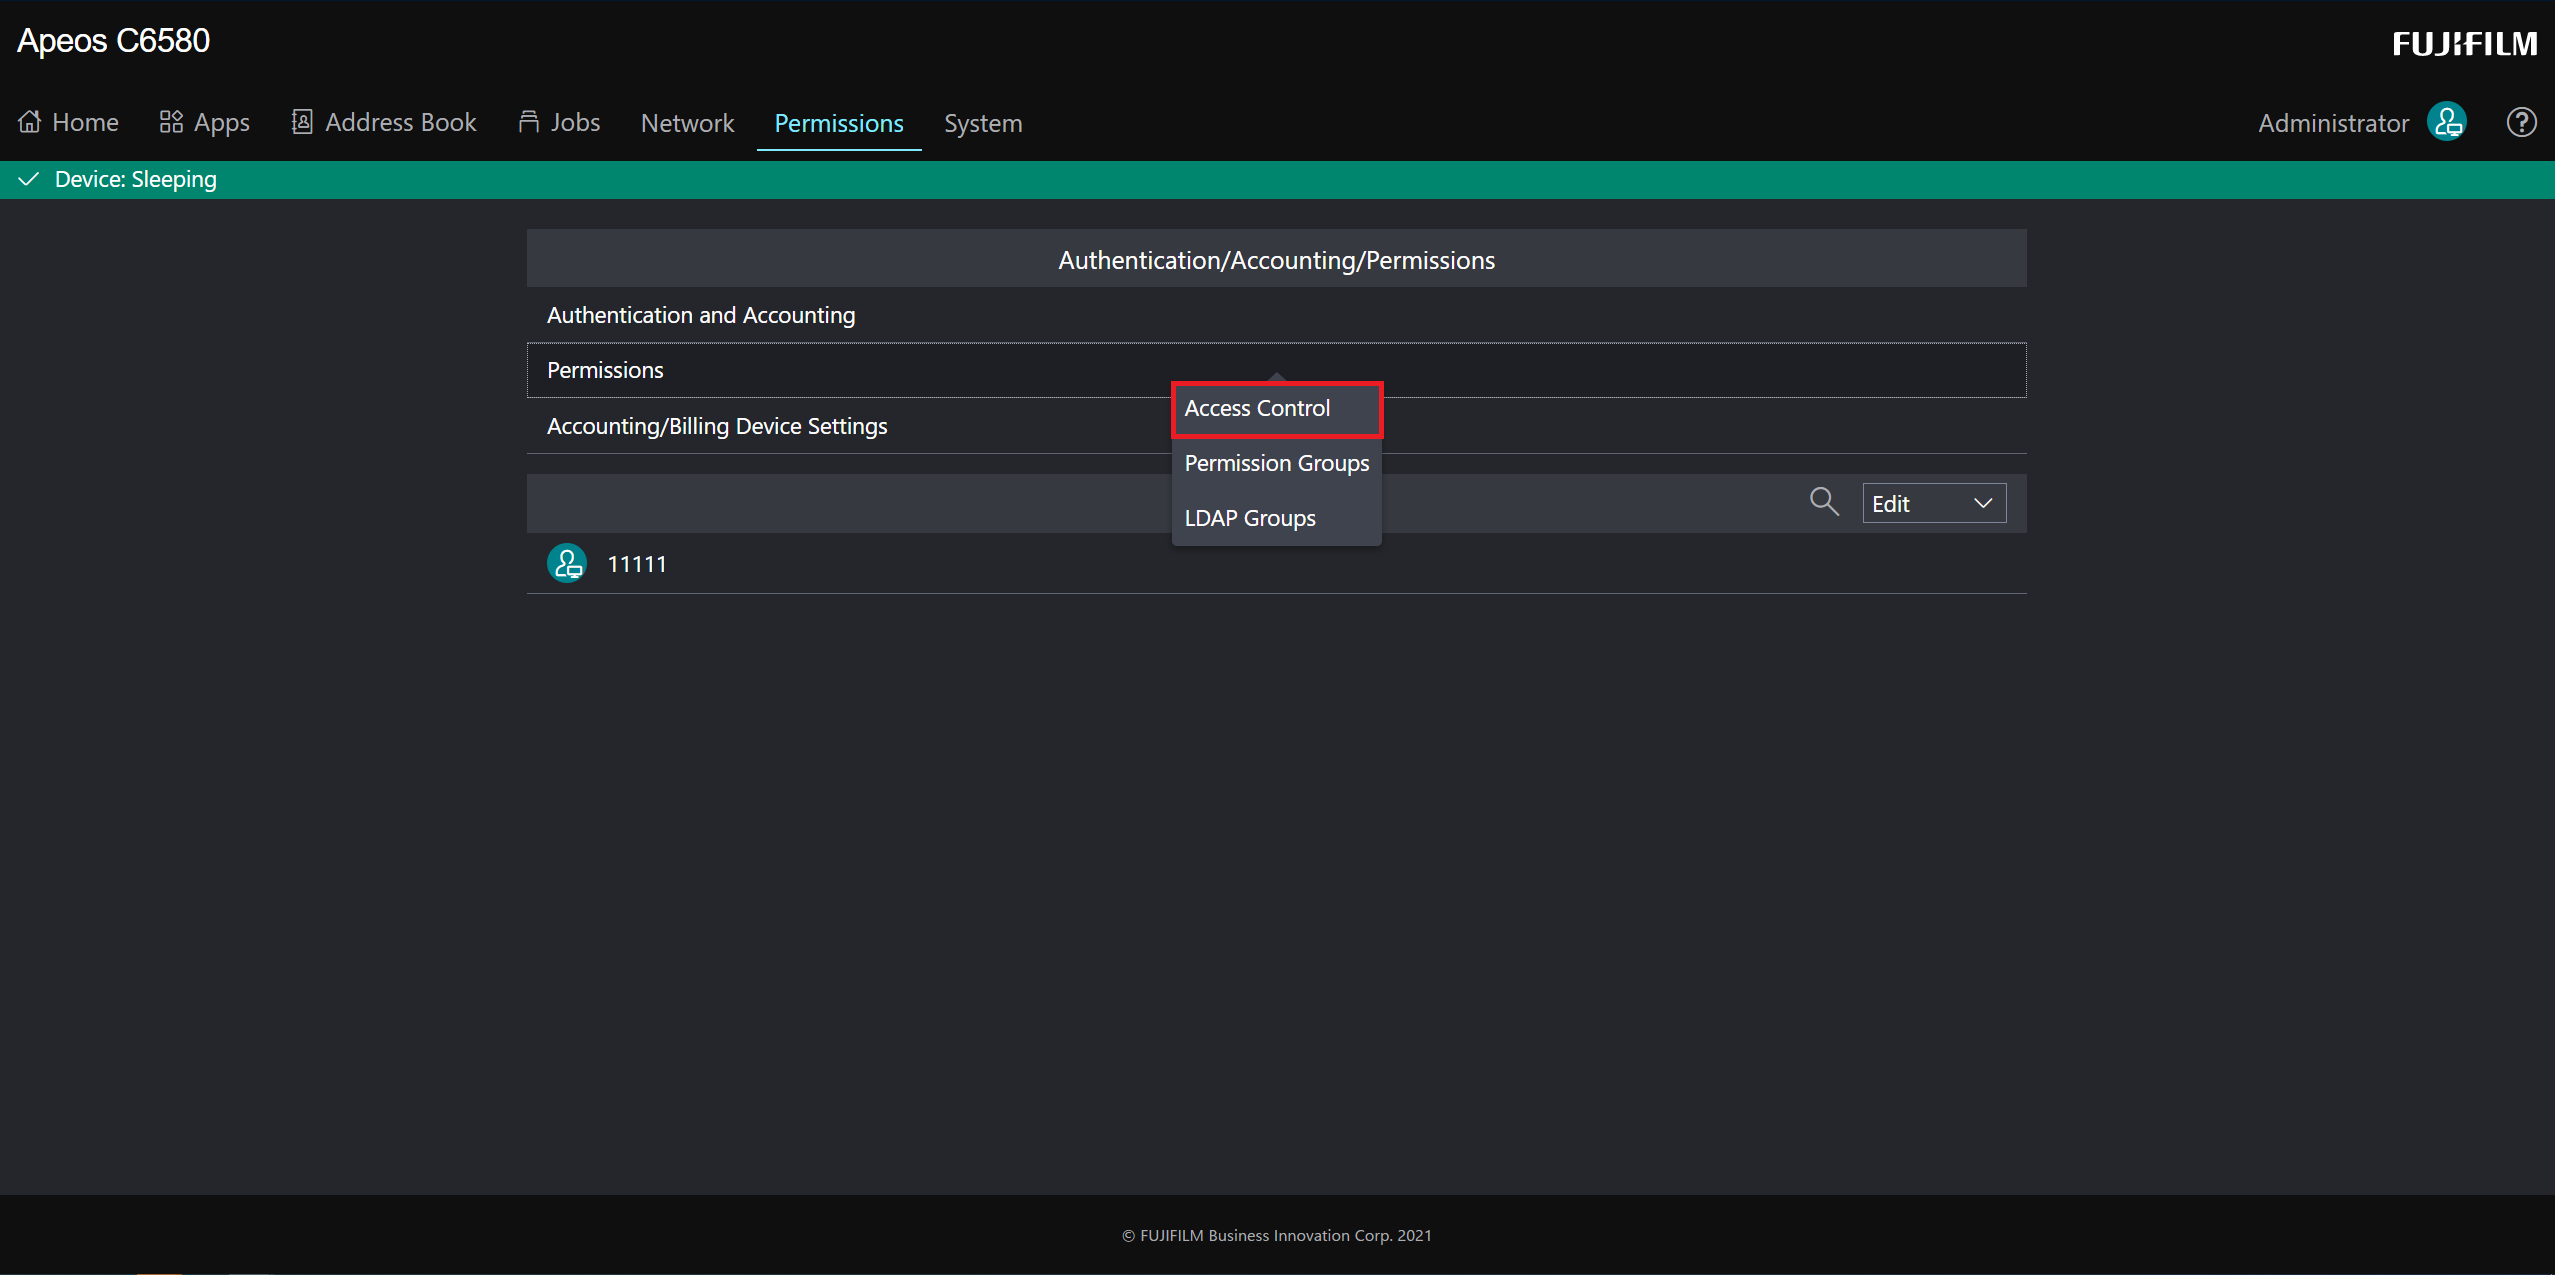
Configure the Access Control as described below to restrict access to walk-up functions by user access right setting. By doing this, the authentication screen becomes the home screen, and the users need to authenticate to access any functions.
-
Go to Permissions > Permissions > Access Control.
-
Set the Device Control Panel Access to Locked.
-
Click Save.
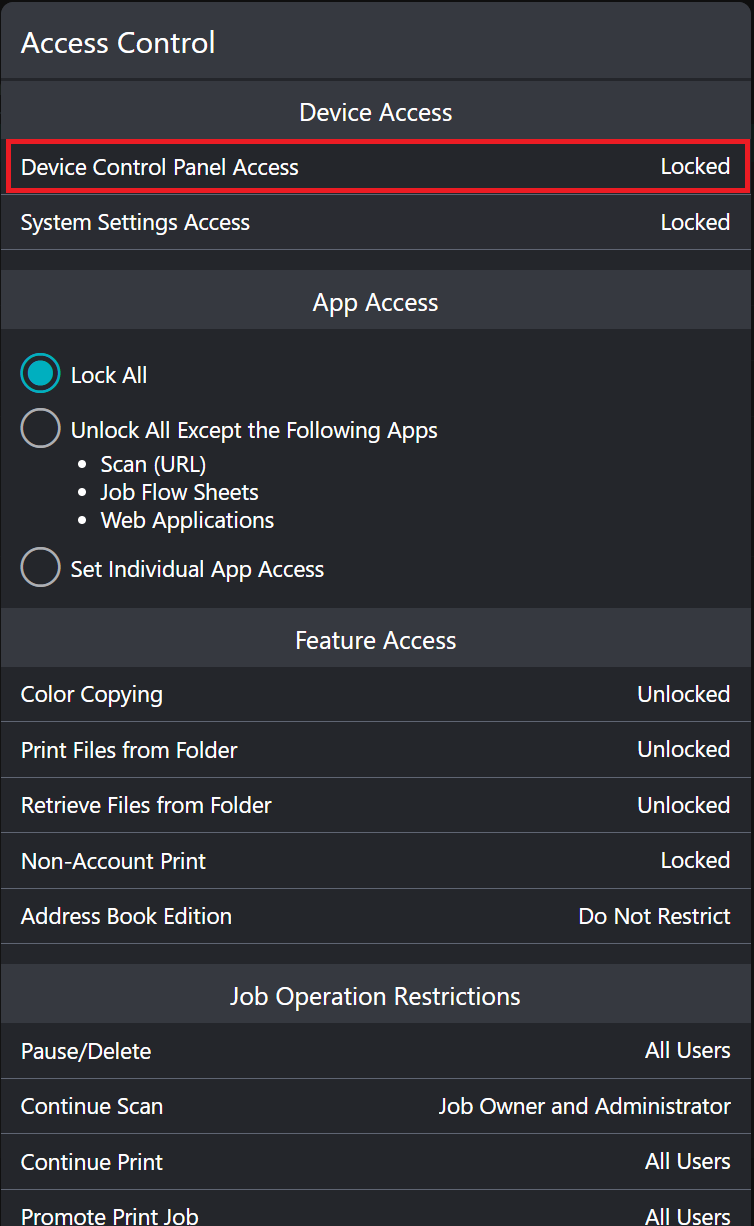
If you wish to define access to individual functions separately, set App Access instead of Device Control Panel Access.
If you uninstall the terminal from the MFD, these settings need to be set to Unlocked to allow access to the MFD's functions again.
Configure color copy restriction (optional)
For the terminal to restrict access to Full-color copy by user access right setting, configure the Access Control in the following way:
-
Go to Permissions > Permissions > Access Control.
-
Set Color Copying to Locked.
-
Click Save.

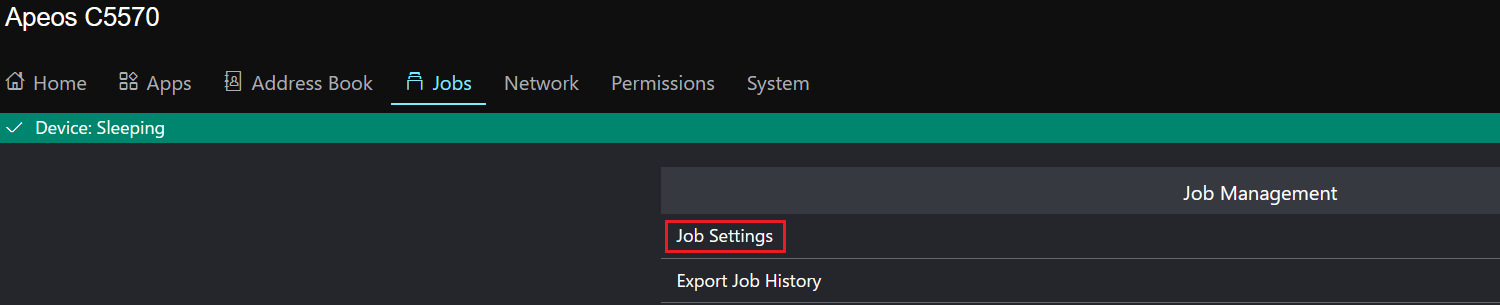
Configure access to completed jobs
This configuration is required to report the accounting of scan and copy.
This configuration is not strictly required to use the terminal. Changing these settings enables the Cloud Terminal to track the actual failure of printing on the MFD (in addition to tracking any possible failure while processing the job, which is always done, regardless of this configuration).
-
Go to Jobs > Job Settings.
-
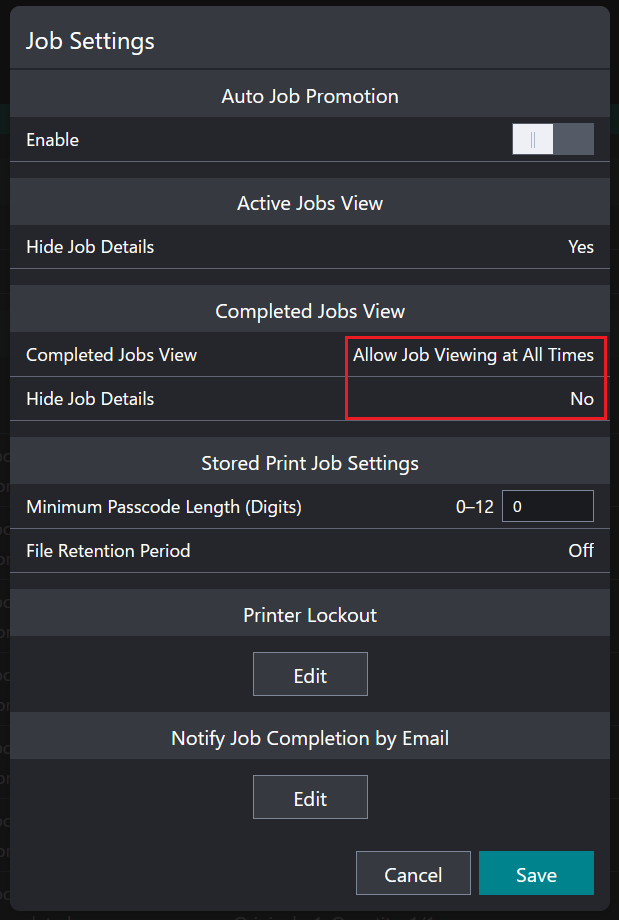
Change the following settings and save them
-
In Completed Jobs View, select Allow Job Viewing at All Times.
-
In Hide Job Details, select No.
-