Relevant Products
Single sign-on is available in pro print pro mfp
Set up a SAML application in Okta
-
Click Application from the menu bar.
-
Click Add Application and then Create new Application.
-
In the Create a New Application Integration dialog box, leave Web as the platform and select SAML 2.0 as the protocol that you want to use to sign in. Click Create.
-
In General Settings, enter the application name and click Next.
Configure SAML Single Sign-On in Okta
-
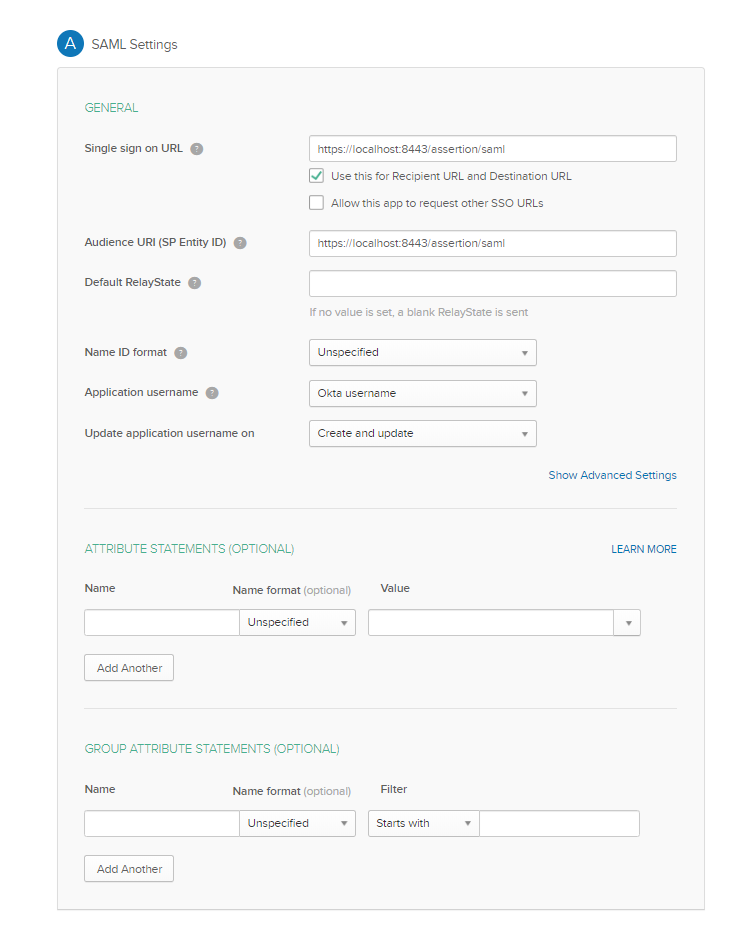
In the SAML Settings, paste the Assertion Consumer Service (ACS) URL into the SSO URL field. This URL depends on the account domain but generally looks like this:
https://<account-domain>:<port>/assertion/saml
The port number is 8443. In environments with reverse proxy infrastructure, do not specify the port number in the URL, meaning the default HTTPS port 443 will be used. -
Paste the Issuer ID value from the SAFEQ Cloud SAML configuration into the Audience URI (SP Entity ID) field, or use
https://<accountdomain>:<port>/pattern if the issuer ID is empty. -
Select the Name ID format and Application username that your application requires. For example, EmailAddress and Email, or leave the defaults.
-
In the Attribute Statements (Optional) section, add the required SAML attributes for your application.
-
In the Group Attribute Statements (Optional) section, add the required group attributed for your application.
-
Click Next. On the Feedback page, select I’m an Okta customer adding an internal app.
-
For the App type, select This is an internal app that we have created.
-
Click Finish.
Assign users to the created application
-
Click the Assignments tab.
-
Click Assign. Select either Assign to People or Assign to Groups. Enter the people or groups who you want to Single Sign-On into the application. Click Assign for each.
-
Verify the user-specific attributes for any people you add, and then select Save and Go Back.
-
Click Done.
Configure SAML Single Logout in Okta
-
The configuration for Single Logout must be done in the advanced settings. On the configuration screen, click on Show Advanced Settings.
-
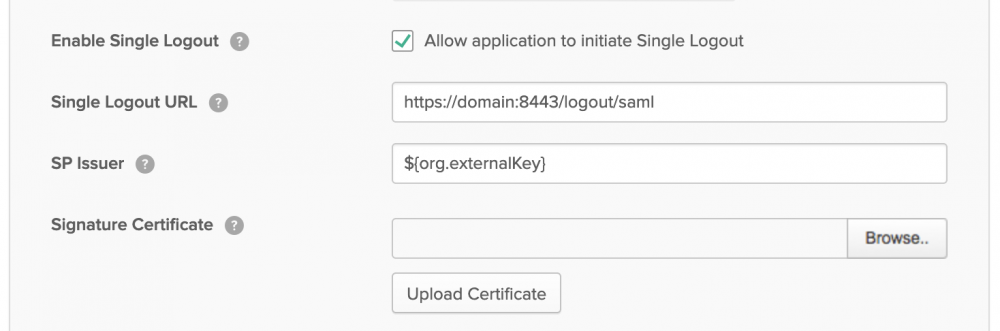
You will then see additional settings. Among them is the Single Logout.
-
Select the Enable Single Logout option.
-
Add the Single Logout URL . This is a URL that points to the SAFEQ Cloud Web UI. The “domain” host name should be the one you used for the single sign-on URL above.
-
For the Signature Certificate , you can use the SAFEQ Cloud Web UI public certificate. Once you have accessed the SAFEQ Cloud Web UI with your browser, the certificate is stored either in your browser or in a key chain application of your operating system. In both cases, you must export the certificate to a file and specify it here to upload.
-
With this configuration, you are automatically logged out of Okta when you click the logout button in SAFEQ Cloud Web UI.
Perform the following steps to export the SAFEQ Cloud Web UI certificate from Firefox:
-
Open Firefox preferences.
-
Go to Privacy & Security.
-
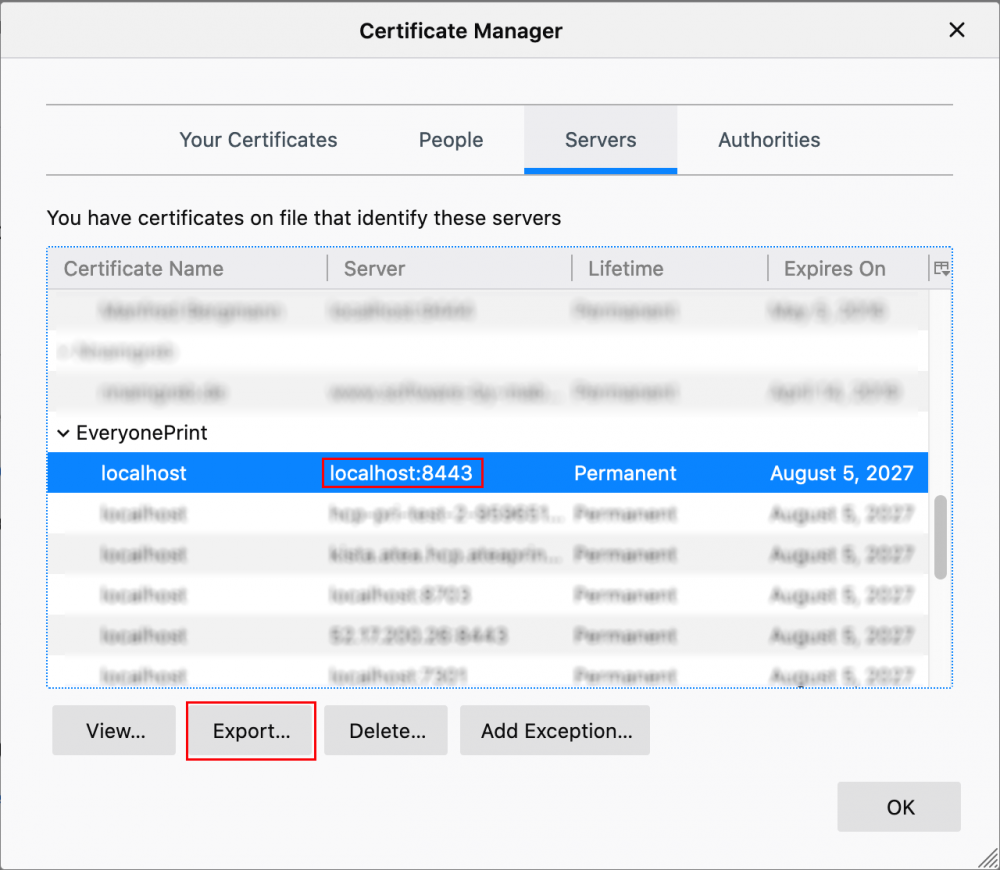
Scroll down and click View Certificates under Security > Certificates.
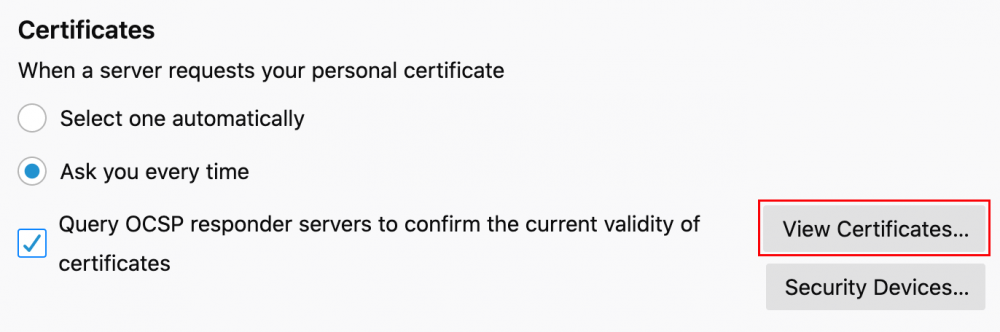
-
Find and select the certificate for the entry with the right hostname and port 8443, which is the SAFEQ Cloud Web UI (unless your setup has a different UI port).
-
Export the selected certificate.