
Relevant Products
OMNI Bridge is available for Pro Print Pro MFD
About YSoft OMNI Bridge
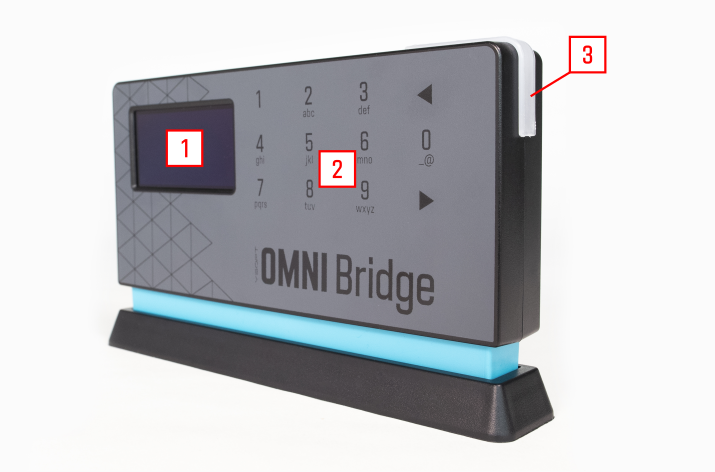
YSoft OMNI Bridge is a small device (about a size of a router), that can connect any networked printer to the cloud. This piece of hardware is manufactured by Y Soft.
-
Display
-
Keyboard
-
Device status LED
Safety instructions
Use only the AC power adapter provided with your YSoft OMNI Bridge. The voltage must be the same as stated on the adapter.
Do not expose the device to water.
Do not expose the device to fire.
Clean only with a dry cloth.
Keep unprotected cords out of the path of foot traffic to prevent tripping. Do not leave cords dangling in places where they can be pulled down and tripped over.
Regulatory information
Only for indoor use
CE (Europe)

WEEE (Europe)
The product conforms with Directive 2002/96/EC of the European Parliament and of the Council of 27 January 2003 on waste electrical and electronic equipment (WEEE) and Directive 2003/108/EC of the European Parliament and of the Council of 8 December 2003 amending Directive 2002/96/EC on waste electrical and electronic equipment (WEEE).
FCC (USA)

FCC Statement
This device complies with part 15 of the FCC rules. Operation is subject to the following two conditions:
-
this device may not cause harmful interference
-
this device must accept any interference received, including interference that may cause undesired operation
ISED (Canada)
ISED statement
This Class B digital apparatus meets all the requirements of the Canadian Interference-Causing Equipment Regulations.
Cet appareil numérique de la class B respecte toutes les exigences du Règlement sur le matériel brouilleur du Canada.
EAC (Eurasian Customs Union)

ACMA (Australia/New Zealand)

China RoHS

Y Soft Corporation, a.s. Technology Park, Technická 2948/13 616 00 Brno Czech Republic P: +420 533 031 500; email: info@ysoft.com
Y Soft North America, Inc., 1452 Hughes Road, Suite 110, Grapevine, TX 76051, USA; P:+1 888-761-9977; email: info.na@ysoft.com
Y Soft Japan Ltd. 〒658-0032 兵庫県神戸市東灘区向洋町中6-9神戸ファッションマート10階; email: info.jp@ysoft.com
Technical specifications
|
Parameter |
Description |
|---|---|
|
Size |
178 mm H / 103 mm W / 33 mm D |
|
Weight |
400 g |
|
Operating System |
Linux |
|
Status indicators |
RGB LED |
|
User interfaces |
White OLED Display, 12-pad capacitive touch keyboard |
|
Power source |
External 12V (DC jack 2.1 mm) |
|
Network connectivity |
2 10/100/1000 Ethernet |
|
CPU |
NXP i.MX 6DualLite Cortex-A9 @1 GHz |
|
RAM |
4GB RAM |
|
Storage |
64GB eMMC |
Operating conditions
|
Operating condition |
Value |
|---|---|
|
Working temperature |
+5°C to +35°C |
|
Storage temperature |
0°C to +50°C |
|
Working air humidity |
20% to 85% without condensation |
|
Storage air humidity |
8% to 85% without condensation |
LED statuses
The LED indicator on YSoft OMNI Bridge displays the following colors based on device status:
-
No light – Early device startup.
-
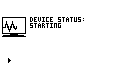
Yellow – A module (or the device) is starting or processing.
-
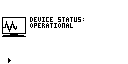
Blue – All modules are operational.
-
Orange – User input is required.
-
Red – Error or alert state.
During normal routine operation after the device has been powered on, the LED color transitions from no light to yellow and then to light blue.
During an update, the components need to be restarted. This will briefly turn the device status indicator yellow, indicating that some component is starting or restarting.
Based on the installed modules, other colors may be displayed. For information on the meaning of these colors, consult the specific module documentation.
Operating System updates
The version of the Operating System is automatically updated after your device is connected to the Internet.
Main menu
The YSoft OMNI Bridge main menu consists of the following screens:
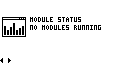
Device status screen – Current device status summary.
If your YSoft OMNI Bridge displays a device verification code on the device status screen and the code is too small for you to read, do the following:
-
On the Device status screen, press ▶ two times.
-
This will take you to the Module status screen. Press 0.
-
You will see the device code displayed in bigger letters.
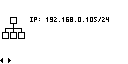
Network status screen – The current network address as received from DHCP. Should the device receive an IPv6 address other than link-local, it will also be displayed here.
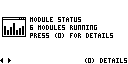
Module status screen – If there are any modules running on your OMNI Bridge, you can see their individual statuses here. Press 0 to display details.
Device info screen
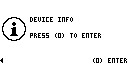
Press 0 to display to access the following information about the device:
-
Serial number
-
Default PIN
-
Default manager password
-
Main MAC address
-
Auxiliary MAC address
-
Current OS version
Press ▶ or ◀ to navigate through the screens.
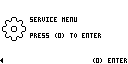
Service menu screen – For more information, see the section Service menu.
Press ▶ or ◀ to navigate through the screens.
Service menu
The Service menu is accessible from any main menu screen:
-
Press 0.
-
Enter PIN and press ▶. The default PIN is located on a sticker on the back of the device.
-
The Service menu is displayed.
In the Service menu, you can find the following settings:
Logout – Log out from the Service menu.
Network – Network configuration menus.
IMS address – Adding an IMS server address.
Use IMS pairing key – Pairing the device with the IMS.
Time settings – Set NTP time servers.
Change PIN – Change the PIN to access the Service menu.
Factory reset – Perform a device factory reset.
All settings are described in detail below.
Logout
-
In the Service menu, use ▶ or ◀ to select Logout.
-
Press 0.
-
You are logged out of the Service menu.
Network
IPv4
By default, the network is configured by DHCP.
Disabling the DHCP and configuring the IP address manually
To enable manual configuration, turn off the DHCP and then proceed with the configuration:
-
In the Service menu, use ▶ or ◀ to select Network.
-
Press 0.
-
Select IPv4: DHCP and press 0.
-
Select DHCP: On and press 0.
-
Select Disable DHCP and press 0.
-
The Manual config screen appears for a short period of time.
-
Enter the IP address and press ▶.
-
Enter the network mask and press ▶.
-
Enter the gateway address and press ▶.
-
Enter the DNS address and press ▶ to save all changes.
After the IPv4 has been set to a static address, you can use the Network setting wizard to edit all subsequent settings in one flow or set the IPv4 address, IPv4 Network mask, IPv4 Gateway, and DNS individually. For individual settings, select a setting, enter a value and press ▶ to save changes.
Enabling the DHCP
-
In the Service menu, use ▶ or ◀ to select Network.
-
Press 0.
-
Select IPv4: Static and press 0.
-
Select DHCP: Off and press 0.
-
Select Enable DHCP and press 0.
-
The DHCP is enabled.
Disabling the IPv4 stack
-
In the Service menu, use ▶ or ◀ to select Network.
-
Press 0.
-
Select IPv4: DHCP and press 0.
-
Select Disable IPv4 and press 0.
Enabling the IPv4 stack
-
In the Service menu, use ▶ or ◀ to select Network.
-
Press 0.
-
Select IPv4: Disabled and press 0.
-
Select DHCP: Off and press 0.
-
Select Enable DHCP and press 0.
IPv6
By default, the network is configured by DHCP.
Disabling the DHCPv6 and configuring the IP address manually
To enable manual configuration, turn off the DHCPv6 and then proceed with the configuration:
-
In the Service menu, use ▶ or ◀ to select Network.
-
Press 0.
-
Select IPv6: DHCP and press 0.
-
Select DHCPv6: On and press 0.
-
Select Disable DHCPv6 and press 0.
-
The Manual config screen appears for a short period of time.
-
Enter the IP address and press ▶.
-
Enter the network mask and press ▶.
-
Enter the gateway address and press ▶.
-
Enter the DNS address and press ▶ to save all changes.
After the IPv6 has been set to a static address, you can use the Network setting wizard to edit all subsequent settings in one flow or set the IPv6 address, IPv6 Network mask, IPv6 Gateway, and DNS individually. For individual settings, select a setting, enter a value and press ▶ to save changes.
Enabling the DHCPv6
-
In the Service menu, use ▶ or ◀ to select Network.
-
Press 0.
-
Select IPv6: Static and press 0.
-
Select DHCP: Off and press 0.
-
Select Enable DHCPv6 and press 0.
-
The DHCPv6 is enabled.
Disabling the IPv6 stack
-
In the Service menu, use ▶ or ◀ to select Network.
-
Press 0.
-
Select IPv6: DHCP and press 0.
-
Select Disable IPv6 and press 0.
Enabling the IPv6 stack
-
In the Service menu, use ▶ or ◀ to select Network.
-
Press 0.
-
Select IPv6: Disabled and press 0.
-
Select DHCPv6: Off and press 0.
-
Select Enable DHCPv6 and press 0.
Ethernet separation
By default, the two network interfaces on the device are bridged together. The device can be connected to the network using either of them.
For some applications, it is possible to strictly separate the interfaces.
Once separation has been enabled, the network interfaces are no longer equal and must be used as follows:
-
Interface 1 – Isolated network
-
Interface 2 – Internet connection
There is no need to separate the interfaces for YSoft OMNI UP365.
To enable or disable Ethernet separation, do the following:
-
In the Service menu, use ▶ or ◀ to select Network.
-
Press 0.
-
Select Eth. sep.: Disabled / Enabled and press 0.
-
Select Enable / Disable eth. sep. and press 0.
-
Confirm by pressing ▶.
-
Press 0 to return to the Network menu.
IMS address
IMS is obsolete.
Adding a new IMS address
-
In the Service menu, use ▶ or ◀ to select IMS address.
-
Press 0.
-
Select Add new IMS address and press 0.
-
Enter a new IMS address and press ▶.
-
Press ▶ to save changes.
All IMS addresses in the list will be tested and the first to respond will be used.
Editing an IMS address
-
In the Service menu, use ▶ or ◀ to select IMS address.
-
Press 0.
-
Use ▶ or ◀ to select an IMS address and press 0.
-
Select Edit and press 0.
-
Edit the IMS address and press ▶.
-
Press ▶ to save the changes.
Deleting an IMS address
-
In the Service menu, use ▶ or ◀ to select IMS address.
-
Press 0.
-
Use ▶ or ◀ to select an IMS address and press 0.
-
Select Delete this server and press 0.
-
Confirm by pressing ▶.
Use IMS pairing key
IMS is obsolete.
-
In the Service menu, use ▶ or ◀ to select Use IMS pairing key.
-
Press 0.
-
Press ▶ to confirm.
-
Enter the pairing ID and press ▶.
-
Enter the pairing key and press ▶.
-
Press ▶ again to use the IMS pairing key.
Time settings
Setting NTP server
Google time servers are used by default.
YSoft OMNI Bridge will try to connect to the NTP servers in the same order as they are listed, and will use the first reachable NTP server.
Adding new NTP server
-
In the Service menu, use ▶ or ◀ to select Time settings.
-
Press 0.
-
Select Set NTP servers and press 0.
-
Use ▶ or ◀ to select Add new NTP server and then press 0.
-
Enter a new NTP server address and press ▶.
-
Press ▶ to save changes.
Editing an NTP server
-
In the Service menu, use ▶ or ◀ to select Time settings.
-
Press 0.
-
Select Set NTP servers and press 0.
-
Use ▶ or ◀ to select a server you want to delete and then press 0.
-
Select Edit and press 0.
-
Edit the NTP server address and press ▶.
-
Press ▶ to save changes.
Deleting an NTP server
-
In the Service menu, use ▶ or ◀ to select Time settings.
-
Press 0.
-
Select Set NTP servers and press 0.
-
Use ▶ or ◀ to select a server you want to delete and then press 0.
-
Select Delete this server and press 0.
-
Confirm by pressing ▶.
Change PIN
-
In the Service menu, use ▶ or ◀ to select Change PIN.
-
Press 0.
-
Enter the current PIN and press ▶.
-
Enter a new PIN and press ▶.
-
Enter the new PIN once again for confirmation and press ▶ to save changes.
Change the manager password
-
Log into the management shell using the following command:
ssh manager@<IP address of your OMNI Bridge> -
To set a new password, type:
password set manager -
Enter a new password.
-
Confirm the new password by entering it again.
Factory reset
The device may need further configuration after a factory reset has been performed. You will therefore need to call our service desk to bring the device back online.
-
In the Service menu, use ▶ or ◀ to select Factory reset.
-
Press 0.
-
Press ▶ to continue.
-
Confirm by pressing ▶.
-
If you press 1, the reset will proceed only if the device is not busy (for example, printing is in progress).
-
If you press 7, the reset will proceed immediately, regardless of the device status.
In case of an emergency, you can perform a factory reset even without knowing the service menu pin.
You can enter the word "factoryreset" (which corresponds to numerical pin "322867973738") on the keypad instead of the Service menu PIN. This will take you directly to the factory reset wizard.
This feature cannot be turned off.