Relevant Products
Gateways are available in Pro Print Pro MFD
This document outlines the specifics of a virtual appliance designed to operate on VMware with Hardware Version 17. It is compatible with ESXi 7.0 and later versions.
Y Soft offers a comprehensive Virtual Software Appliance that includes Rocky Linux 9 and the latest version of SAFEQ Cloud. For detailed package specifications, see the Complementary Information section of this page.
This guide is applicable to virtual machines using OVA/OVF images.
Prerequisites
A functioning virtual machine (VM) environment. If you are not sure how to set up a VM, ask your IaaS provider for assistance.
Installing the Virtual Software Appliance
-
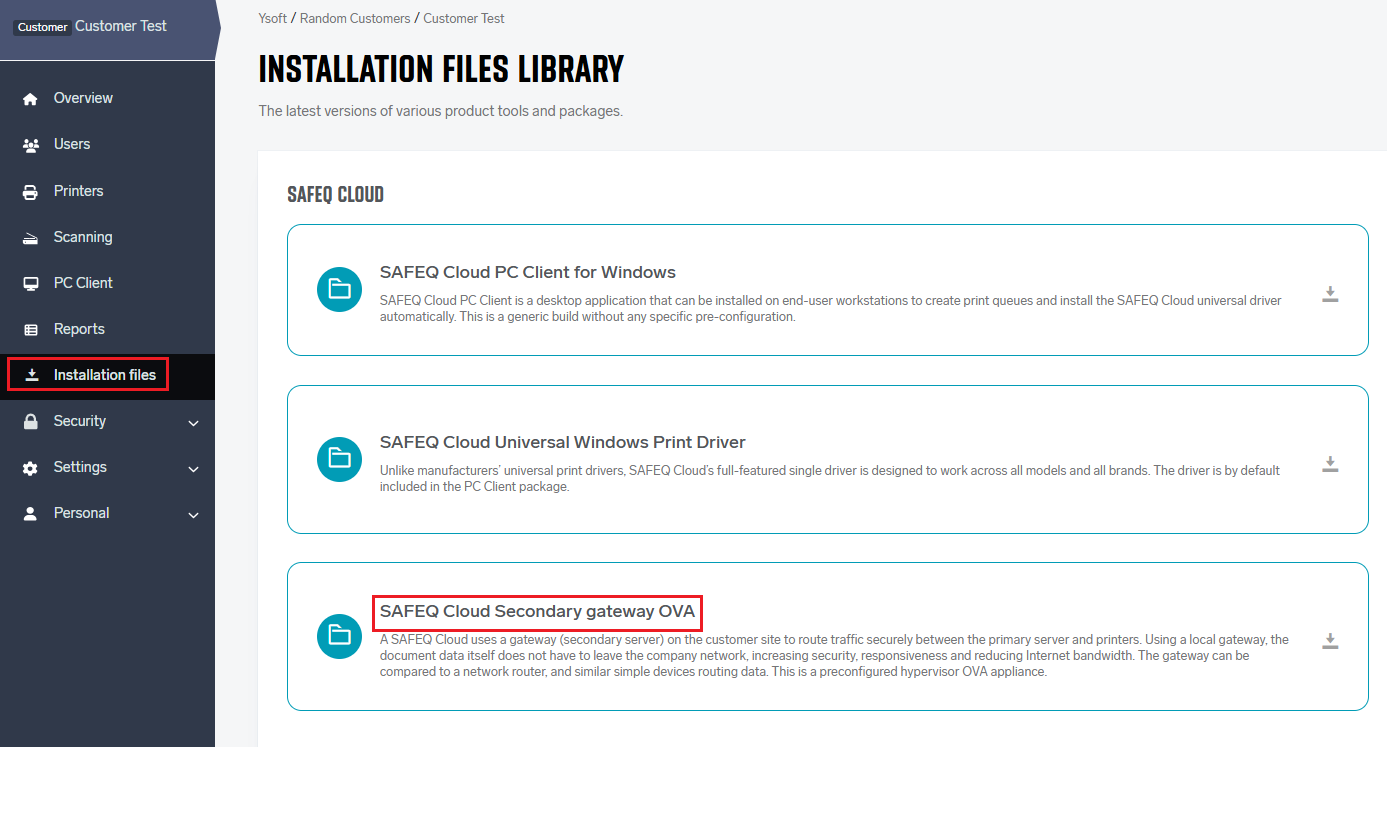
Download the most recent Virtual Software Appliance from the Installation files library.
-
Open the package in your VM manager. If you are using VMware, select File > Open, then navigate to the Virtual Software Appliance and follow the on-screen guided instructions.
-
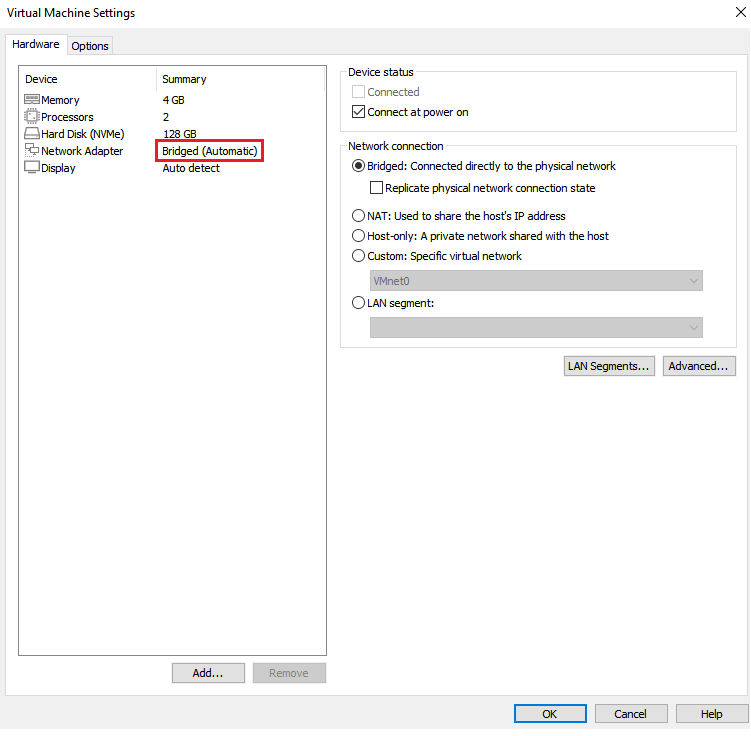
Once the Virtual Software Appliance is imported, verify and adjust the VM settings:
-
Memory size – The default is 4 GB.
-
Processor – We recommend 1 processor/2 cores.
-
Options > VMware Tools – Verify the Synchronize guest time with host option. Disable automatic updates as the appliance uses open-vm-tools updated with Rocky Linux 9.
-
Network – Make sure the network adapter is set to Bridged Mode to ensure the appliance has direct access to the network.
-
-
Start the VM.
-
At the login prompt, enter admin as the username and va as the password.
-
After your first login, you will be prompted to change your password. If you are connected via SSH, you will be disconnected after changing the password. Log in again to continue.
By default, the appliance is set up to use the US keyboard mapping.
-
The Appliance Welcome screen provides a comprehensive view of the setup. Note these values, as you will be customizing them later on.
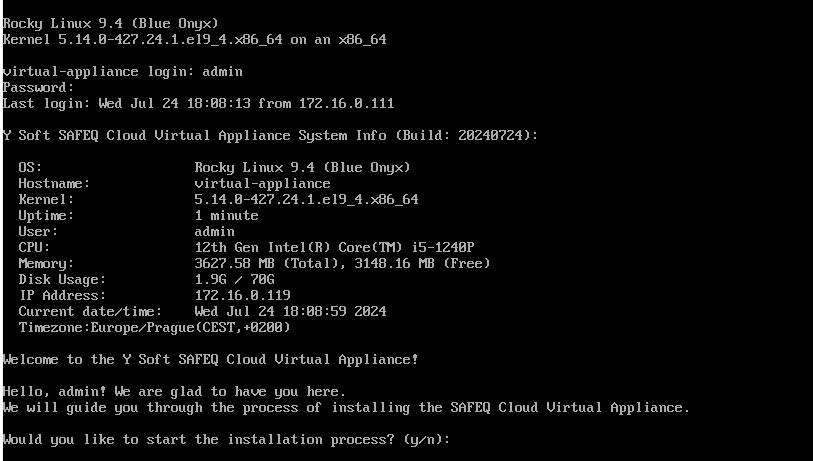
From here, you can continue the installation in your VM manager or remotely connect to the appliance using an SSH client such as MobaXterm or PuTTY (see the Complementary Information section) with the username admin and your new password.
Installing SAFEQ Cloud
-
When prompted to start the installation process, press y.
-
Enter your password to start the wizard with elevated privileges. Follow the instructions in the wizard. During the installation, you will be asked to:
-
Change the keyboard layout.
-
Customize the complete hostname in FQDN form (e.g.,
appliance-01.acme.com). -
Customize the network settings. For example, change to a static IP address.
Do not change the network profile name.
-
Customize the Time Zone.
-
-
When the SAFEQ Cloud installer opens:
-
Read and accept the license agreement.
-
Accept the installation directory.
-
Select the role of the server – in this case Extra secondary server for existing vendor or customer installation.
-
-
When prompted for Connection details, provide the required information for the primary server address and account name.
You can see these in Customer information in SAFEQ Cloud Web UI.
-
Accept to autostart all services and complete the installation.
Firewall ports will be updated automatically.
At the end of the installation, you will be presented with instructions on how to use the Cockpit admin tool.
Optional recommended post-installation tasks
Connect to the appliance via an SSH client with the username admin and your password.
If you did not set a static IP address during installation, change the network settings as follows:
$ sudo nmtui
To change the keyboard layout:
-
To list all available keymaps:
$ sudo localectl list-keymaps -
To temporarily change the system’s keymap, for example, to ‘English UK keyboard’:
$ sudo loadkeys uk -
To permanently change the system’s keymap, for example, to ‘English UK keyboard’:
$ sudo localectl set-keymap uk
Complementary Information
Automatic Updates with DNF Automatic
This virtual appliance uses DNF Automatic to apply the latest security patches and package updates on a daily basis.
Understanding Mirrors and the Impact of Blocking Them
Rocky Linux uses a network of mirrors to distribute packages and updates efficiently. When you run a command like dnf update, your system fetches packages from one of these mirrors—public servers that host copies of the Rocky Linux repositories.
Mirrors are geographically distributed servers that host identical copies of official Rocky Linux repositories: https://mirrors.rockylinux.org/mirrormanager/mirrors
DNF automatically selects a mirror (usually the fastest or nearest).
This system improves download speeds, reduces load on individual servers, and provides redundancy.
If your system cannot reach the mirrors (e.g. due to firewall rules, proxy restrictions, or DNS blocks), you may experience:
-
Failed package installations or updates
-
DNF timeouts or errors like
Cannot find a valid baseurl -
DNF automatic failing silently or logging update errors
-
Delays while DNF retries alternative mirrors
This affects both manual package management (dnf install, dnf update) and automated updates via DNF Automatic.
External URL Requirement for Installation
During installation, the virtual appliance connects to the following URL to download the SAFEQ Cloud installation binary:
https://cdn.everyoneprint.com/updatecatalog.json
This URL hosts the update catalog, which provides metadata and download links for the latest version of the SAFEQ Cloud. The installation wizard retrieves this catalog to:
-
Determine the latest available version
-
Download the correct installer file
-
Ensure compatibility and integrity before proceeding
Web-Based Management with Cockpit
This virtual appliance includes Cockpit, a modern web-based interface for managing Linux systems. It is enabled by default for easy system monitoring and administration.
Accessing Cockpit
Once the appliance is powered on and connected to the network, you can access Cockpit by navigating to:
https://<appliance-ip>:9090
-
Replace
<appliance-ip>with the actual IP address of the appliance. -
You’ll need to log in using a valid system user account (typically
rootor an admin user). -
The connection is secured via HTTPS.
Features of Cockpit
Cockpit provides access to:
-
System logs and journal
-
Storage and disk usage
-
Networking status
-
Running services and systemd units
-
Terminal access
-
Software updates
Disabling Cockpit
If you prefer to manage the system only via SSH or other methods, you can disable Cockpit with the following command:
systemctl disable --now cockpit.socket
To re-enable it later:
systemctl enable --now cockpit.socket
Installation log
During the setup process, all actions performed by the installation script are logged for transparency and troubleshooting purposes.
The log file is automatically created at:
/home/admin/install_script_<date>.log
SSH clients
Windows:
-
PuTTY: Download PuTTY
-
MobaXterm: Download MobaXterm
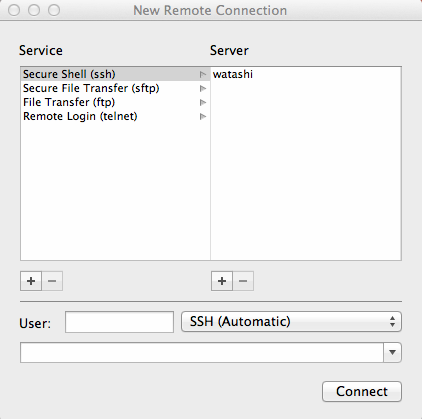
macOS:
-
Launch the Terminal app.
-
From the menu, select Shell > New Remote Connection.
-
This will open a connection manager window.