
Relevant Products
Secondary Gateway is available in PRO PRINT pro mfp
Terminals that require a secondary gateway are available in pro mfp
Perform the following steps to configure the Secondary Gateway for use with Embedded terminals:
-
Log in to the SAFEQ Cloud Web UI with your administrator account.
-
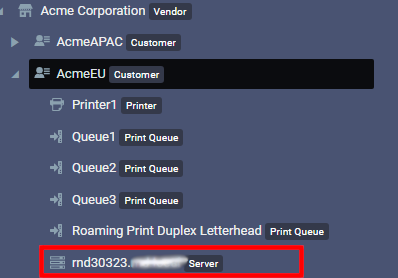
In the SAFEQ Cloud tree, select the customer account which contains the Secondary Gateway you wish to configure.
-
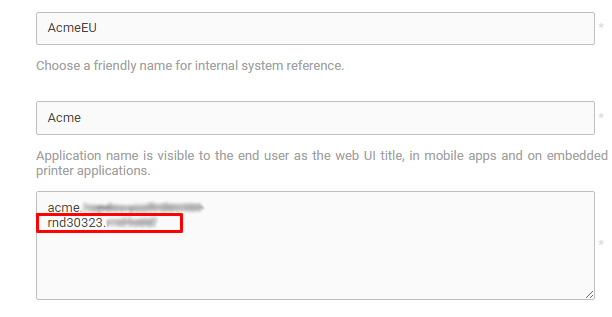
Go to Settings > Customer account.
-
Add the IP address or a domain name of the Gateway to Domains on a new line and click Save.
Whether to use a domain name or IP address for the secondary gateway depends on your MFD vendor.
-
For HP, Ricoh, and Brother) use a domain name.
-
For Canon, use an IP address.
-
For the rest of vendors, we recommend using the domain name.
-
-
The next step is mapping this Secondary Gateway to your account. In the SAFEQ Cloud tree, click the target Secondary Gateway node.
-
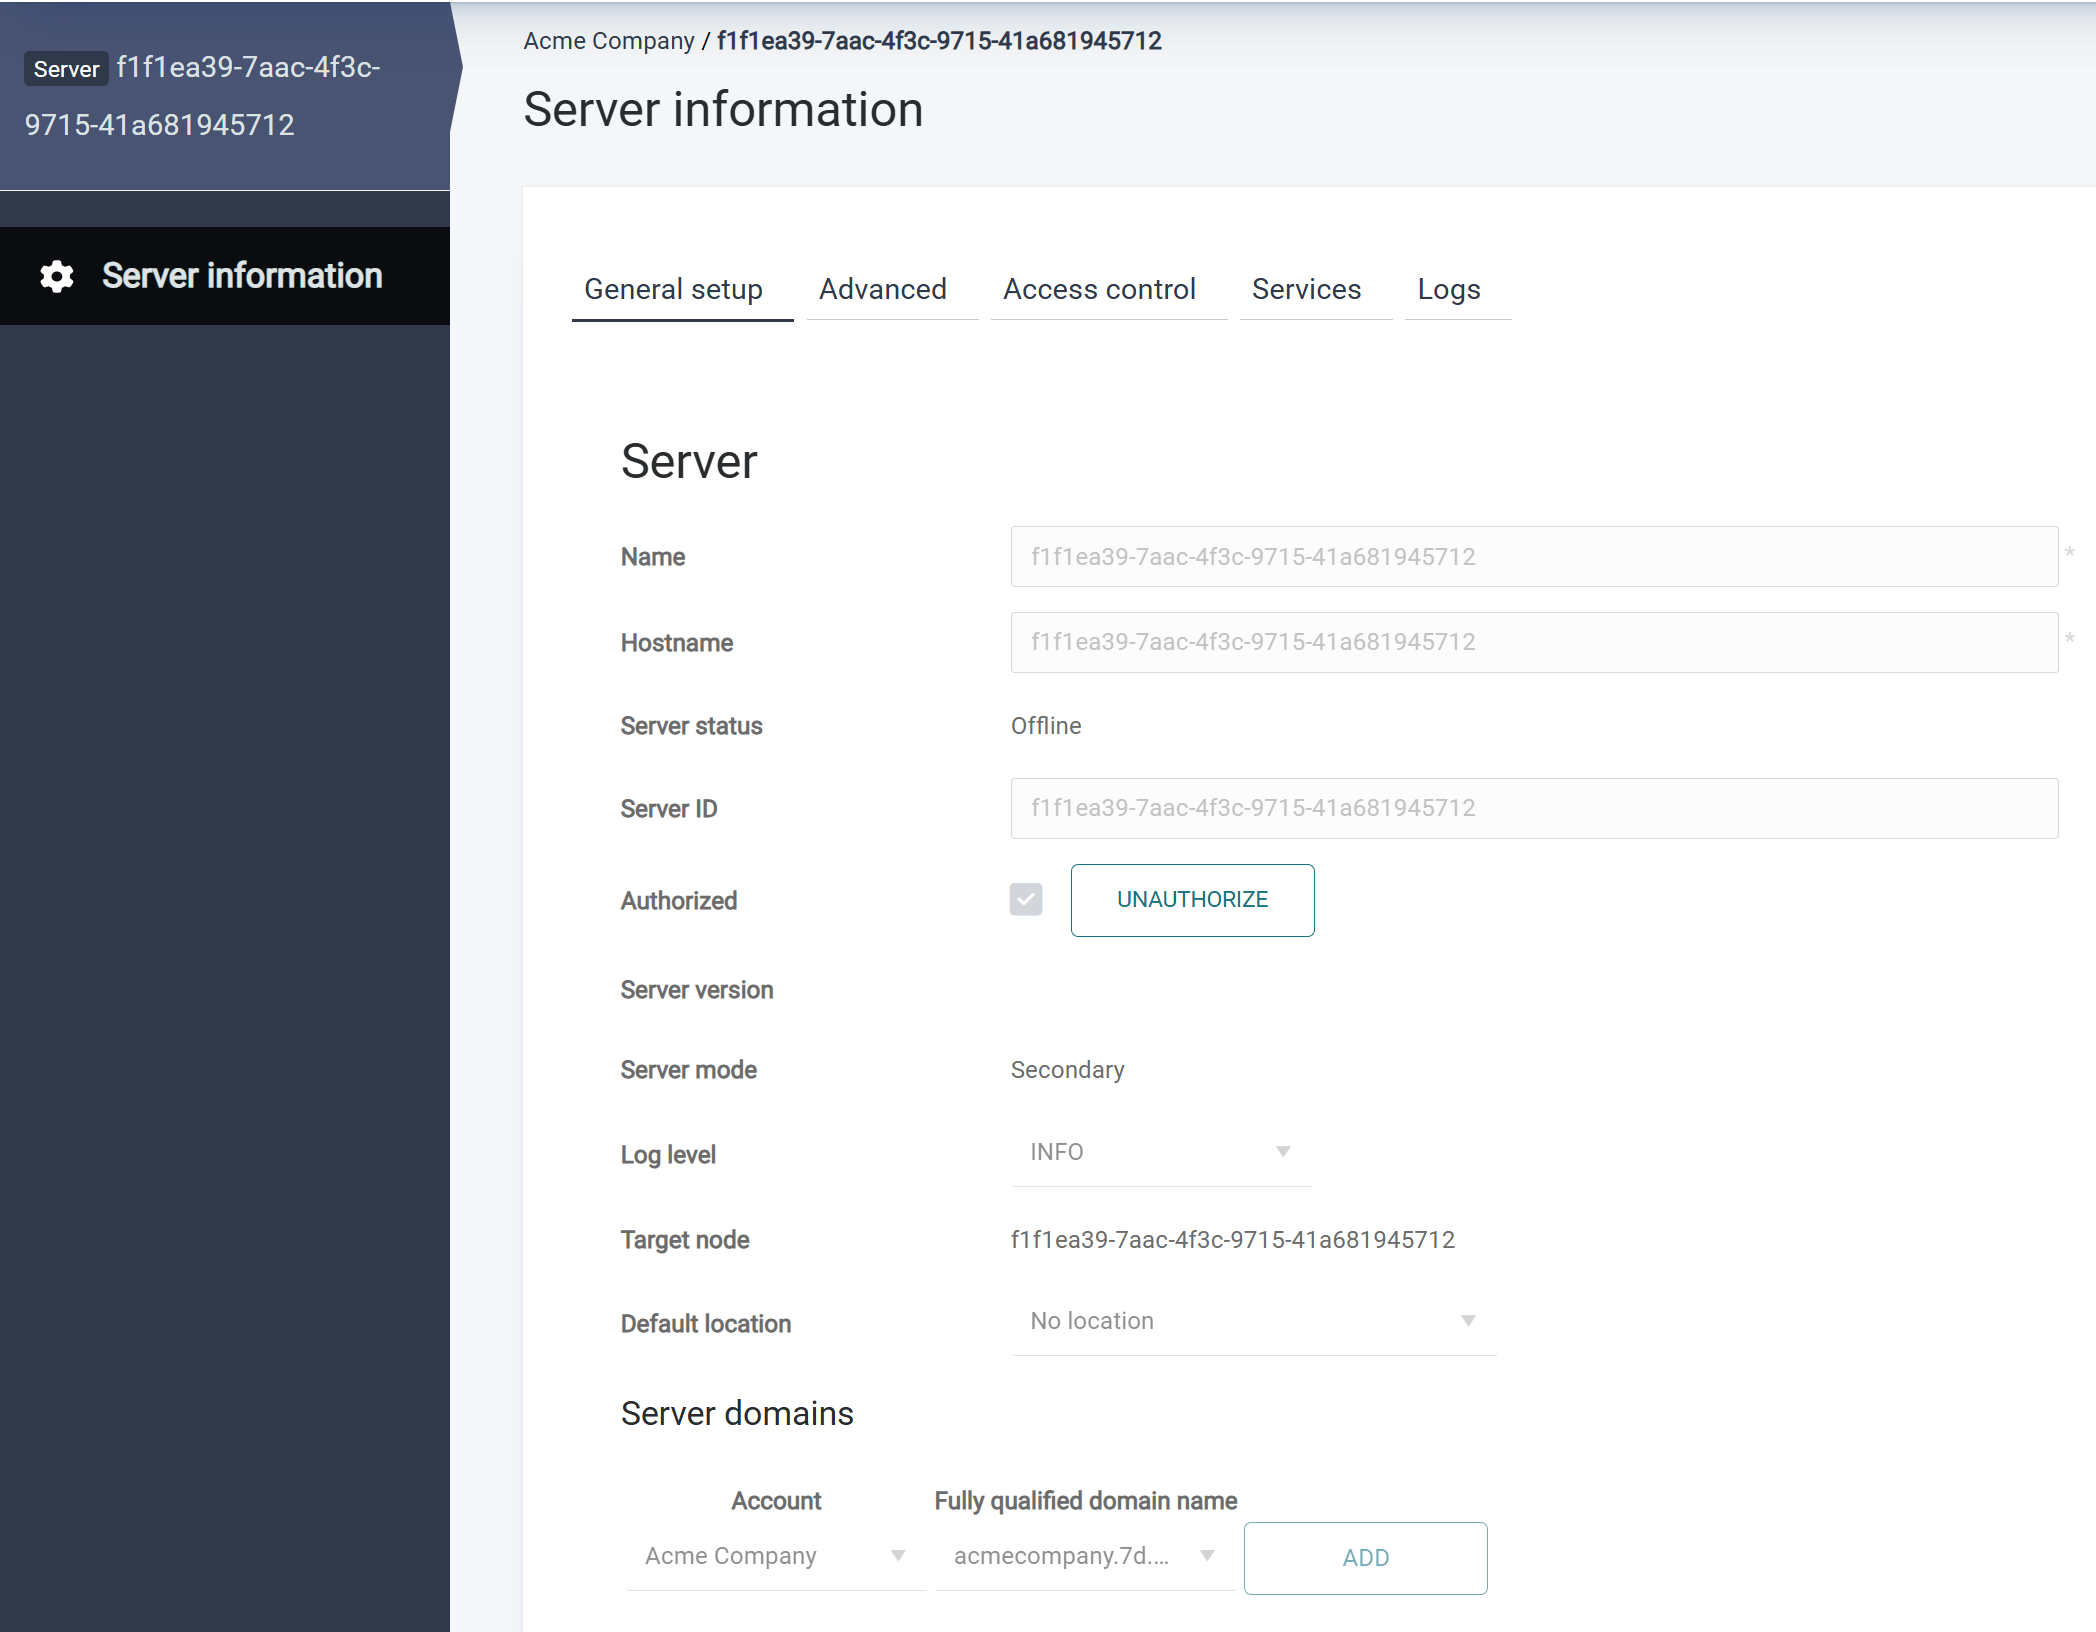
Click Server information.
-
In the Server domains section, choose the IP address or domain name from the FQDN drop-down list that you've previously entered in the Customer account section. After your selection, click Add. If the row is created correctly, the Add button will change to Delete button. This is what the page will look like before saving:
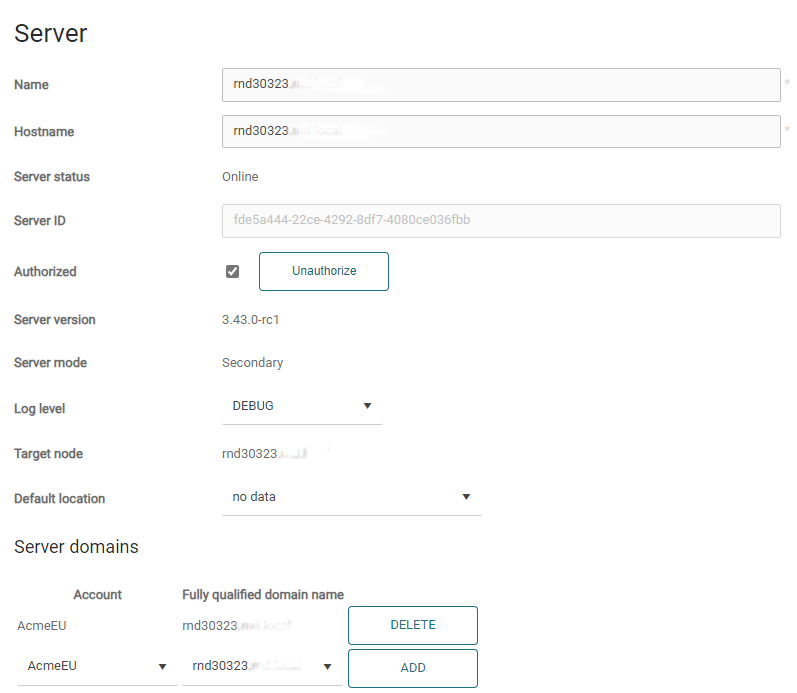
Map only one address for each gateway. You may use the same name for several secondary gateways if you use load balancing.
-
Click Save.
-
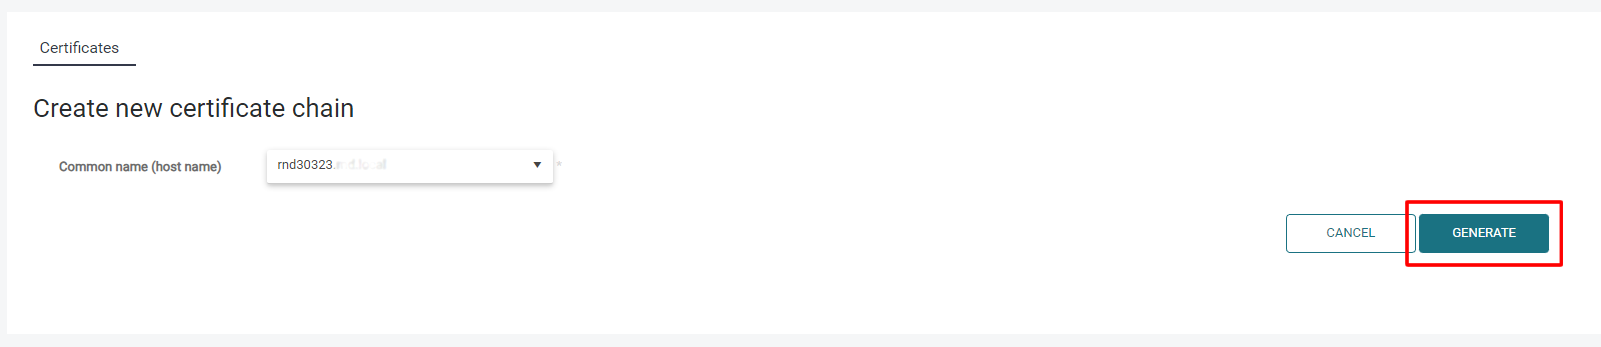
Go to Security > Security options and click the Certificates tab. In the Private certificate chains section, create or import an SSL certificate for the mapped address.
-
An example of creating a certificate:
-
-
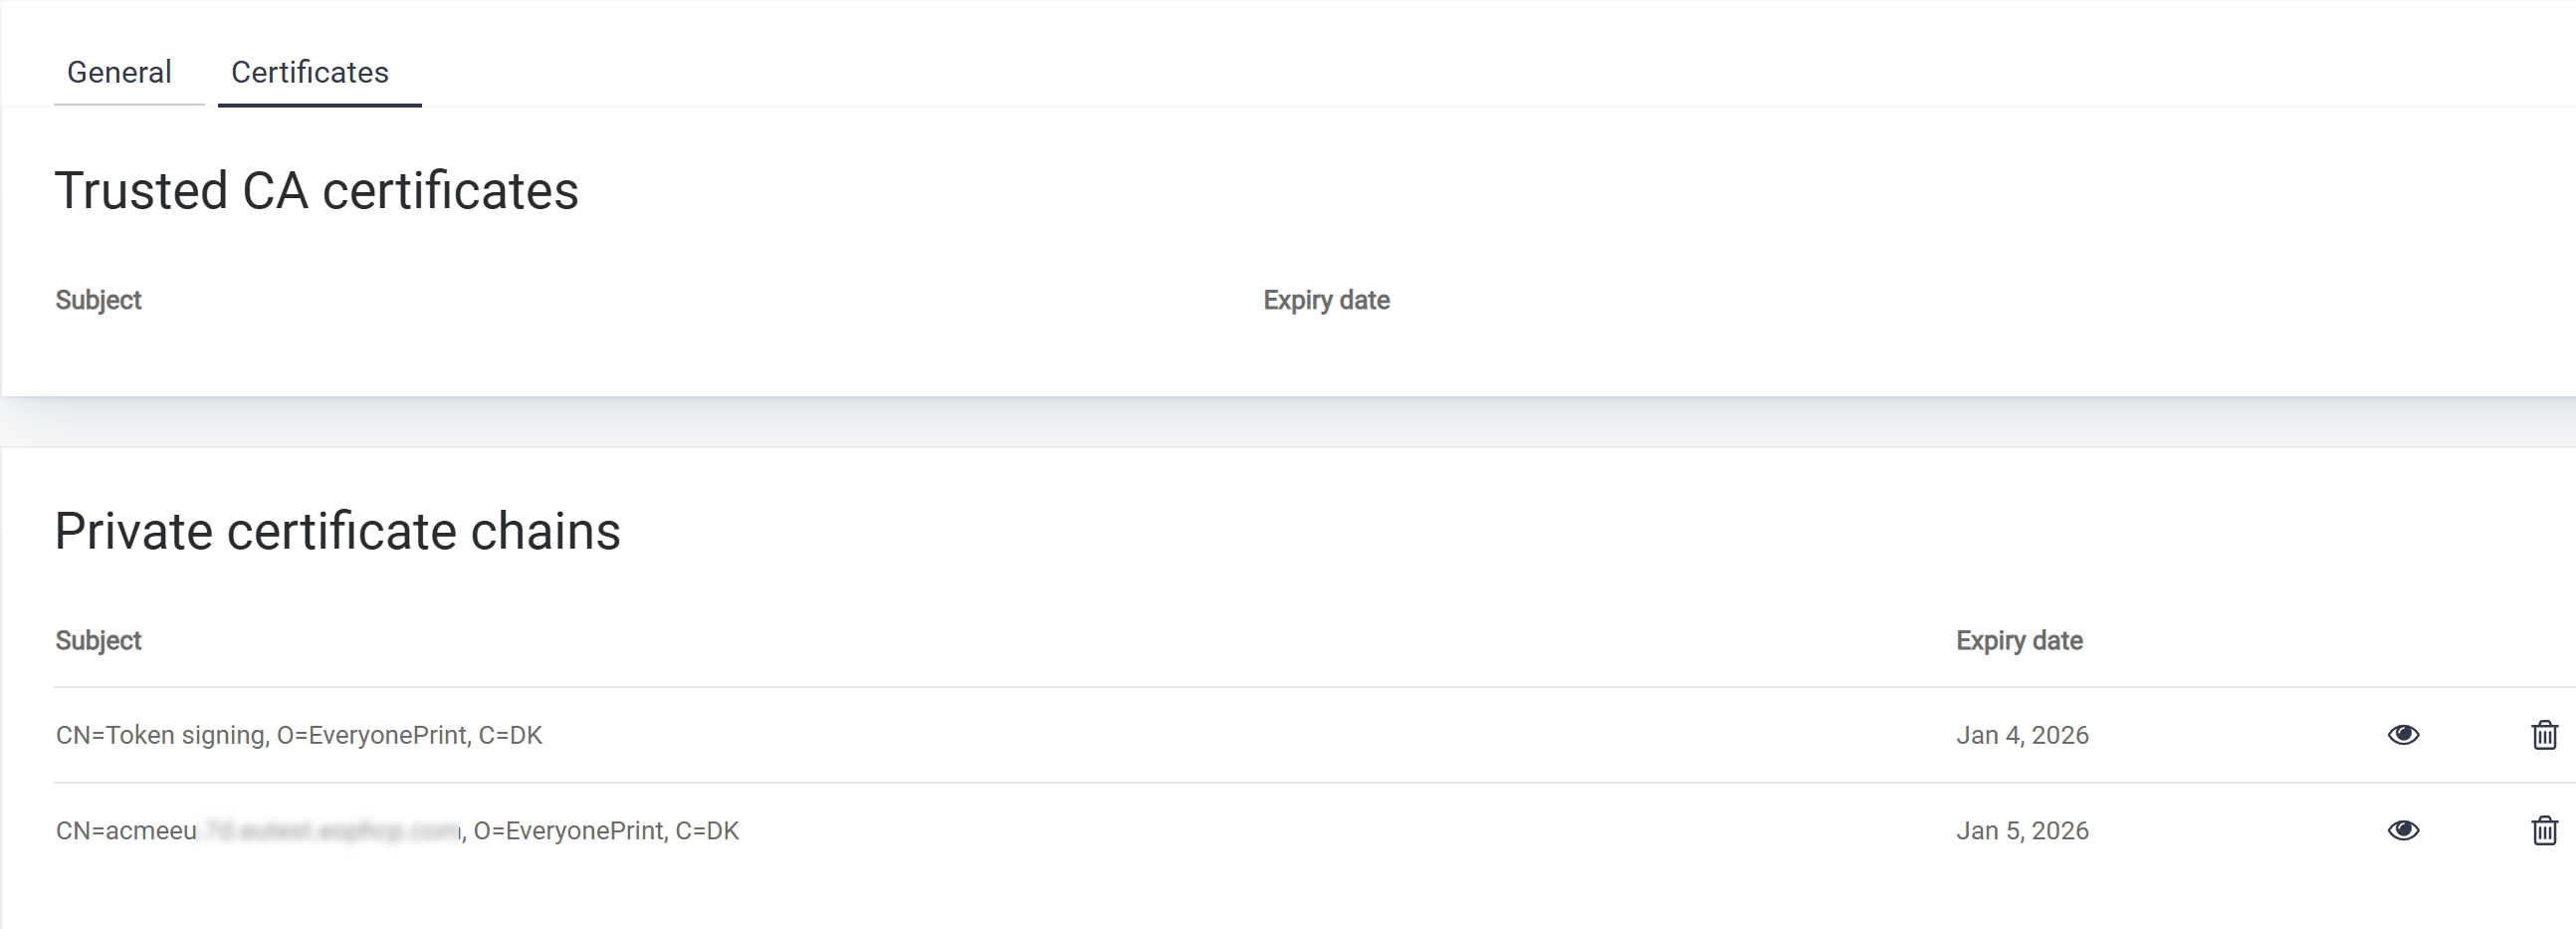
The result will look like this:
After performing the above steps, you should be able to successfully deploy the embedded client from the specific Embedded configuration screen.