Relevant Products
Mobile app is available in BREEZE MFD PRO PRINT PRO MFD
Download the application from the App Store.
Logging in
-
After you start the application for the first time, you will see the login screen.
-
Enter the User Domain. You can enter it manually or by scanning the configuration QR code that you can find in SAFEQ Cloud Web UI.
-
Tap Sign in and enter your SAFEQ Cloud username and password or use other login methods, for example via your Microsoft or Google account. The available login methods depend on how your administrator configured the app.
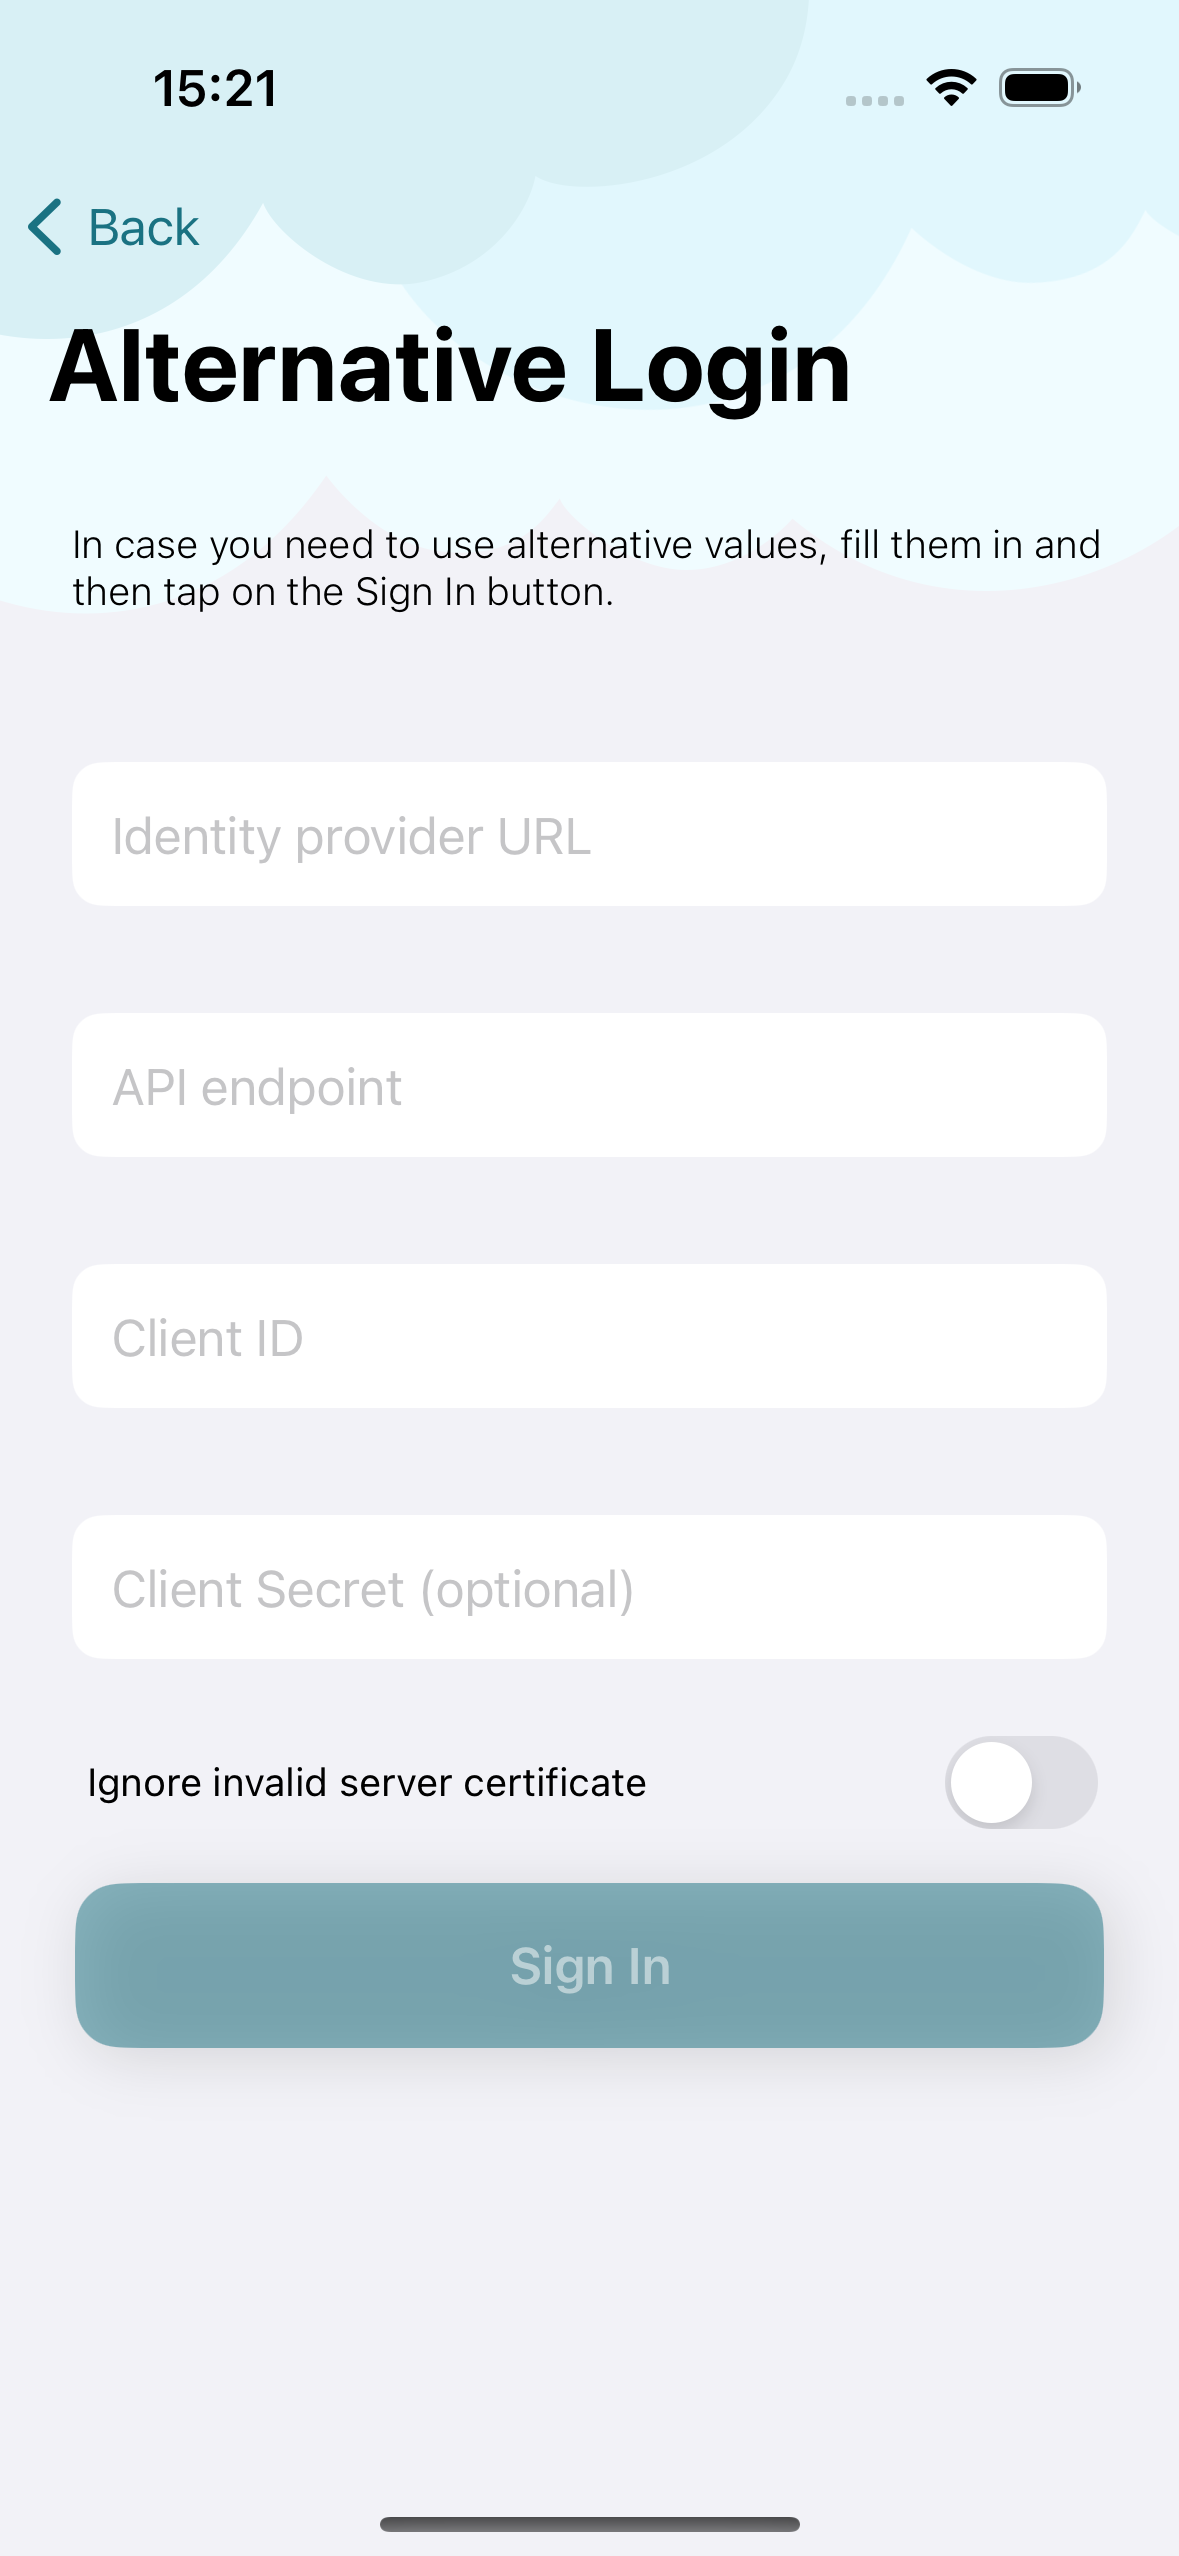
Alternatively, tap Alternative Login if your company uses, for example, a custom identity provider
Alternate login
On the Alternate Login screen, enter the following:
-
Identity provider URL – If a custom identity provider is deployed, provide the custom identity provider’s URL. For a default deployment, enter the address and port of Job Service. For example, if the Job Service is deployed on a machine with hostname example.com , then the value is https://example.com:5000/ .
-
API endpoint – Use the address and the HTTPS port of Spooler, e.g. https://example.com:5002 .
-
Client ID – Use the ClientId value specified in the identity provider. For a default deployment using Job Service as an identity provider, use ClientId of Additional Clients located in Job Service’s local.json configuration file. The default value is mobile-application.
-
Client Secret – Optional value of the API Key that authenticates the app.
You can enable communication that is not secured by TLS by using the toggle button.
Job list
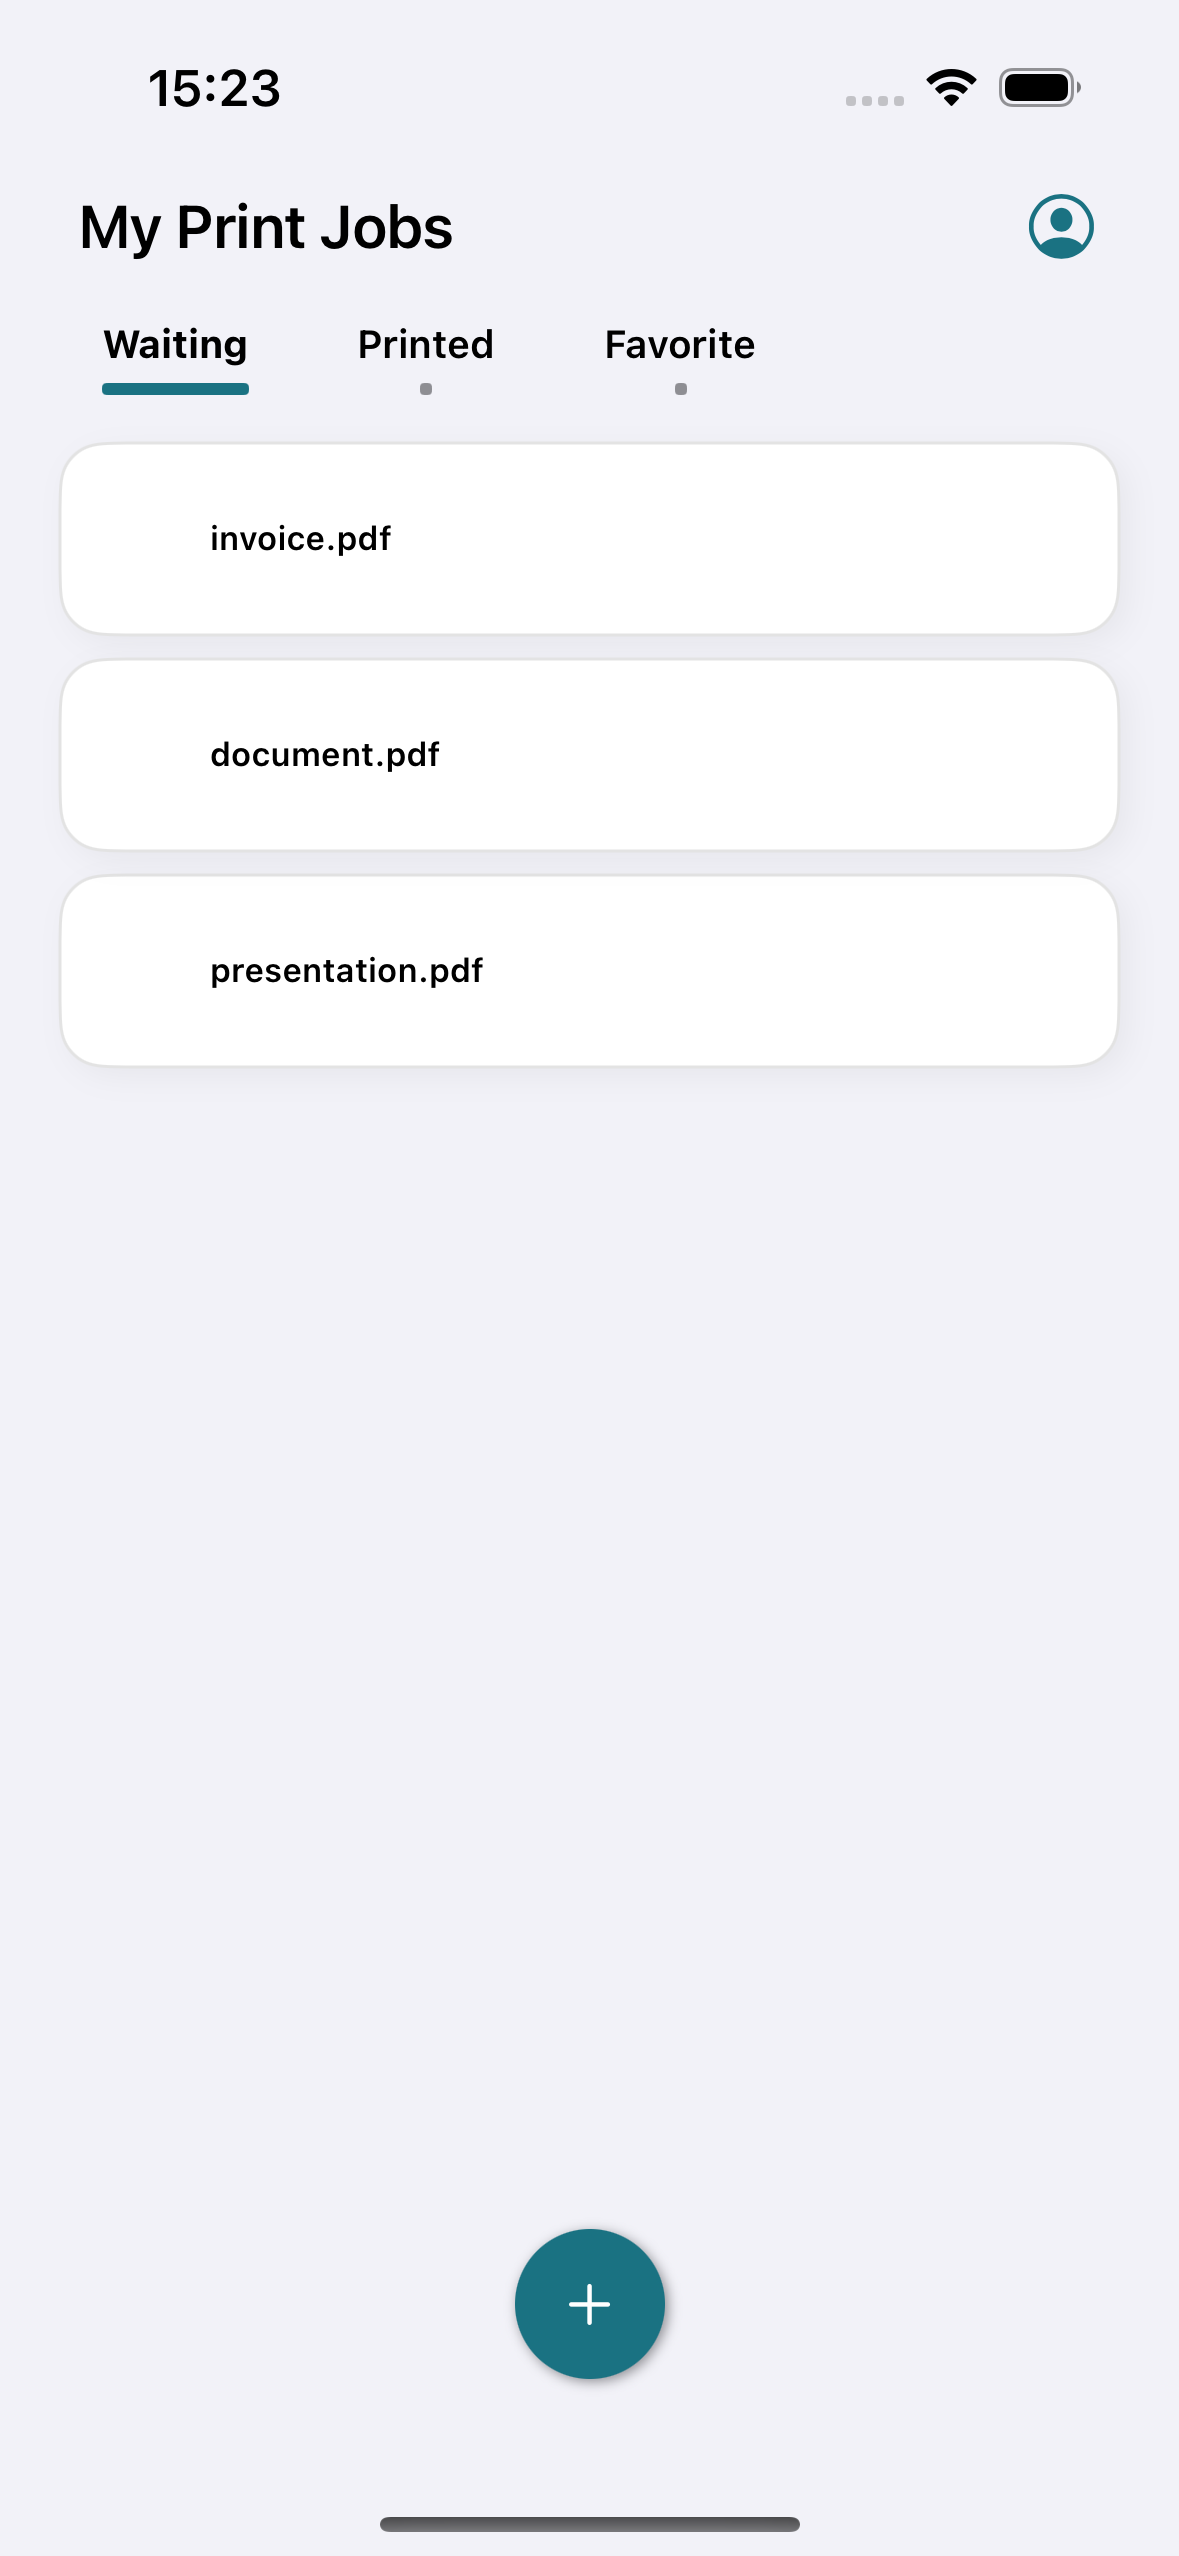
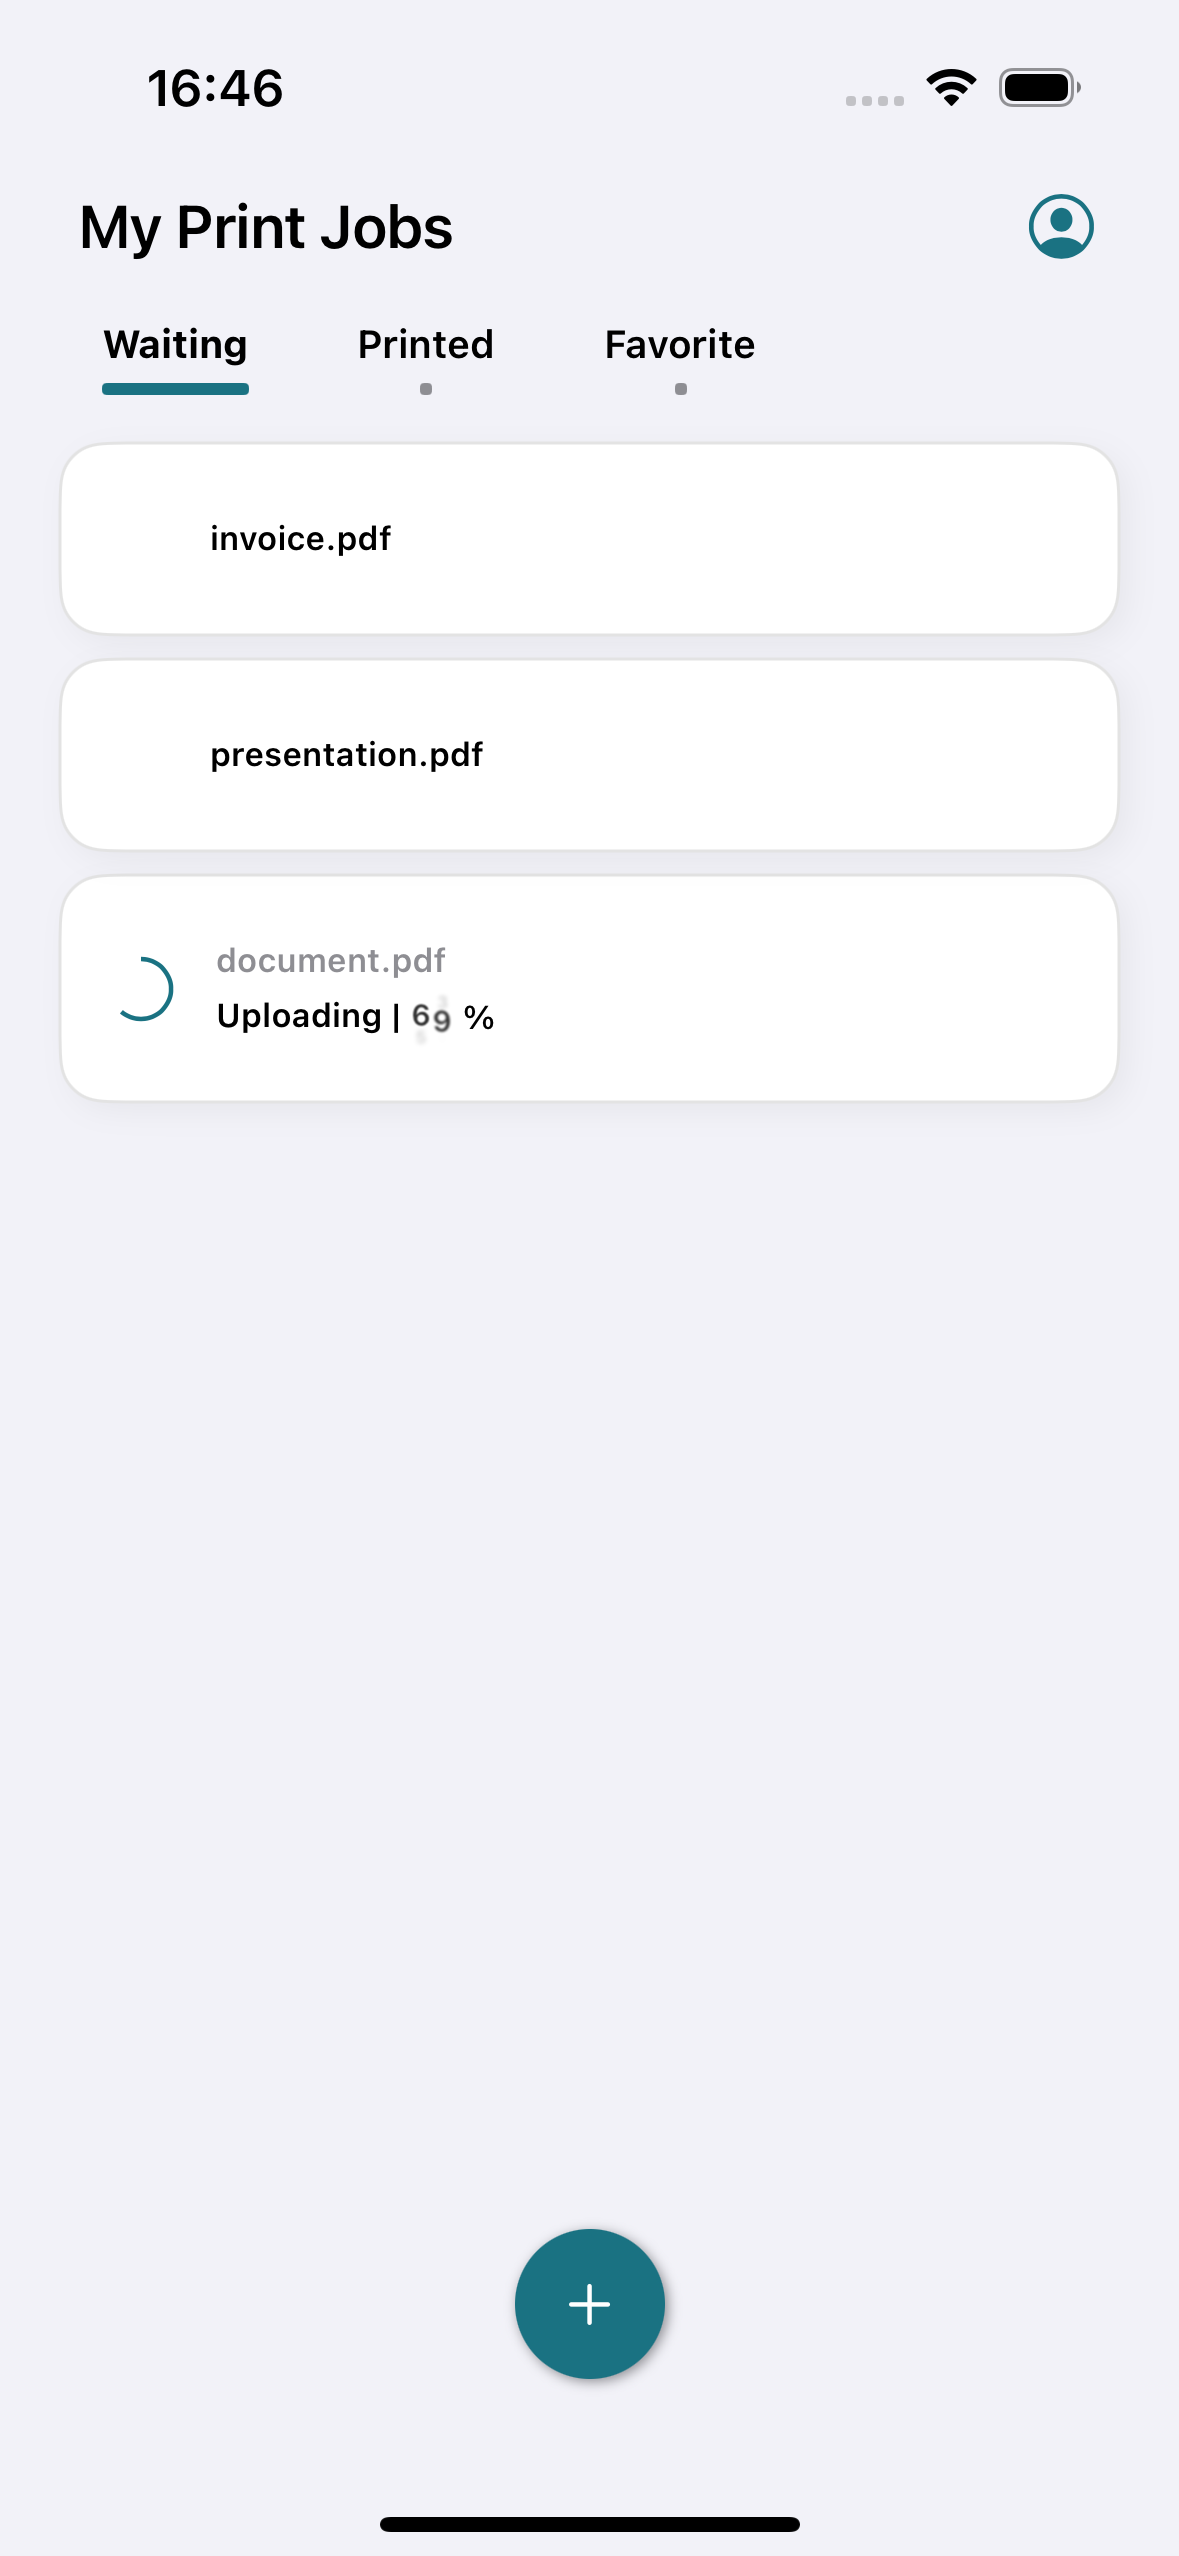
After a successful login, you will see all of your documents.
Submitting print jobs
Supported formats
-
BMP
-
DOC
-
DOCX
-
JPEG
-
ODP
-
ODS
-
ODT
-
PDF
-
PNG
-
PPT
-
PPTX
-
rawImage
-
RTF
-
SVG
-
TIFF
-
WebP
-
XLS
-
XLSX
Submitting print jobs from the apps via the share menu
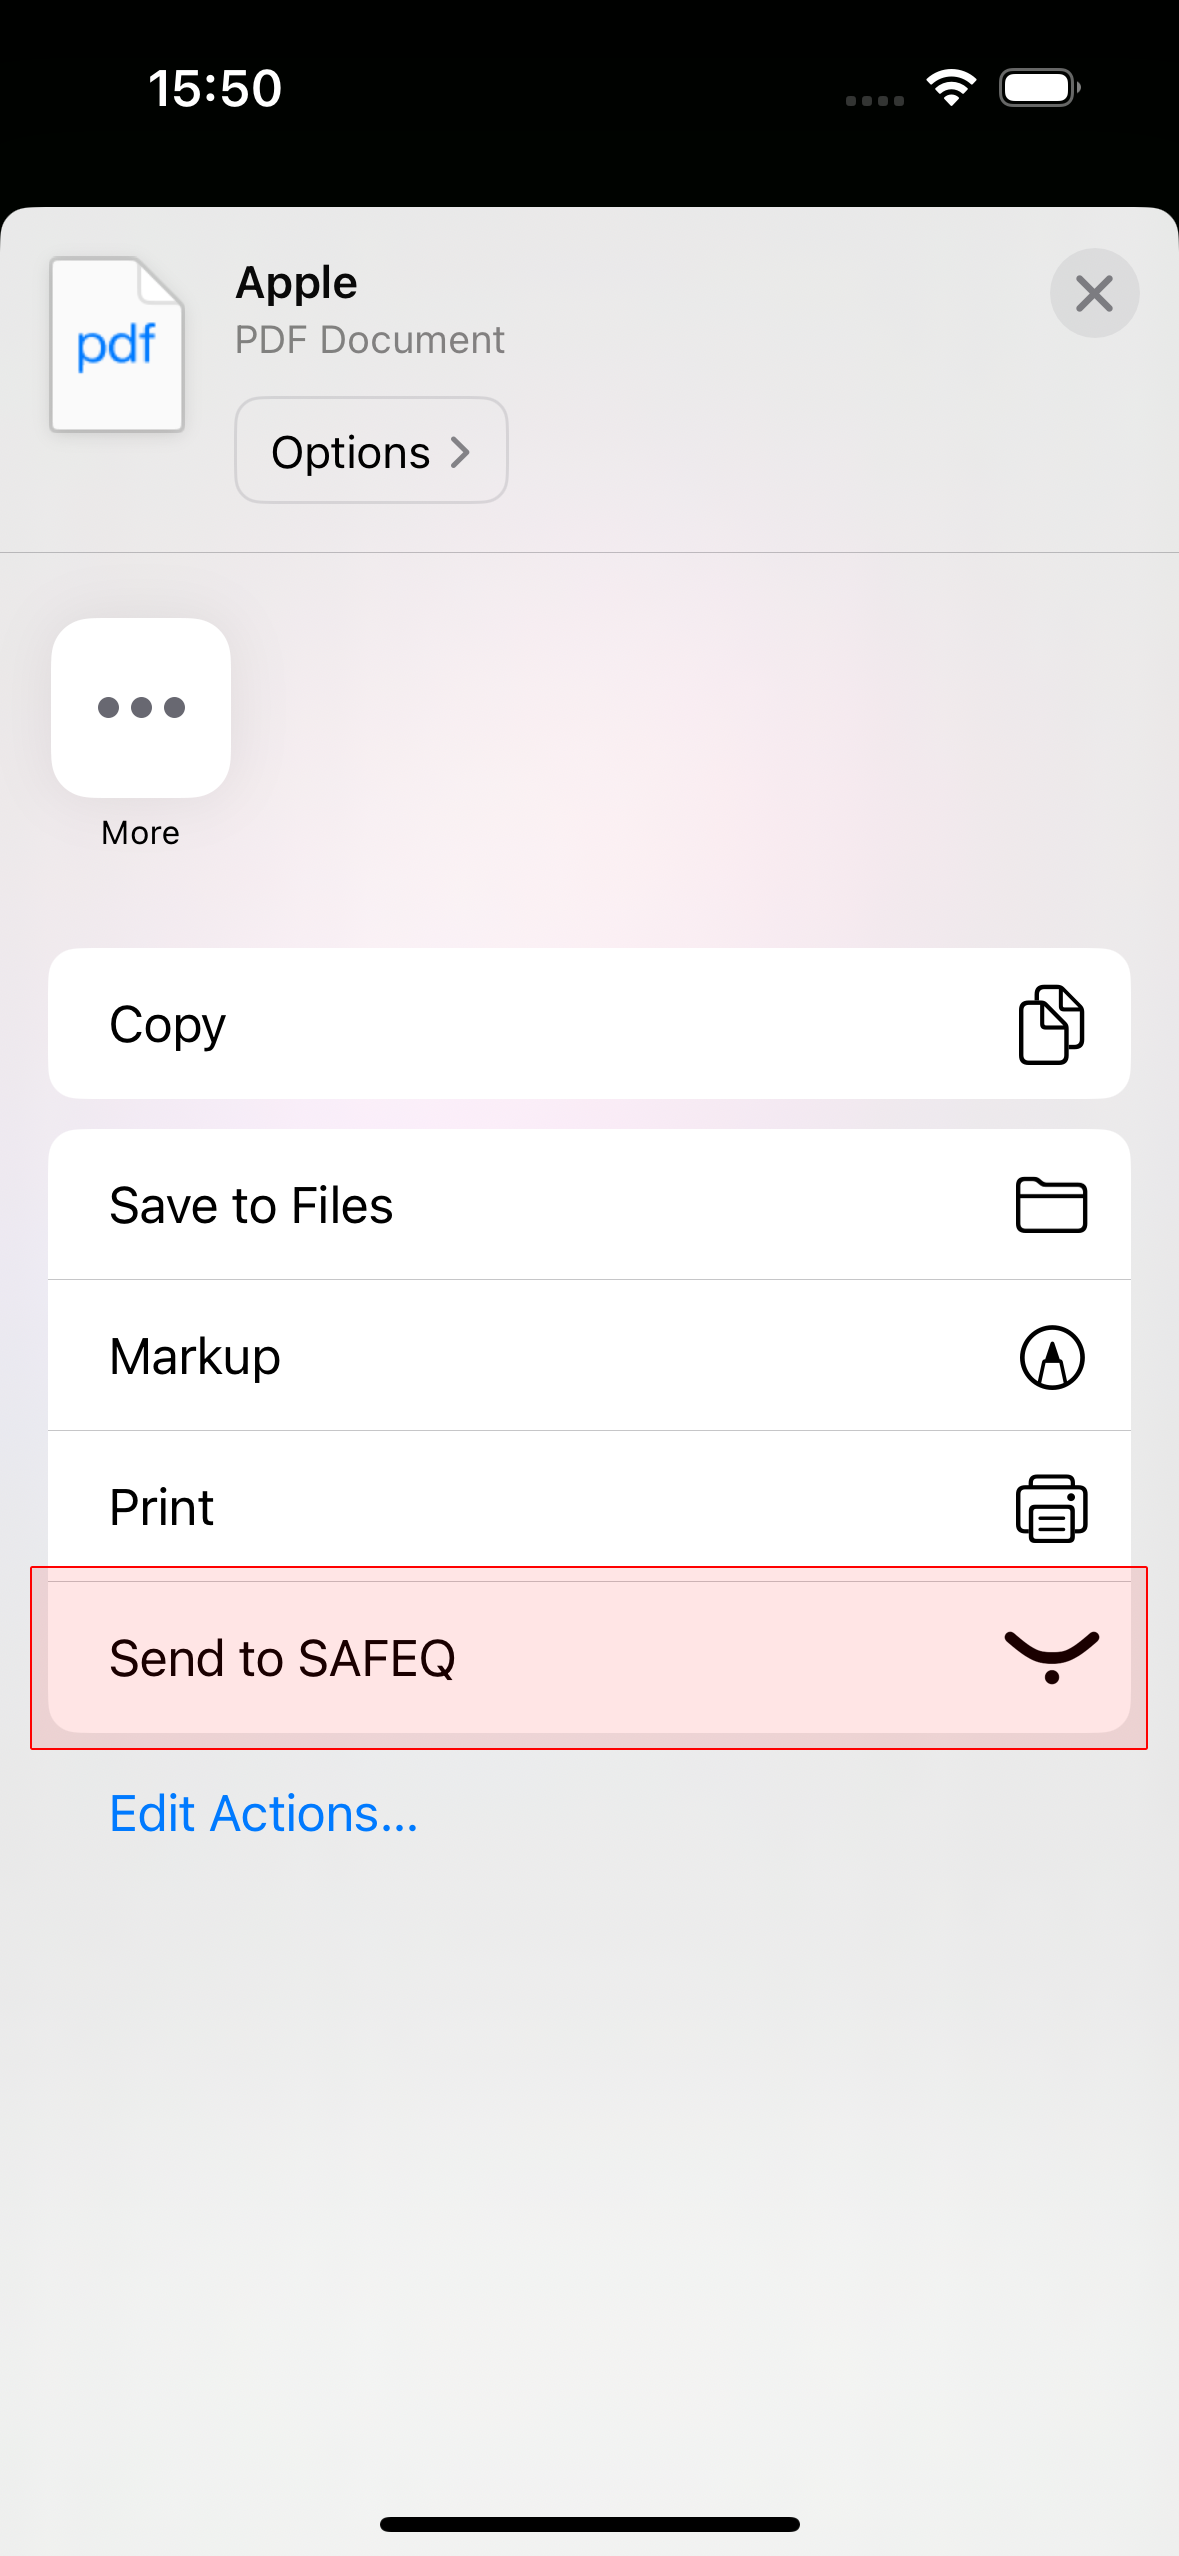
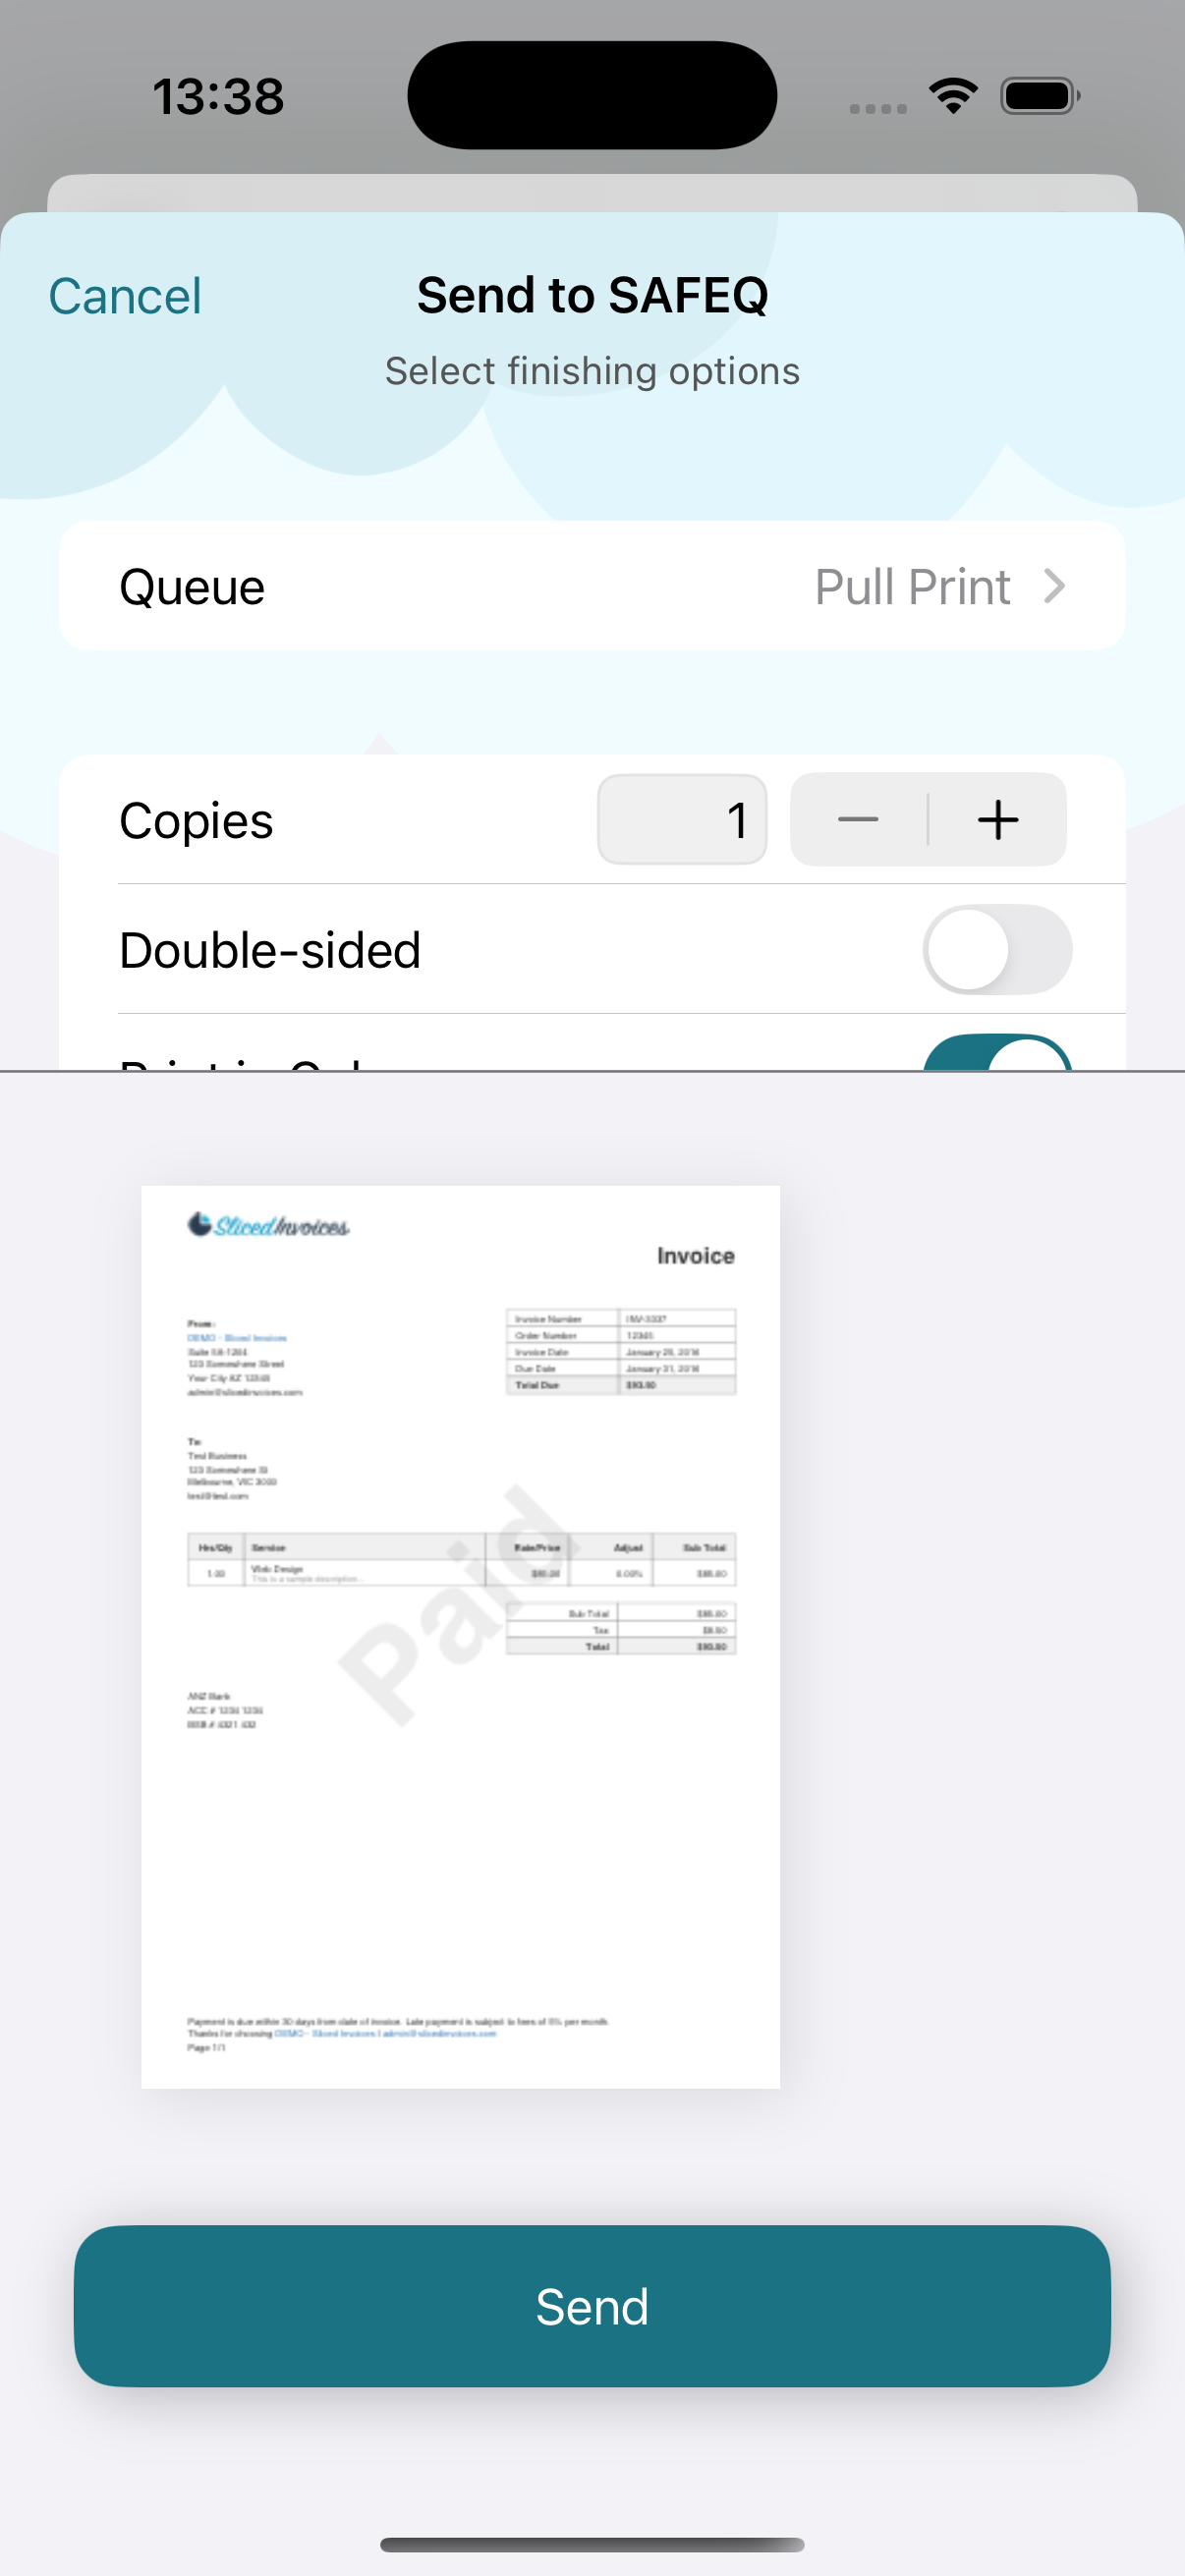
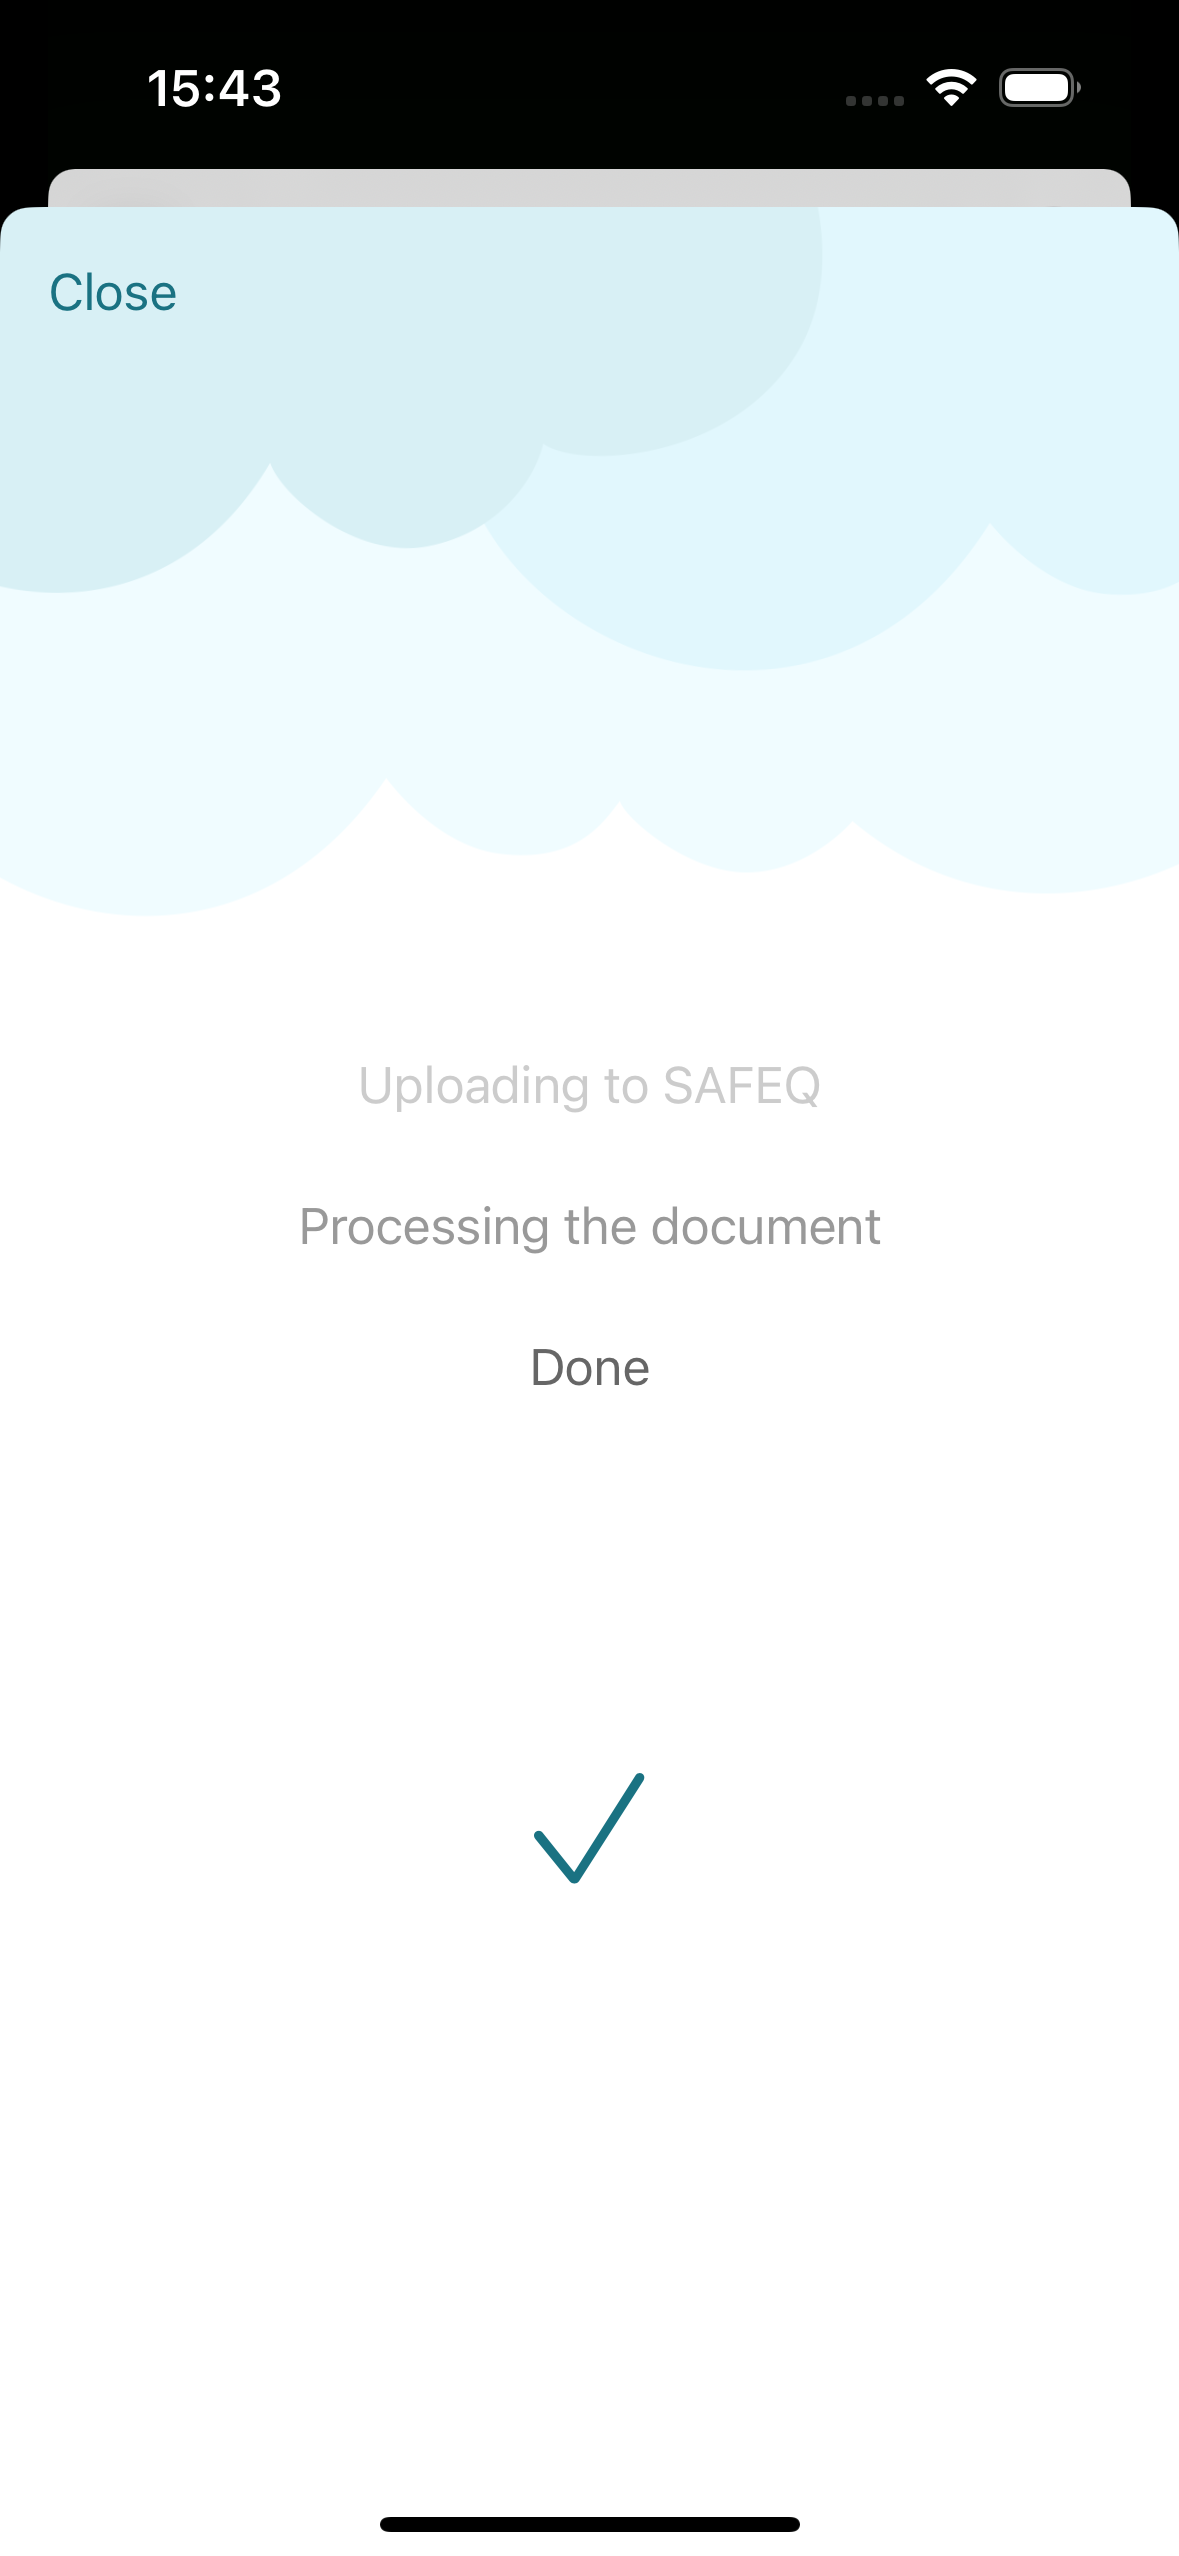
This can be done from any app that supports printing. Select SAFEQ Cloud from the share extension in the iOS share menu.
Submitting print jobs directly from the app
-
To submit a new document, tap the plus button at the bottom of the Job List screen. This will open the standard system file picker.
-
Select one or more files. If any of the chosen files are password-protected, a dialog will appear prompting you to enter the password. You will have the option to skip those files you do not wish to unlock.
-
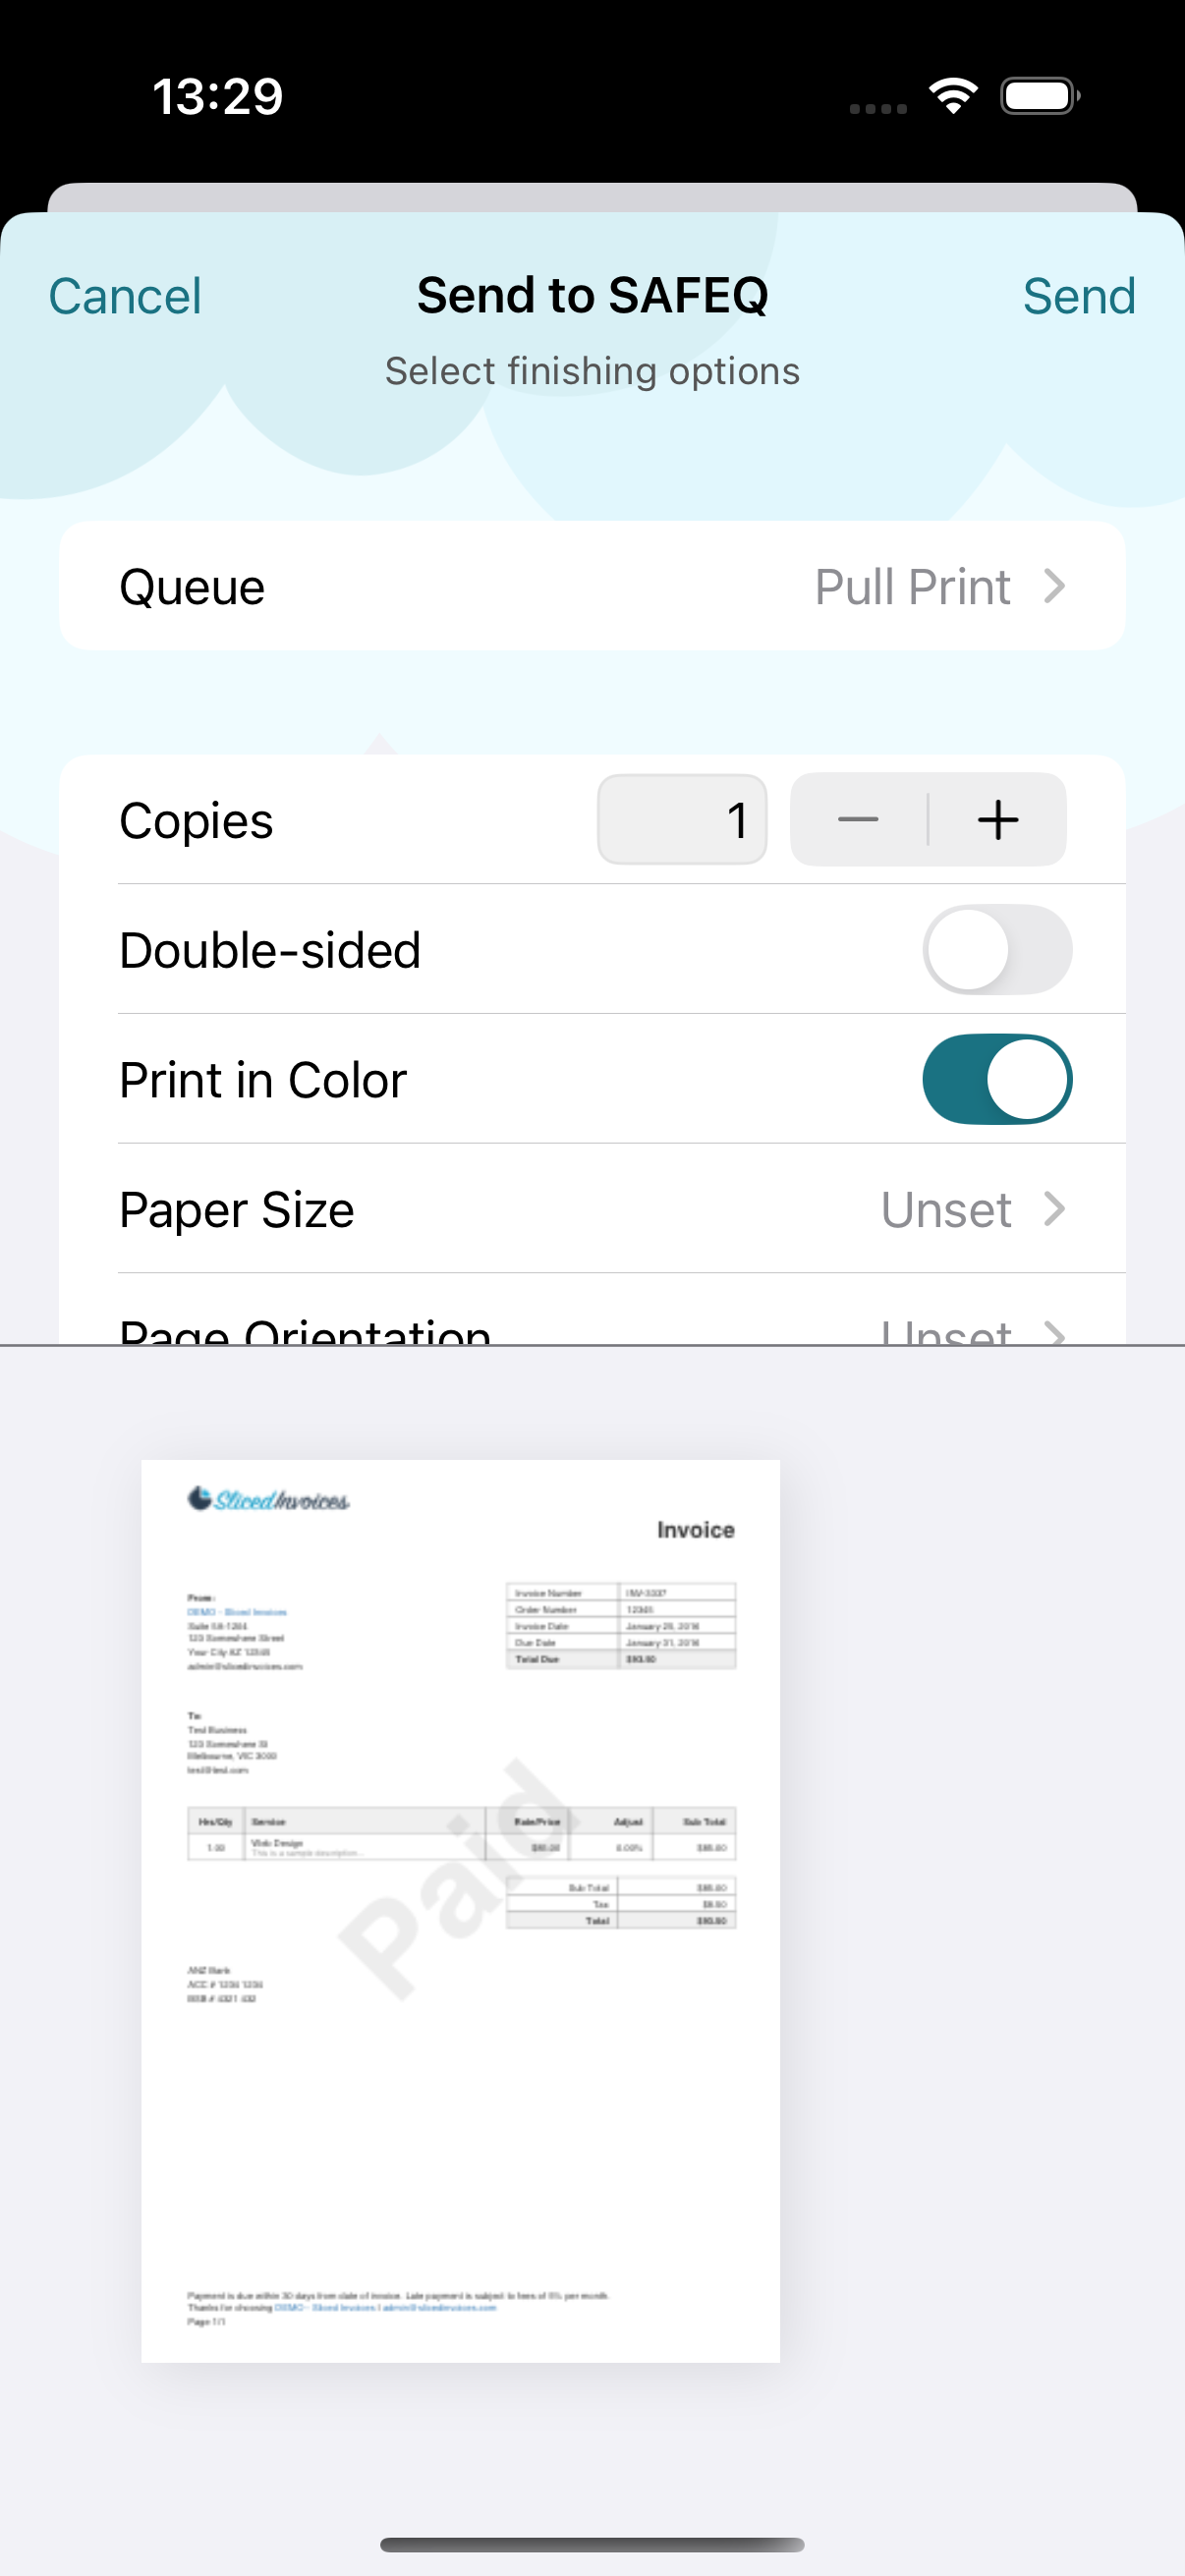
On the next screen, customize the finishing options (print queue, number of copies, color, page size, page orientation, and sides) according to your needs.
-
Tap Send.
Printing unsupported file formats
If the printable document is not in supported format, you can use the standard system print dialog and share the output into the SAFEQ Cloud mobile app instead of selecting the AirPrint printer. You can do this in any app that supports system print.
iOS 16 or higher
-
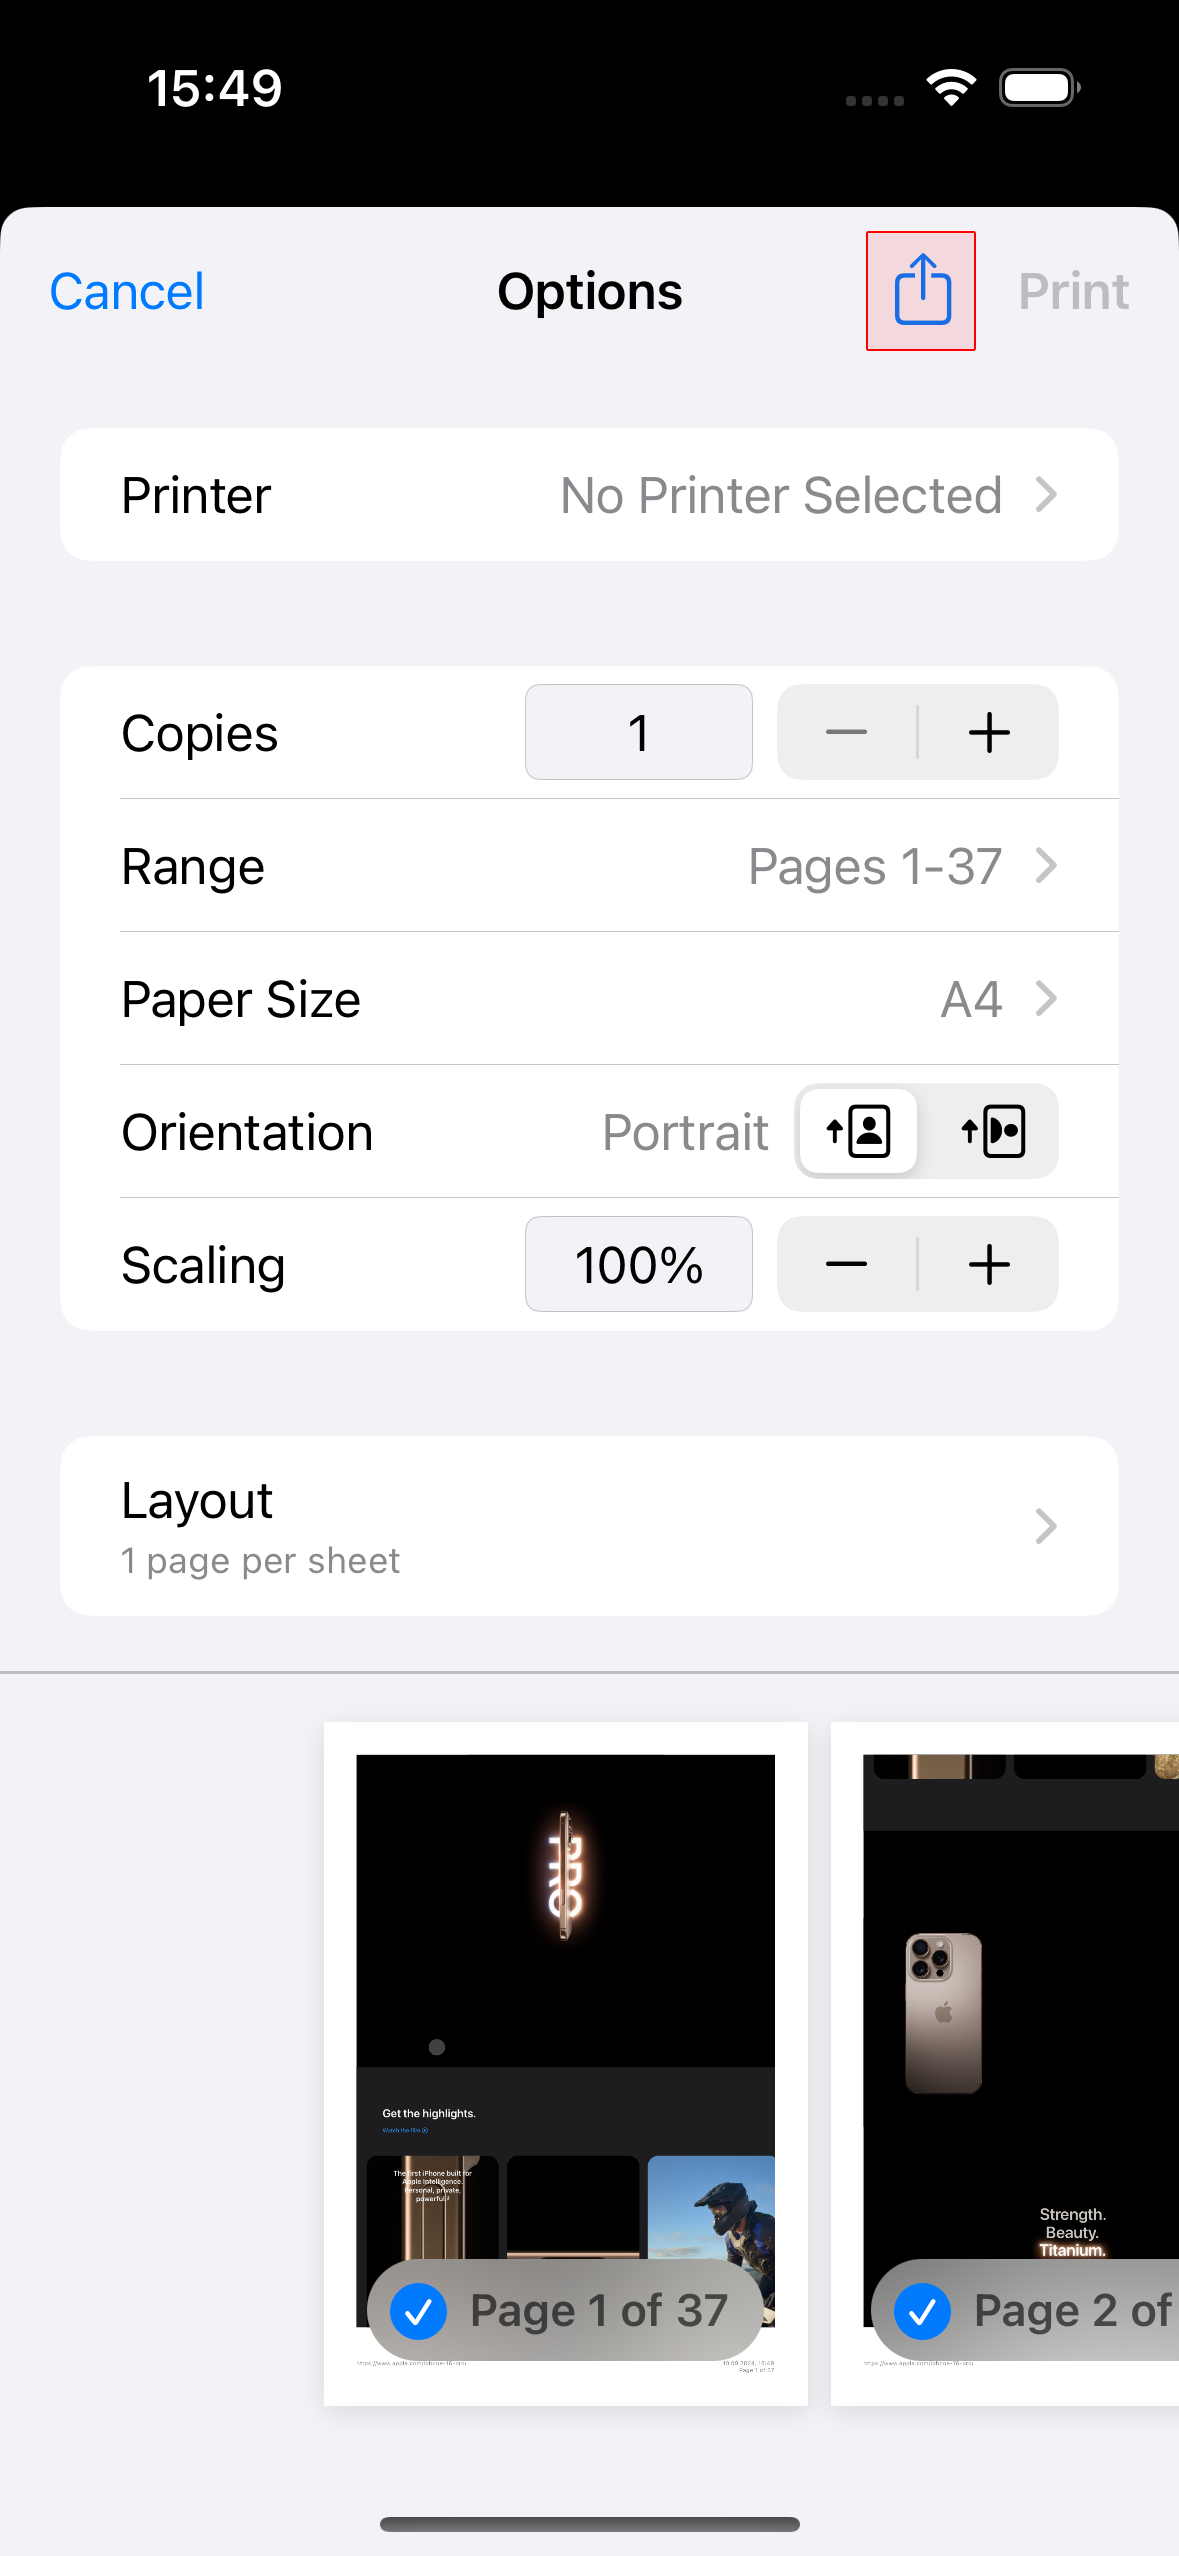
Open the system print dialog and use the system print finishing options.
-
Tap the share icon.
-
Continue as described in the Submitting print jobs section above.
iOS 15 or lower
-
Open the system print dialog and pinch to zoom with two fingers on the preview of the document.
-
This will open the preview of the document in PDF format.
-
On this preview, tap the share button.
-
Continue as described in the Submitting print jobs section.
Printing a web page from Safari
-
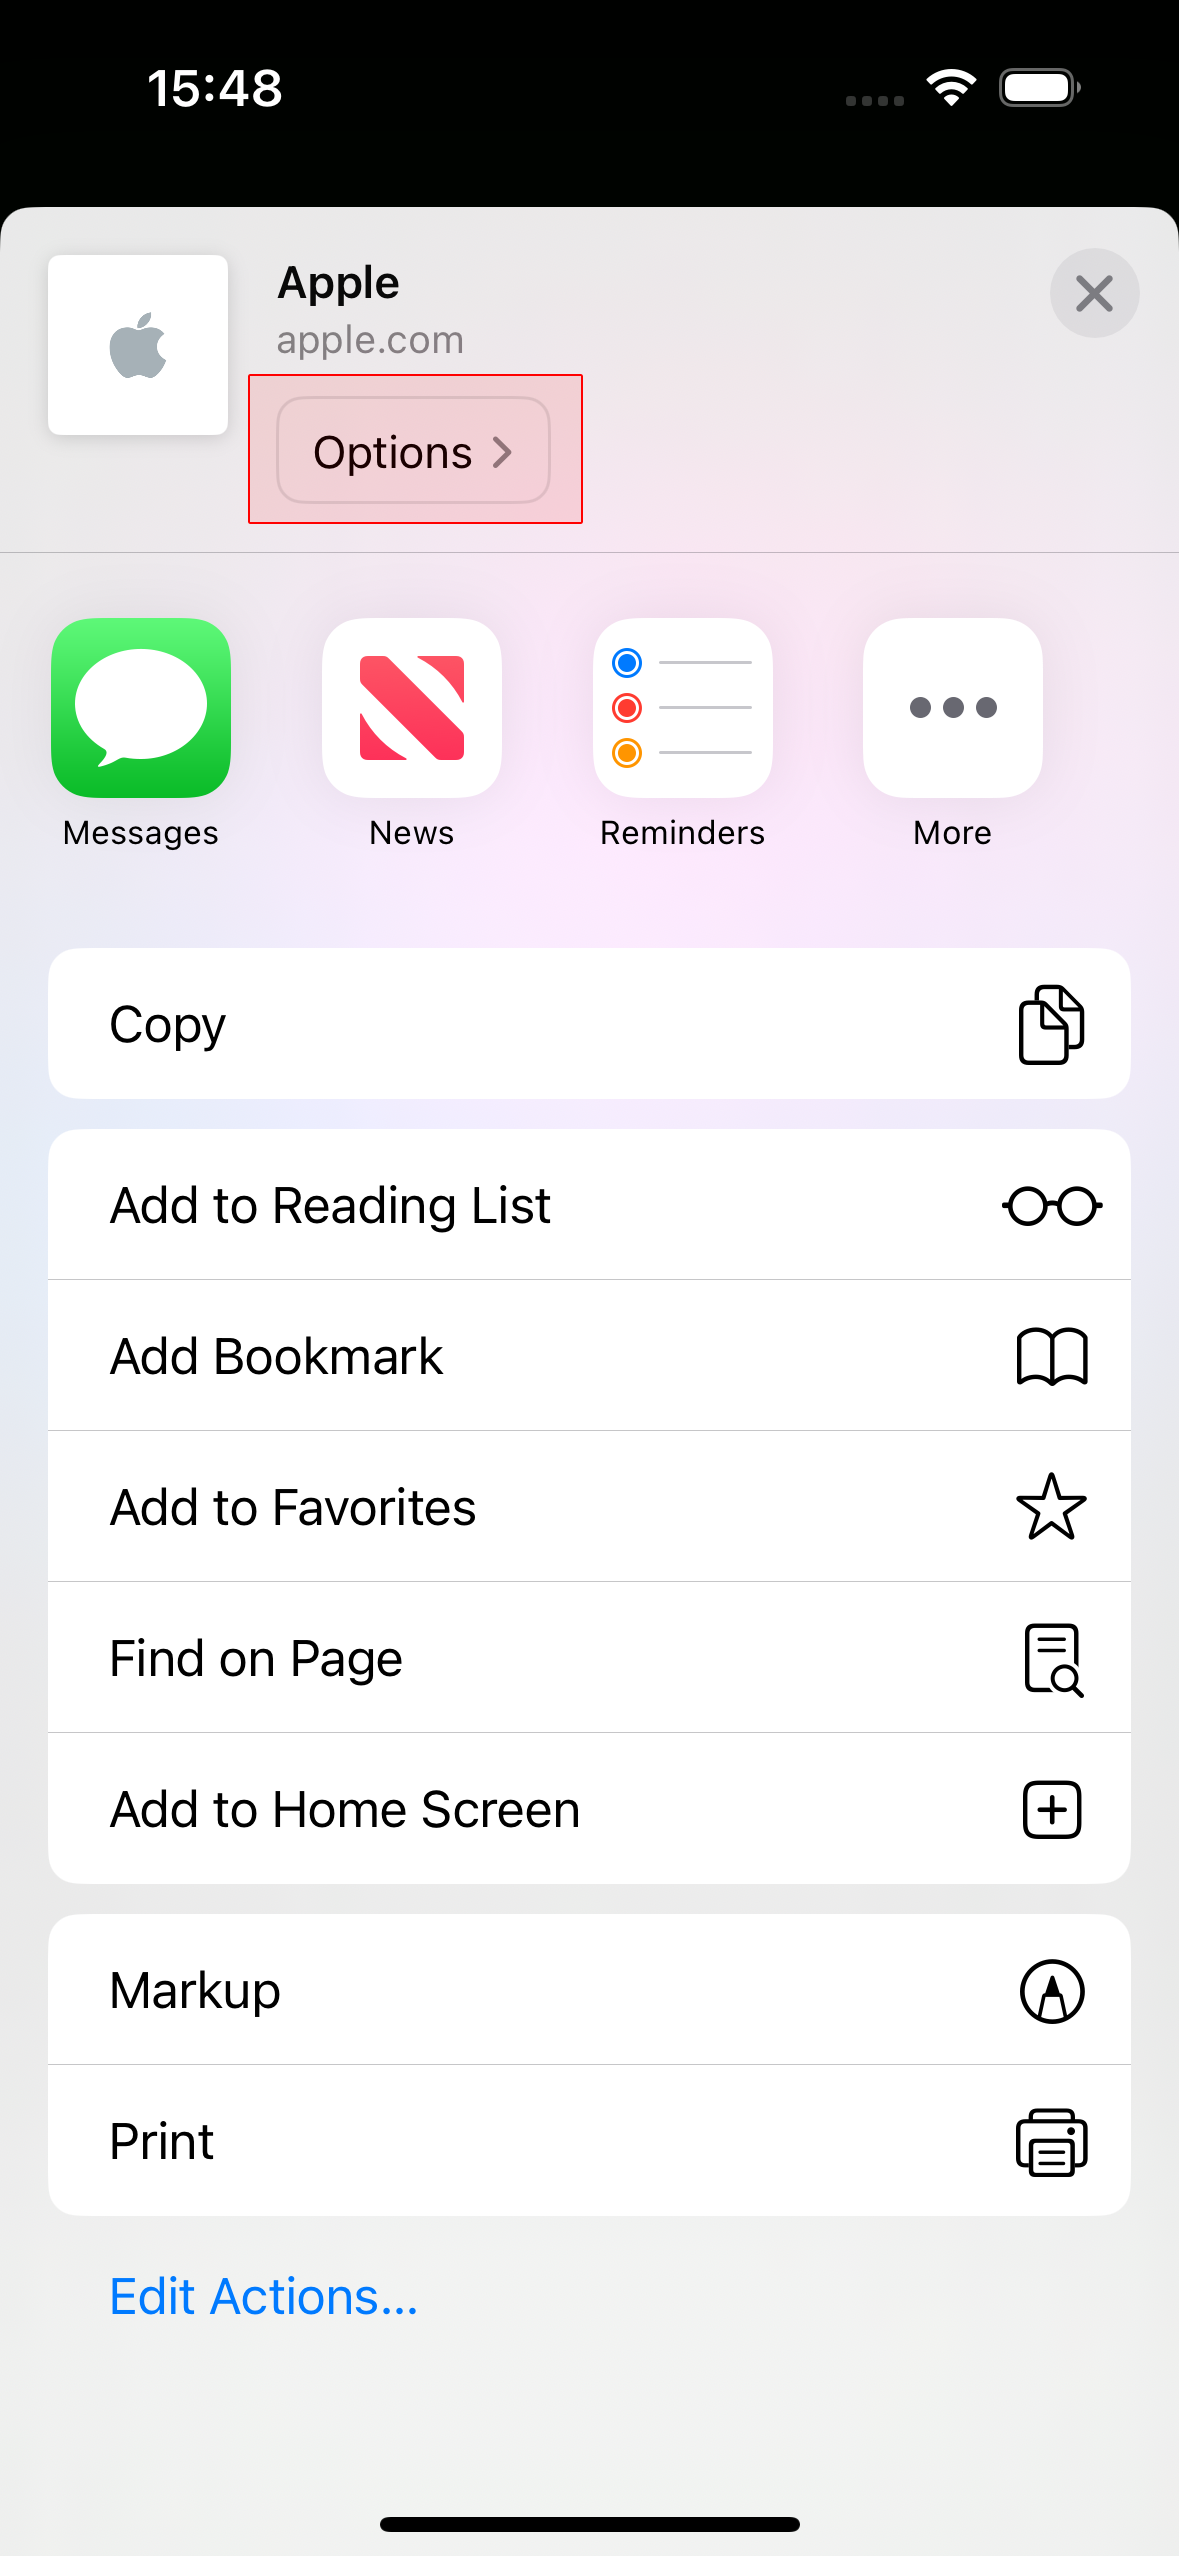
Go to the iOS share menu.
-
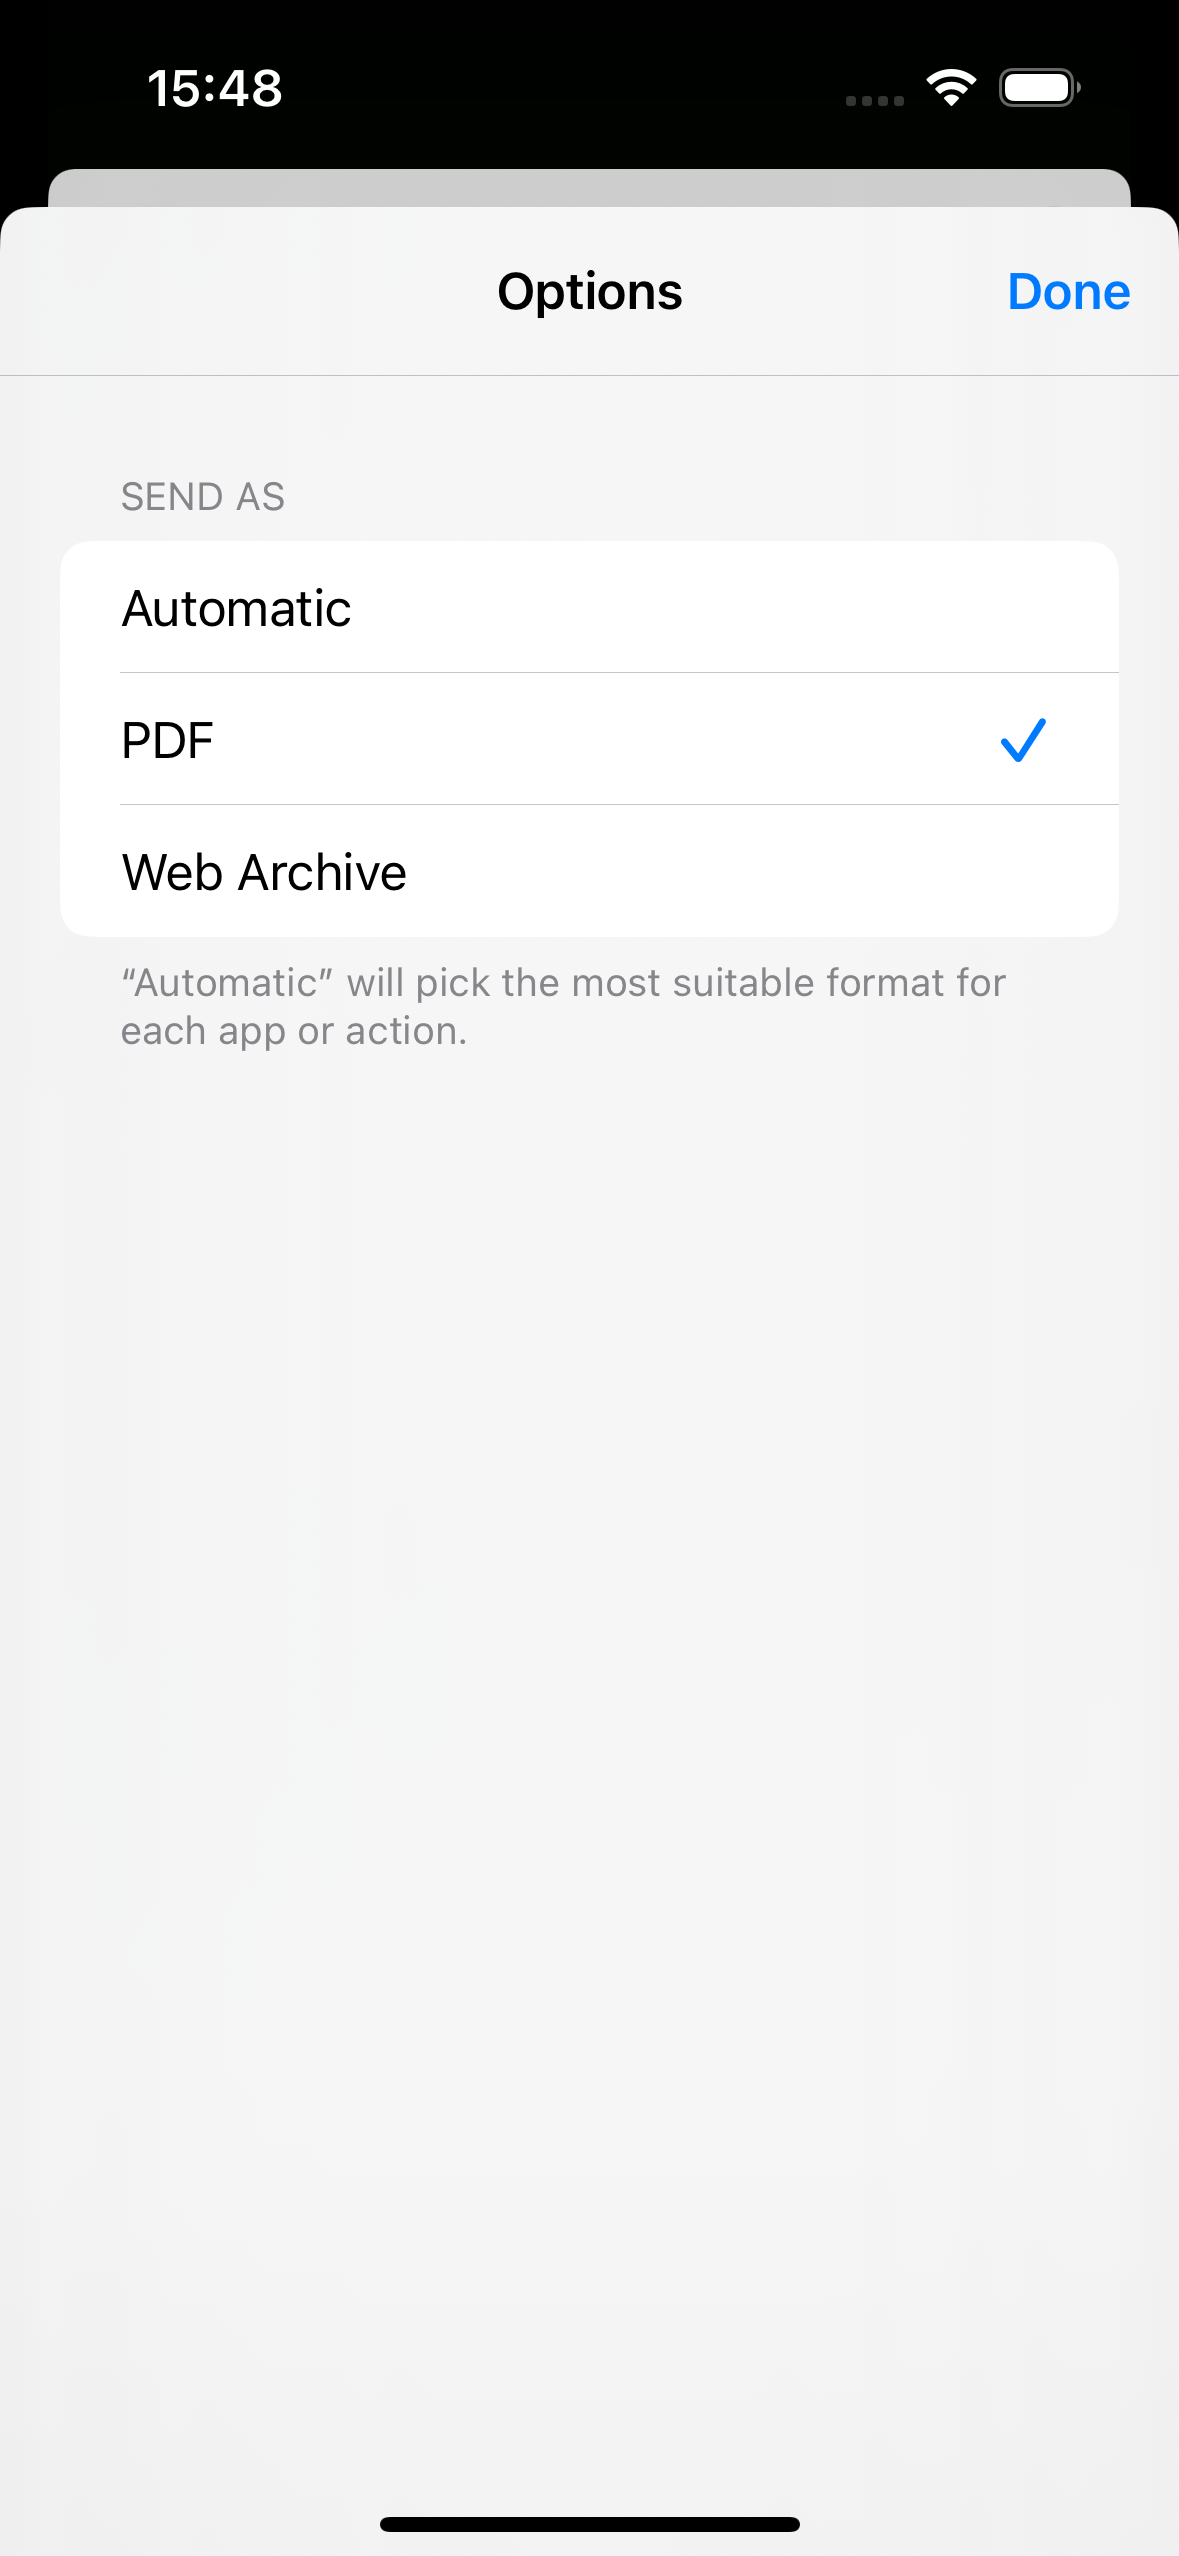
Tap Options. Make sure that the PDF option is selected so that the SAFEQ Cloud share extension is visible in the share menu.
Deleting print jobs
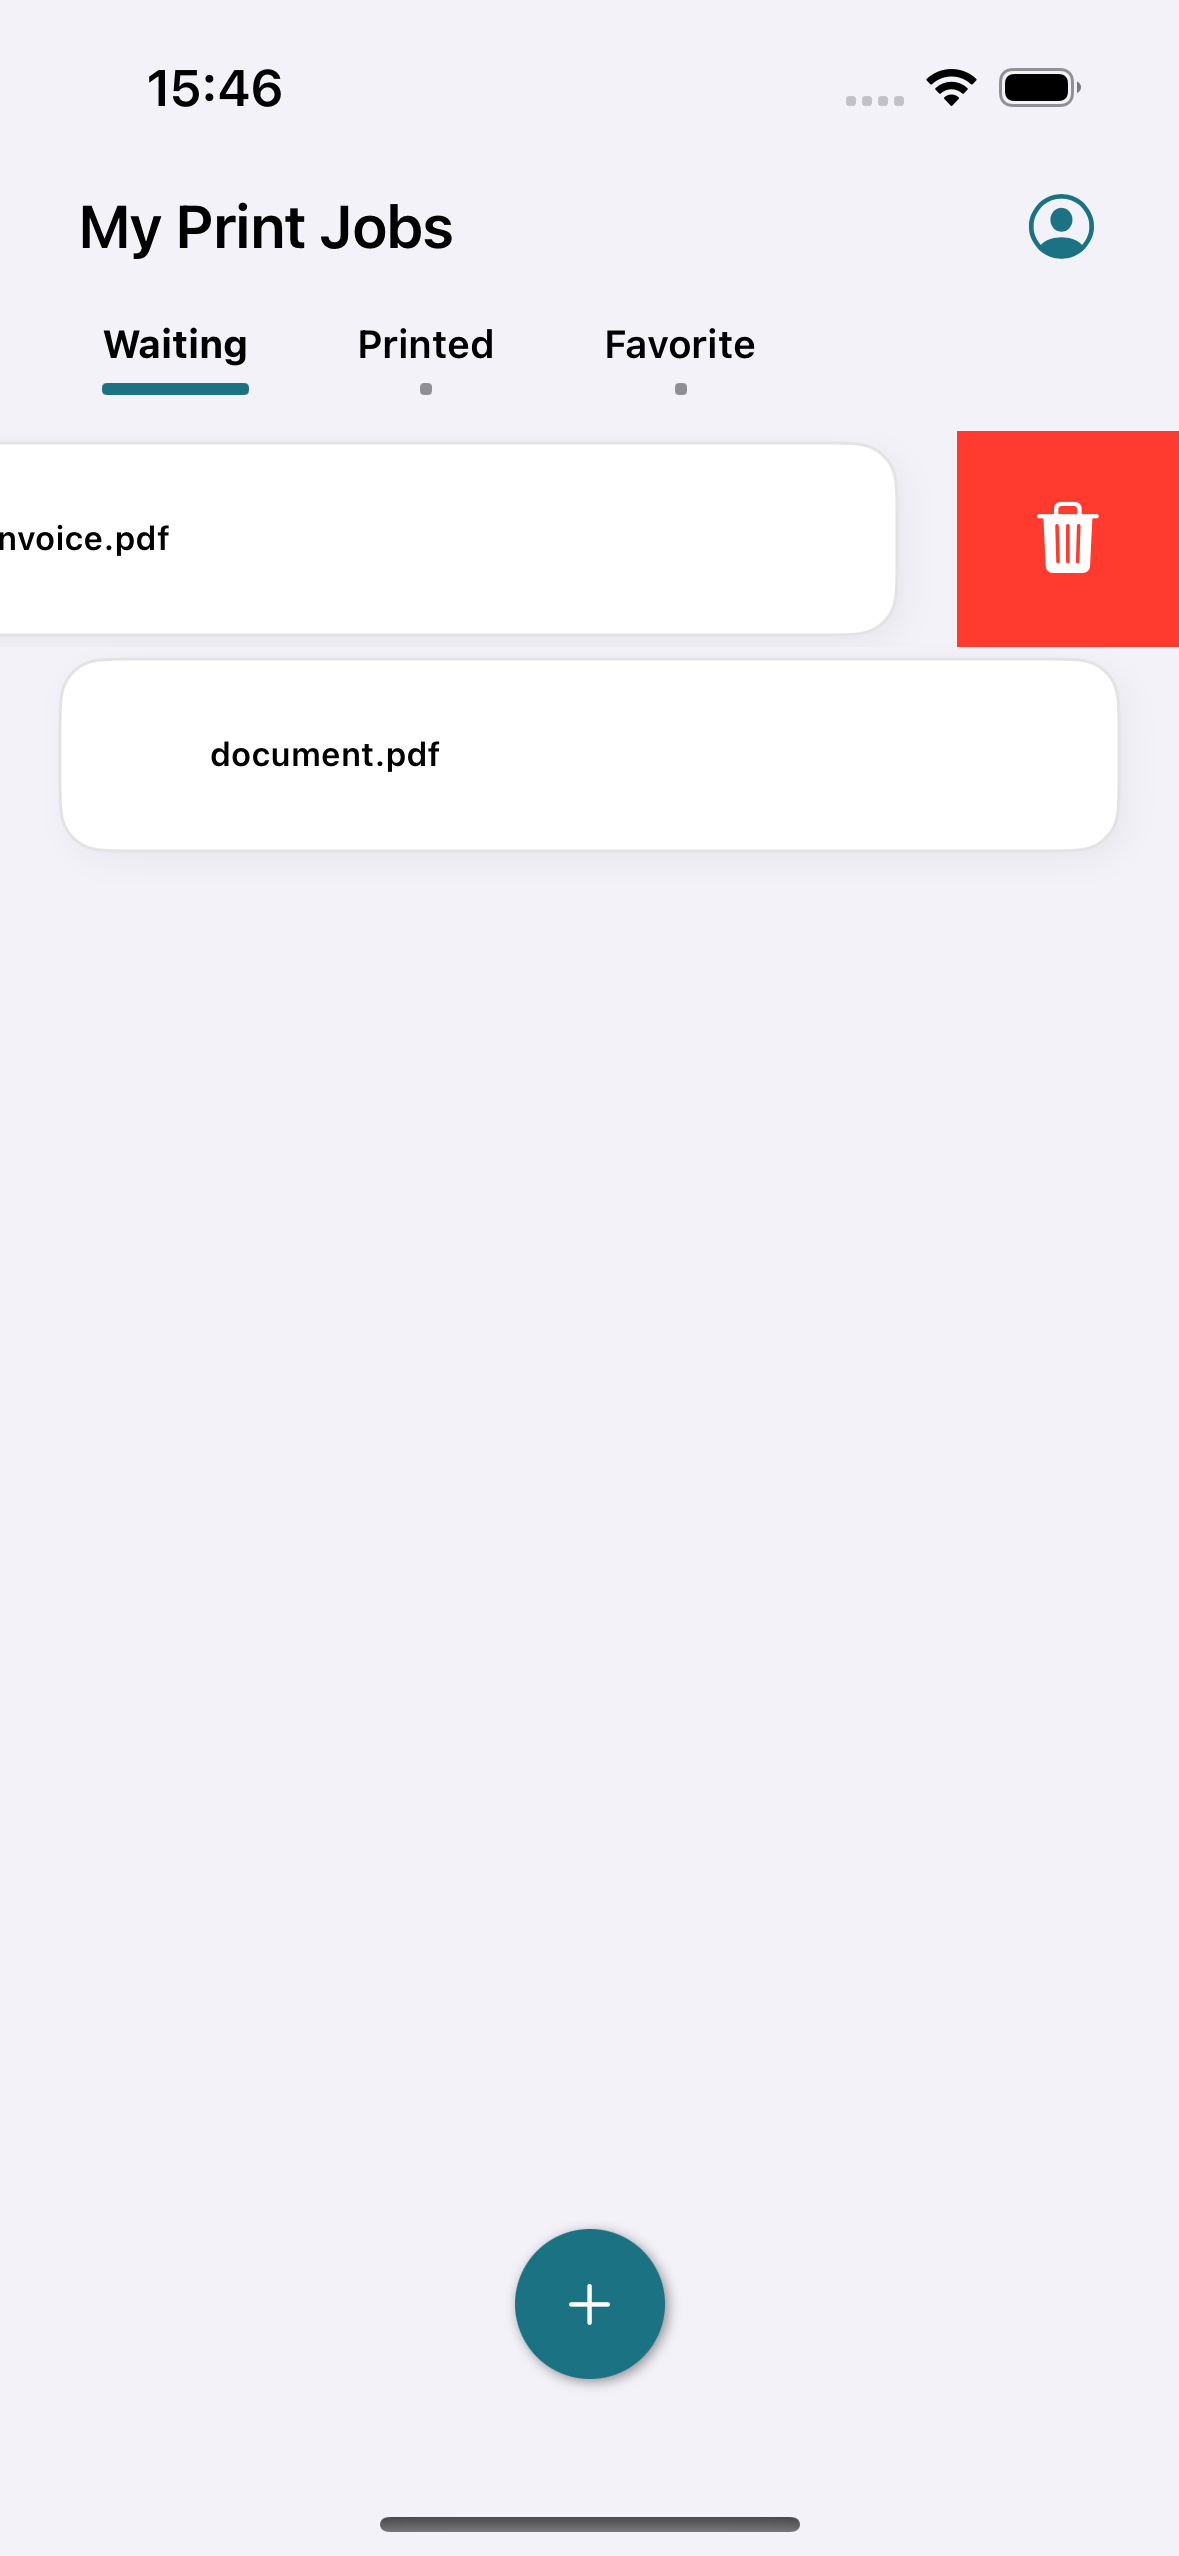
To delete a print job, swipe it to the left.
Job release with QR code
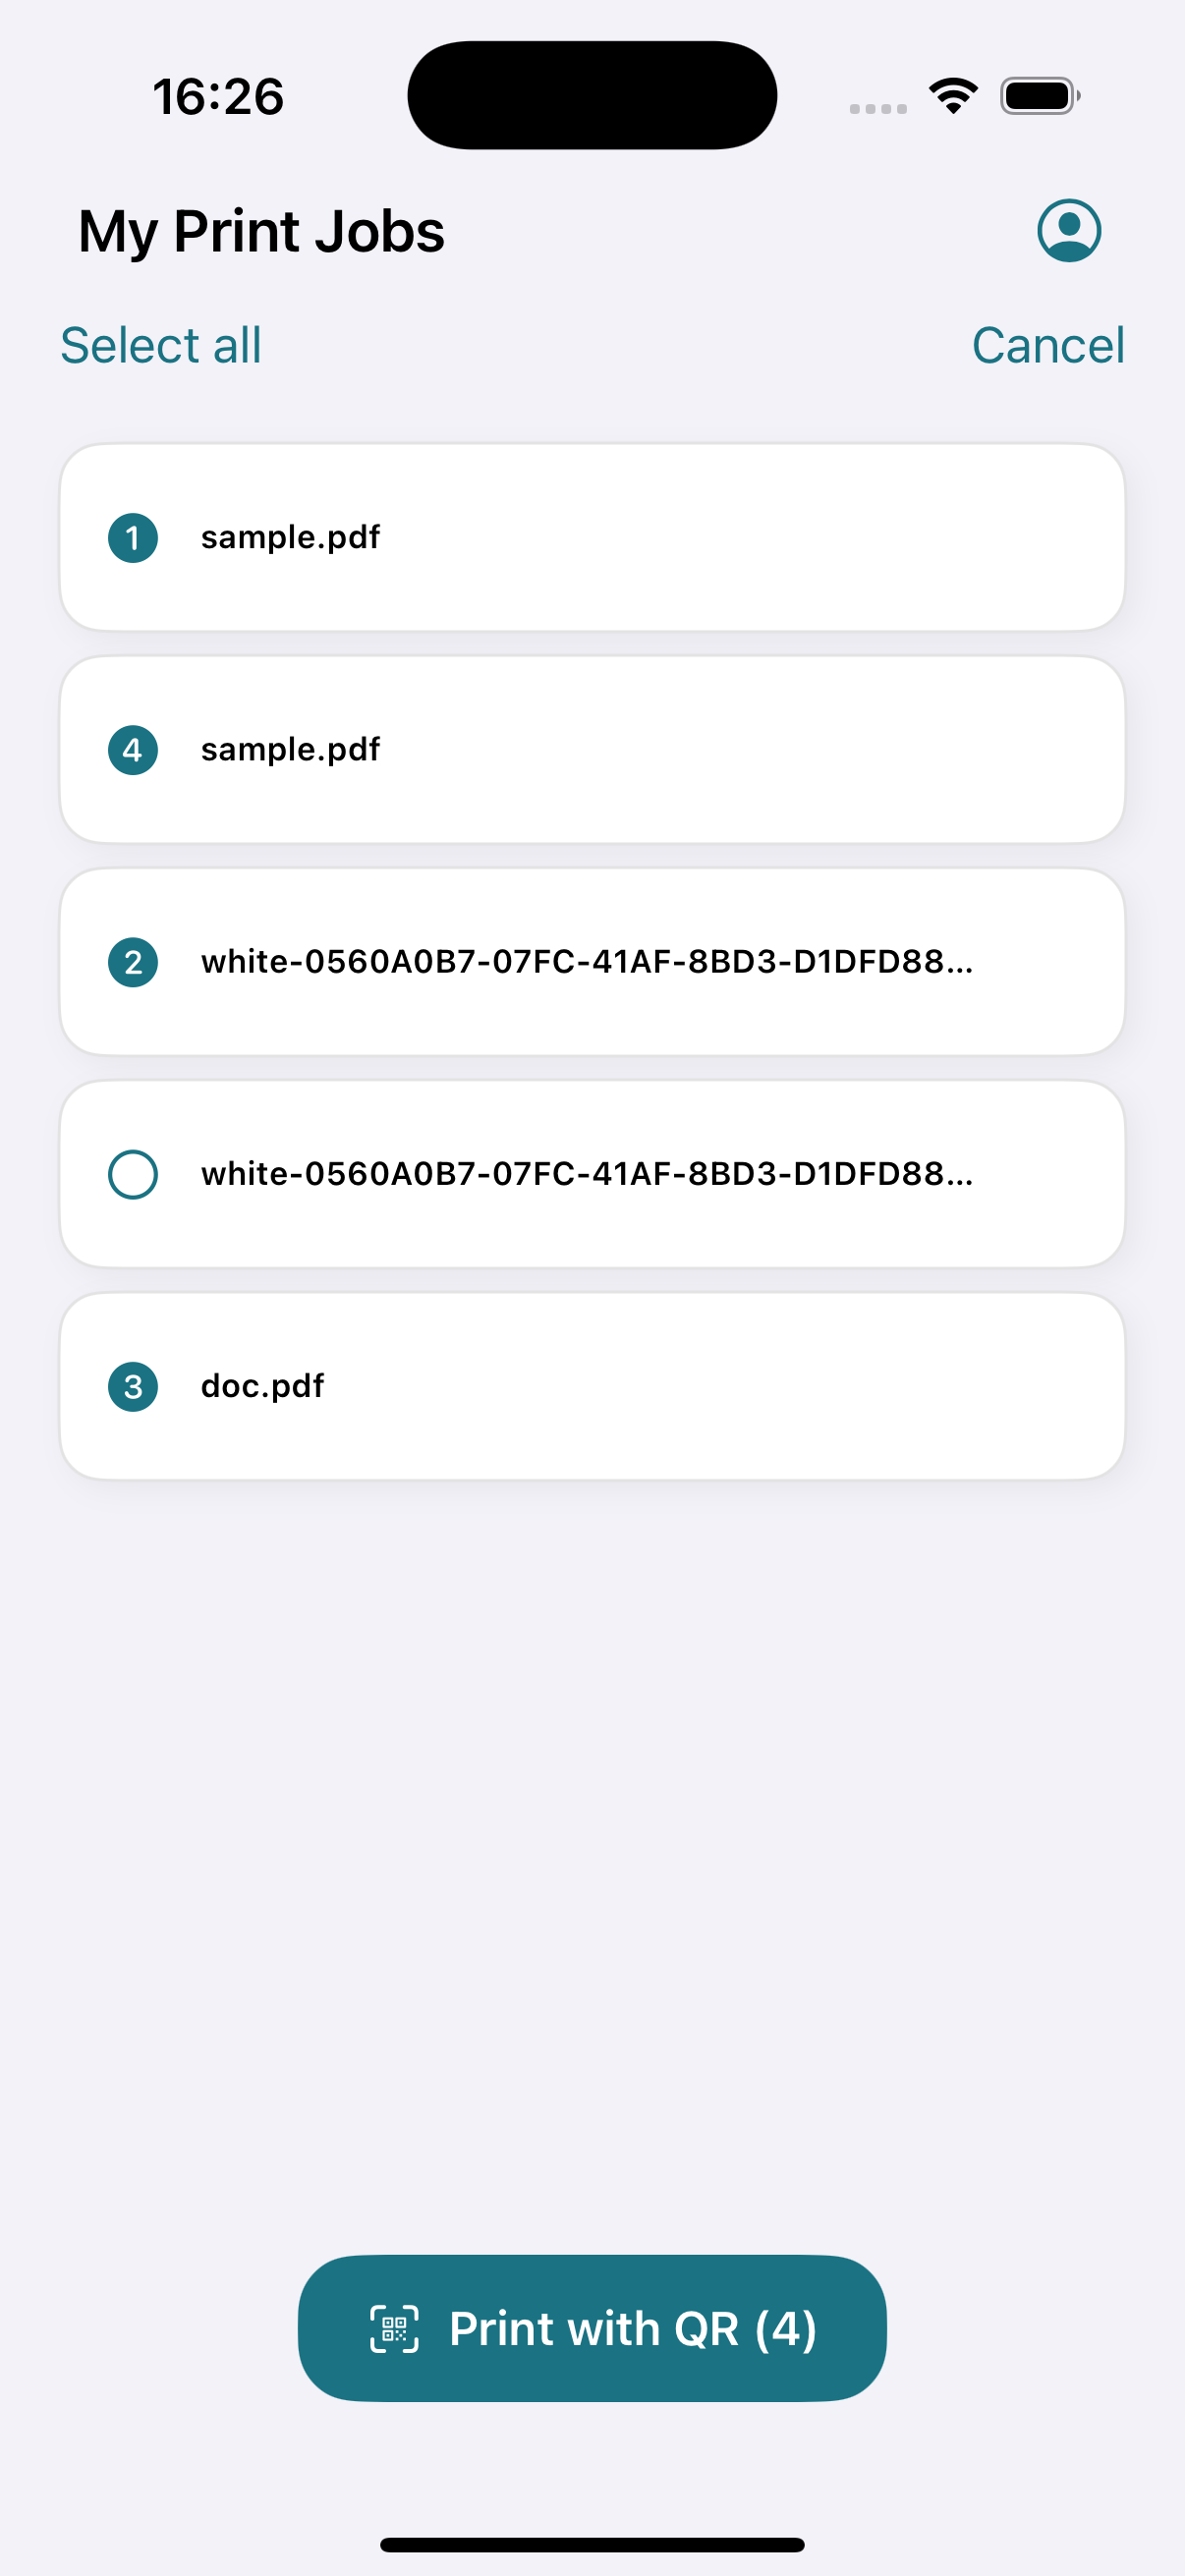
Users can select multiple files in a specific order. After tapping the Print with QR button, they can scan a QR code to release the jobs to the corresponding printer in the previously selected order. If any jobs cannot be printed, a popup will appear providing information about why they could not be processed.
Troubleshooting
The application provides a way to collect support information for troubleshooting problems. The function is accessible from the settings screen (person icon on the job list screen).
After the support information is collected, it can be shared by tapping the “Share diagnostic information” button, which opens the standard sharing dialog.
