
Prerequisites
-
Make sure that you have Cloud Terminal Integration enabled. For information on how to do this, see Enable Cloud terminal integration.
-
Make sure that HTTPS (and TLS 1.2 or above) is enabled on the MFD, see Enabling HTTPS section.
Limitations
Printing
Finishing options
-
Booklet bind direction Left to Right is always used.
-
Booklet folding is supported only on a cloud storage print method and a printer connection set to cloud only.
-
Only devices with EIP version 5.3.3 or newer support nesting of papers into each other during booklet printing.
-
Devices with older EIP fold each sheet of paper individually.
-
-
When a simplex or duplex short-edge job is changed to a duplex long-edge job in basic finishing options, it will be printed as a simplex job. The duplex long-edge job sent to the queue will be printed as a duplex long-edge job. For a workaround, see the section Changing default printing value on AltaLink devices.
-
Only options and their combinations supported by the official Xerox driver are supported by our app.
-
Supported is 2/4 hole punching on the left and top left/right or double left/right stapling.
-
Hole punching must be on the same side as stapling.
-
AltaLink devices require EIP version 5.3.3 or newer to support combinations of finishing options.
-
Stapling 2 at center is the only supported stapling option when combined with booklet.
-
Download & print
-
When pull printing a document sent via Universal Print Driver, output may be slightly downscaled due to interpretation of printable area.
Scanning
The impact of color setting on resulting file format
Depending on what color setting (Auto, Full color, Greyscale, etc.) you or the user chooses, the MFD will deliver different formats:
-
When scanning on VersaLink models with color mode set to Auto, the device will produce a PDF file regardless of the configured file format.
-
If you select JPG file format in combination with Black and white, One color, or Two color, VersaLink devices will produce a TIFF file.
-
If you select JPG file format in combination with Full color or Greyscale, the device will produce a JPEG file.
Merging originals
-
Merging originals for multipage TIFF works only with Black and white, One color, and Two color color settings.
Duplex scan from glass
For AltaLink devices only: A simplex scan is performed when a duplex scan with merging originals set to "off" is started while the feeder is empty. This is due to vendor limitations that prevent us from altering scan behavior based on the scan source.
Copying
-
Advanced finishing options (Stapling, Punching, and Folding) are not supported.
-
PrimeLink devices do not support accounting for copy functions and are restricted to single-sided copying. Double-sided (duplex) copying is not available.
Language switching
-
If you set the language on the MFD, the selected language becomes the default application language. If a user changes the language from the application's language selection menu, the new language will be used for the current user session and will reset to the default device language once the user logs out.
-
Languages with limited support
-
Thai, Chinese (Simplified), Japanese, Korean
-
Languages are limited to devices that are capable of displaying them – they must have the respective browser fonts embedded.
-
These languages are only available when set as the device language (not via the application language selection menu).
-
Accounting
Accounting for native applications like Copy, USB print, and Fax is not supported. If you set the device to the kiosk mode, the users will not be able to use these applications and you will not miss any accounting information.
Scanning
-
If the terminal loses connection before finishing the scan job, the scan job will be accounted for even if it was not delivered to the user.
Card Readers
-
The user is not able to logout by card swipe.
-
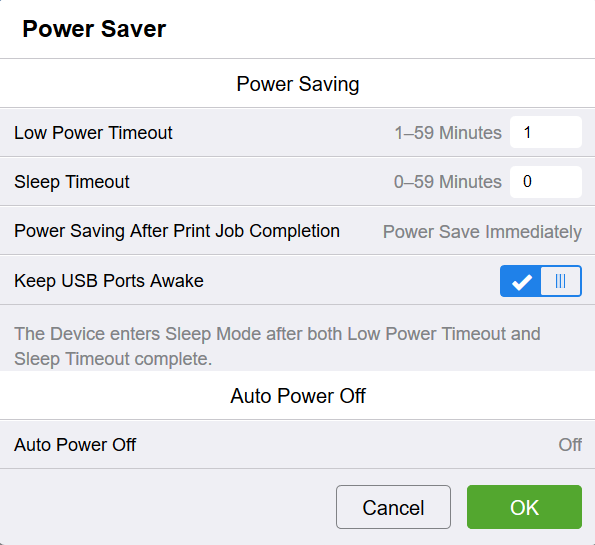
On VersaLink MFDs, the Keep USB Ports Awake option in the Power Saver settings must be enabled. Otherwise, when the MFD wakes up from a deep sleep, card authentication will not work until you reset the Cloud terminal by tapping the Reset button on the MFD home screen (the button reloads all application).
-
To ensure the proper functionality of the card reader, the corresponding DNS address endpoint must be whitelisted. Please note that the DNS address is region-specific. The correct address will be displayed in the Terminal Deployment Tool console window upon completion of the Cloud Terminal installation.
Automatic logout timeout
For automatic user logout to function correctly, the system timeout on the device must be set to a higher value than the Automatic logout timeout (120 seconds by default), ideally the maximum value available. Using a lower system timeout increases the likelihood of the device locking the user session during a print job (or other long-running operations), logging the user out, and preventing the job from being properly accounted.

It is necessary to reboot the device for a change in this setting to take effect.
Device setup
Enabling Printing on AltaLink Devices
To set user permissions for printing on AltaLink devices:
-
Log in to the MFD as an administrator.
-
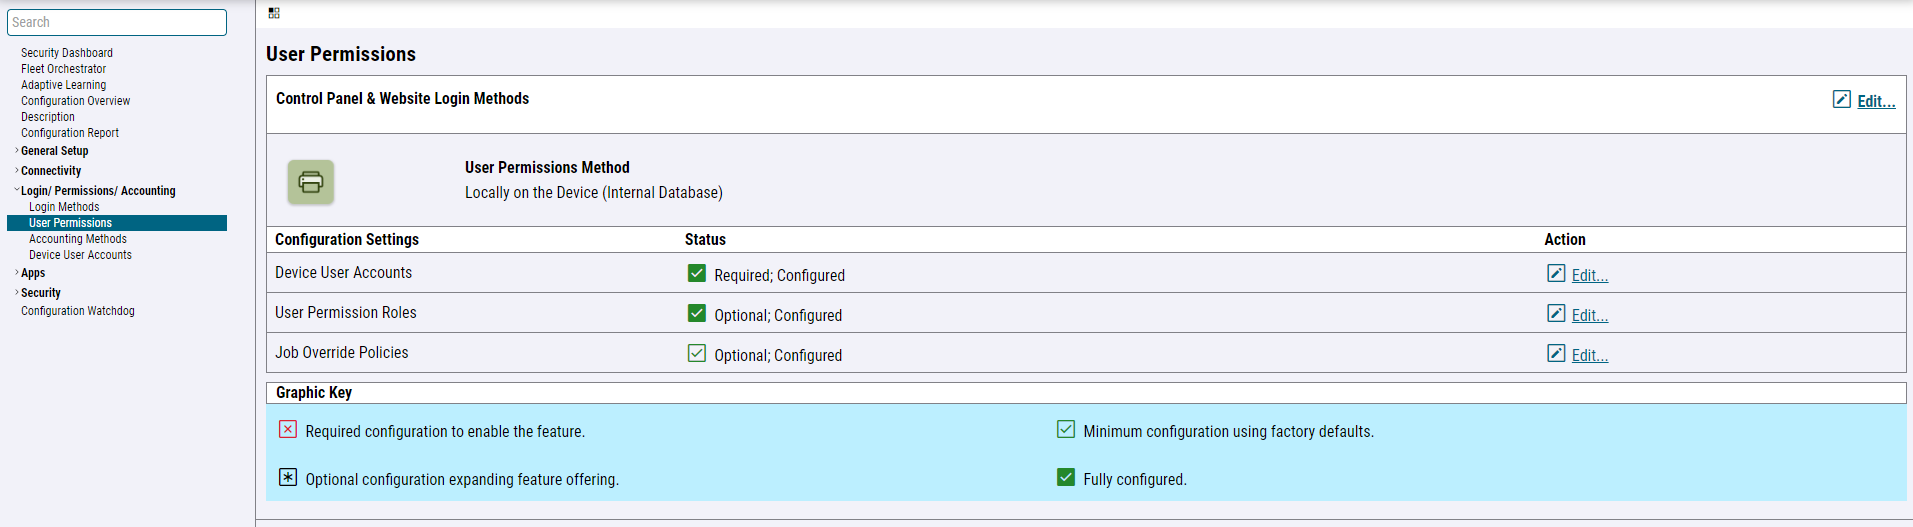
Navigate to Properties > Login/Permissions/Accounting > User Permissions.
-
Click Edit in the User Permission Roles section.
-
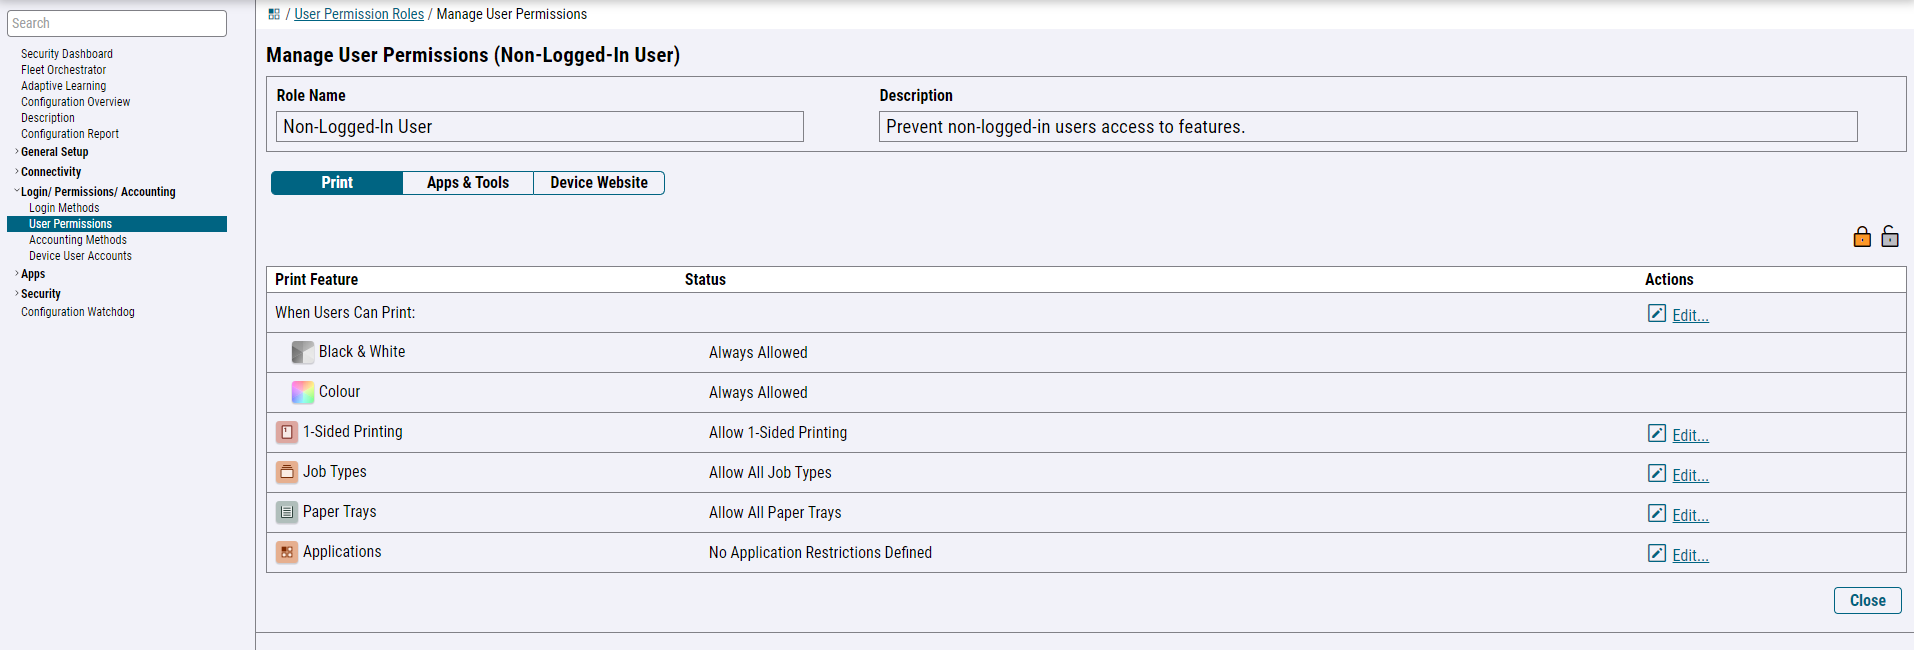
Select Edit under Non-Logged-In User.
-
Set the desired permissions for Non-Logged-In user.
Enabling Accounting (Reporting) on AltaLink and VersaLink Devices
This section is fully automated in the Terminal Deployment tool.
AltaLink
To enable accounting on AltaLink devices, perform the following steps:
-
Log in to the MFD as an administrator.
-
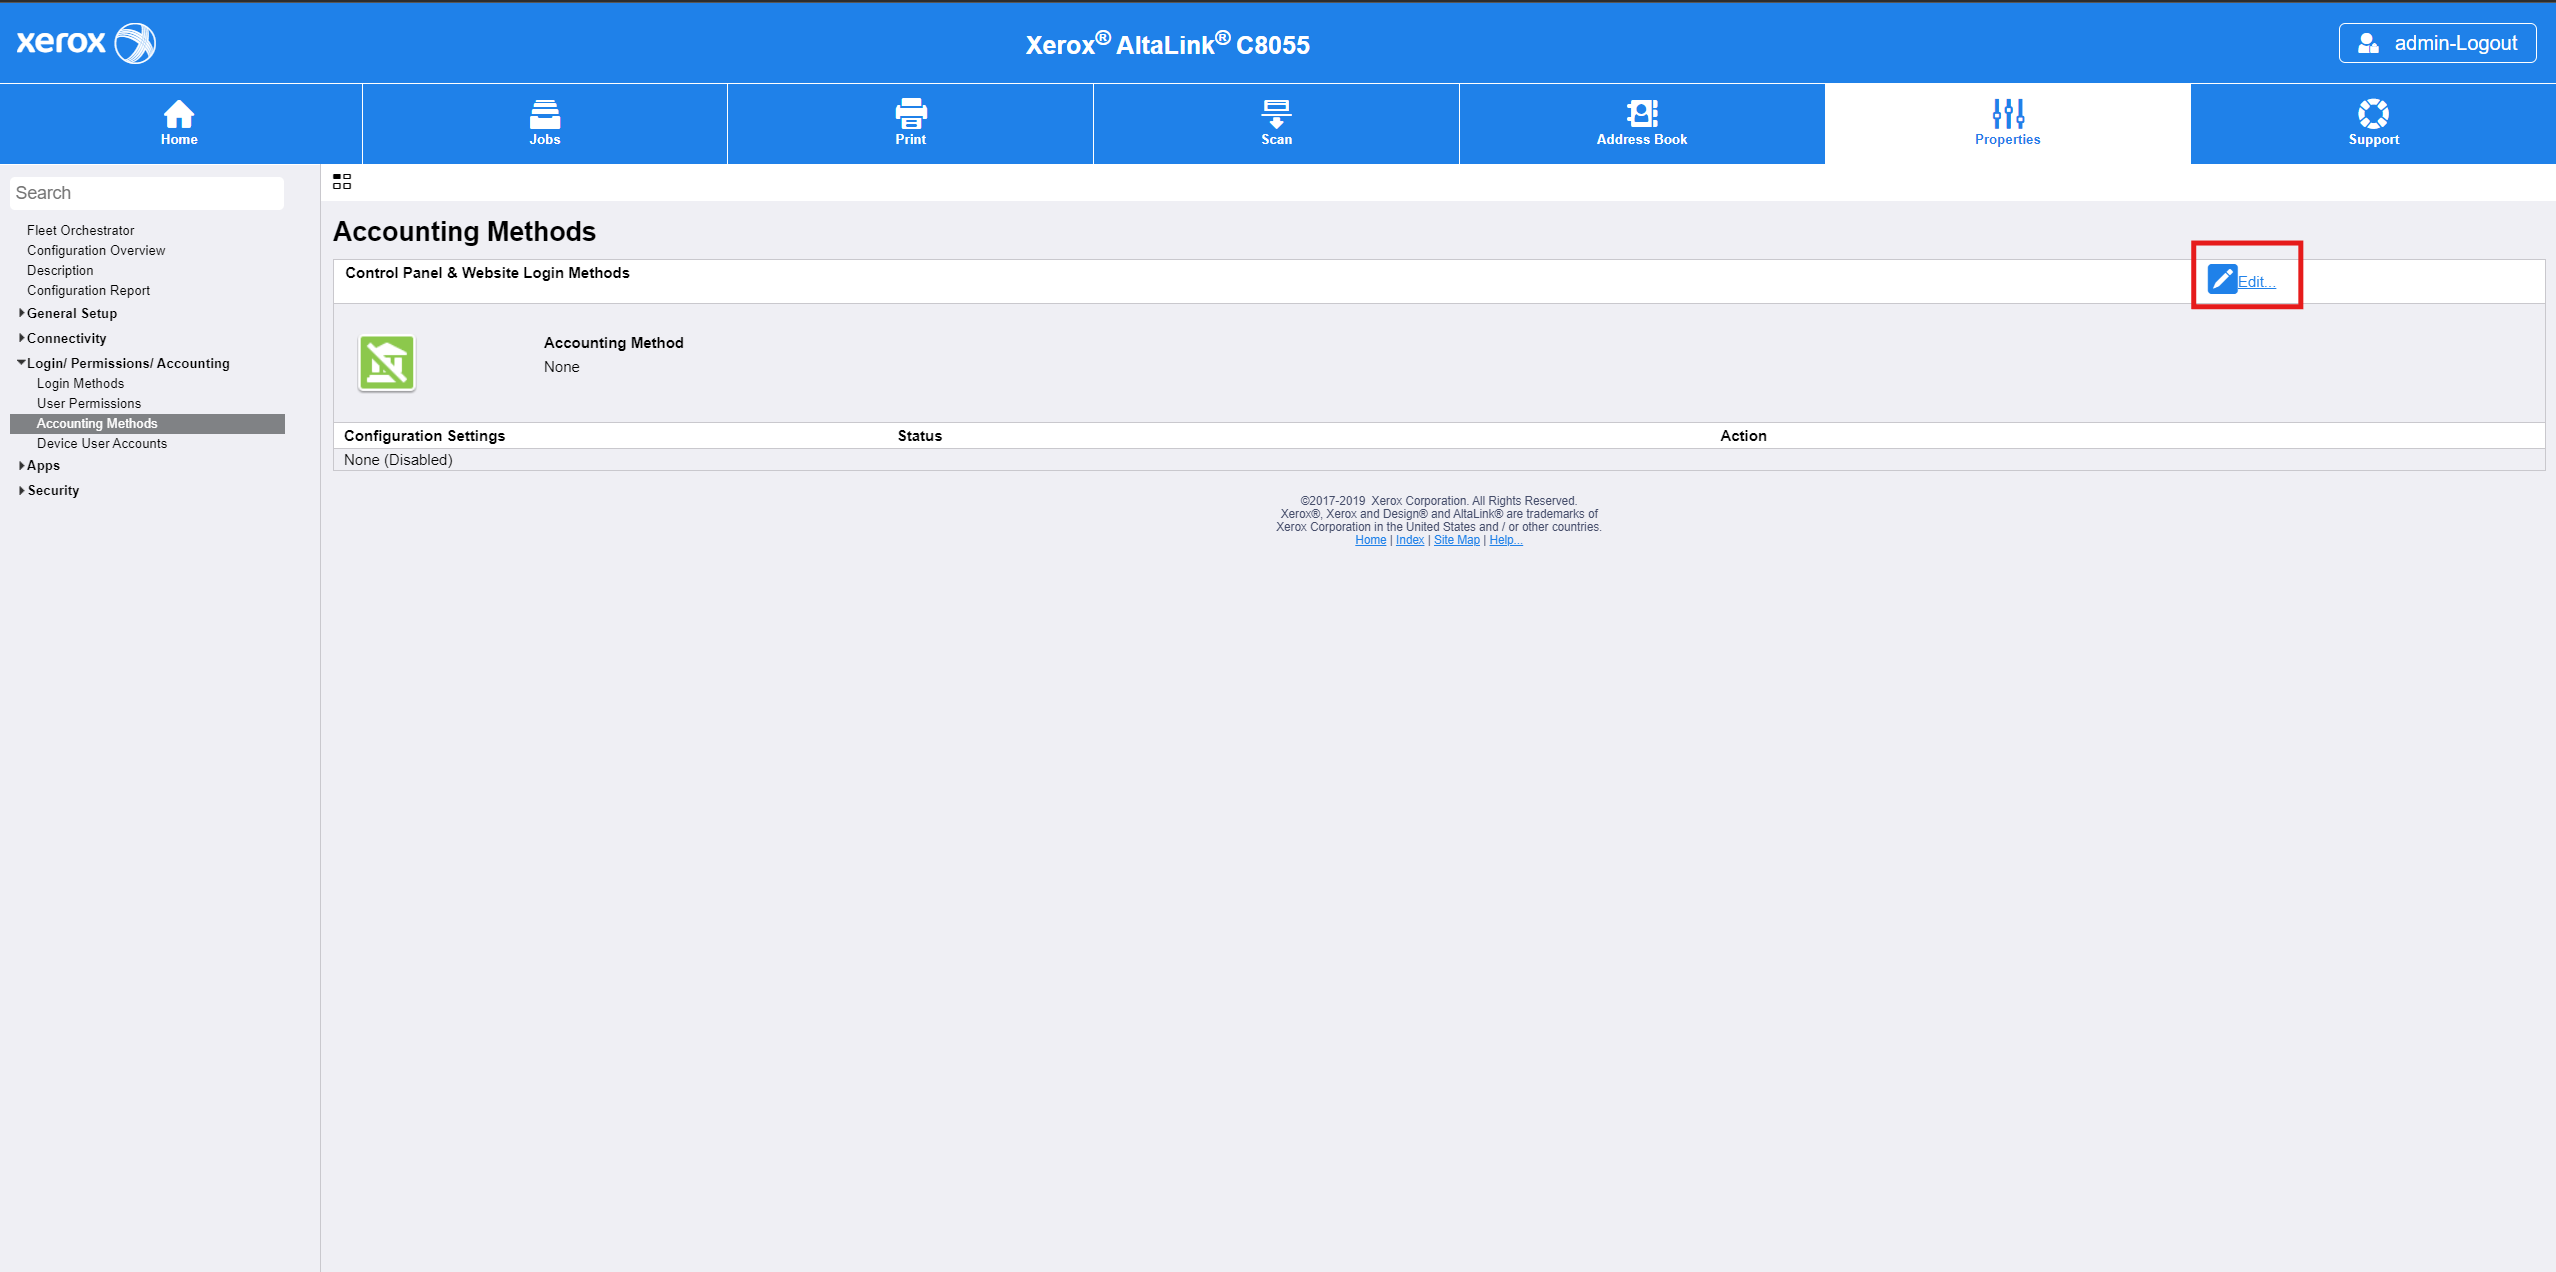
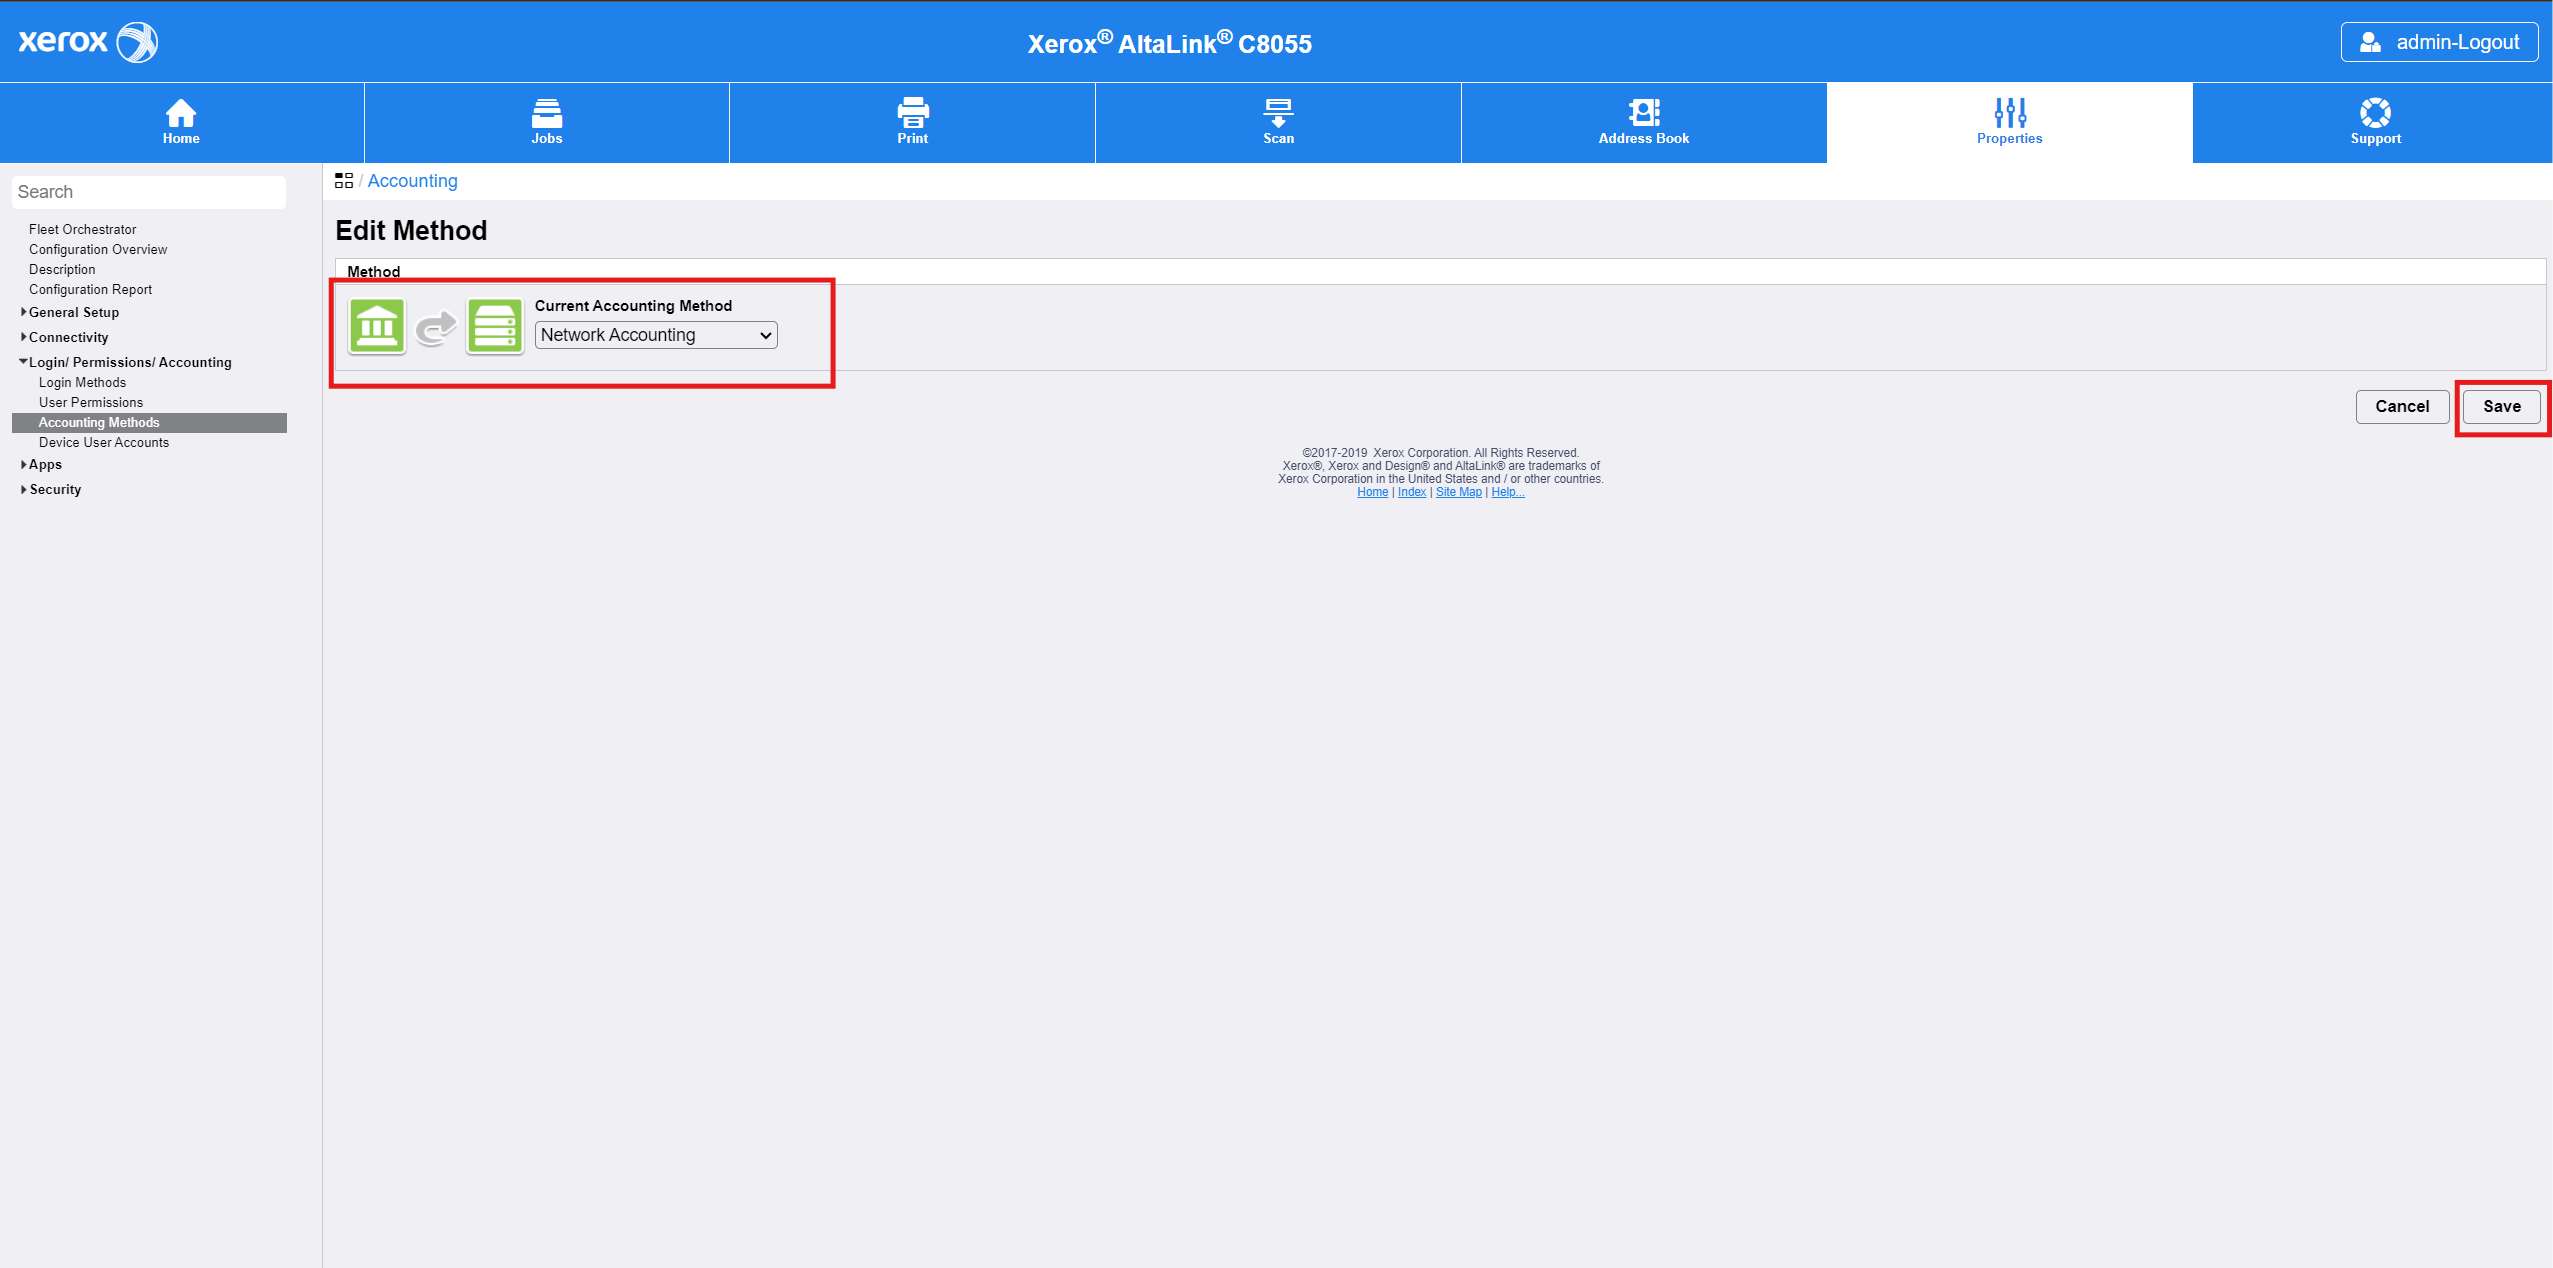
Navigate to Properties > Login/Permissions/Accounting > Accounting Methods and click Edit.
-
Select Network Accounting in Current Accounting Method selection box. Click Save.
-
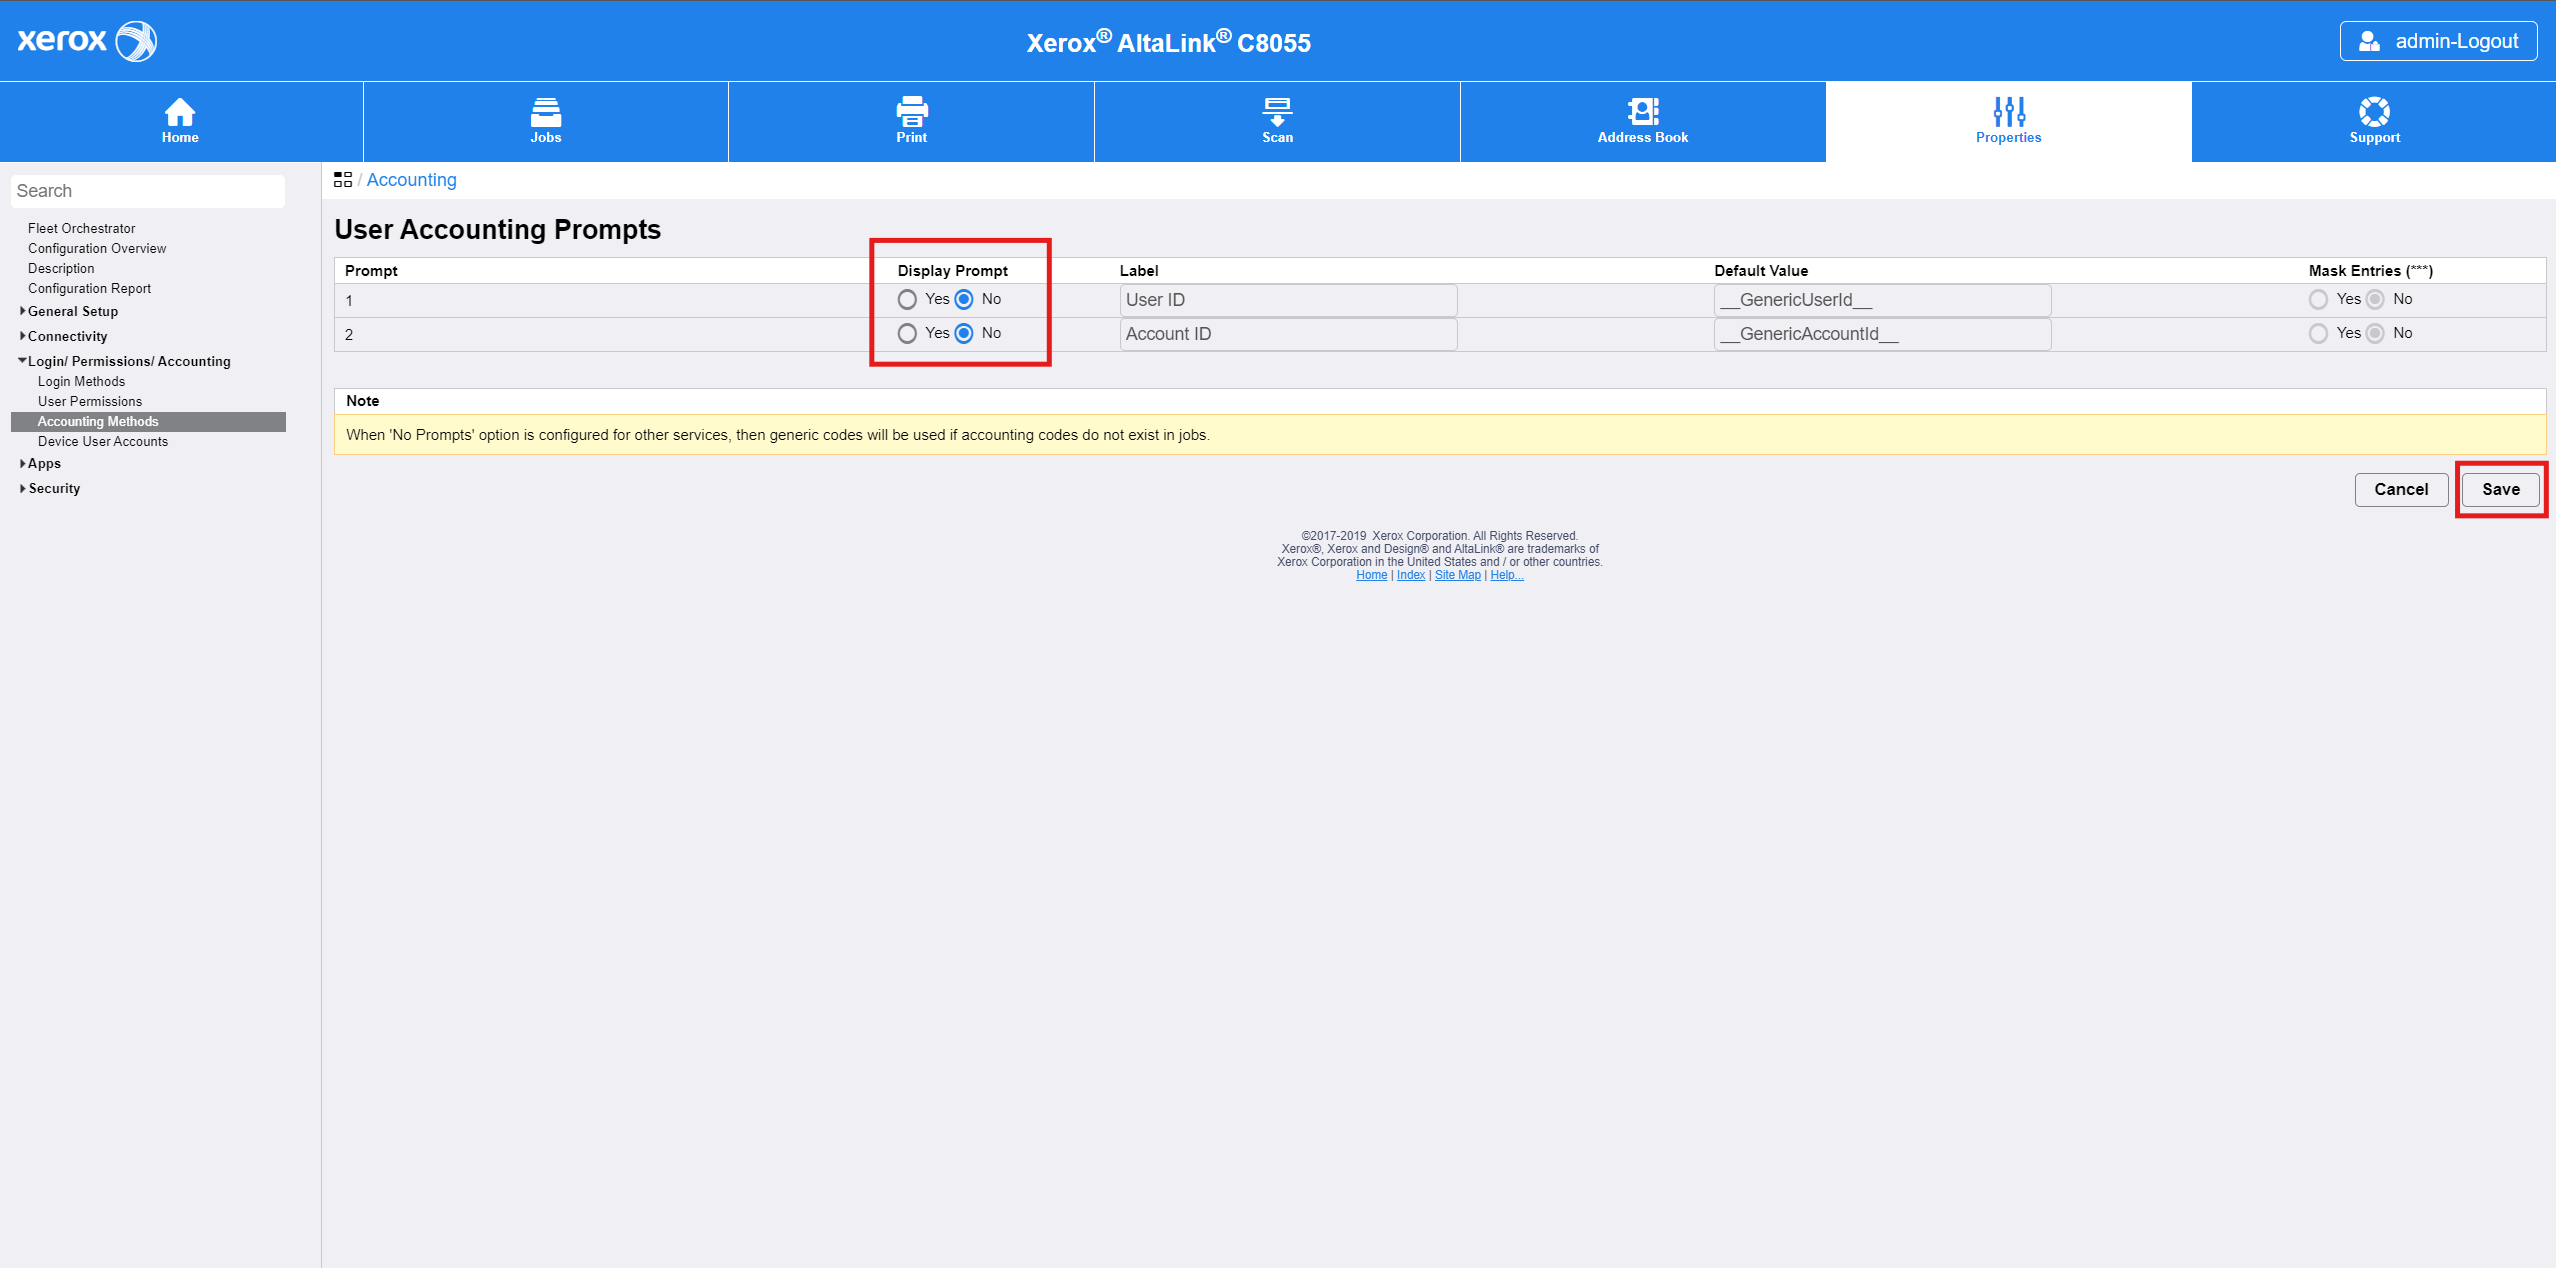
Click Edit in the User Accounting Prompts section.

-
Disable prompts User ID and Account ID by selecting No in Display Prompt column. Click Save.
-
If the Job Limits Server (Pre Authorization) is in Configuration Settings list on Accounting Methods screen click Edit and set the Server URL to https://127.0.0.1.
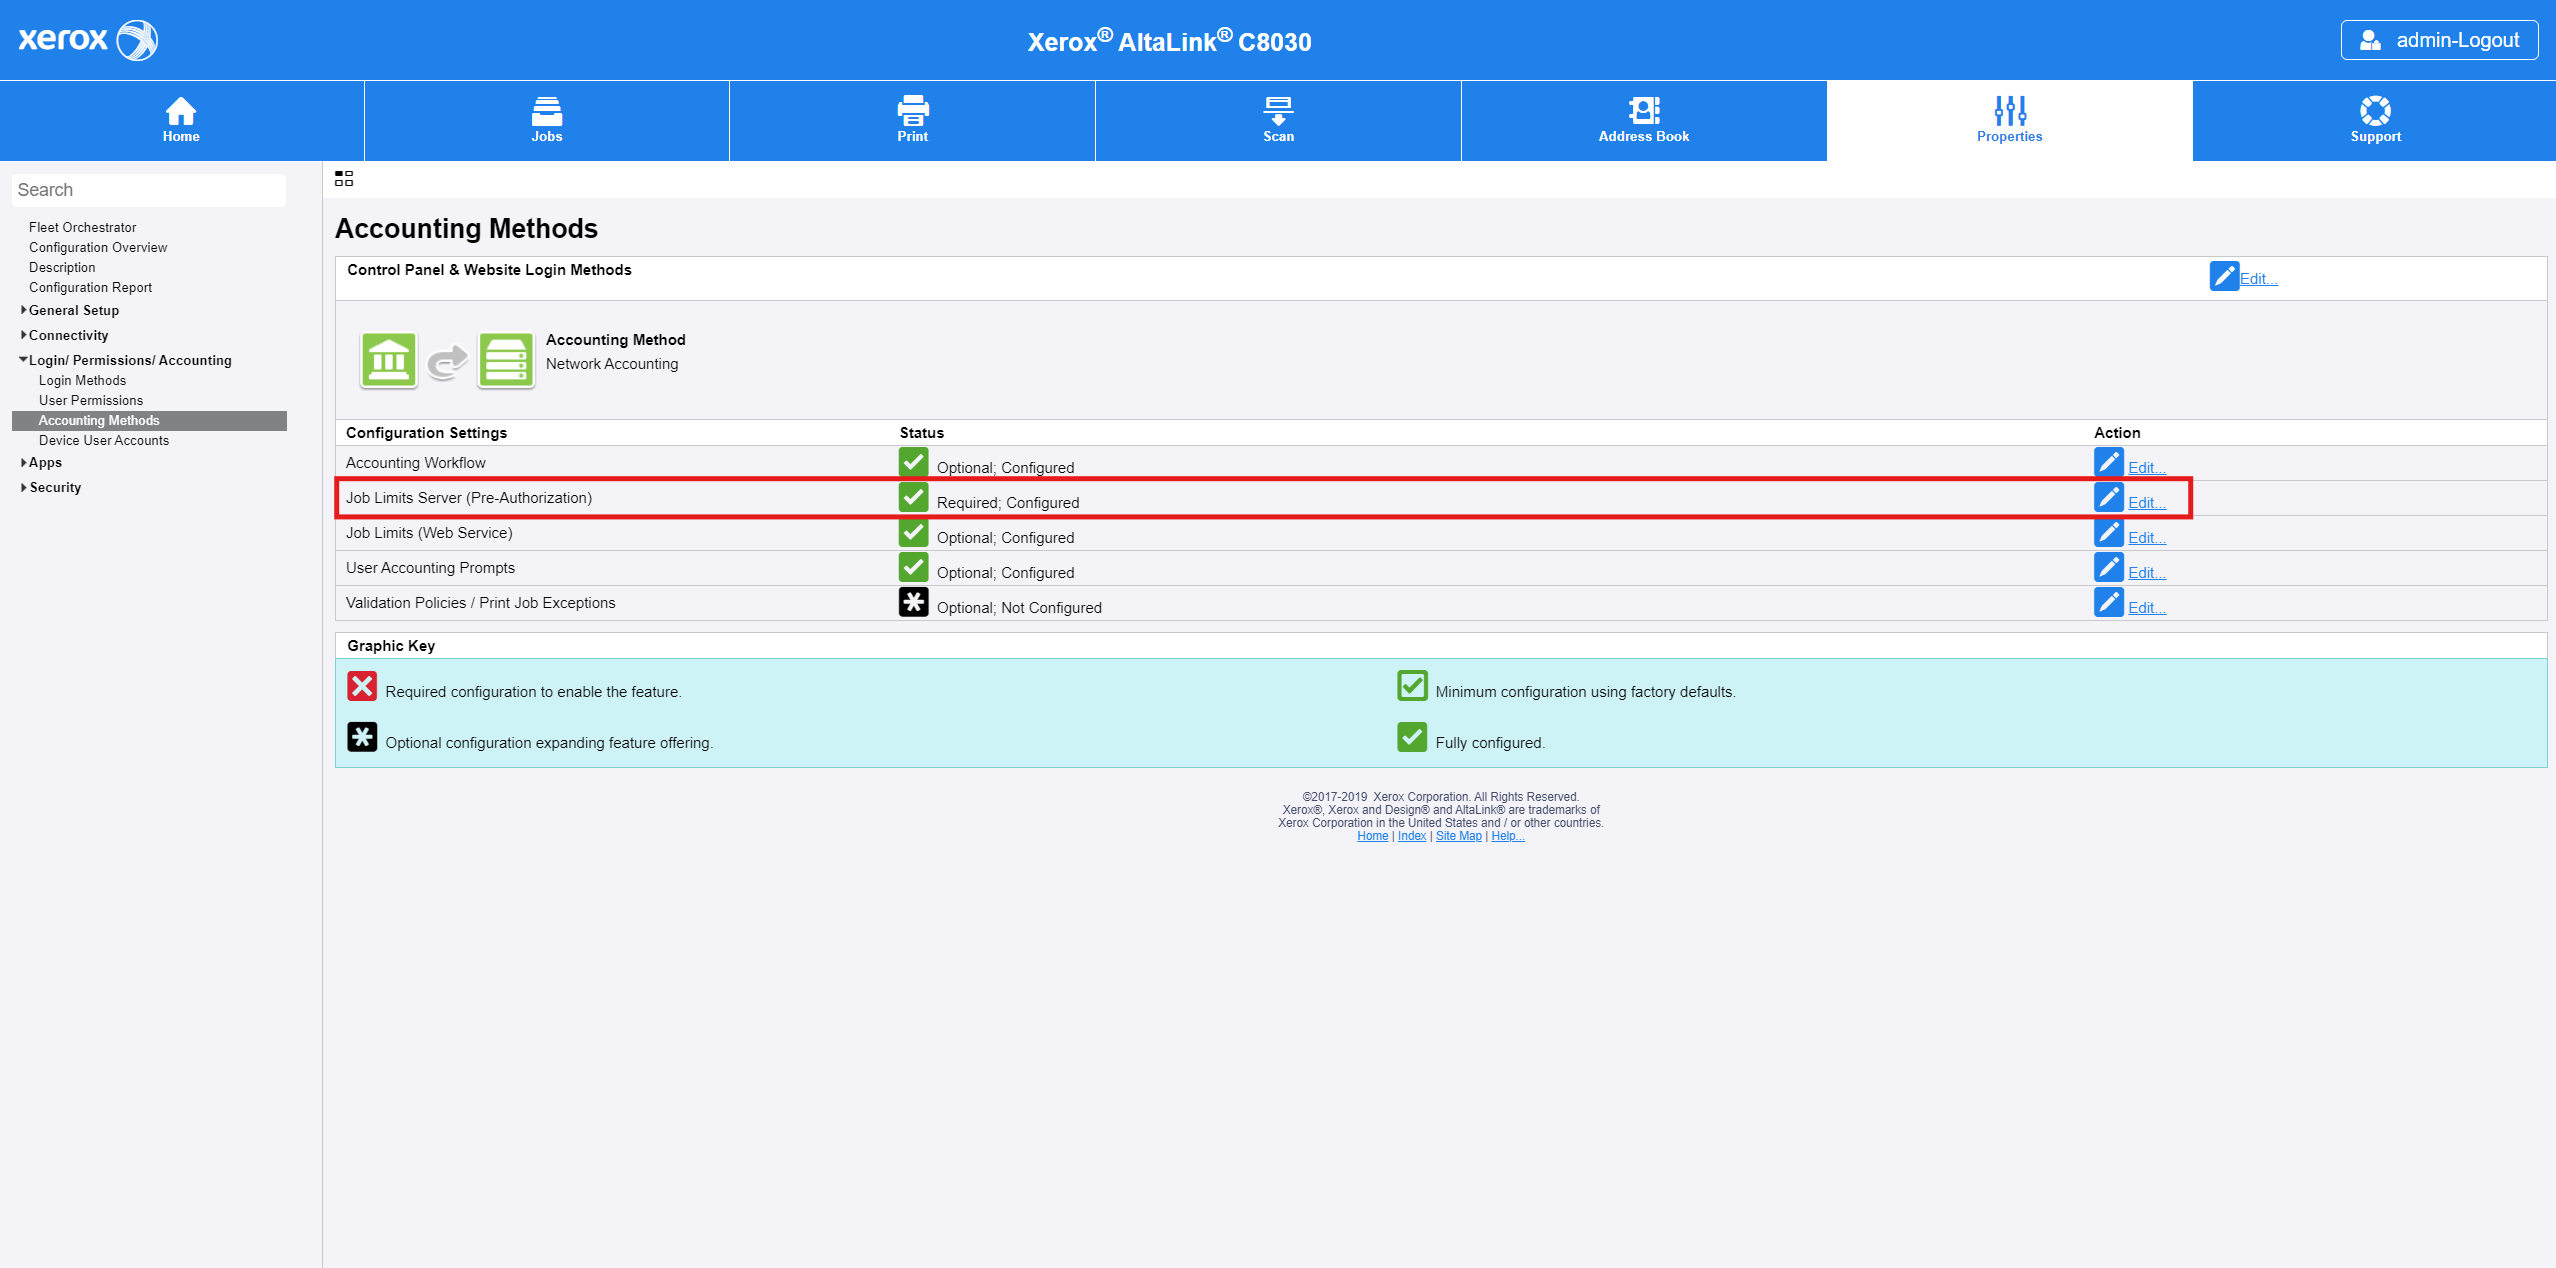
-
Click Save.
-
Restart the MFD to apply the new Accounting setting.
VersaLink
To enable accounting on VersaLink devices, perform the following steps:
-
Log in to the MFD as an administrator.
-
Navigate to Permissions > Accounting Method. Click Select in the Network section.
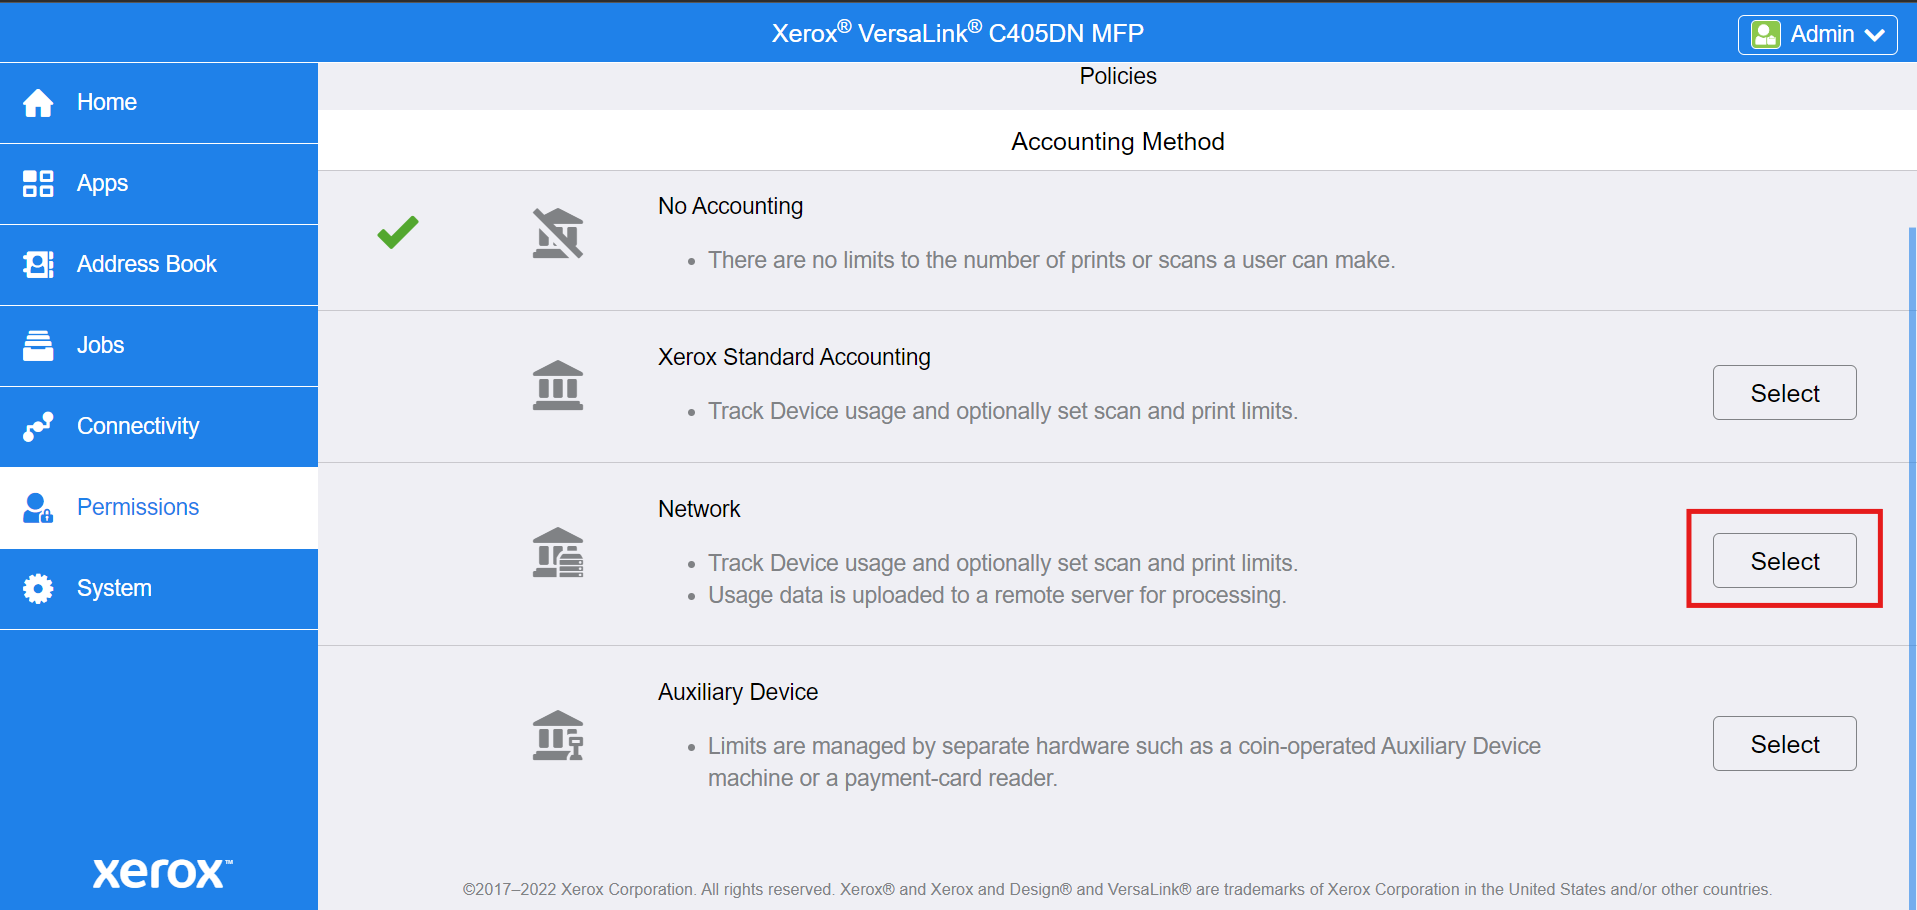
-
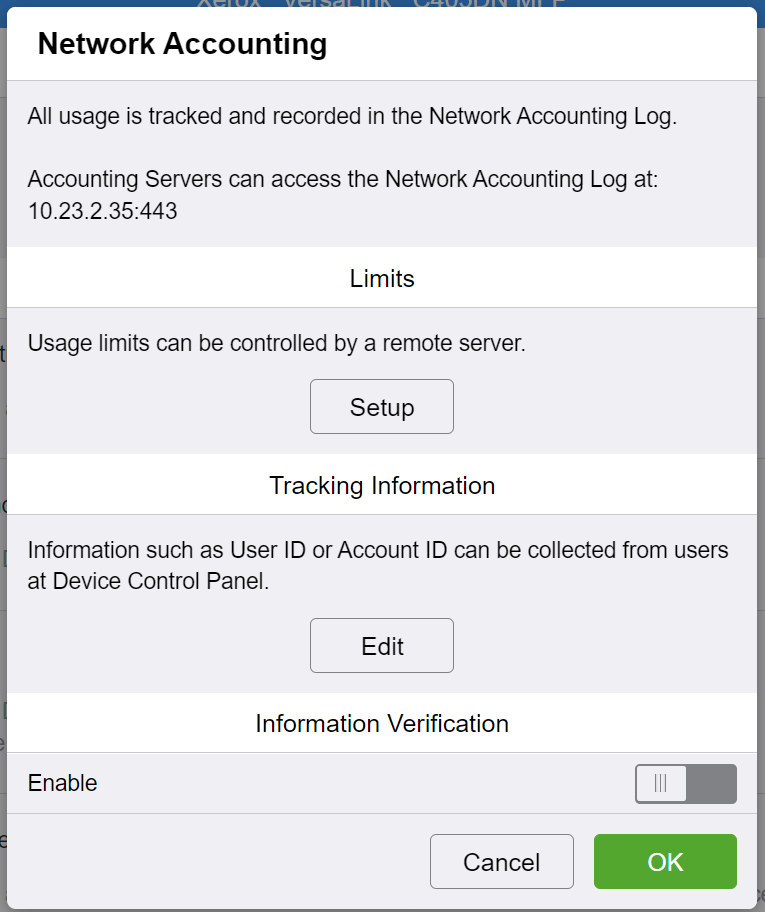
You will see the following screen.
-
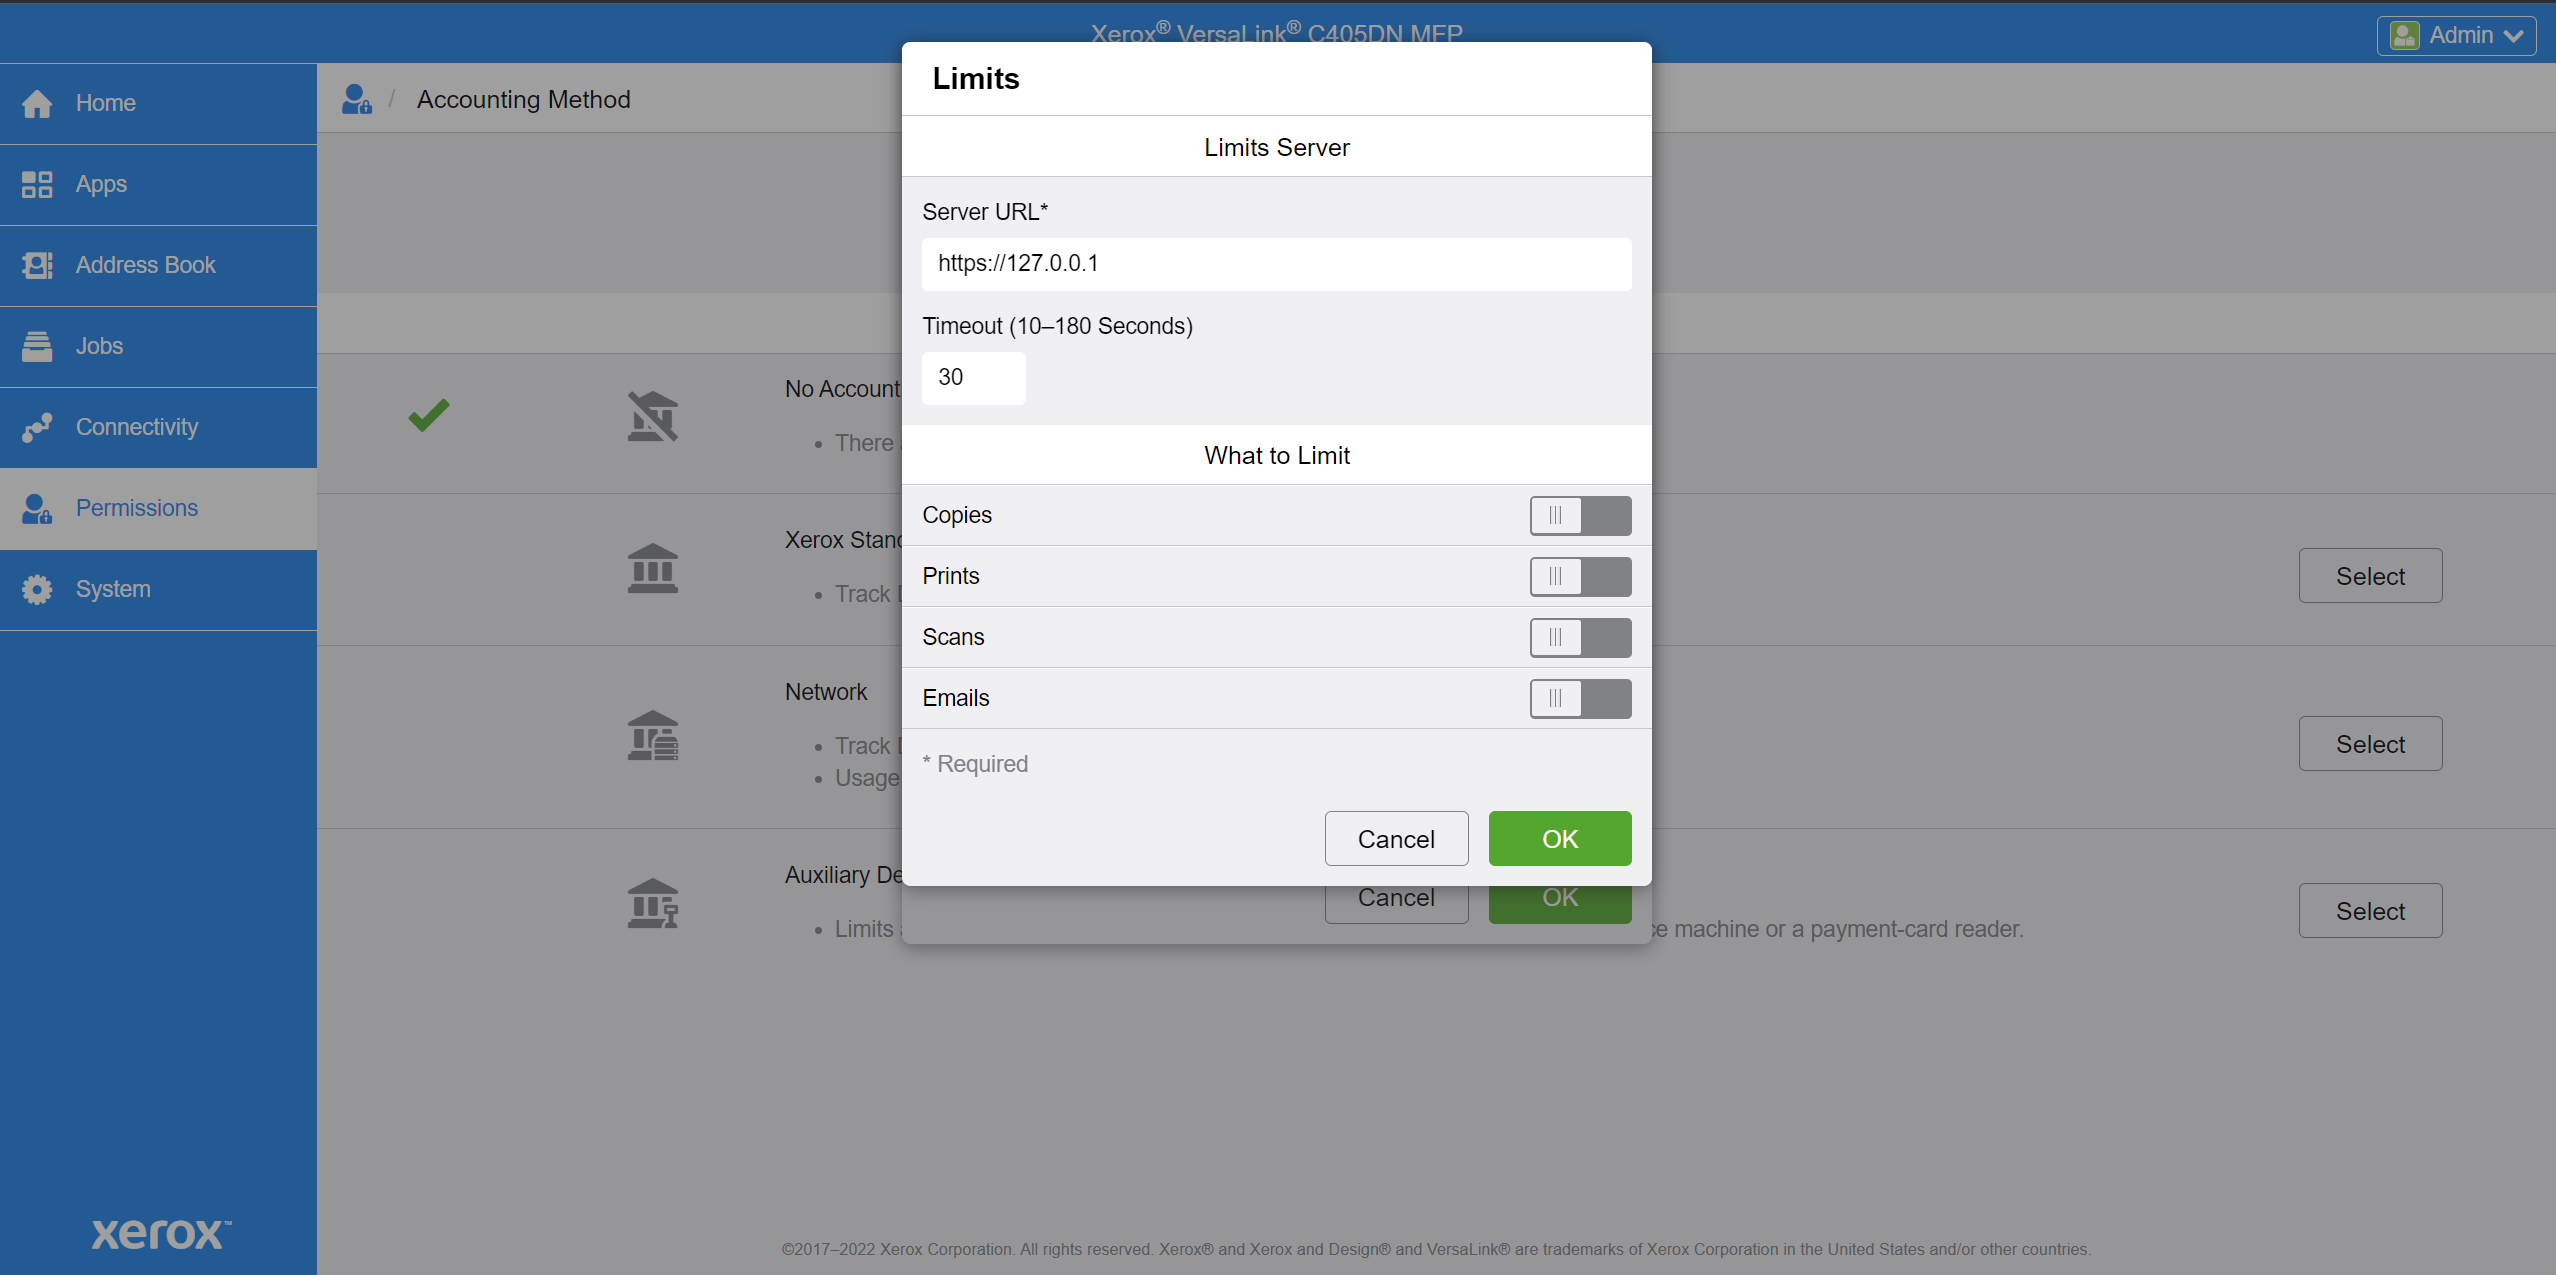
Click Setup in the Limits section. Set Server URL to https://127.0.0.1. Disable all items (Copies, Prints, Scans, Emails) in What to Limit section, and click OK.
-
Open Tracking Information settings by clicking Edit. Disable Ask Users option for User ID and Account ID. Select No Prompt for Copy, Print, Scan and Fax in When to Prompt section. Click OK.

-
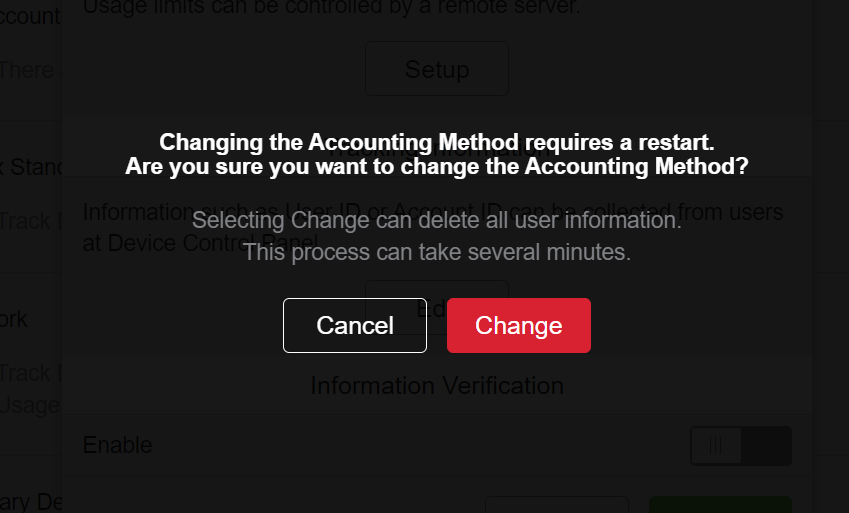
Click OK on the Network Accounting screen. Restart the device by clicking Change.
Enabling HTTPS
VersaLink
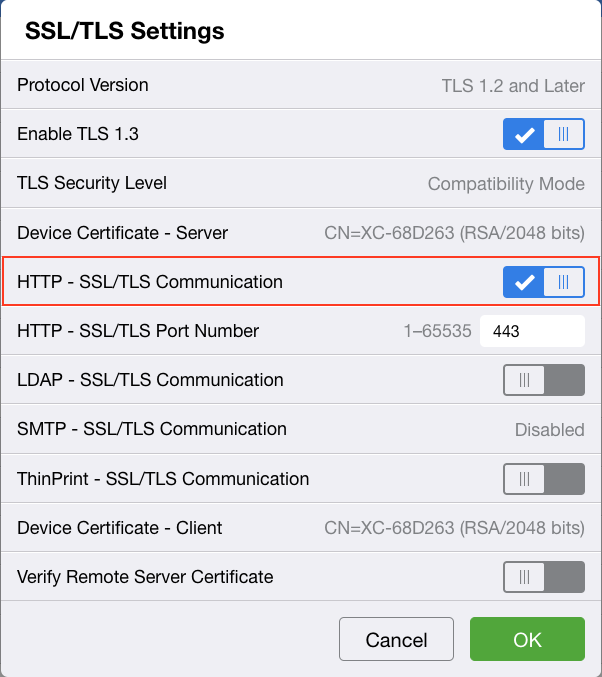
Enabling HTTPS and TLS 1.2 or higher on VersaLink devices is required to proper functioning of a device.
-
Log in to the MFD as an administrator.
-
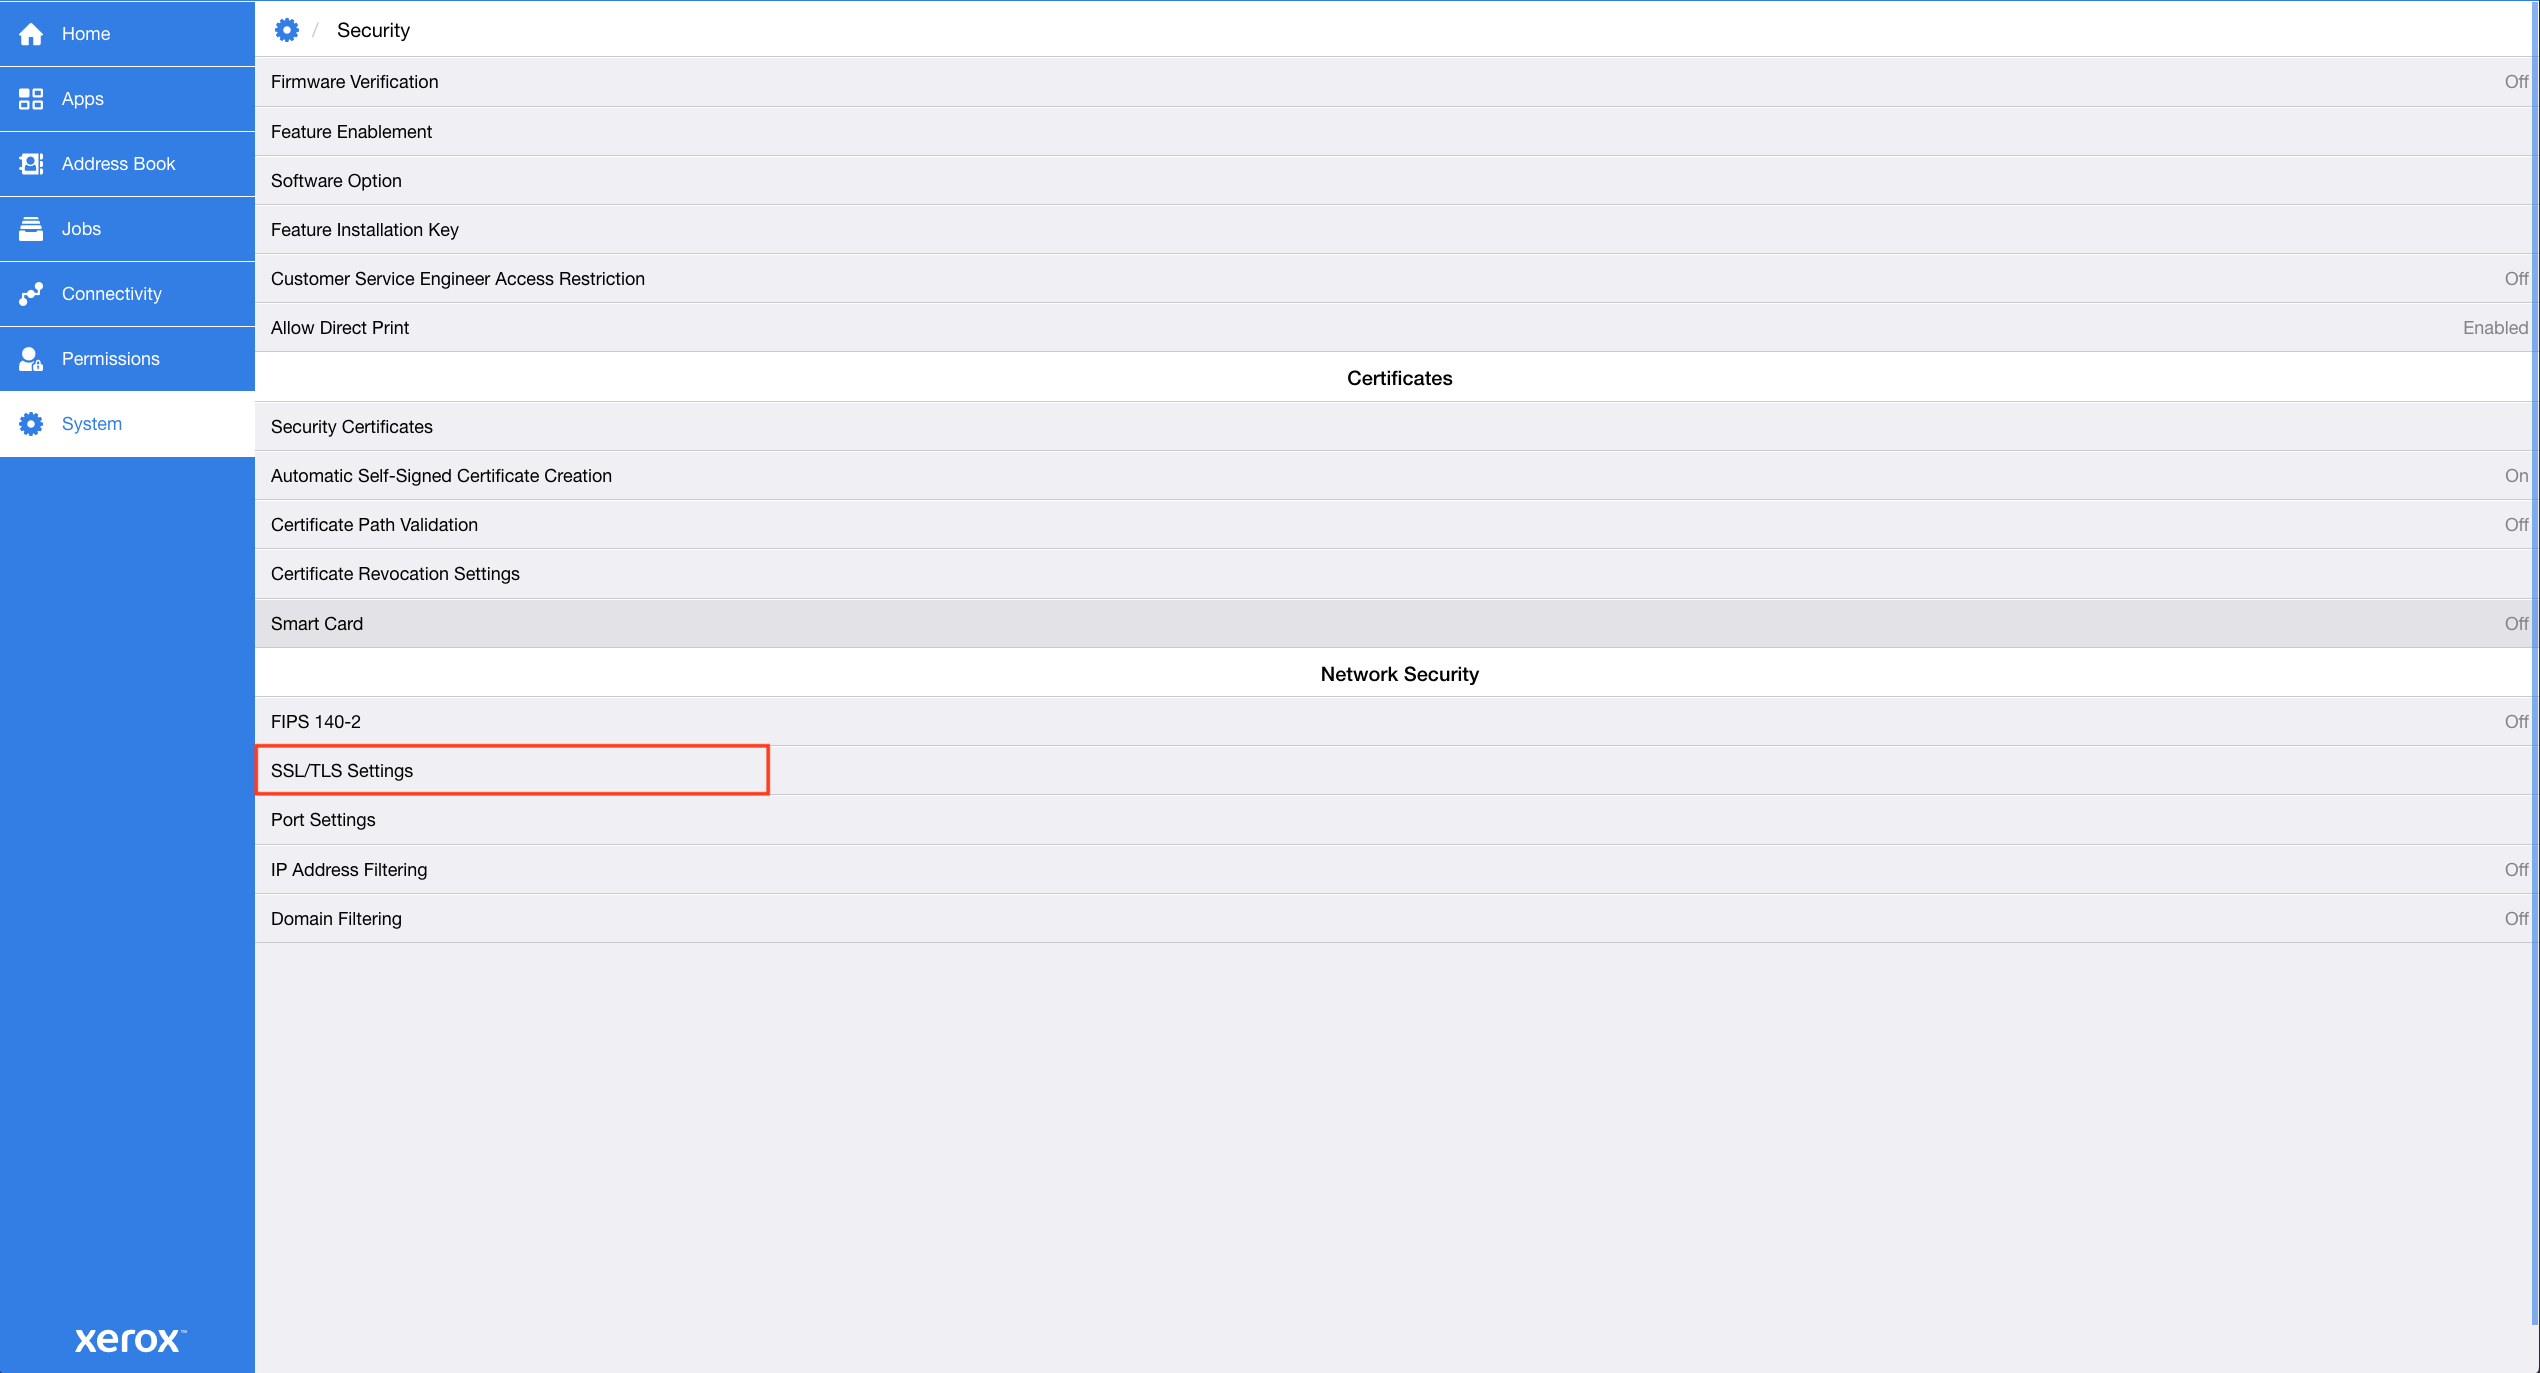
Go to System > Security > SSL/TLS Settings.
-
Enable HTTP - SSL/TLS Communication.
-
Click Ok to save changes.
AltaLink
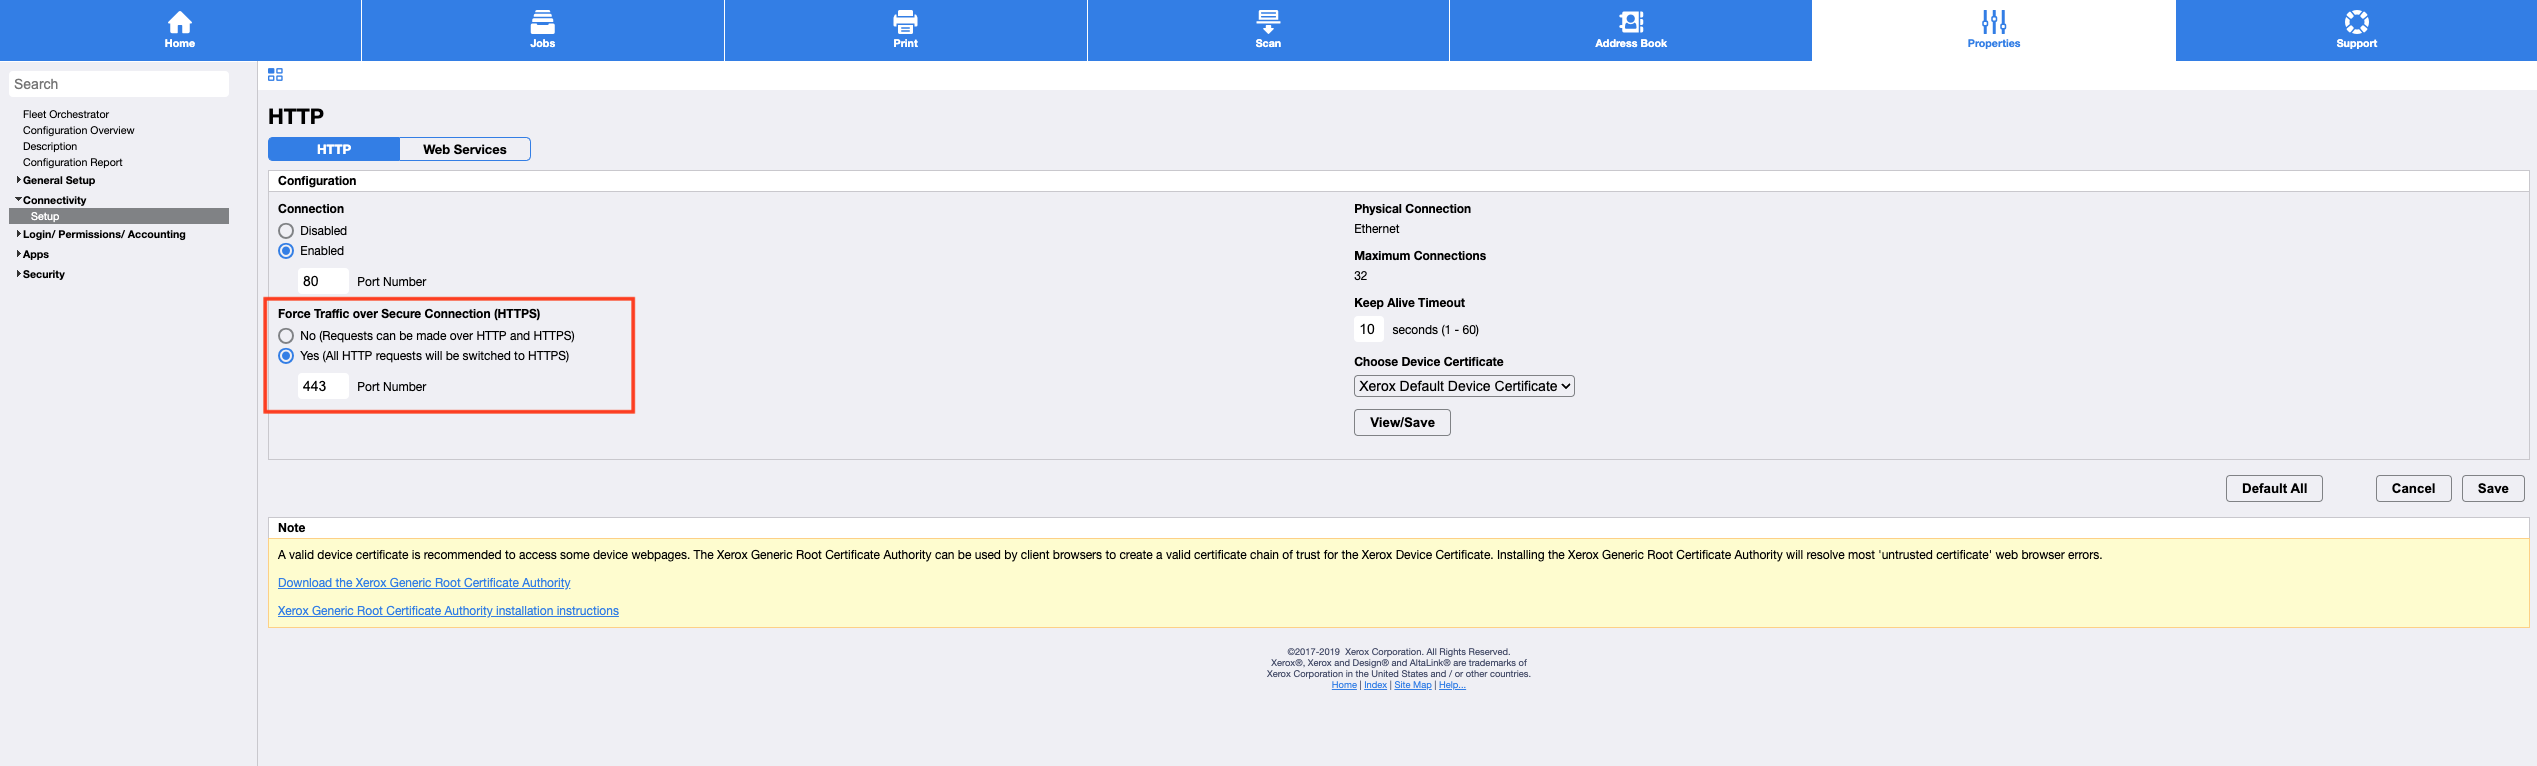
Enabling HTTPS and TLS 1.2 or higher on AltaLink devices is required to proper functioning of a device.
-
Log in to the MFD as an administrator.
-
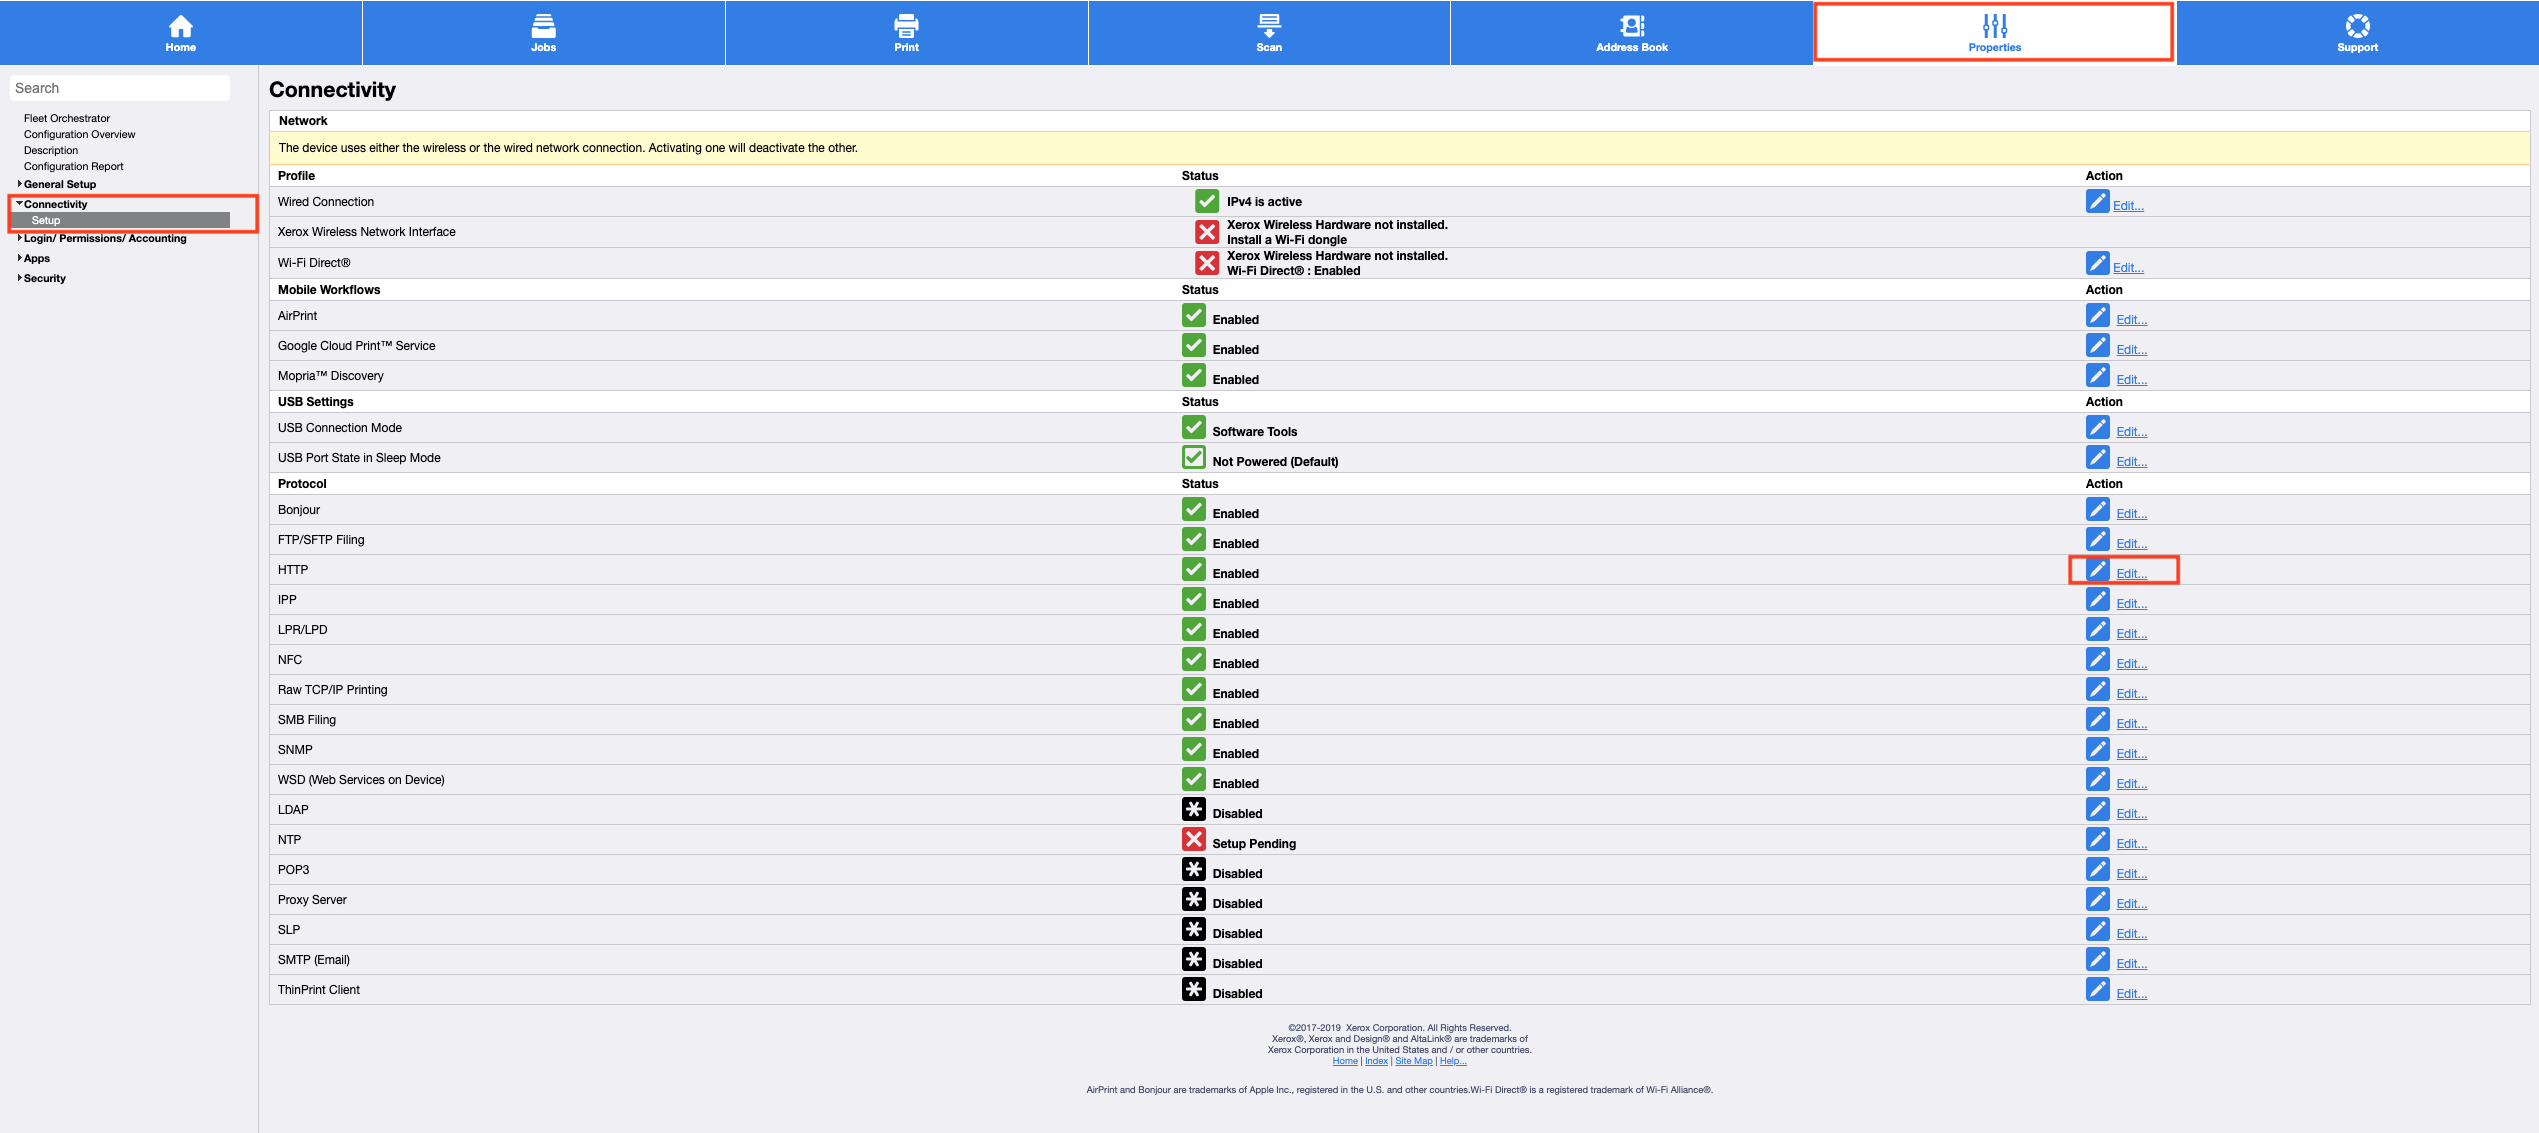
Go to Properties > Connectivity > Setup
-
Locate HTTP and click Edit on the right side in the same row.
-
Enable Force Traffic over Secure Connection (HTTPS)
-
Click Save to save changes.
Enabling Copy on VersaLink Devices
To enable the copy function and avoid permissions problem (Internal error 500 when the user tries to copy without permissions) enable Guest Access for copy application below.
-
Log in to the MFD as an administrator.
-
Go to Permissions. Click Edit in the Guest Access section and then Device User Role.

-
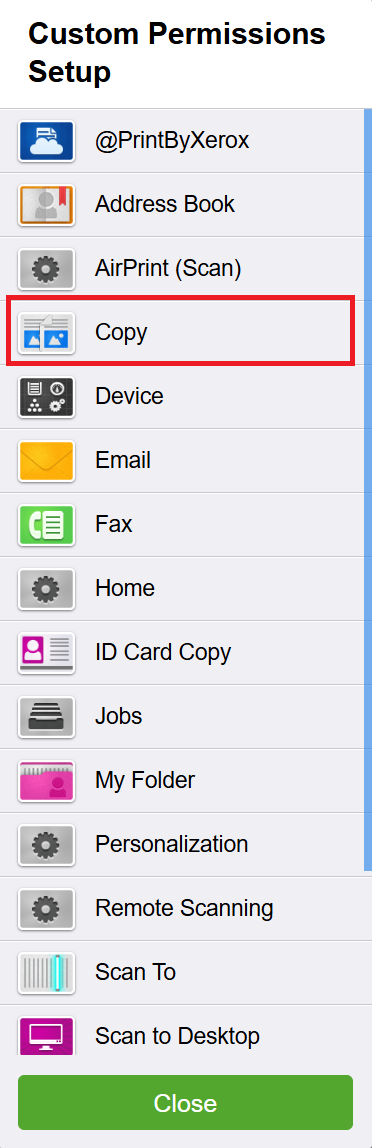
Select Custom Permissions in the Control Panel Permissions section and click Setup.
-
Click on Copy application.
-
Allow all available options Access Copy, Make Color Copies (relevant only for Color devices), 1-Sided Output
-
Click on OK→ Close → OK buttons to save changes.
Enabling ECDHE Ciphers on VersaLink Devices
To successfully establish a secure TLS connection between a device and the cloud server, we recommend to enable ECDHE Ciphers for the TLS communication on the device.
If device FW version is xx.71.21 or higher, the ECDHE Ciphers are available by default - not further steps are needed.
If device FW version is below xx.71.21, the steps below need to be done.
The key codes below enable these ciphers. When the “Enablement Key” is applied, the ciphers are available. The “Disablement Key” will restore the default condition, i.e. ciphers are not available.
Feature Key Instructions:
-
On the device’s Embedded Web Server select System-> Security-> Feature Enablement
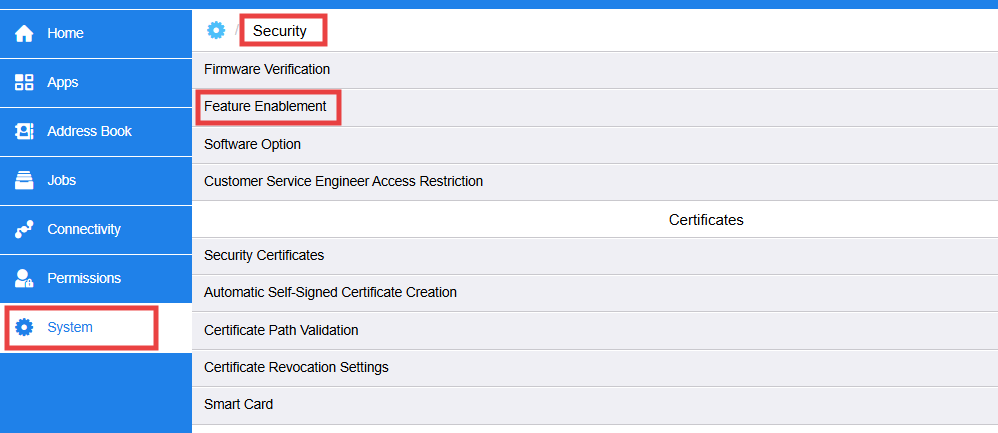
-
Enter correct enable/disable code (include the * character)
The Feature keys are as follows:
|
Product Model |
Enablement Key |
Disablement Key |
|---|---|---|
|
Xerox® VersaLink™ C405 |
*3002452891 |
*3002452890 |
|
Xerox® VersaLink™ C400 |
*3006452891 |
*3006452890 |
|
Xerox® VersaLink™ B405 |
*3003452891 |
*3003452890 |
|
Xerox® VersaLink™ B400 |
*3007452891 |
*3007452890 |
|
Xerox® VersaLink™ C7020/C7025/C7030 |
*3014452891 |
*3014452890 |
|
Xerox® VersaLink C7000 |
*3015452891 |
*3015452890 |
|
Xerox® VersaLink C505/C605 |
*3016452891 |
*3016452890 |
|
Xerox® VersaLink C500/ C600 |
*3017452891 |
*3017452890 |
|
Xerox® VersaLink™ B605/B615 |
*3020452891 |
*3020452890 |
|
Xerox® VersaLink™ B600/B610 |
*3021452891 |
*3021452890 |
|
Xerox® WorkCentre 6515 |
*3005452891 |
*3005452890 |
|
Xerox® Phaser 6510 |
*3008452891 |
*3008452890 |
|
Xerox® VersaLink™ B7025 / B7030 / B7035 |
*3004452891 |
*3004452890 |
|
Xerox® C8000 / C9000 |
*3023452891 |
*3023452890 |
|
Xerox® C8000W |
*3064452891 |
*3064452890 |
Changing default printing value on AltaLink devices
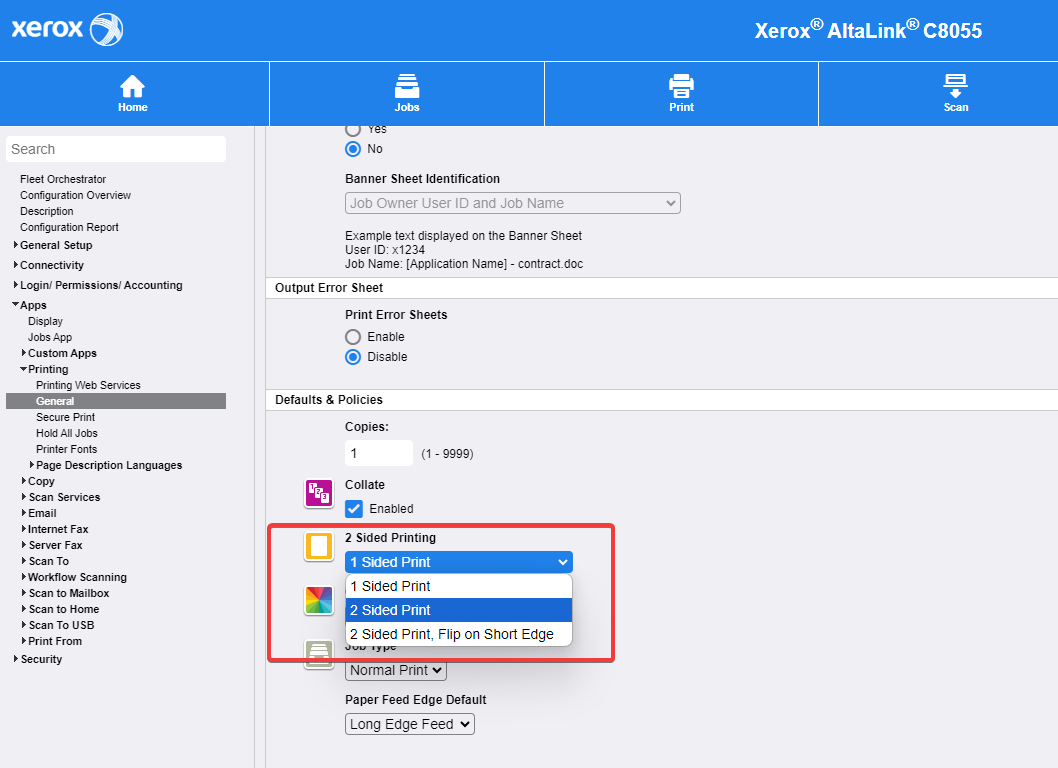
We recommend you to set up the following to prevent issues with duplex printing with basic finishing options.
-
Log in to the MFD as an administrator.
-
Go to Properties > Apps > Printing > General.
-
In 2 Sided Printing, select 2 Sided Print.
-
Click Save.
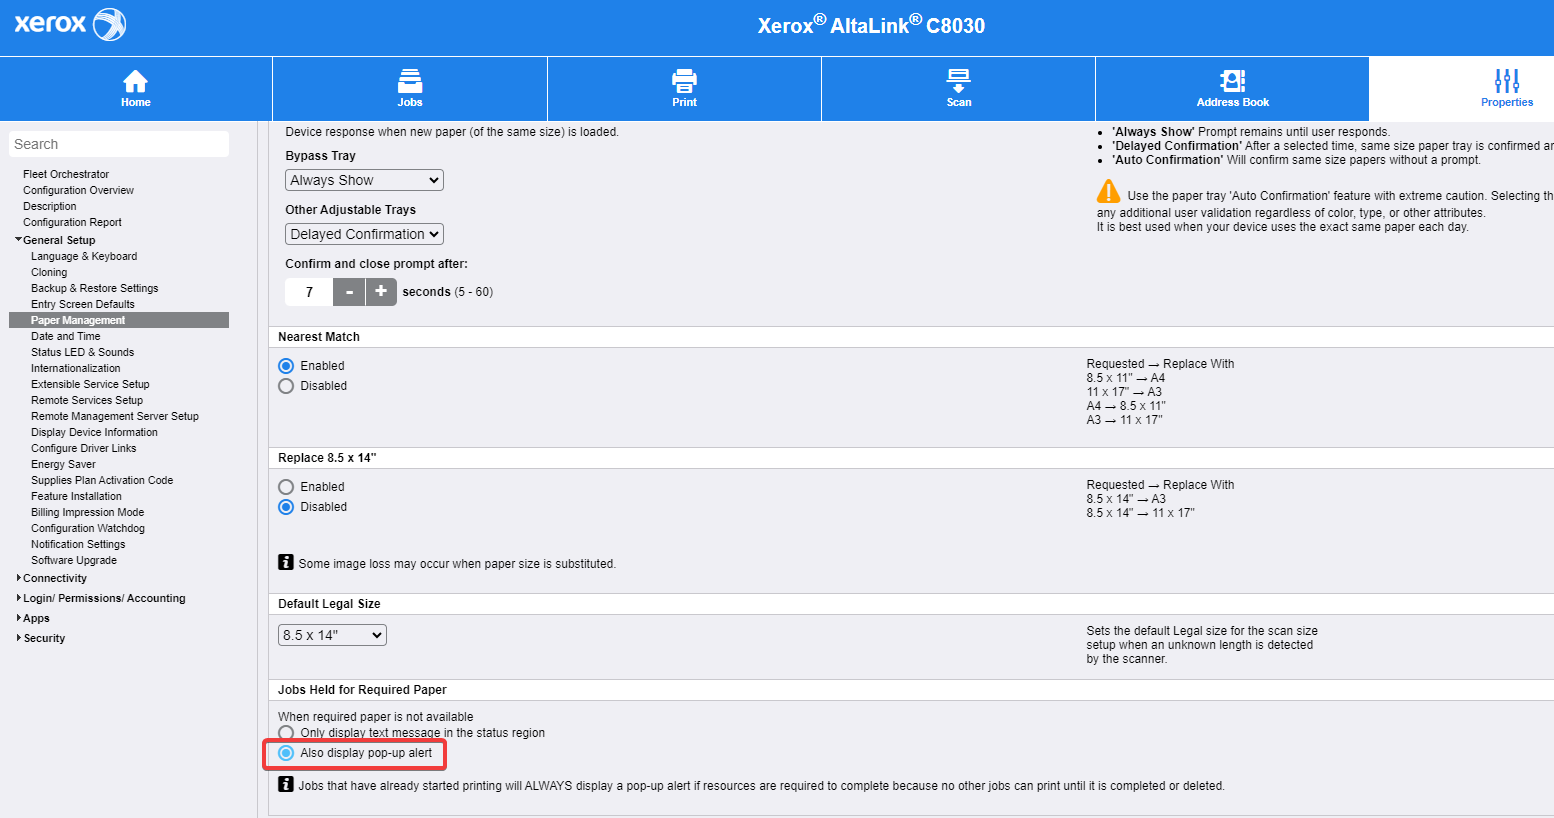
Allowing "Resources Required" native pop-up screen on Altalink devices
-
Log in to the MFD as an administrator.
-
Go to Properties > General Setup > Paper Management > Required Paper Policies.
-
In Jobs Held for Required Paper section, select Also display pop-up alert option.
-
Click Apply.
Setting the default screen when originals are detected
This setting is necessary to prevent the cloud terminal from being closed and another application being opened when the user puts a document in the feeder. Also, if Kiosk mode is enabled on the MFD, the user would be prompted to enter admin credentials for the MFD.
-
Log in to the MFD as an administrator.
-
Go to Properties > General Setup > Entry Screen Defaults.
-
In Default Screen when Originals are Detected, select None (Take No Action).
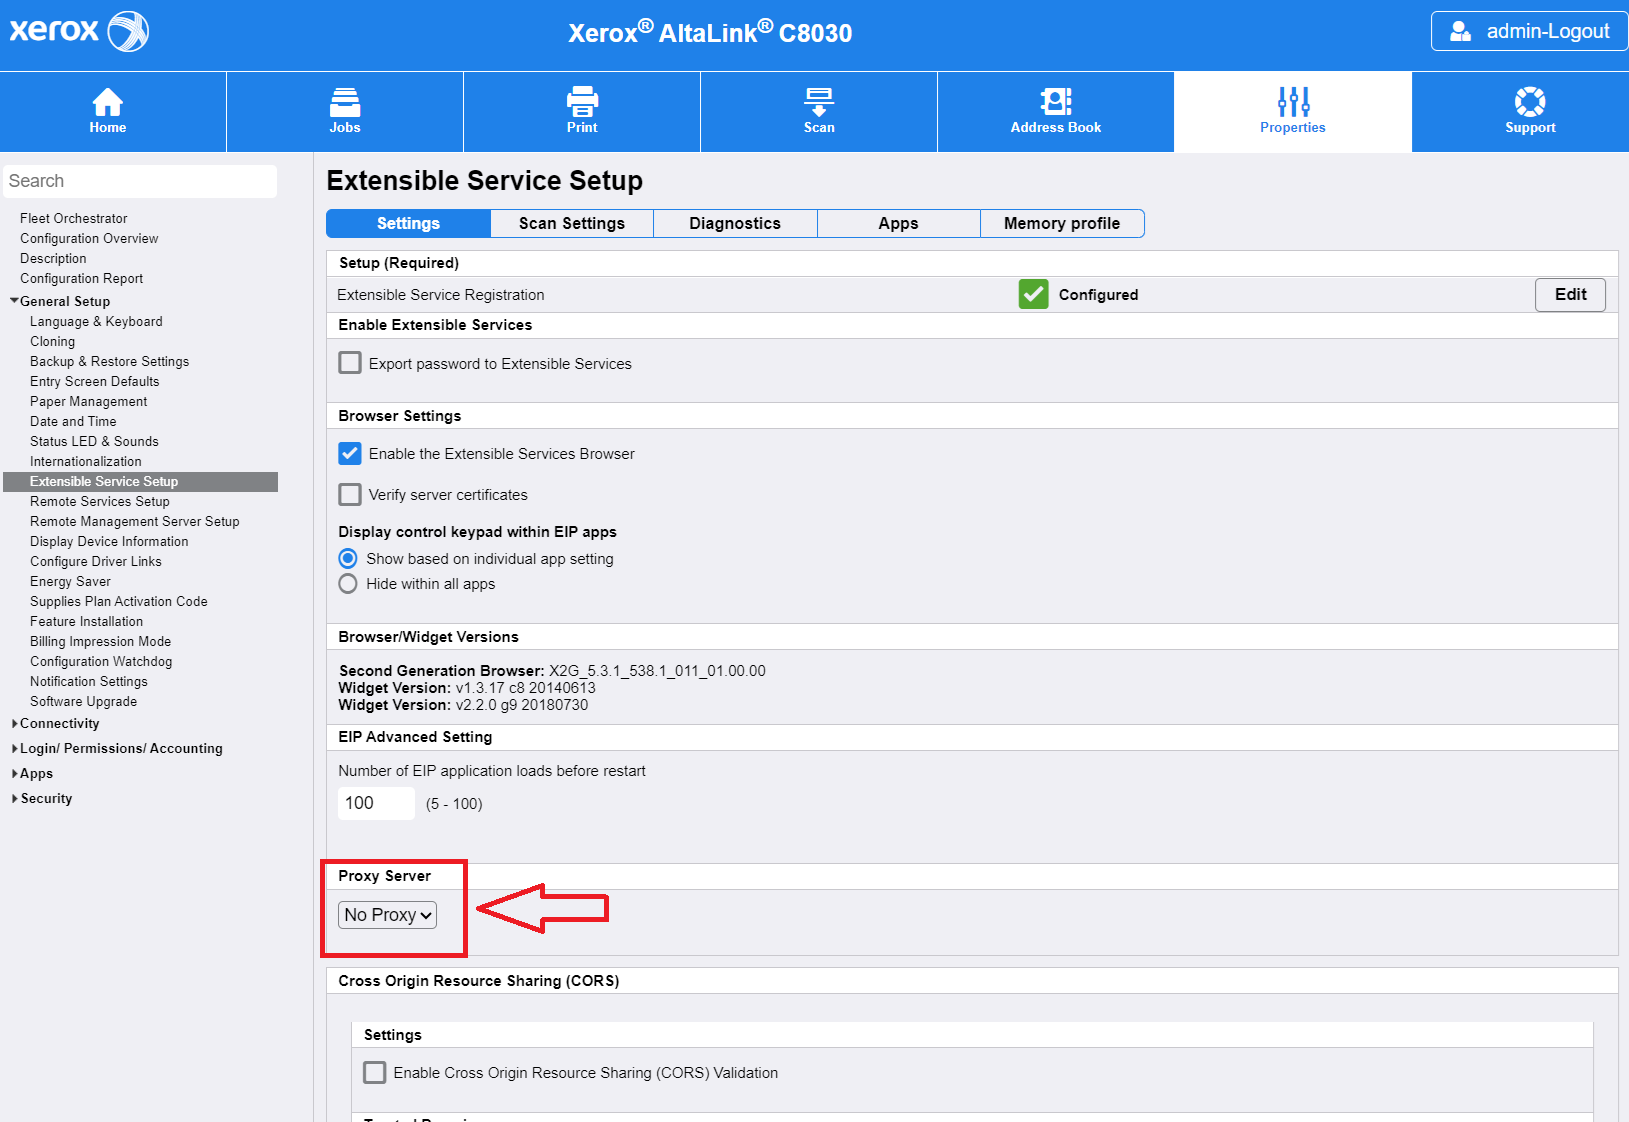
Changing the proxy settings on AltaLink devices to prevent issues while scanning to WebDAV
This section is fully automated in the Terminal Deployment tool.
If your MFD supports WebDAV but you are receiving an error message "A connection to the server could not be established" while scanning to WebDAV, perform the following steps to bypass the proxy servers.
-
On the MFD's home screen, tap Properties to access the MFD's Control Panel. If you cannot access it this way, consult your the manual for your MFD's model.
-
Go to General Setup > Extensive Service Setup.
-
Locate Proxy Server Settings.
-
Set Proxy to No Proxy.
-
Tap Save.
-
The device may require a restart for the changes to take effect.
Installing the cloud terminal manually
-
Start with adding your Xerox MFD and creating the embedded configuration in SAFEQ Cloud Web UI. See section Adding the Xerox printer and Embedded configuration in SAFEQ Cloud Web UI of this guide.
-
Go to Printers > Embedded templates and open the newly created embedded configuration.
-
Click Manual operations.
-
Follow the instructions in the dialogue window.
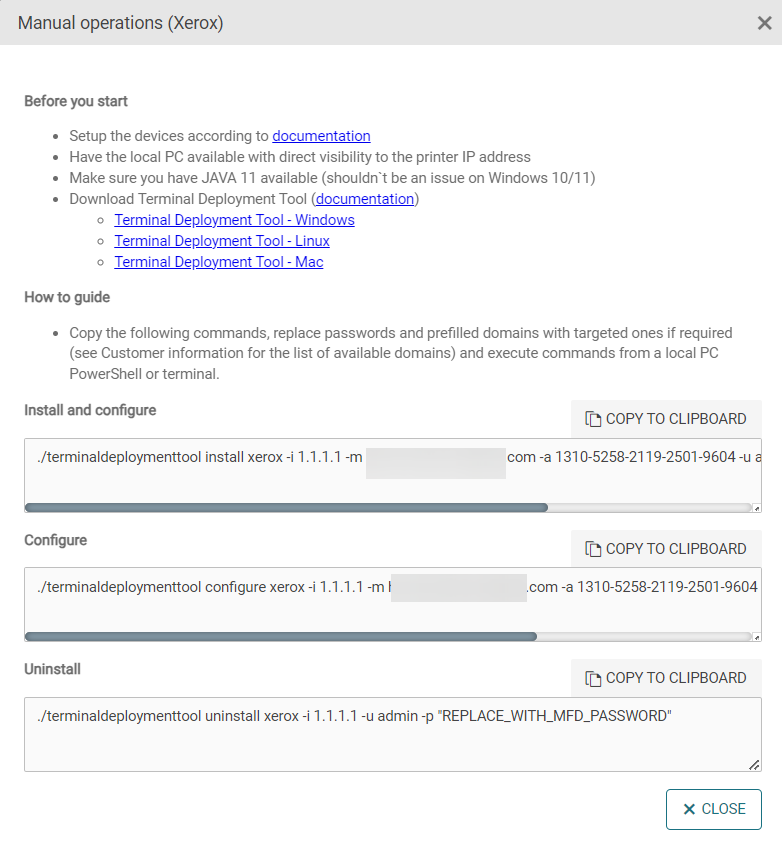
The example commands are generated regardless of the operating system.
For Windows, the full file name should be used in the command so that each command starts with
./terminaldeploymenttool.bat
Web Services - IP Lockout
The device includes a security feature that locks out an IP address after multiple failed login attempts to the Web UI or Web Services.
-
Cause: Too many failed authentication attempts from the same IP address.
-
Effect: The locked-out IP cannot access the Web UI or certain services until the lockout is cleared or the timer expires.
Administrator Action - Clearing IP Lockout
Only administrators can clear the lockout. To restore access:
-
Log in to the Xerox device as Administrator from a different IP address that is not locked out.
-
Navigate to:
Apps / Printing/ Printing Web Services / Advanced Settings (location may vary by model/firmware)
or Connectivity / Setup / HTTP / Web Services / Advanced Settings
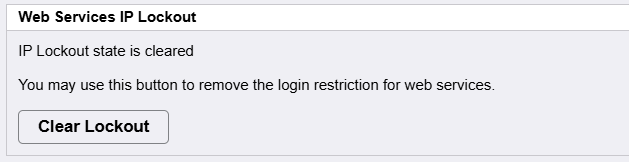
-
Select Clear Lockout (or equivalent option) to restore access for that IP.
Registering the cloud terminal in SAFEQ Cloud Web UI
-
Upon installing the MFD, you will see a screen with the Serial Number of the device (prefixed with xe_). Note down the ID number.
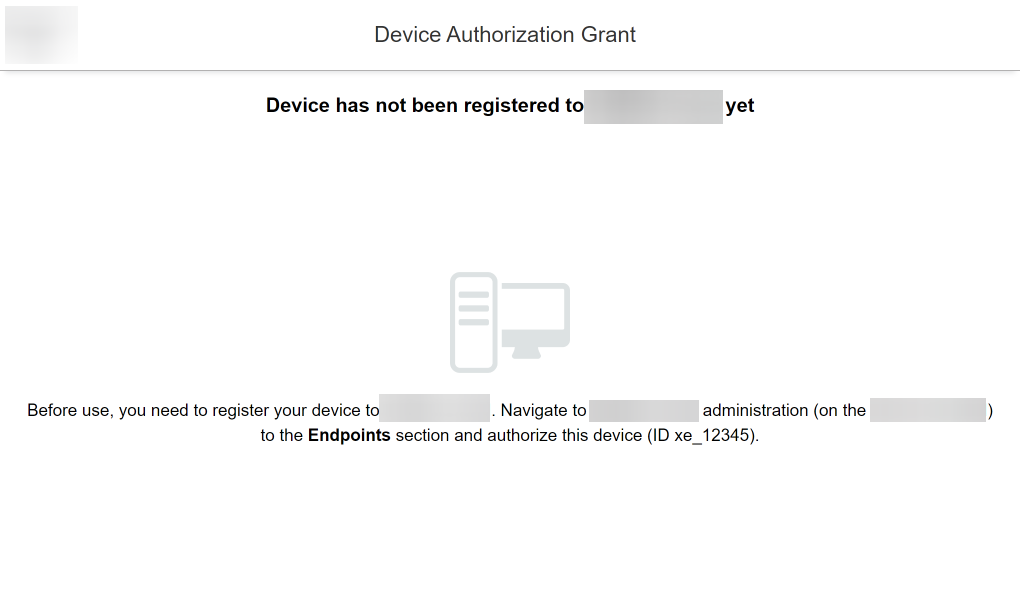
-
In SAFEQ Cloud web UI, go to Security > Endpoints and find the entry with ID number that you noted in the previous step. Select the entry and click Authorize selected.

-
Back on the MFD, you will see the following screen:
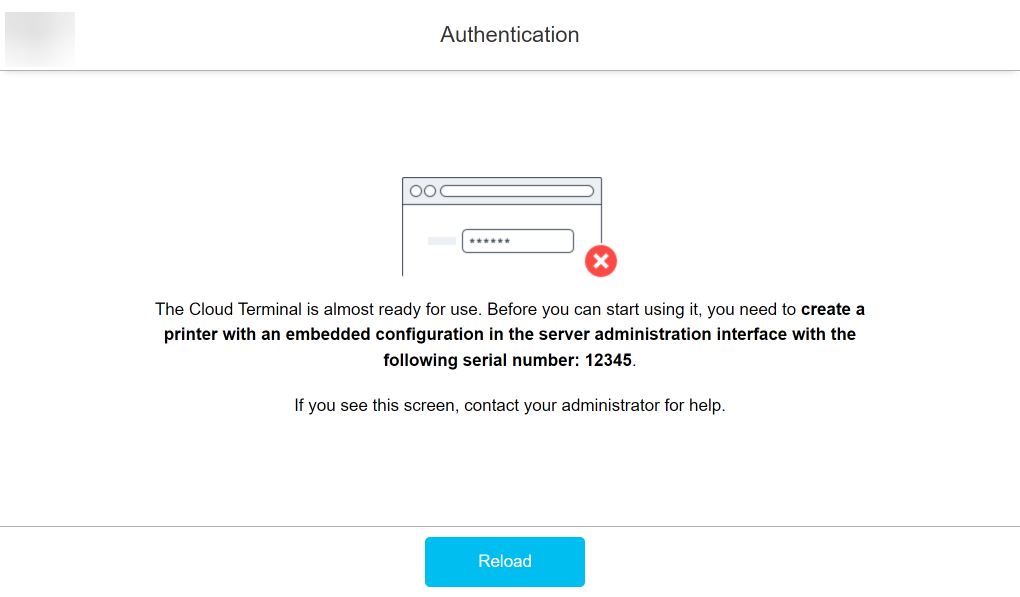
Adding the Xerox printer and Embedded configuration in SAFEQ Cloud Web UI
These steps are optional and if not performed, the Xerox printer will be added automatically after the endpoint is authorised, see Registering the cloud terminal in the SAFEQ Cloud Web UI section of this page.
-
In the SAFEQ Cloud Web UI, go to Printers > Embedded templates.
-
If not done already, create an embedded configuration for your Xerox MFD(s) by clicking Add.
-
In Vendor, select Xerox.
-
In Application type, select Xerox Gen 2.
-
Fill in the rest of the configuration according to your needs and click Save. For more information on embedded configuration, see Embedded Terminals' configuration.
-
Go to Printers.
-
Click Add.
-
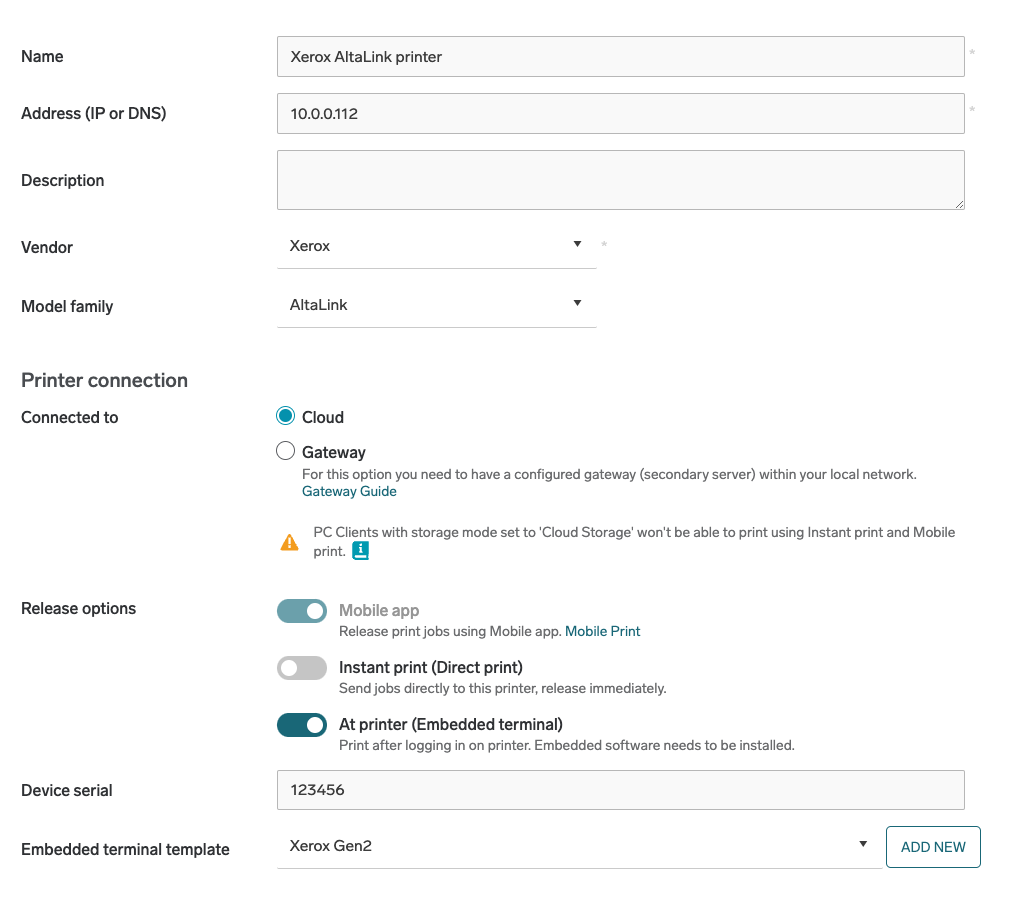
In Vendor, select Xerox.
-
Fill in all required information.
-
Select the At printer (Embedded terminal) release option. This will display additional fields related to embedded configuration.
-
In Embedded configuration, select your Xerox embedded configuration from the list.
-
Click Save.
-
Return to MFD, if you see the screen from the end of the previous section tap Reload. The MFD will now display a login screen with your chosen authentication type.
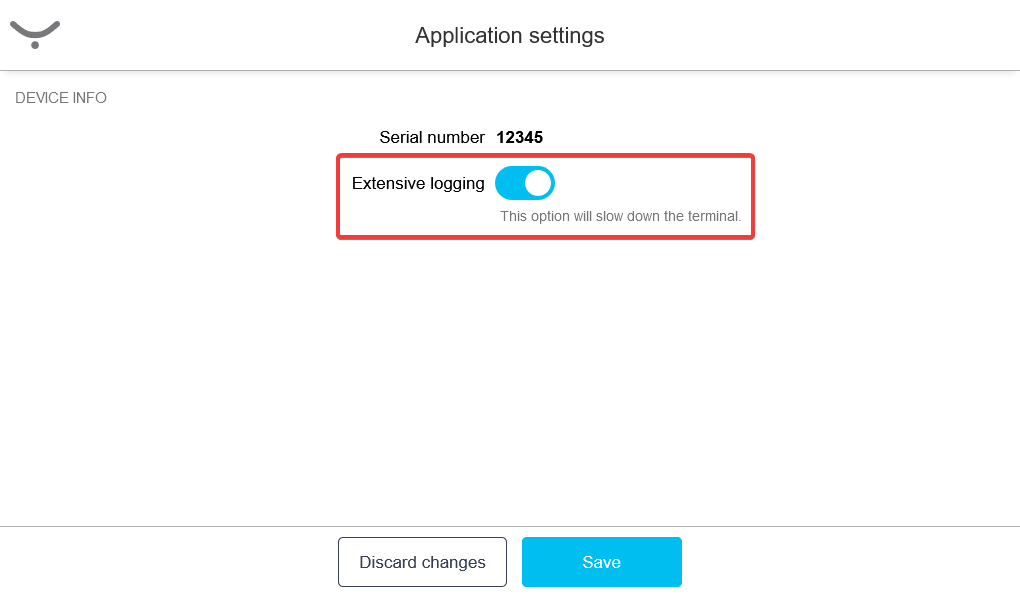
Extensive logging
In case of problems, we might ask you to enable detailed logs from the terminal. This is done in the Application settings menu. Note that this option may significantly slow down the terminal.
-
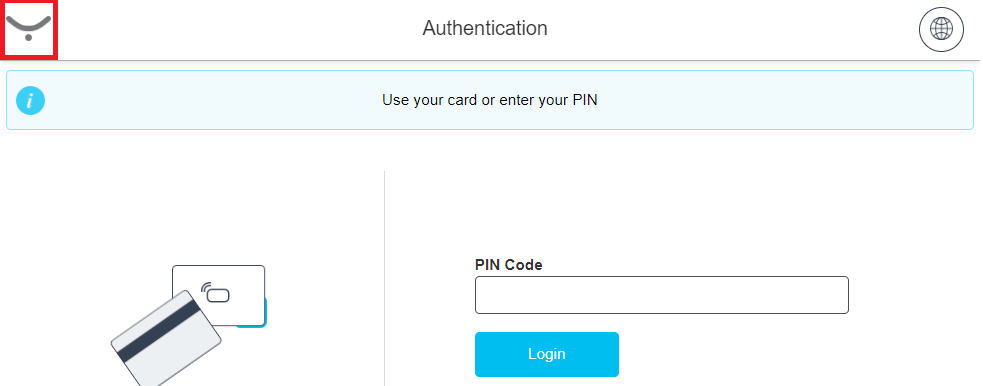
At the MFD, go to the Authentication or My quick actions screen.
-
Tap and hold the logo in the top-left corner for at least 5 seconds (note that the logo will be different if you have set up a custom logo in the SAFEQ Cloud Web UI).
-
Enable Extensive logging.
-
Tap Save.
How to use YSoft MFX and TWN4 card readers with older VersaLink devices
The older Xerox VersaLink devices use plugins for card authentication. This section describes how to use the TWN4 readers and the YSoft MFX readers with these devices
The screenshots were taken on Xerox VersaLink B605 and Xerox VersaLink C405DN. The UI may look different on other models.
Card reader plugins must be installed before launching the terminal. Otherwise, the MFD may experience performance slowdowns. If this occurs, you will need to restart the device, uninstall the cloud terminal immediately after bootup, install the plugins manually, and then perform the cloud terminal installation again.
TWN4 card readers
To use the TWN4 card reader, connect it to the MFD. The cloud terminal will detect the connected card reader, and card authentication will work out of the box.
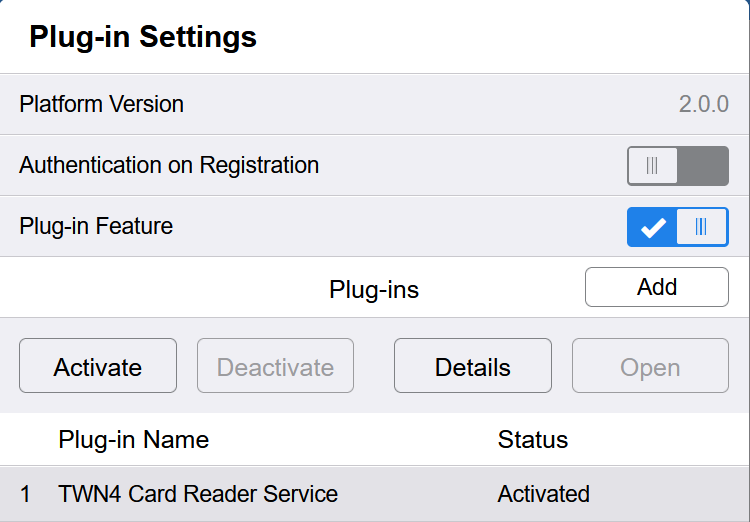
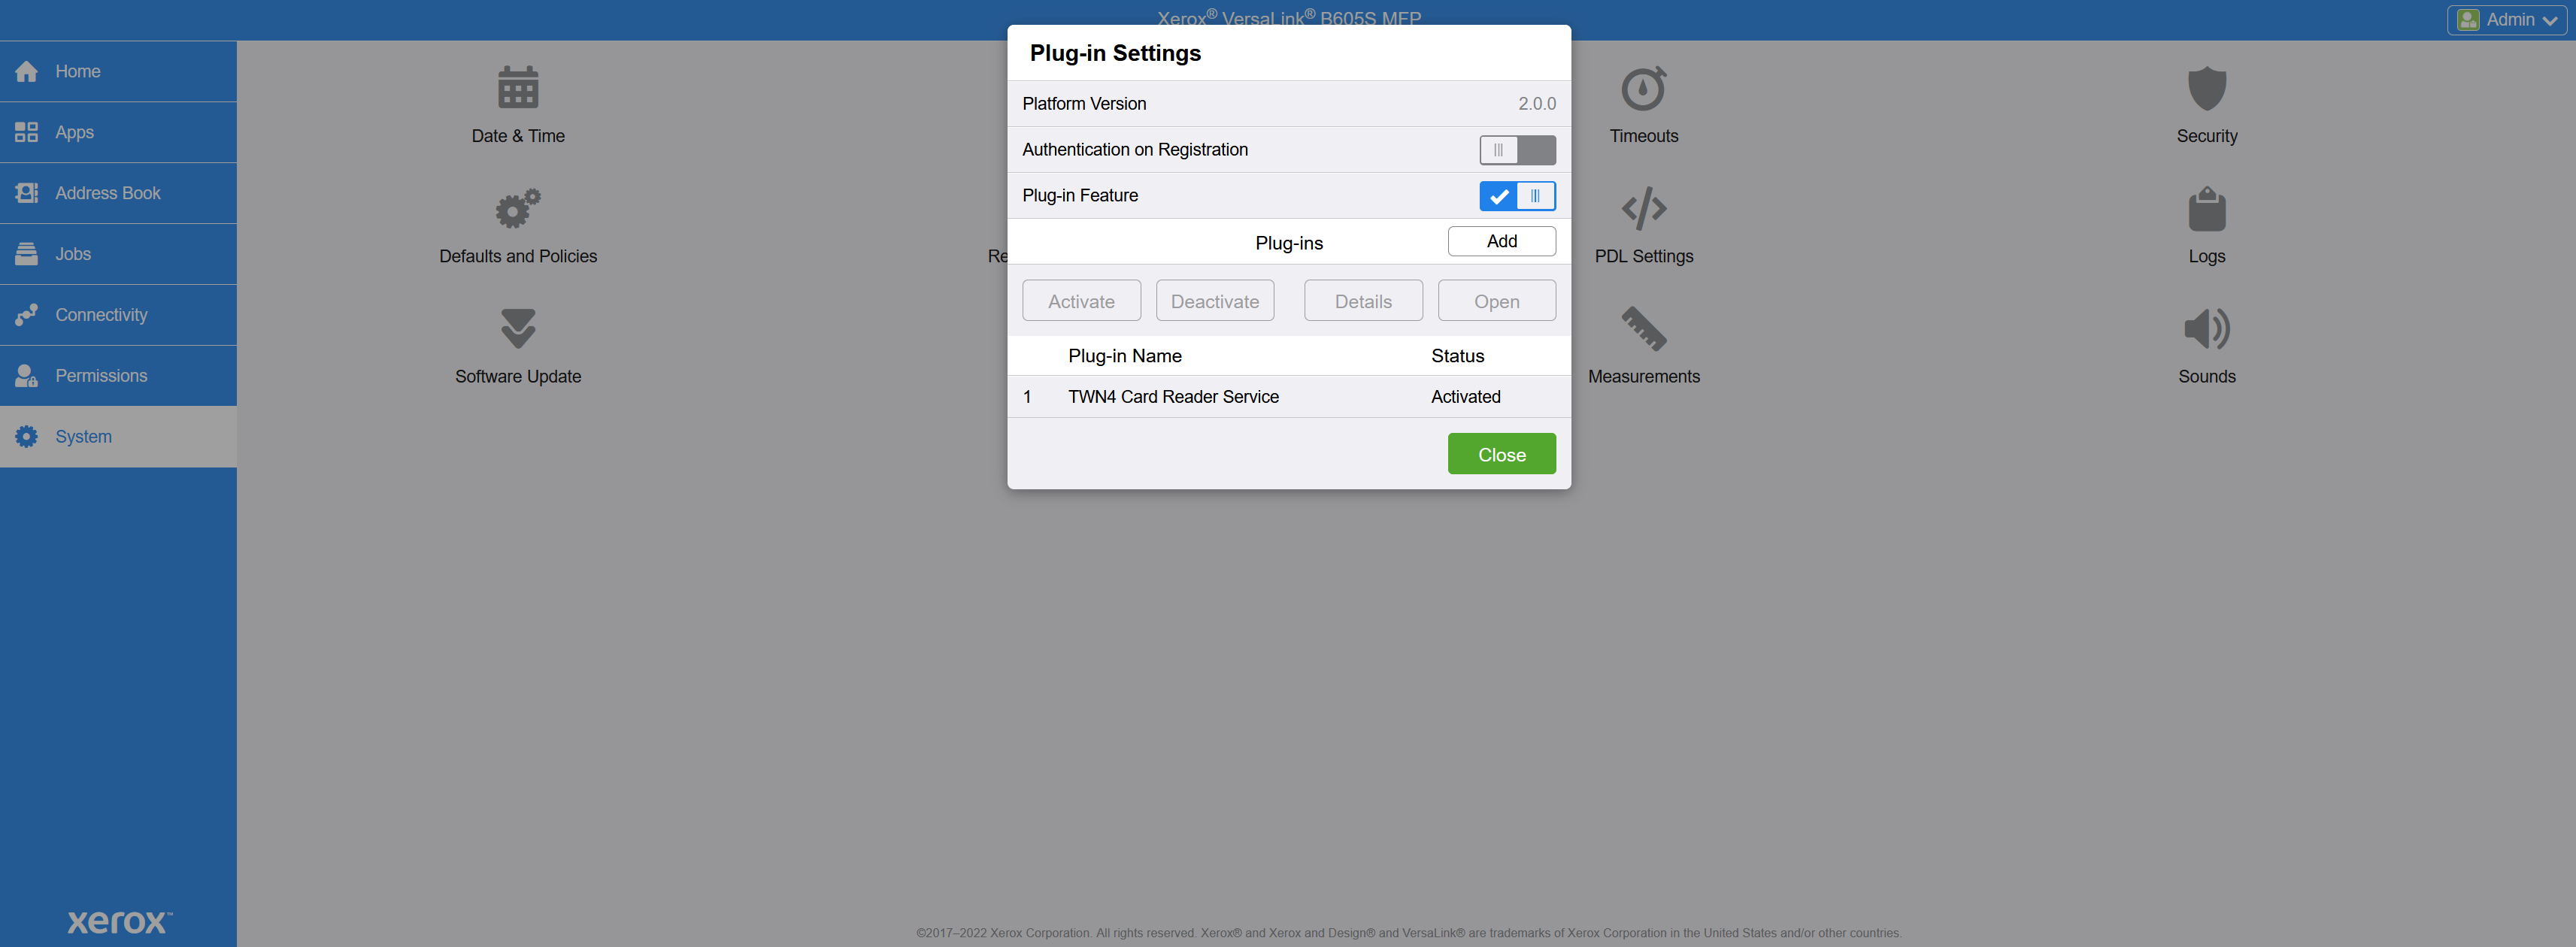
In case of problems, check if the TWN4 card reader service plugin is active:
-
Log in to the MFD's admin interface.
-
Go to System > Plug-in settings.
-
Check if the Plug-in Feature is enabled. If not, activate the TWN4 Card reader service.
-
Restart the MFD.
YSoft MFX card readers
This step is done automatically during installation via the Terminal Deployment Tool. Use the following guide in case of the plugin setup failing consistently during the installation.
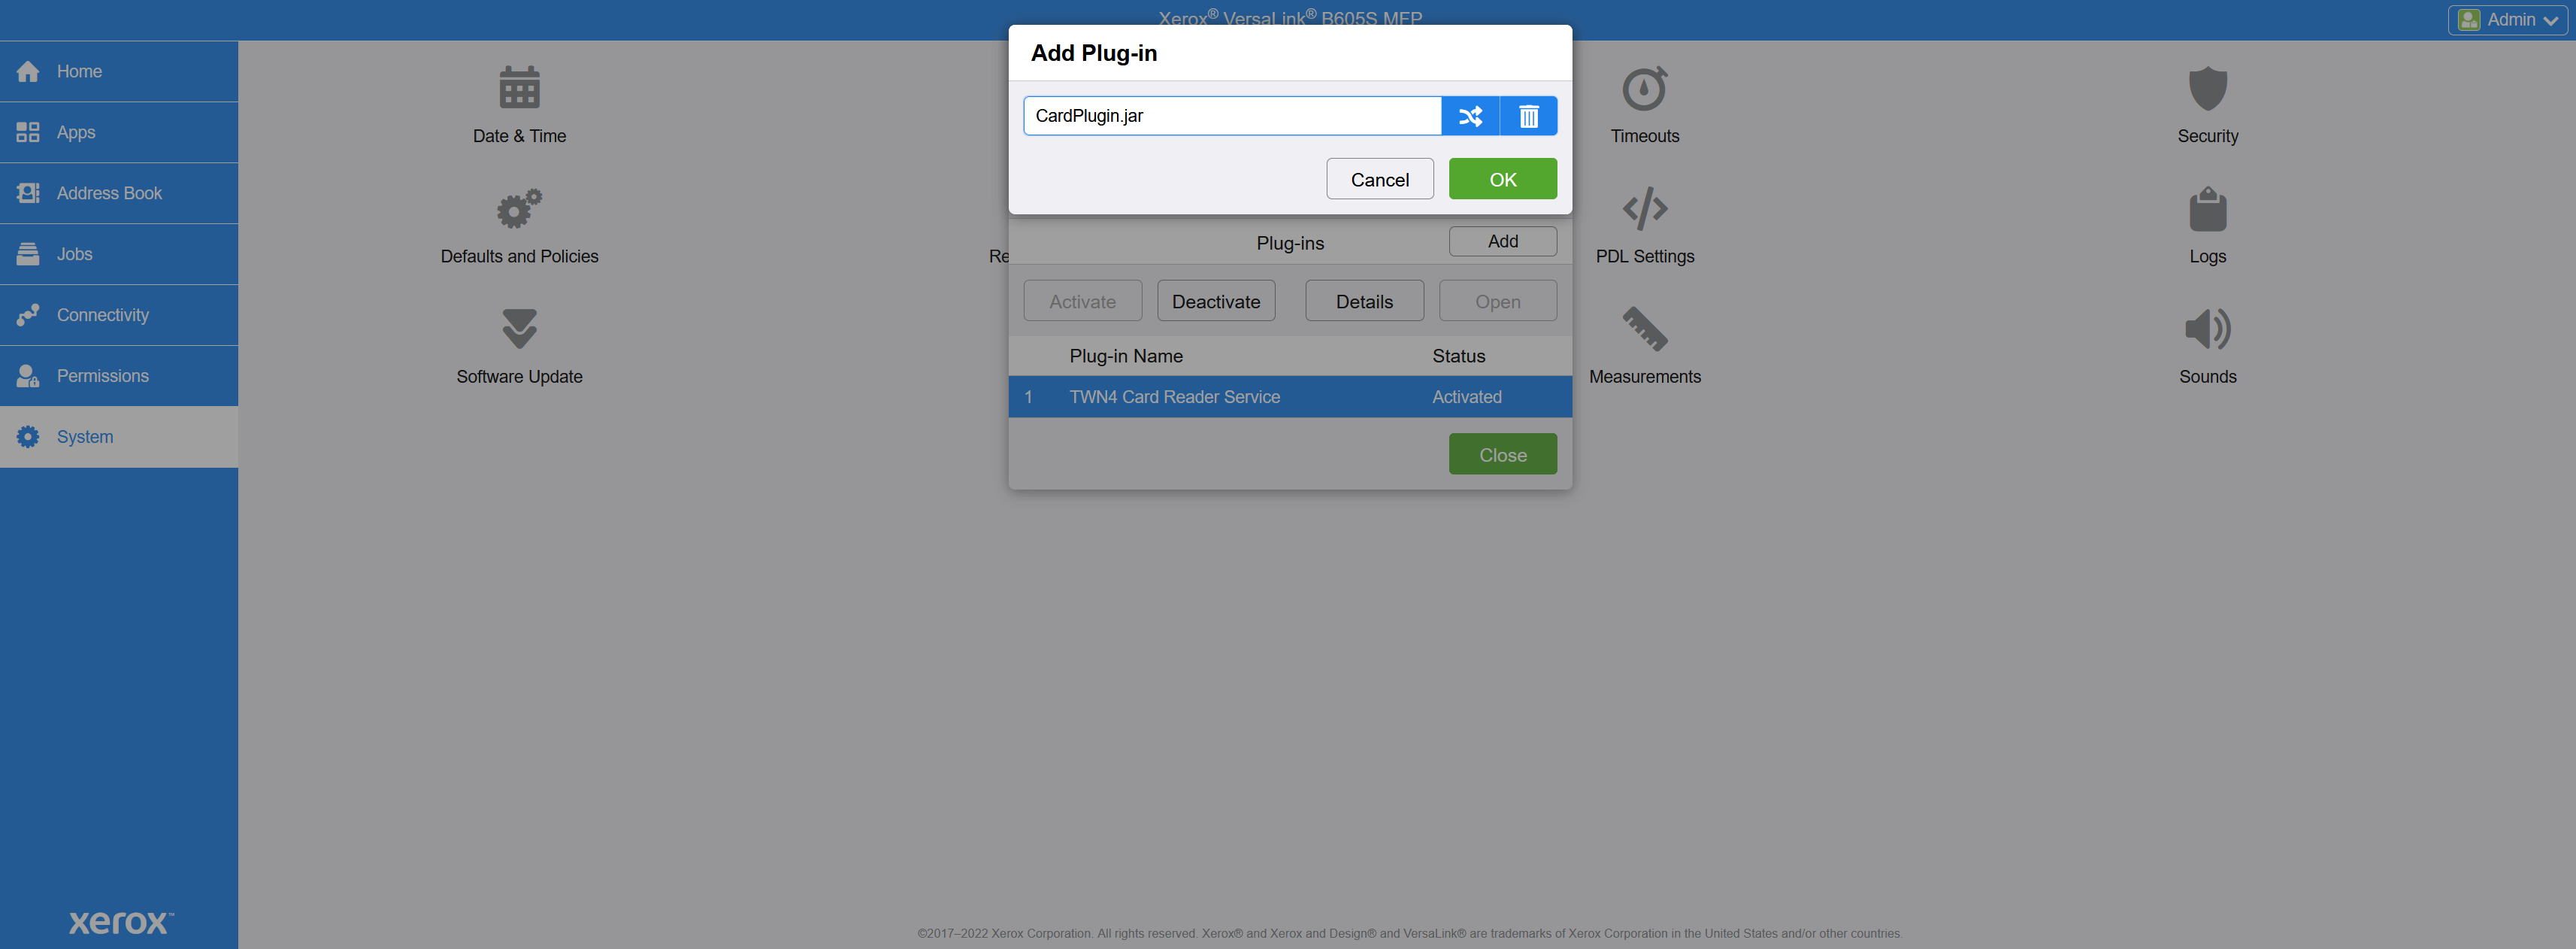
For the YSoft MFX reader, you must install two plugins (CardPlugin and CardService) manually. They are part of the terminal deployment tool and they can be found in terminaldeploymenttool/packages/xerox/.
To install the plugins, perform the following steps:
-
Log in to the MFD's UI as an administrator.
-
Go to the system settings and enable the Plug-in feature.
-
Notice that the TWN4 card reader service is enabled. You must deactivate it (it cannot be deleted).
-
Add both plugins from the terminal deployment tool and activate them.
-
Restart the device in order to deactivate TWN4 and activate the new plugins.