*Login at the device as admin
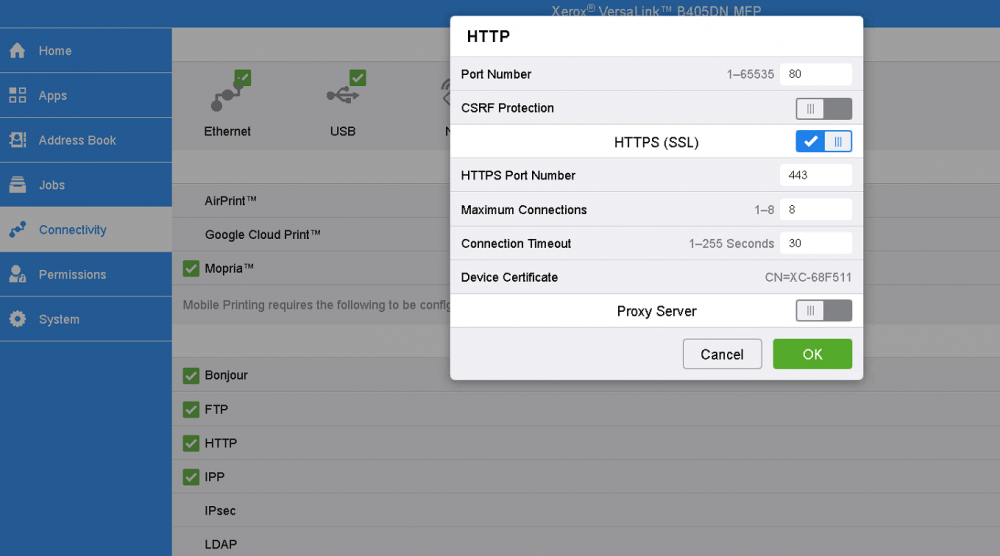
Go to Connectivity and setup SSL with settings as below picture.
Go to Connectivity and setup SNMP with settings as depicted on the next few pictures.

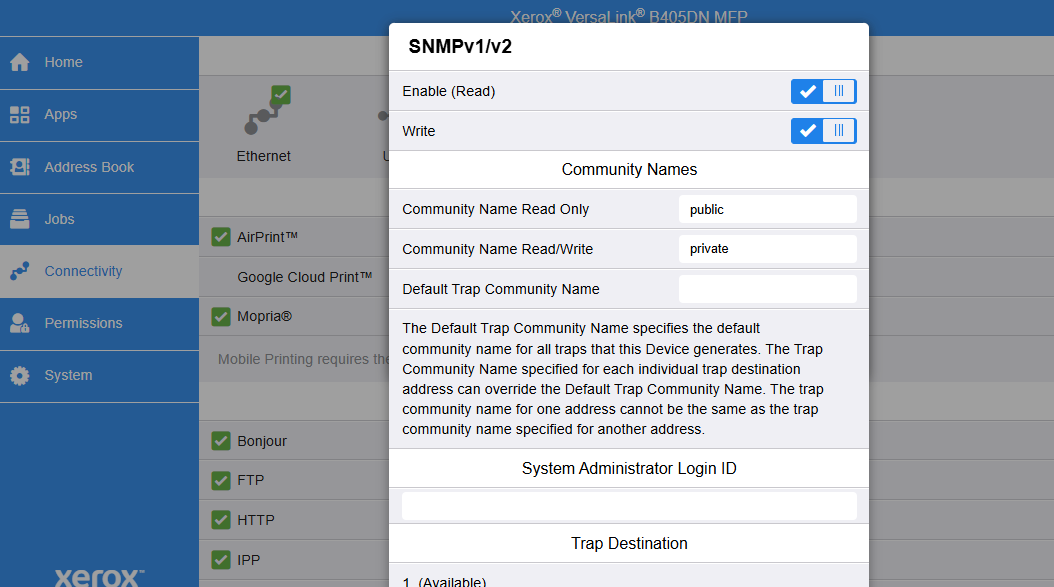
Note: Please, do not forget to fill the values of the fields "Community Name Read Only" and "Community Name Read/Write" (for instance the values "public" and "private" as shown on the picture above) into the corresponding fields of the "Embedded Terminal Template" in the SAFEQ Cloud Web UI.
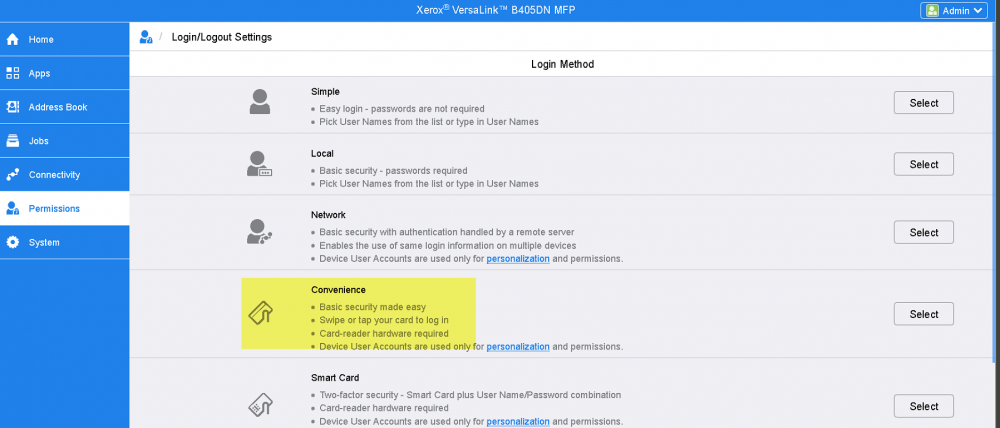
Go to Permissions, select Convenience and setup device as depicted on the next few pictures.
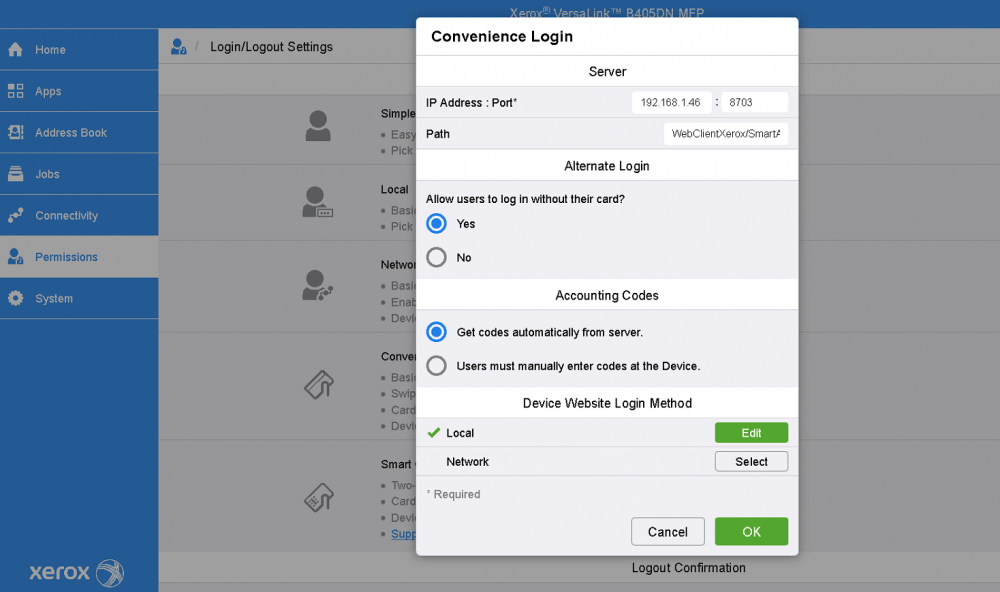
In the "Convenience Login"
-
As the "IP Address" fill the IP or rather domain name of the Secondary Gateway as it is filled in the field Domains in the Customer Account in the SAFEQ Cloud Web UI (details described in the Secondary Gateway mapping).
-
As the "Port" fill the number "8703"
-
As the "Path" fill "WebClientNG/Xerox/SmartAuthServerService"
-
Select "Get codes automatically from server" at "Accounting Codes"
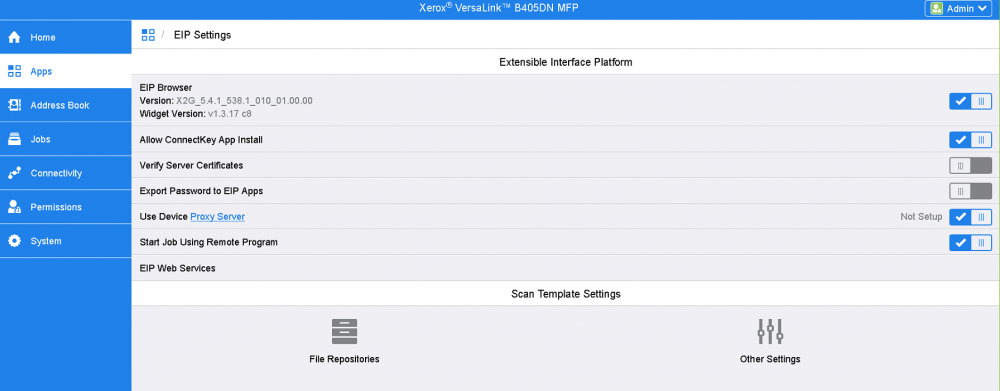
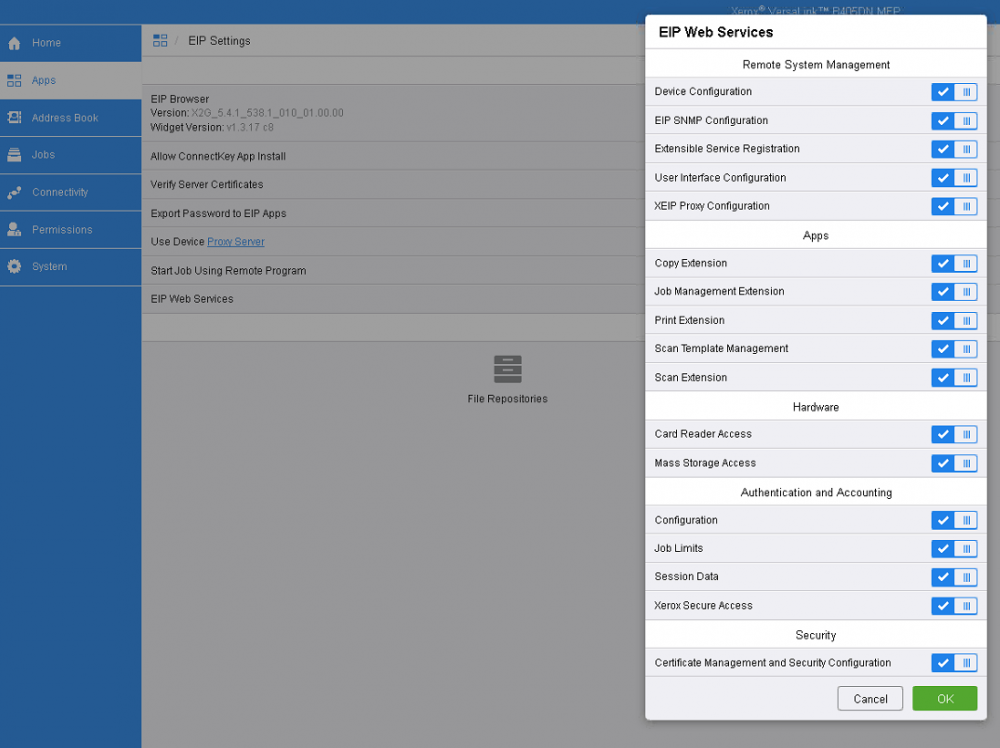
Under Apps, setup the EIP settings
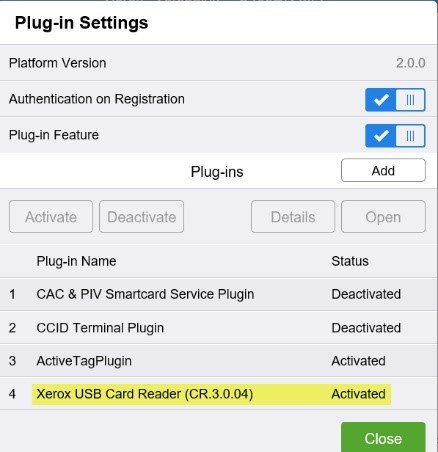
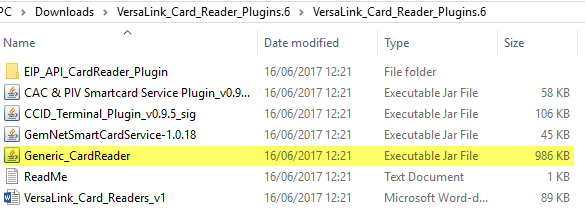
To setup a card reader on the Xerox Versalink, it is necessary to download and install the Versalink card reader plugin, to be downloaded from Xerox web
Select Xerox USB Card reader