Relevant Products
Adding IPP print queue is available in PRO PRINT PRO MFD
If you are not using the SAFEQ Cloud Client for MacOSX, you can print directly from the programs on your computer, by adding an IPP print queue manually. Your administrator must provide you with the print queue address and with information on which print driver to use. When you have this information, perform the following steps:
-
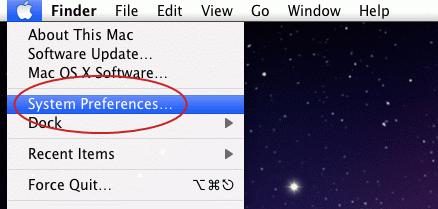
Go to System Preferences.
-
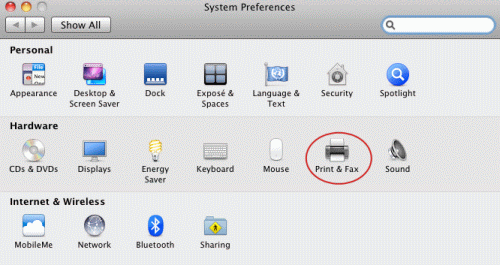
Click the Print & Fax icon.
-
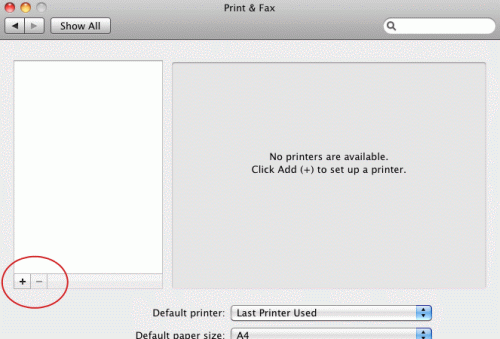
Click the + to add a new printer.
-
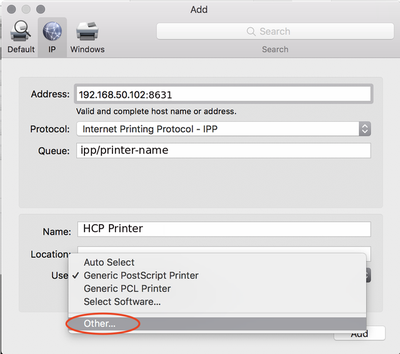
The Add dialogue window will be displayed. Enter the following:
-
In Address, enter the print queue address that you received from your administrator.
-
In Protocol, select Internet Printing Protocol – IPP.
-
In Queue, enter the queue name that you received from your administrator
-
In Name, enter a user-friendly name. This name will be visible only to you.
-
In Use, select the print driver recommended by your administrator.
Information for administrators:
-
Address: SAFEQ Cloud-gateway:8631 (or 9631 for HTTPS)
-
Queue: ipp/input-port-name
-
-
-
If a window opens asking about options, click Continue.

-
Now you can print from the programs you use. In the Print dialogue, select your newly created print queue.