
Relevant Products
Adding IPP print queue is available in PRO PRINT PRO MFD
If you are not using the SAFEQ Cloud Client for Windows, you can print directly from the programs on your computer, by adding an IPP print queue manually. Your administrator must provide you with the print queue address and with information on which print driver to use. When you have this information, perform the following steps:
Windows 10
-
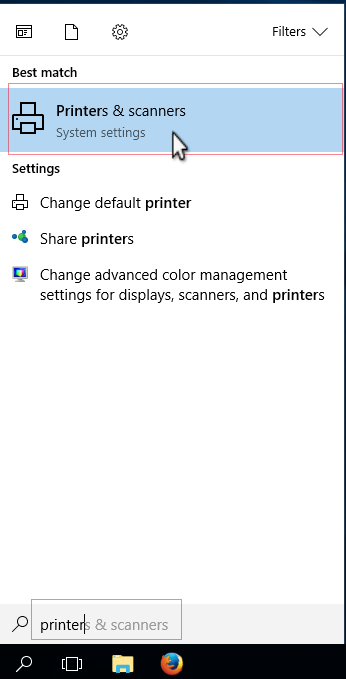
Enter printer in the Search field in in your task bar. Click Printers & Scanners.
-
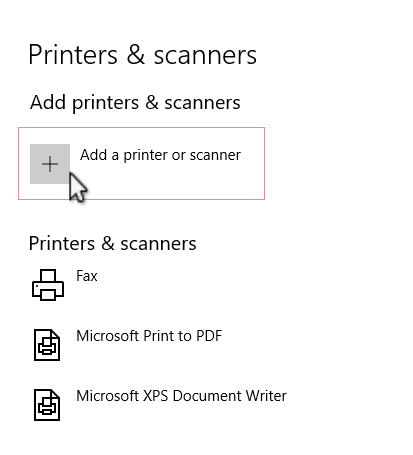
Click Add a printer or scanner.
-
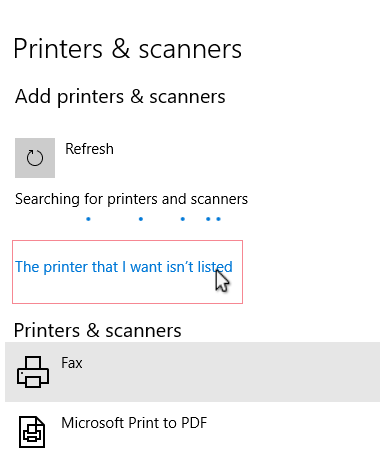
Wait until you see The printer that I want isn’t listed, and click the link.
-
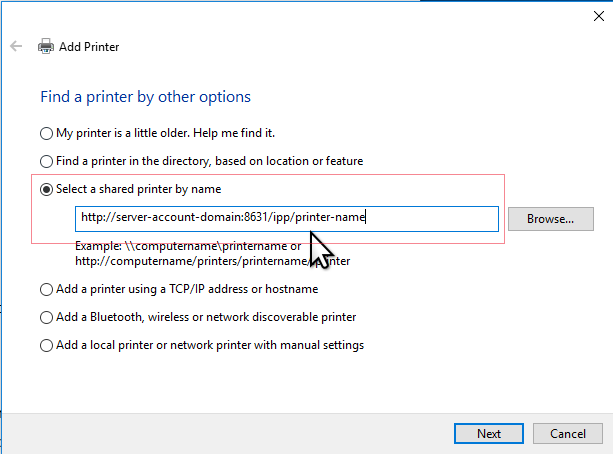
Select Select a shared printer by name and enter the address of the IPP print queue that you received from your administrator.
Information for administrators regarding the print queue URL customization:
SSL (requires a valid certificate for the domain):
https://<server-fqdn>:9631/ipp/<printer-name>/accountdomain=<account-domain-fqdn>/username=<user-name>/providerid=<auth-provider-ID>
Non-SSL:
http://<server-fqdn>:8631/ipp/<printer-name>/accountdomain=<account-domain-fqdn>/username=<user-name>/providerid=<auth-provider-ID>
For both types:
-
Replace <server-fqdn> with the domain name of the server that hosts the IPP service.
-
Replace <printer-name> with the print queue name or ID as created in the Print queues section in SAFEQ Cloud Web UI. We recommend using the ID of the printer in the IPP URL, so that any potential queue renaming doesn’t break any existing client configurations. You can leave out the port and use the default HTTPS port (443) in environments with standard port 443 support.
-
Replace <user-name> with the user name.
-
Replace <account-domain-fqdn> with your SAFEQ Cloud domain name.
-
Replace <auth-provider-ID> with your authentication provider ID as created in the Authentication section in SAFEQ Cloud Web UI. This can be useful if your users have the same usernames in different providers.
-
-
When prompted for the Printer Driver, select the one specified by your administrator, or the SAFEQ Cloud Universal Driver depending on your installation.
-
Fill in user name and password in the printer properties if instructed by administrator.
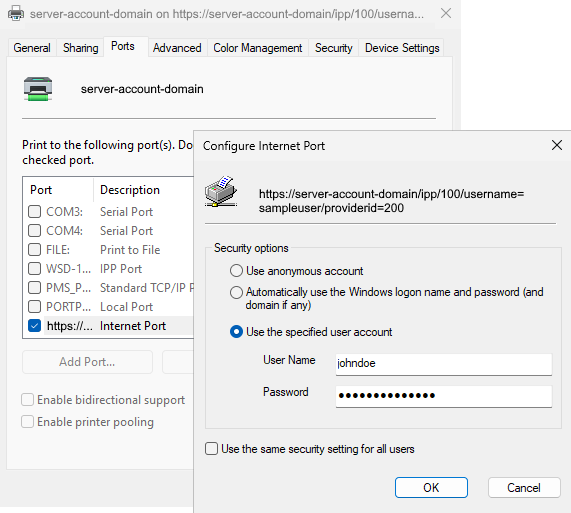
This is essential when the "IPP authentication is mandatory" is enabled in Security options; otherwise, the job will not appear in the print queue.