Note that this manual is for HP Workpath Cloud Terminal which is in SAFEQ Cloud Web UI called Workpath Gen 2. This terminal connects directly to the cloud. The first generation of the HP terminal (OXPd/Workpath Gen1) can connect to the cloud only via a secondary gateway.
Prerequisites
-
Make sure you have Cloud Terminal Integration enabled (for information on how to do this, see Enable Cloud terminal integration guide).
-
Minimum required firmware version is 5.6.0.1 or higher.
-
Make sure that you have a signing certificate selected. To check this, log in to SAFEQ Cloud Web UI and navigate to Security > Security options> scroll down to PKI and encryption section. The Signing certificate field must not be blank.
-
SAFEQ Cloud HP Workpath version 3.6 or later is required for Remote Configuration.
-
Workpath has to be enabled on the MFD. You can enable it in HP Command Center or in the EWS interface at the MFD, on the Security tab.
-
If you have a legacy Workpath terminal installed on the MFD, we recommend uninstalling it before proceeding further.
-
The device must be added to your HP command center account. Navigate to the last window on the terminal, tap HP Command Center, and follow the wizard.
-
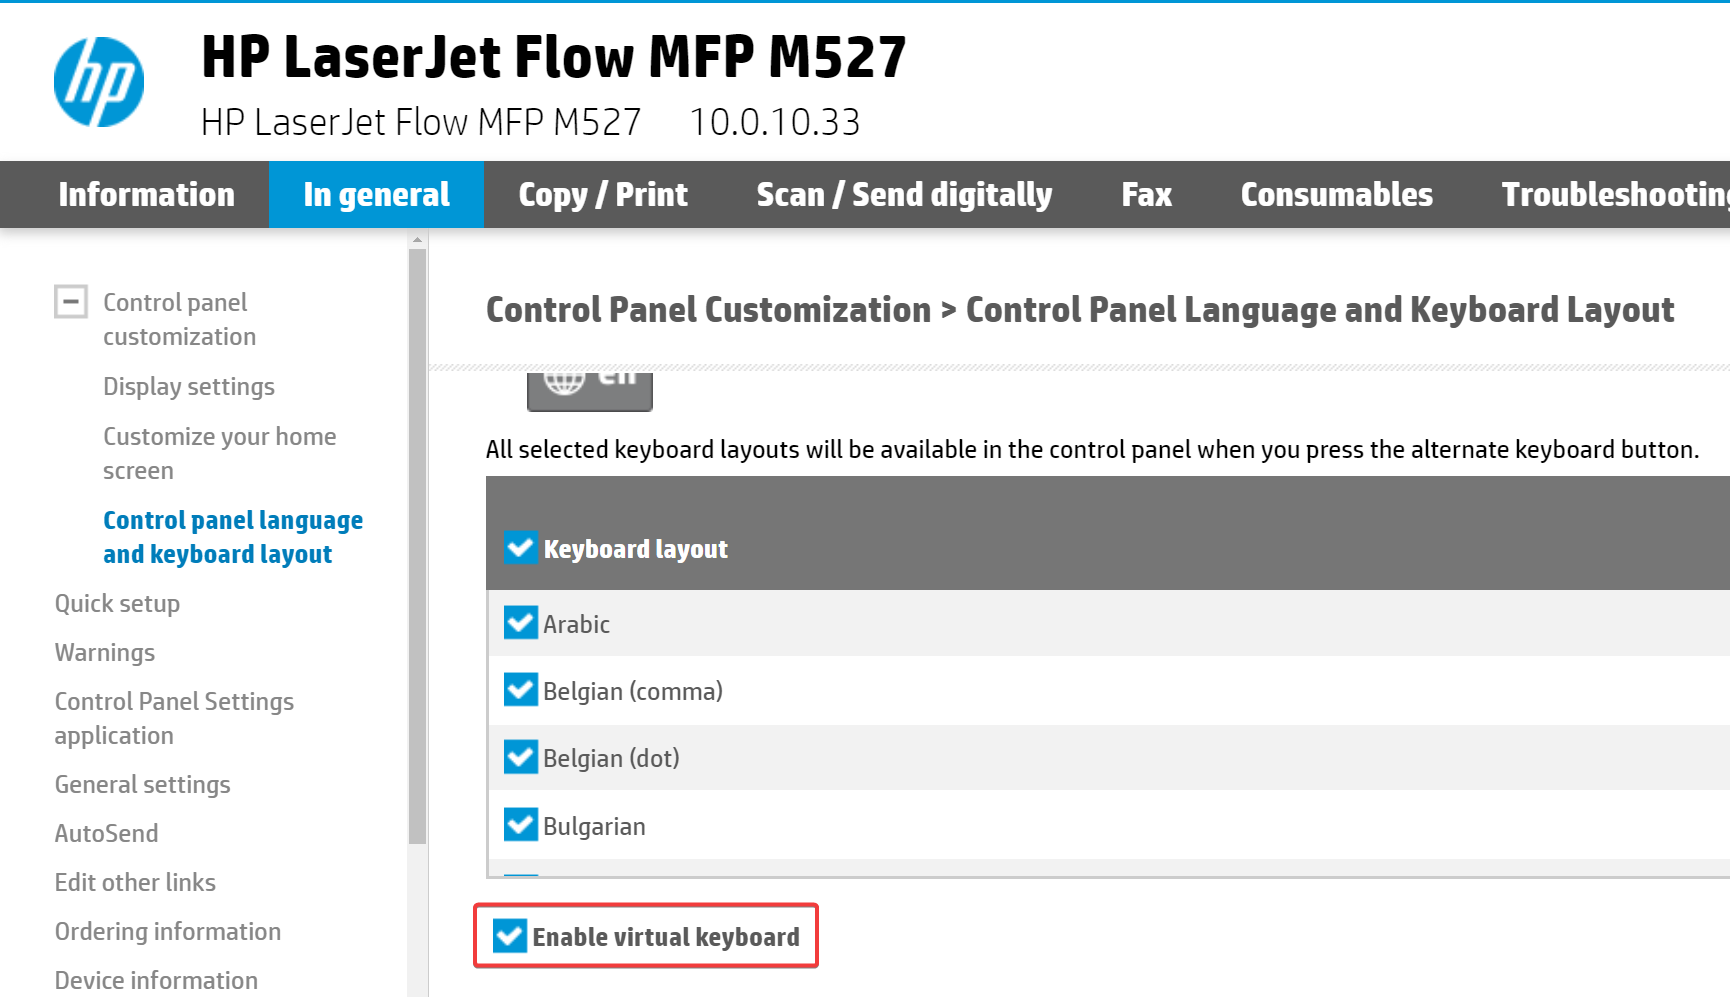
Native keyboard must be enabled on the MFD (in some instances, it is disabled by default).
-
Log in to the EWS interface as administrator.
-
Go to General > Control Panel Language and Keyboard Layouts.
-
Select Enable Virtual Keyboard. If you don't see this checkbox, it means that the keyboard is enabled by default.
-
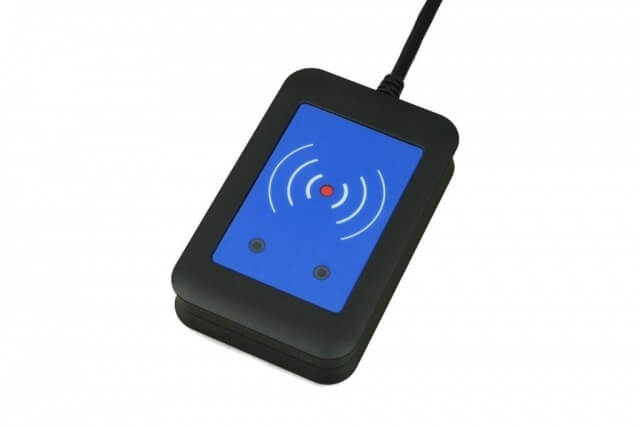
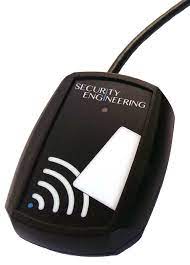
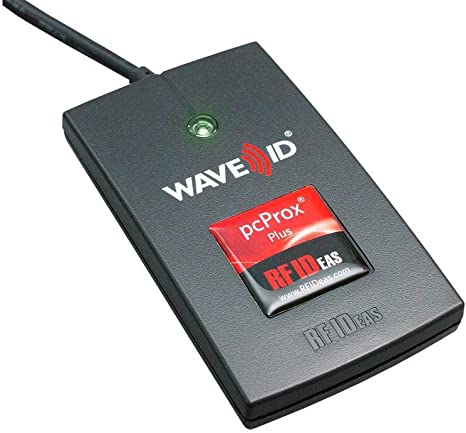
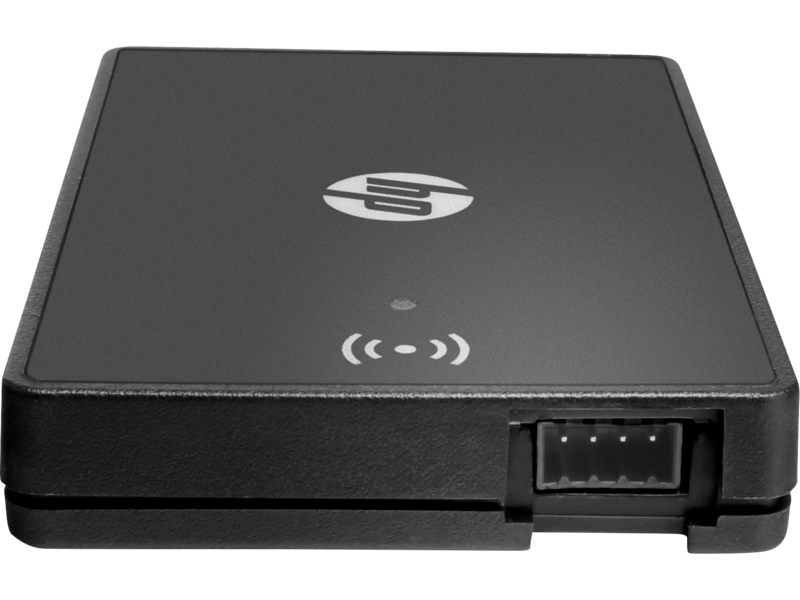
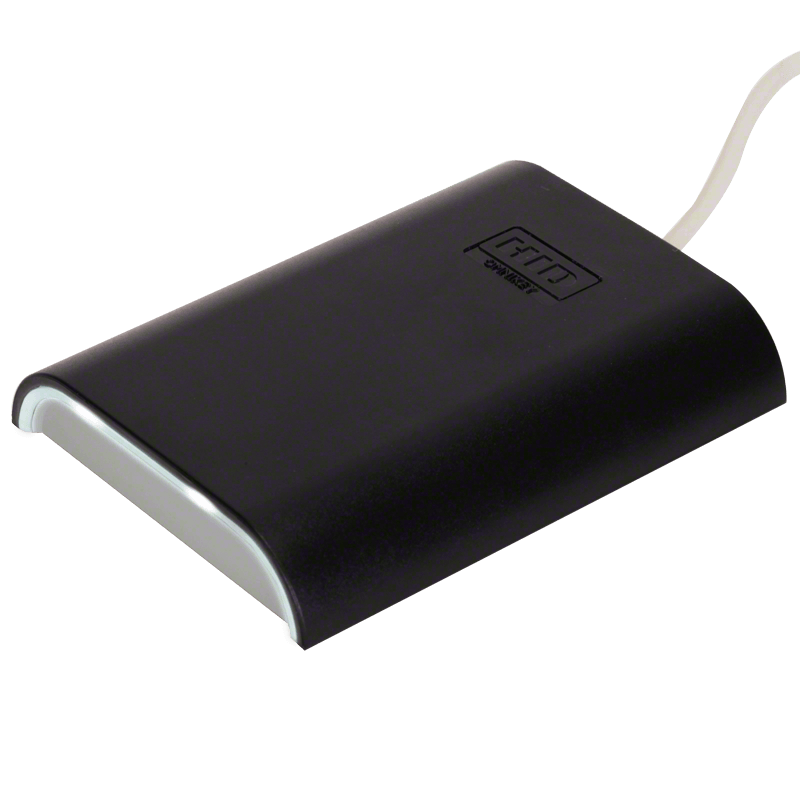
Card readers compatibility
|
VID |
PID |
Name |
Note |
|
|---|---|---|---|---|
|
09D8 |
0310 |
Elatec - TWN3 Mifare USB Keyboard emulating |
(untested) |
|
|
09D8 |
0410 |
Elatec - TWN4 Mifare USB |
tested |
|
|
09D8 |
0206 |
Elatec - TWN3 Mifare USB |
(untested) |
|
|
04D8 |
FE86 |
SB - SBR 0993 MIX |
(untested) |
|
|
0C27 |
3BFA |
RFIDeas - pcProx Card Reader |
(untested) |
|
|
03F0 |
0045 |
HP - X3D03A HP USB Universal Card Reader |
tested |
|
|
076B |
5428 |
HID - OMNIKEY 5427G2 (keyboard) |
(untested) |
|
|
1FC9 |
80D9 |
Seawing - Card Reader, issue IB-3416 |
(untested) |
|
|
214C |
0309 |
YSoft Card Reader, MU03065 - configured for HP mode |
tested |
|
|
0A5C |
BD1F |
JetDirect 3100w BLE/NFC Wireless Accessary, model 3JN69A |
(untested) |

|
Limitations
When you change the authentication type associated with card login in the Embedded client configuration in the SAFEQ Cloud Web UI, the change won't take effect until the terminal is manually opened. For example, if you change the authentication type from short ID (PIN) to short ID or card login, the user will not be able to log in by swiping their card at the card reader until the terminal is opened. Once they open the terminal manually, the configuration change will be applied.
Cloud Print
-
Color, Duplex, Number of Copies, stapling, punching, and other finishing options cannot be changed at the terminal.
-
Print & hold functionality is not supported.
-
Favorite print jobs are not supported.
-
Only print jobs in the waiting folder can be printed/deleted. The printed tab shows historical data.
Scan
-
Scanning only works when the MFD is connected to a primary server. This is a limitation of scanning and therefore applies to all terminals.
Copy
-
The Cloud terminal doesn't support copying. The users must go to the native menu by tapping the home button on My quick actions screen and use the MFD's native copy application.
Card authentication
-
When authenticating via card, as long as the Card authentication screen is present, you are able to assign the card that you’ve tapped. Keep that in mind when leaving printer unattended, when trying to register a new card. The timeout is 1 minute by default set in the printer settings under Settings > General > Display settings > Inactivity Timeout. We recommend not setting it higher than 2 minutes. Users are able to cancel their request by pressing Cancel on that screen.
Installing the Cloud Terminal
Remote installation
-
In the HP Command Center, go to Account and choose the SAFEQ Cloud Secure Print & Scan solution.
-
Click Manage.
-
Click Install and follow the wizard.
After the installation, you must lock the MFD so that users cannot log in without authentication:
-
Log in to the EWS interface as an administrator.
-
On the Security tab, select Access Control.
-
Lock the SAFEQ Cloud Secure Print & Scan application, using the SafeQ Cloud Login authentication provider. If you wish to use SafeQ Cloud Login as the default authentication provider, set the default Sign-in Method to SafeQ Cloud Login.

If you skip this setting, launching the application without using the authentication provider may lead to issues with automatic logout when the MFD goes to sleep mode.
Remote configuration
-
In the HP Command Center, go to Account and choose the SAFEQ Cloud Secure Print & Scan solution.
-
Click Manage.
-
Click Configure and follow the wizard.
-
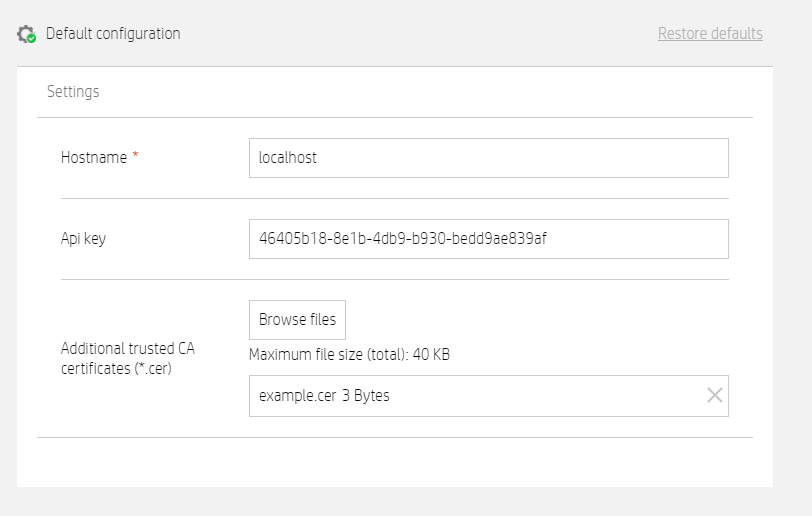
Hostname – Domain name of your tenant in SAFEQ Cloud. It can be a primary or a secondary server.
-
API key – A valid SAFEQ Cloud API Access Key. It defaults to Default key for client and gateway. To increase security, we recommend you to create a dedicated key. If you wish to use a dedicated key, log in to the SAFEQ Cloud Web UI and go to Security > API access keys. Click Add. Copy the key value and click Save. For more information see API access keys.
-
Additional trusted CA certificates – If the specified hostname does not provide a HTTPS certificate issued by a globally trusted Certification Authority, additional trusted certificates can be specified here. See the following section for details.
-
Automatic local configuration
If the MFD is located in a network with a Secondary gateway and is configured to connect to SAFEQ Cloud using this gateway, you can create and deploy the Embedded configuration as described in Embedded Terminals' configuration.
Additional trusted CA certificates
The terminal uses HTTPS to connect to the server specified by a hostname securely.
The WorkPath SDK comes preinstalled with a list of globally trusted Certification Authorities, meaning that if you are connecting to a cloud server, chances are that no special configuration is needed.
If you are connecting to a secondary gateway or OmniBridge, we recommend using the Automatic local configuration described above.
Only in rare cases, you might need to configure certificates manually within HP Command Centre in the following ways:
-
Using an in-house Certification Authority.
-
Using a Certification Authority that comes bundled in SAFEQ Cloud.
The list of CAs trusted by the WorkPath SDK is distinct from the CAs trusted by the native functions of the printer.
Natively trusted CAs can be manipulated in the printer's web interface, usually in the Security section, and have effect, for example, on outbound LDAPS or SMTP connections.
However, they have no effect on the Cloud Terminal or other apps that use WorkPath SDK.
This counter-intuitive behavior is confirmed by HP. The only way to grant additional trust to the Cloud Terminal is described in this guide.
Prerequisites
The server you are connecting to must have a domain specified, not just an IP address.
There must be a certificate assigned to this domain in SAFEQ Cloud. See Certificates.
Certificates
You must have the root CA certificate in PEM format.
If you are using the default SAFEQ Cloud CA, you can copy is from here:
-----BEGIN CERTIFICATE-----
MIIDMDCCAhigAwIBAgIIKSkOK6vJeiIwDQYJKoZIhvcNAQELBQAwNjELMAkGA1UE
BhMCREsxFjAUBgNVBAoTDUV2ZXJ5b25lUHJpbnQxDzANBgNVBAMTBkhDUCBDQTAe
Fw0xNzA3MzEwNzI3MzBaFw0zNzA3MjYwNzI3MzBaMDYxCzAJBgNVBAYTAkRLMRYw
FAYDVQQKEw1FdmVyeW9uZVByaW50MQ8wDQYDVQQDEwZIQ1AgQ0EwggEiMA0GCSqG
SIb3DQEBAQUAA4IBDwAwggEKAoIBAQDextBfBIinhJfLxLzMSyATyHsJMMnfI/oY
jrEFxXnR/7p8KvvXSGwKzF2ZUvoggtvZUe0O94GIttZEwoQuyj7r6RrO7OtT5F9S
BLk2jKx6O4/JD5AlOMsORwRXdFSmhC4CNYWQ7EmPIK6DR7pEZSSkk49wPfcaT8Un
/745hya7p9Asl8NmyrADOjy3BWhLysXnM7qH8gzrYH96X9X/KfRZLSw1IgA/vUbr
+RRknYR4R/Hp7PYyW6HihDIW6eb0yLO5USWpVMHUhyEGPgV8DVU9Z5Q/8xxN5FoT
snvM//HnJnPXCz+J6voJF9DYN3dbRmpp2OiZ+lFdIuruRbOT8i9VAgMBAAGjQjBA
MA8GA1UdEwEB/wQFMAMBAf8wDgYDVR0PAQH/BAQDAgEGMB0GA1UdDgQWBBRsfCK7
yUhtZmk//7xnQU5jbqqg3TANBgkqhkiG9w0BAQsFAAOCAQEAwTj0rIr6uKUpo0T7
Hx+cILI+LeIwmmlkNC8zeE6B5UIan2k7KWP6uAeM7FkKcFUtWpd036S96yjjw2KD
auO1+xjIL2wRyQCG+Y0EZ/4JNHXVAWpxvbt25jFMqs5OFYNLu3/iRLRsfbi0/+2Z
PdfIMpyRIDK+Y7rgLniVfnwAfxGD278I6v0s+6LPAS0ax4P2lr6jjLeWxC3hM/XG
HPQEESpyqe859xWHQXpu/87SNZn0o8Ka57x+0kE7fNjQE6ksQbl948aIQgwZo5UL
TtoxV35fWsmrsRNUm5BdflBrSLbSWqIlhy4FbOj7Hr04qTqYBO82tRlB6Hx53nTL
SXShZw==
-----END CERTIFICATE-----
You can specify more than one trusted CA. For example, for migration purposes.
The default item in the configuration, named example.crt, does not contain a certificate and serves no practical purpose other than being a default. It is safe if you remove it but does no harm if you keep it.
Registering the Cloud Terminal in the SAFEQ Cloud Web UI
-
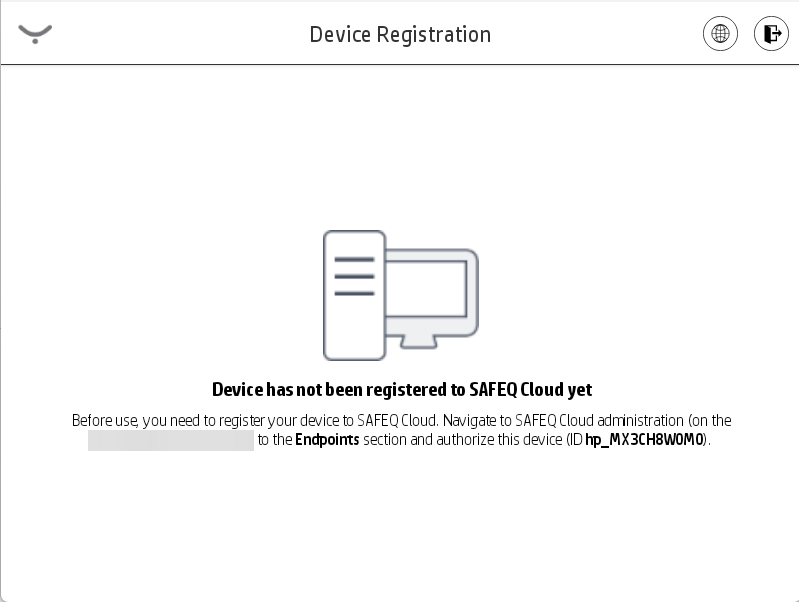
After the terminal installation from the HP Command Center, you will see the following screen on the MFD. Note down the endpoint ID. The endpoint ID is the MFD serial number prefixed with "hp_".
-
In SAFEQ Cloud web UI, go to Security > Endpoints and find the entry that contains the endpoint ID from the previous step.
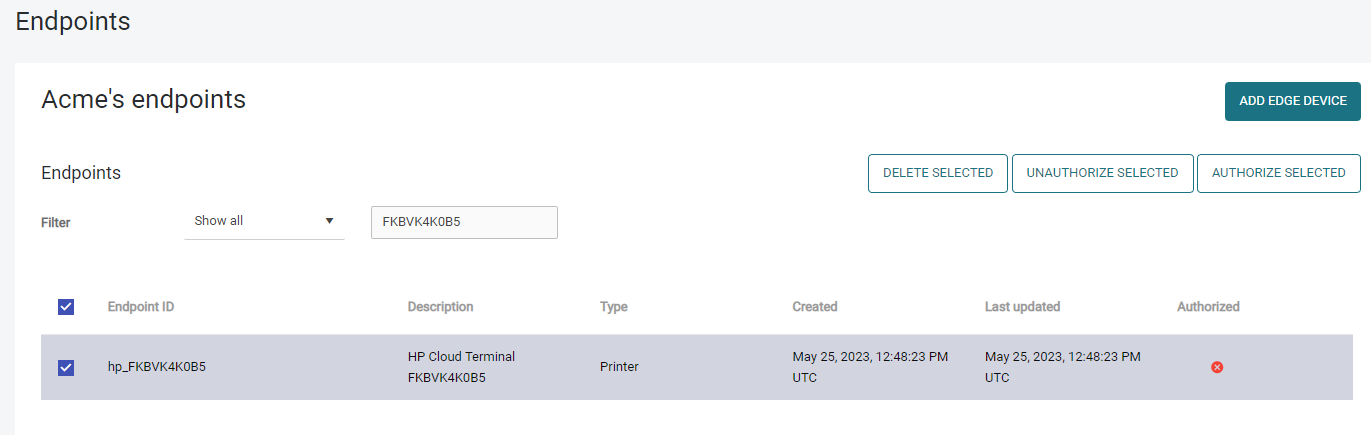
-
Select the entry and click Authorize selected.
-
Back at the MFD, you will see the following screen:

If the terminal on the MFD is reinstalled, you must delete the already authorized endpoint before it can be re-authorized.
The terminal will display instructions on how to do that.
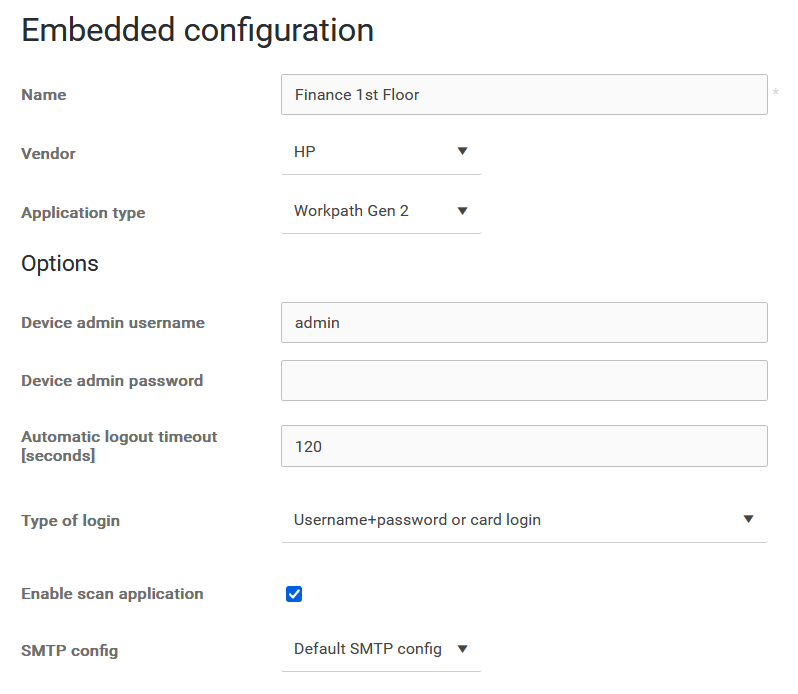
Adding HP Workpath printer and Embedded configuration in SAFEQ Cloud Web UI
-
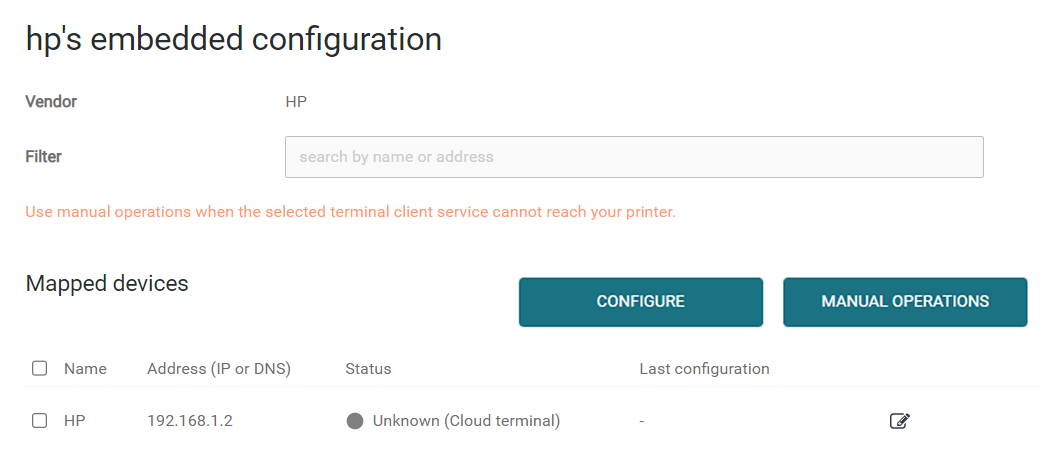
In the SAFEQ Cloud Web UI, go to Printers > Embedded templates.
-
If not done already, create an embedded configuration for HP Workpath by clicking Add.
-
In Vendor, select HP.
-
In Application type, select Workpath Gen 2.
-
Fill in the rest of the configuration according to your needs and click Save. For more information on embedded configuration, see Embedded Terminals' configuration.
-
Go to Printers and click Add.
-
In Vendor, select HP.
-
In Address, fill in the MFD IP address.
-
In Device serial, enter the serial number which was presented on the MFD. Leave out the hp_ prefix.
-
Fill in the rest of required information according to your needs.
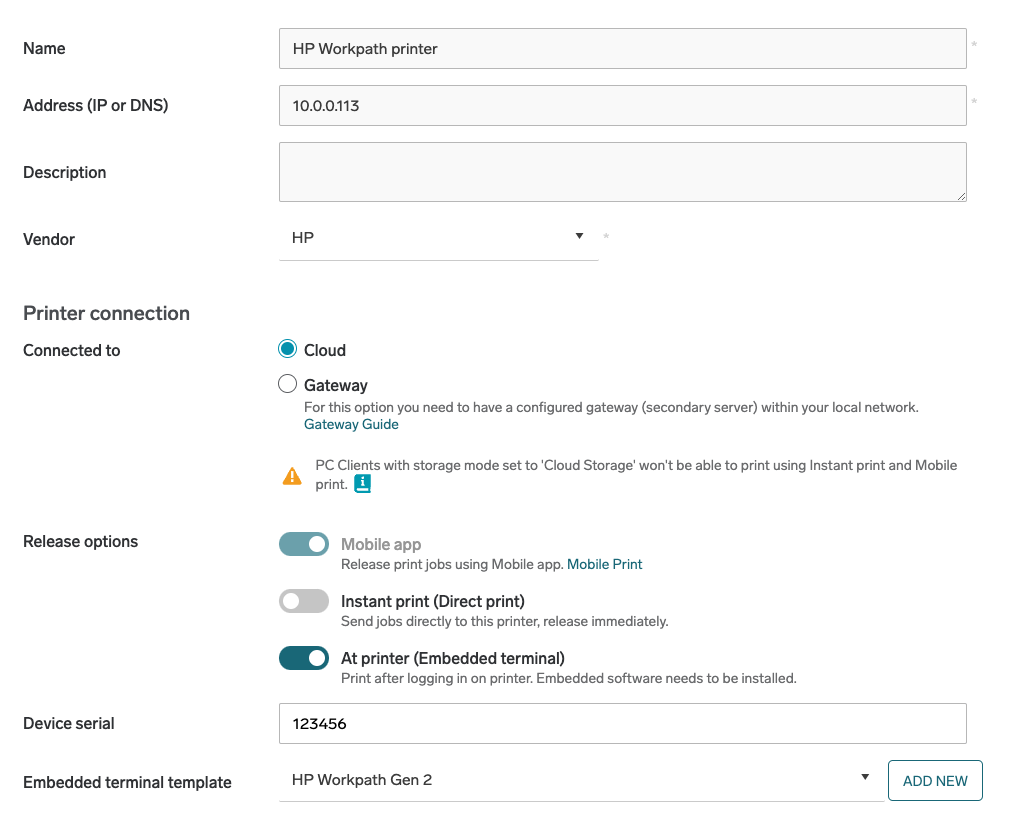
-
In Embedded configuration, select your HP embedded configuration from the list.
-
Click Save.
-
The MFD will now display a login screen with your chosen authentication type.
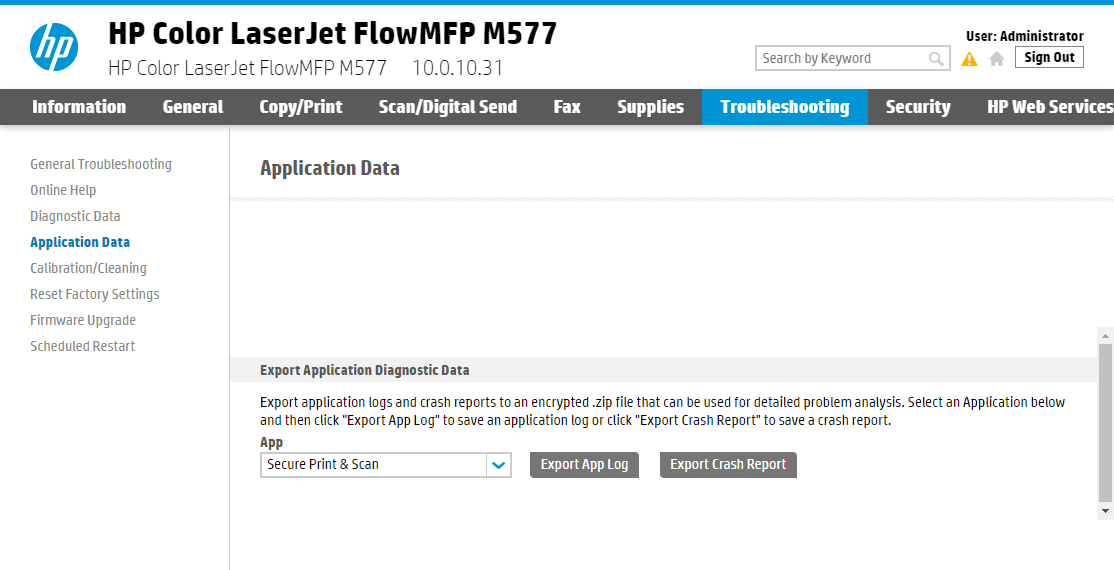
Troubleshooting
When reporting an issue with the HP Cloud Terminal to our service desk, please include logs from the MFD.
To obtain the logs:
-
Log in to MFD's web administration interface and navigate to Troubleshooting > Application Data.
-
Select Secure Print & Scan, click Export App Log, and Export Crash Log.