Relevant Products
Pure cloud terminals are available in BREEZE MFD pro mfp
Terminals that require a secondary gateway (Non-Pure cloud terminals) are available in pro mfp
This guide is to install, configure and setup the Kyocera Embedded Terminal consists of the following parts:
-
Kyocera devices hardware requirements
-
Kyocera printer setup
-
Install Kyocera application
-
SAFEQ Cloud Server Setting using SAFEQ Cloud Web UI
-
Kyocera application
Before you begin, make sure that your secondary gateway is configured according to Secondary Gateway mapping.
Requirements
The MFD must support the HyPAS applications.
Some devices require additional memory and an additional SD-Card
For a list of supported devices, go to SAFEQ Cloud Partnerzone (https://www.ysoft.com/safeq/hardware-compatibility-list/ysoft#cloud)
MFD setup
-
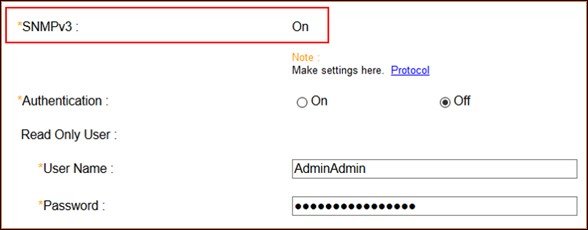
Enable SNMPv3 on the device.
-
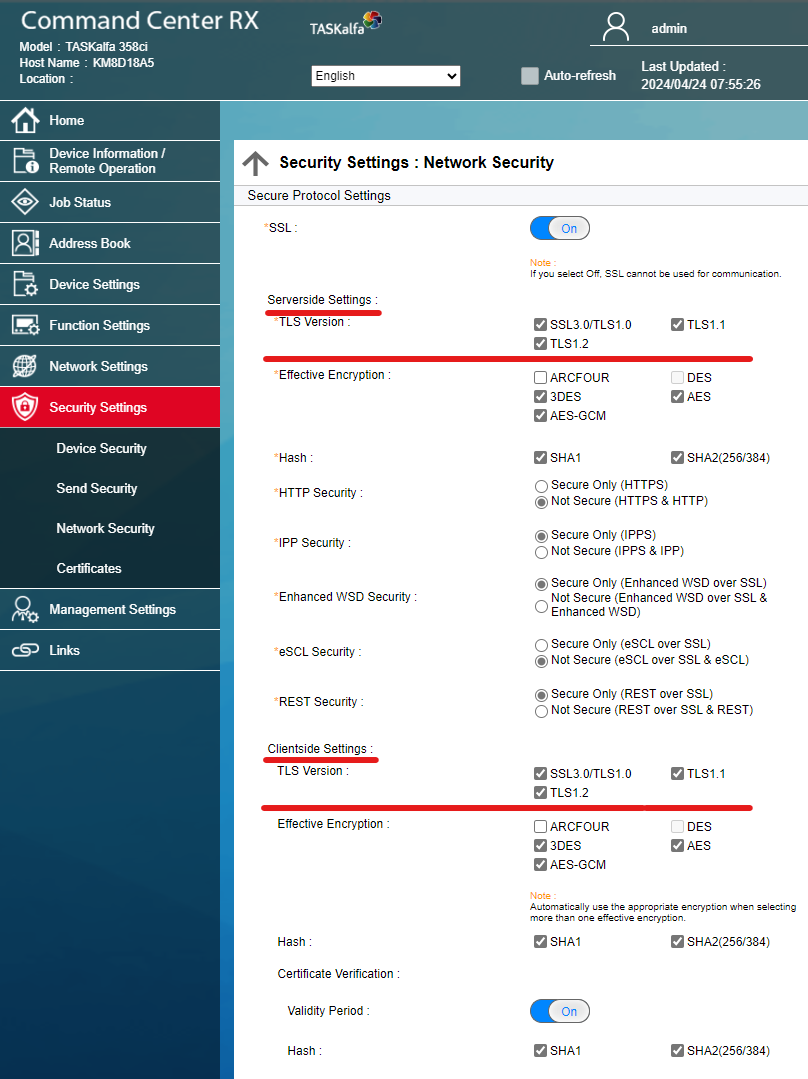
If you want to change the MFD's admin password on the newer models, select all TLS versions in the Serverside Settings and Clientside Settings and save the settings before changing the password.
-
Download the installation package (a pkg file) from the Y Soft Partnerzone. Go to the Library and search for Kyocera Embedded Client.
Installing the Kyocera Embedded Terminal via KYOCERA Net Viewer
-
To install the terminal, download and install KYOCERA Net Viewer.
-
Run KmInstall.exe.
-
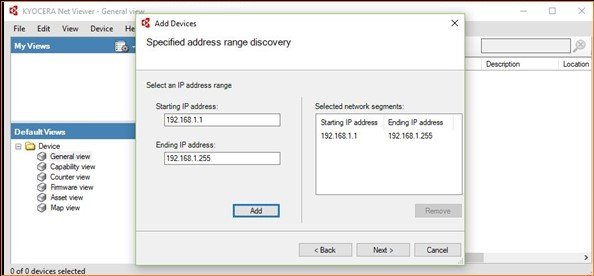
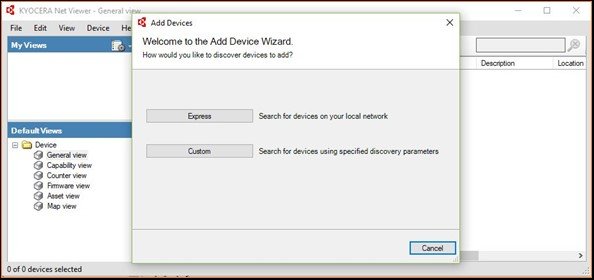
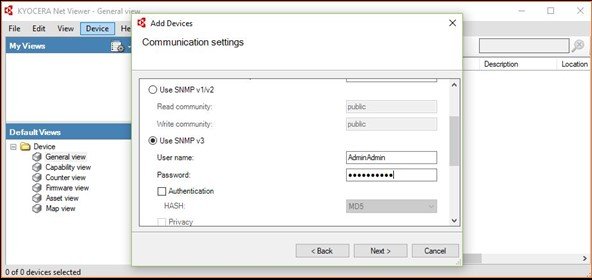
Search for devices:
-
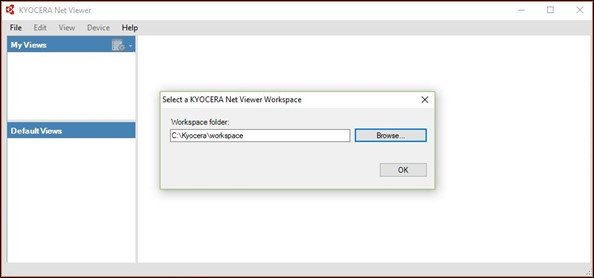
Create a folder and select it as the workspace folder.
-
Search for devices in your network.
-
Set SNMPv3 Username and password.
-
-
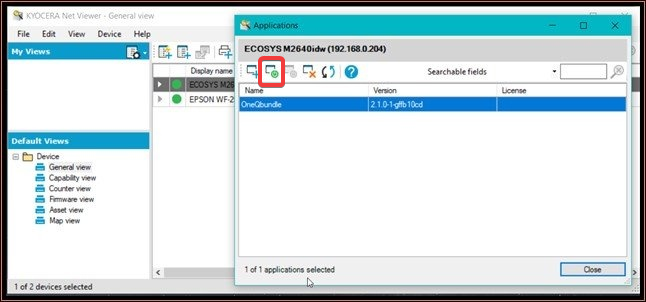
To install the terminal, select the device(s) where you wish to install it.
-
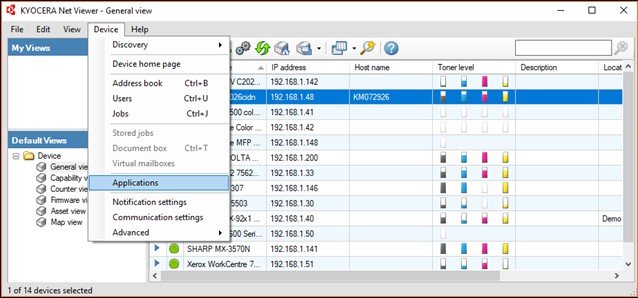
Click Device > Applications.
-
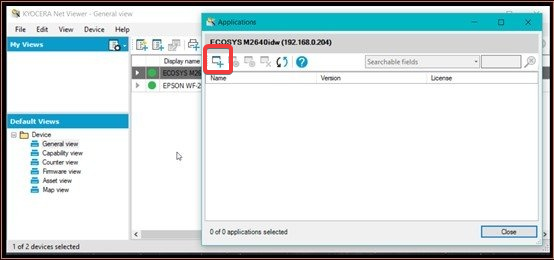
Click the Install new button.
-
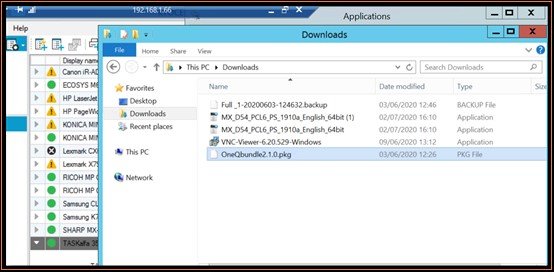
Browse to where you have saved the pkg file and select it.
-
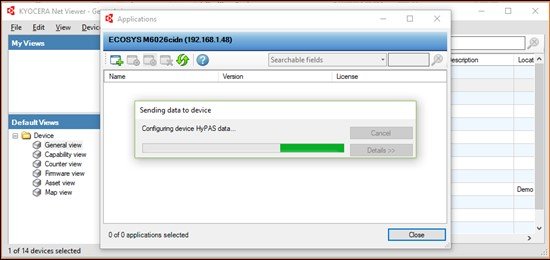
Run the installer.
-
Click the activation icon and activate the application without a license key.
Default Screen setting
-
Change this setting if you want the user’s job list to be displayed after they are logged in. You can also set the initial screen after login to be one of the native MFD’s functions.
-
Go to the printer’s home screen.
-
Log in as the machine administrator.
-
Go to Device Settings > System.
-
Set Default Screen to Favorites/Application.
-
Set the Default Screen (Favorites/Application) to the One Q application.
-
Reboot the MFD.
Using Kyocera Fleet Service (KFS)
You can also install the Kyocera Embedded Terminal via the Kyocera Fleet Service.
For more information on using Kyocera Fleet Service please contact your Kyocera vendor.
Configuring the terminal
-
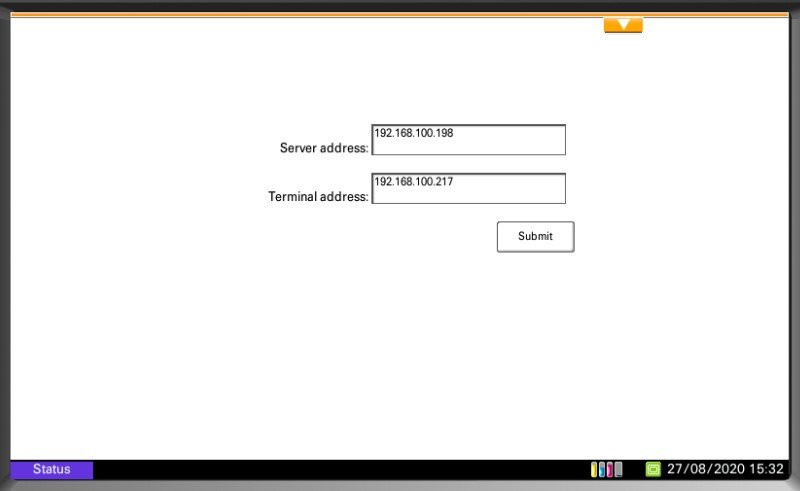
After you have installed the terminal, tap the terminal's icon on the MFD.
-
In the Server address field, enter the secondary gateway address.
-
The Terminal address field should already contain the MFD's IP address. If not, enter it.
-
Tap Submit.
-
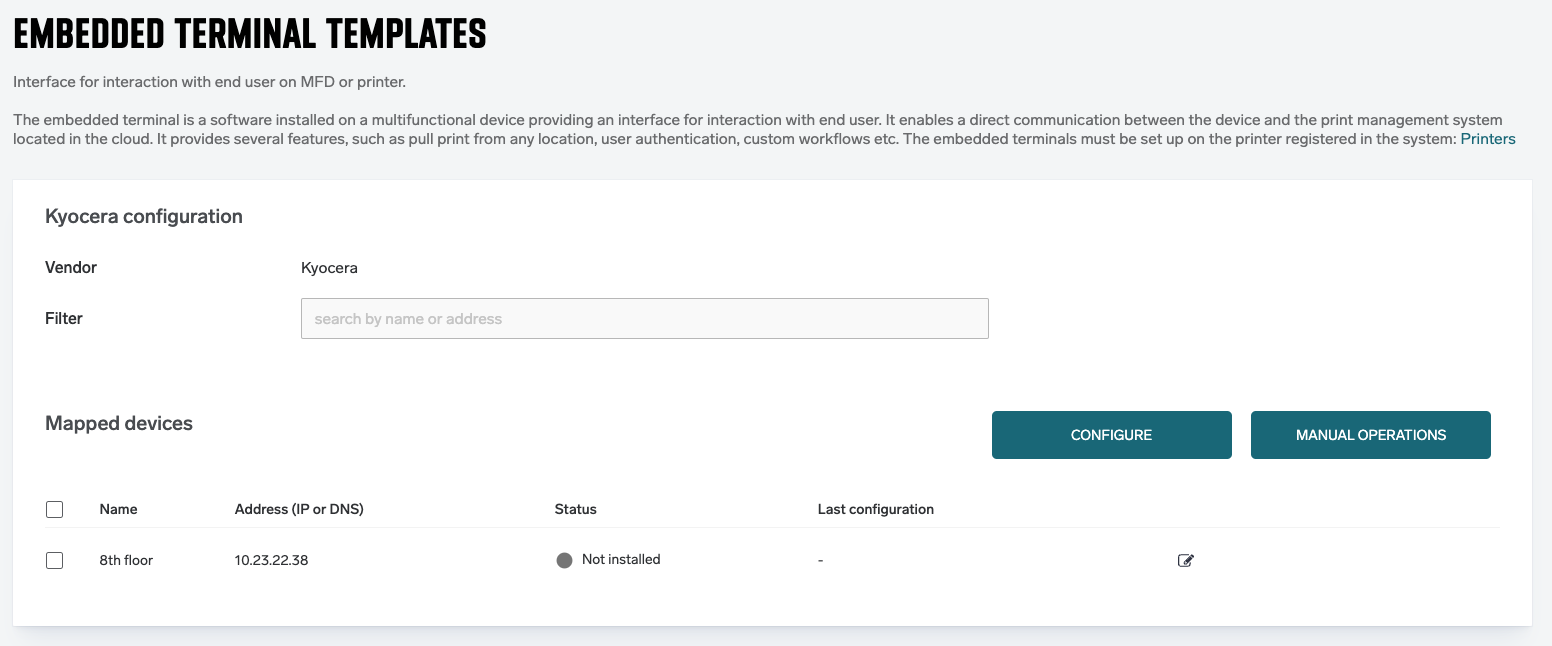
Log in to SAFEQ Cloud Web UI and create the embedded configuration for Kyocera, if not done already. See Embedded Terminals' configuration.
-
Select the MFD from the list and click Configure to push the configuration to the MFD.
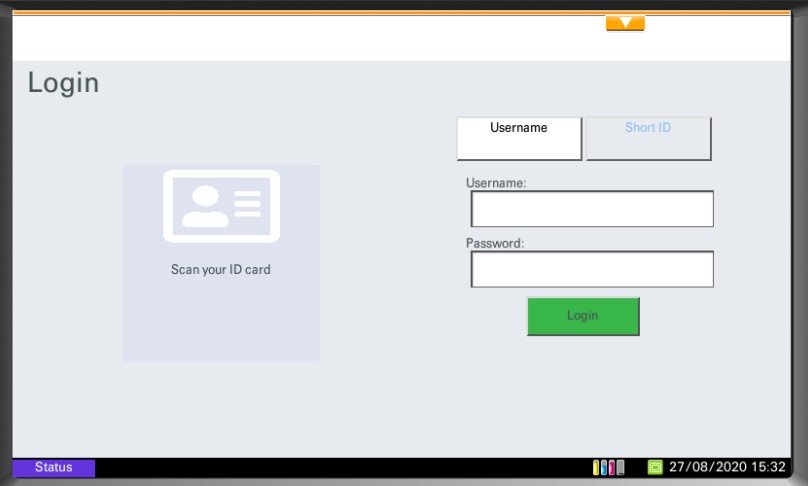
Using the terminal
-
Login screen
-
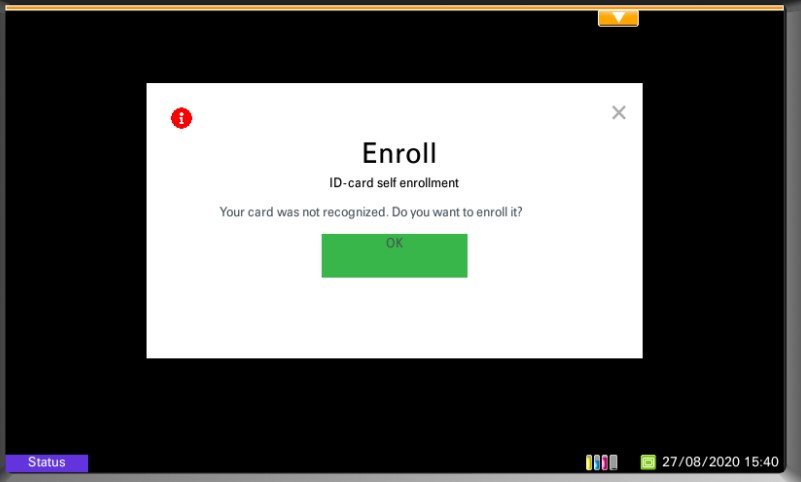
Card enrollment
-
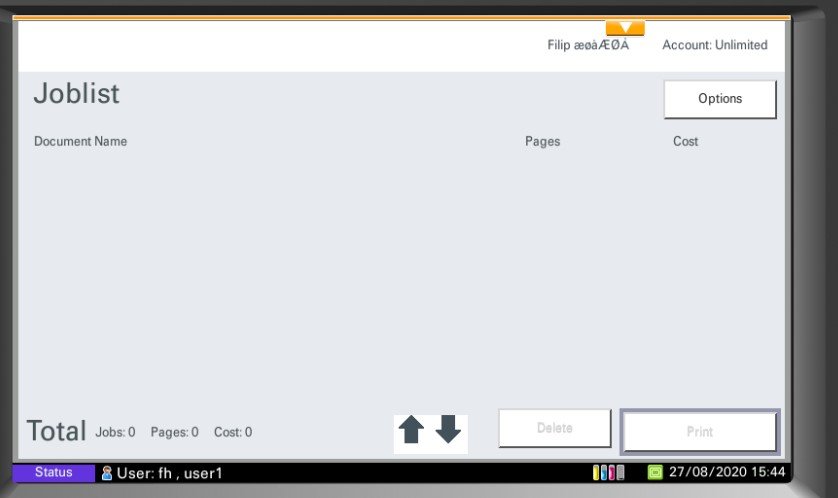
Job list