Registering your card
See Card registration at the MFD.
Logging in and out
Logging in
-
The authentication method depends on how your administrator configured the terminal. You can log in via PIN (Short ID) or username/password. Follow the instructions on the screen.
Example for login method Card or PIN:
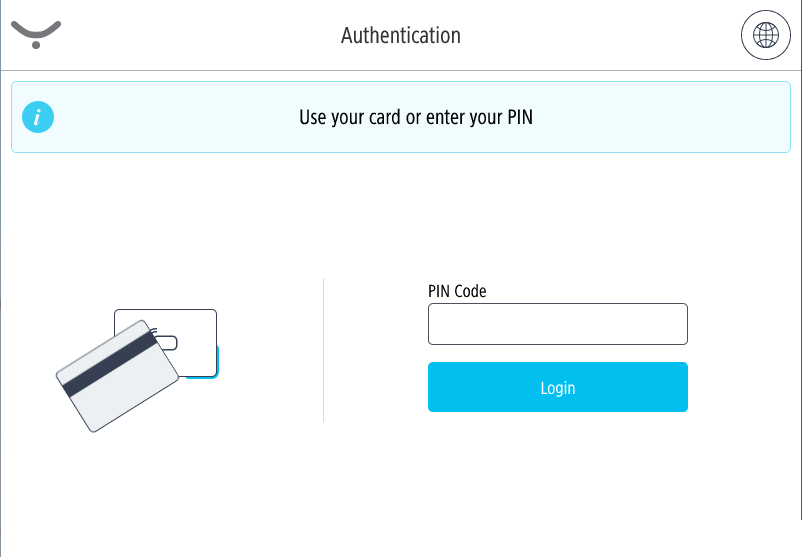
-
You will see the device home screen – navigate to Print and Scan application.
-
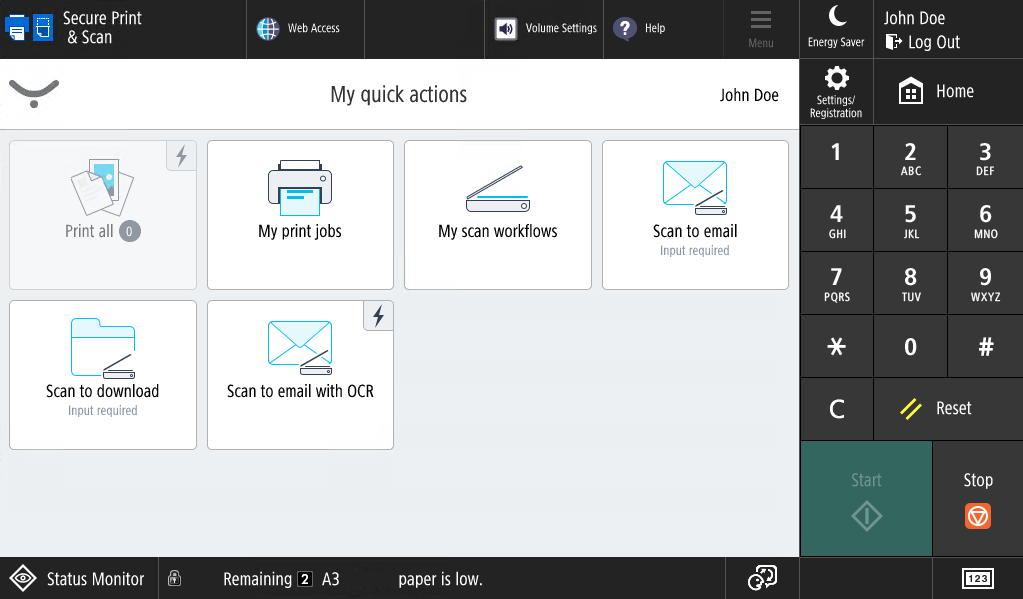
You will see the Cloud Terminal home screen – My quick actions application.
-
If the authentication fails, you will see an error message saying "Invalid credentials”
-
To change the language during authentication, tap the language icon in the top-right corner.
Logging out
Tap the logout button in the right-hand top corner of the screen.
If the terminal is configured to use authentication by card, you can also log out by placing your card on the card reader.
My quick actions applications
My quick actions application allows you to access frequently used functions, such as print all jobs. The quick action buttons are displayed according to your rights and scan workflows assigned to you.
Printing and managing jobs
-
Log in to the Cloud Terminal. Open Secure Print & Scan application.
-
If you wish to release all of your print jobs, tap Print all.
-
If you wish to release only a specific print job or jobs, tap My print jobs.
-
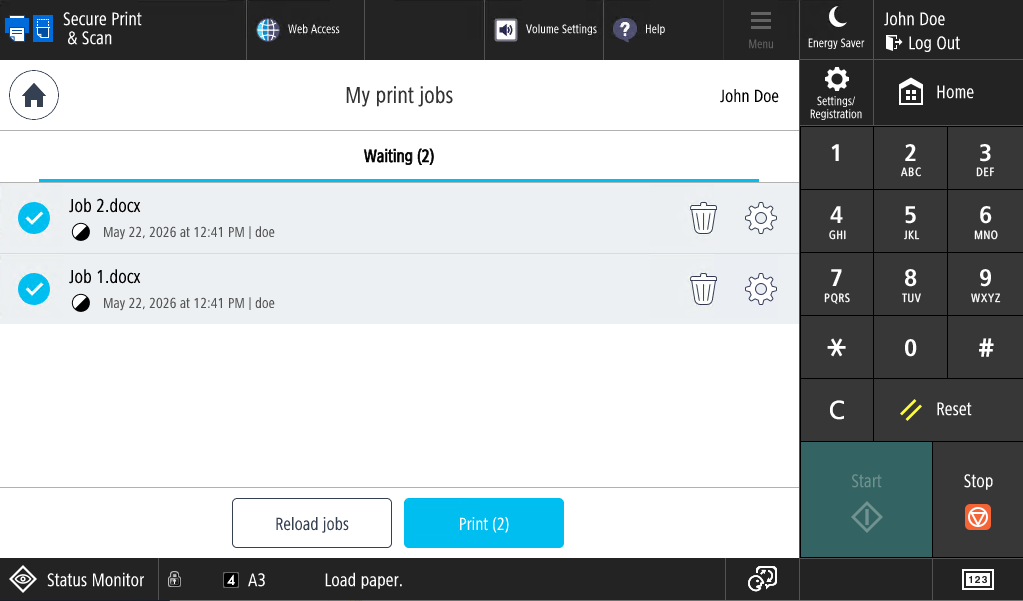
My print jobs screen will be displayed. Select the print job(s) you wish to print from the list and tap Print. You may also delete jobs by tapping Trash icon.
-
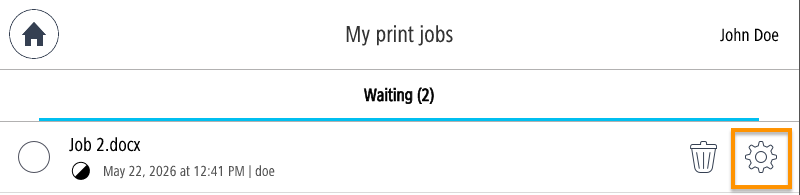
To modify the finishing options (Color, Sides, and Number of copies) before printing, tap the cogwheel icon next to the job.
-
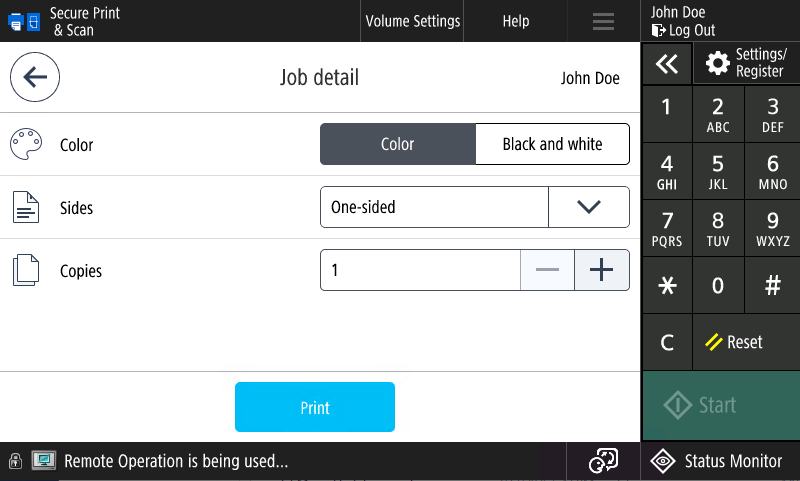
Change the settings according to your needs and tap Print.
-
The Color option is not present on MFDs that don't support color printing.
-
In Sides, you can select between One-sided, Flip on Long Edge and Flip on Short Edge.
-
The range for the number of copies is between 1 and 1000. You can modify the number by tapping the plus and minus buttons or by entering it directly into the text field.
-
-
After the job has been delivered, a success message will appear.
Scanning
-
Log in to the terminal.You will see the device home screen – navigate to Print and Scan application.
-
You will see the Cloud Terminal home screen – My quick actions application.
-
You can run scan workflows from My quick actions screen or from My scan workflows screen.
-
My quick actions screen displays the first three workflows from all scan workflows that your administrator made available to you. Tap the workflow you wish to execute. The workflow will start immediately.
-
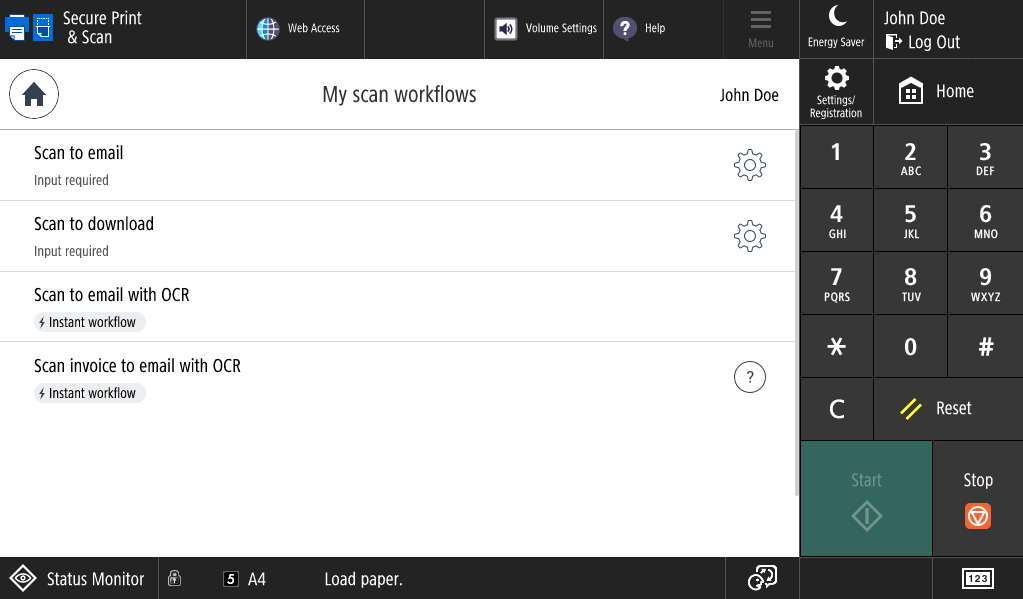
My scan workflows screen displays the list of all scan workflows available to you.
-
Tap the workflow you wish to execute. The workflows that do not require any user input are called instant workflow and are marked with a flash icon. If you need more information on a particular worklow and how to use it, tap the
icon.
-
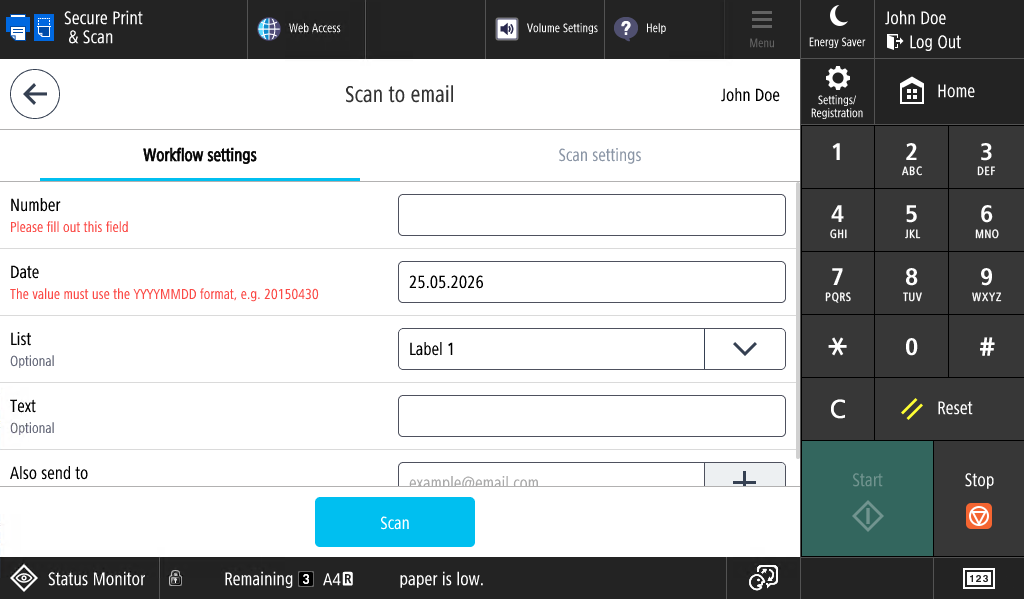
If a workflow is marked with Input required, tapping it will take you to Workflow settings and/or Scan settings. Note that the available settings depend on how your administrator configured the workflow. Alternatively, you can access these settings by tapping the gear icon.
-
The Workflow settings tab is displayed only if the workflow has at least one user input. Fill in the required information (marked in red). You can leave the other fields empty if you do not wish to modify them.
-
You can input an email address manually, or tap the + icon next to the email field to open the search dialogue and select an existing email address. You can input multiple email addresses.
-
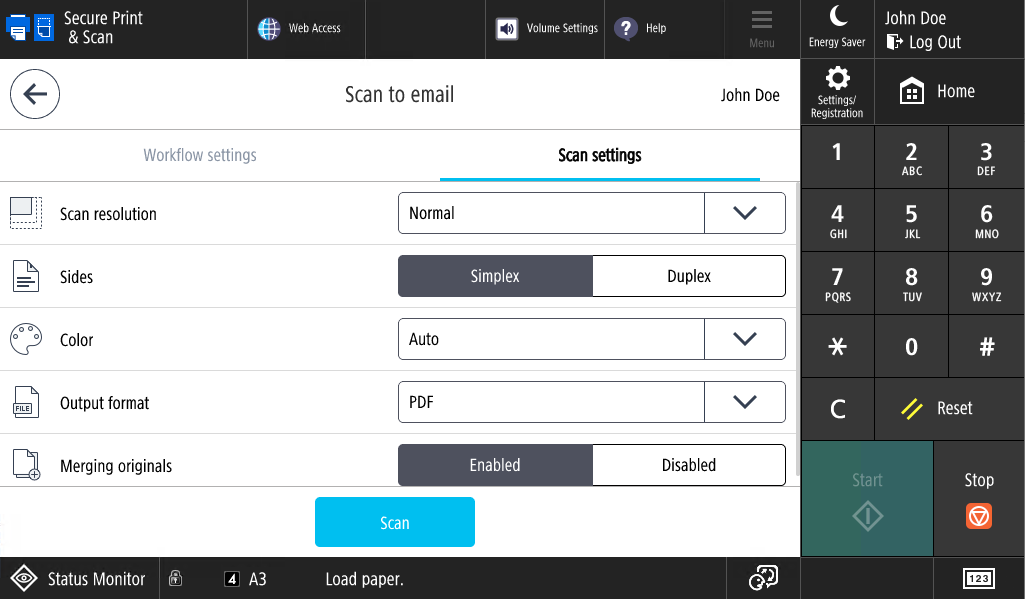
The Scan settings tab is displayed only if the workflow has at least one scan setting. Select the options according to your needs.
-
Tap Scan.
-
-
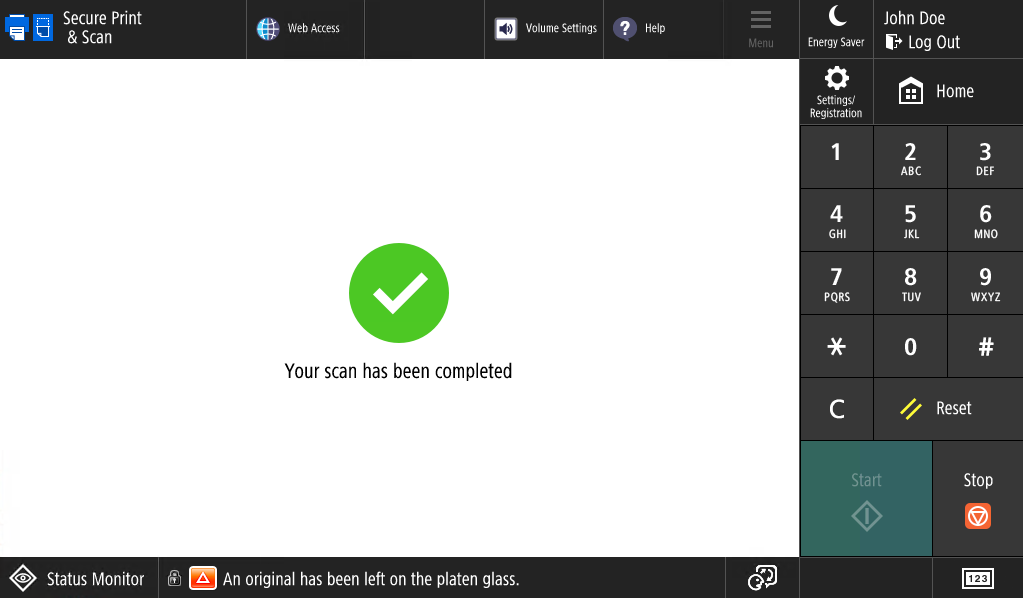
While scanning, you will see the Scanning workflow in progress screen. The following screen will be displayed when the scanning is finished.
-
If you want to continue scanning, insert more documents into the document feeder. Otherwise, tap Finish.
-
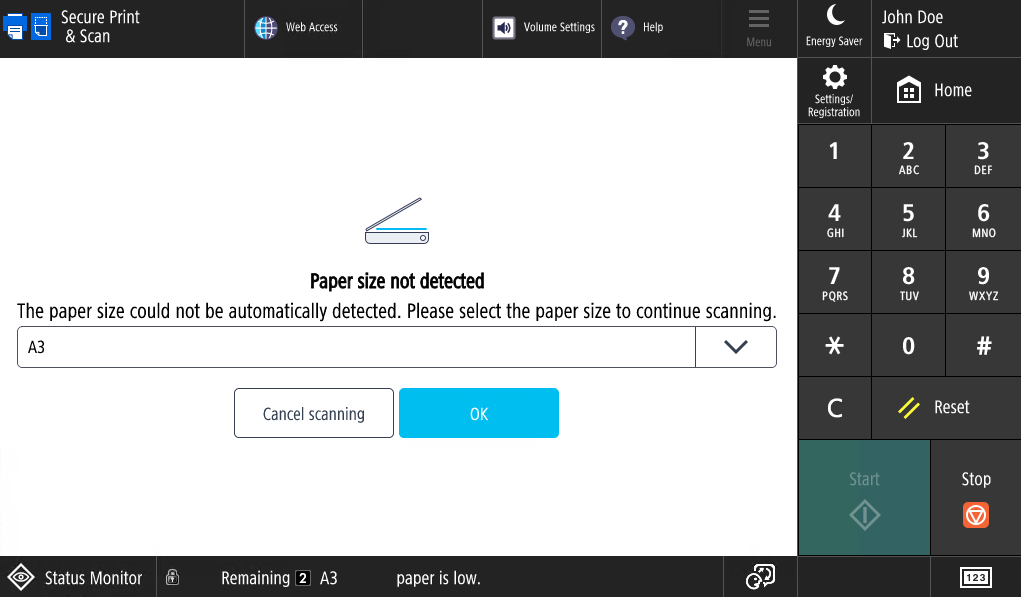
If the size of the paper on the glass is not recognized, you will see the option to select it manually. Tap OK to continue scanning. There is also possibility to cancel the scan job by Cancel scanning button.