
Relevant Products
OKTA authentication is available in pro print pro mfp
SAFEQ Cloud supports integration with OKTA identity management service for authenticating users, including multi-factor authentication (MFA). Additionally, SAFEQ Cloud supports OKTA’s LDAP interface service, see OKTA authentication via LDAP.
Limitations:
-
Only OKTA Push MFA is supported, in combination with Okta Verify mobile app
You can configure OKTA authentication to use either OpenID Connect (OIDC) authentication or Service account authentication (using native OKTA APIs), or both types at the same time. This combined type supports MFA.
-
With OIDC Authentication users will enter their credentials at OKTA login page where they will be authorized and redirected back to the SAFEQ Cloud. This type does not allow fetching additional user properties, like card IDs or PINs.
-
With configured Service account authentication, users will use their OKTA username/password to authenticate into SAFEQ Cloud using their OKTA credentials. This type provides access to all user properties.
Configuring an authorization provider with both OIDC and service account can be useful in situations where you require enhanced security and user convenience in logging into SAFEQ Cloud, as well as allowing users to log in at the MFDs with cards or PINs.
Be aware that OIDC on its own is incompatible with SAML Single sign-on. If you wish to use SAML, enable Service Account Authentication as well.
OIDC Authentication
To use OKTA OIDC authentication, you must first create OKTA application and then assign it to SAFEQ Cloud authentication provider. Perform the following steps:
-
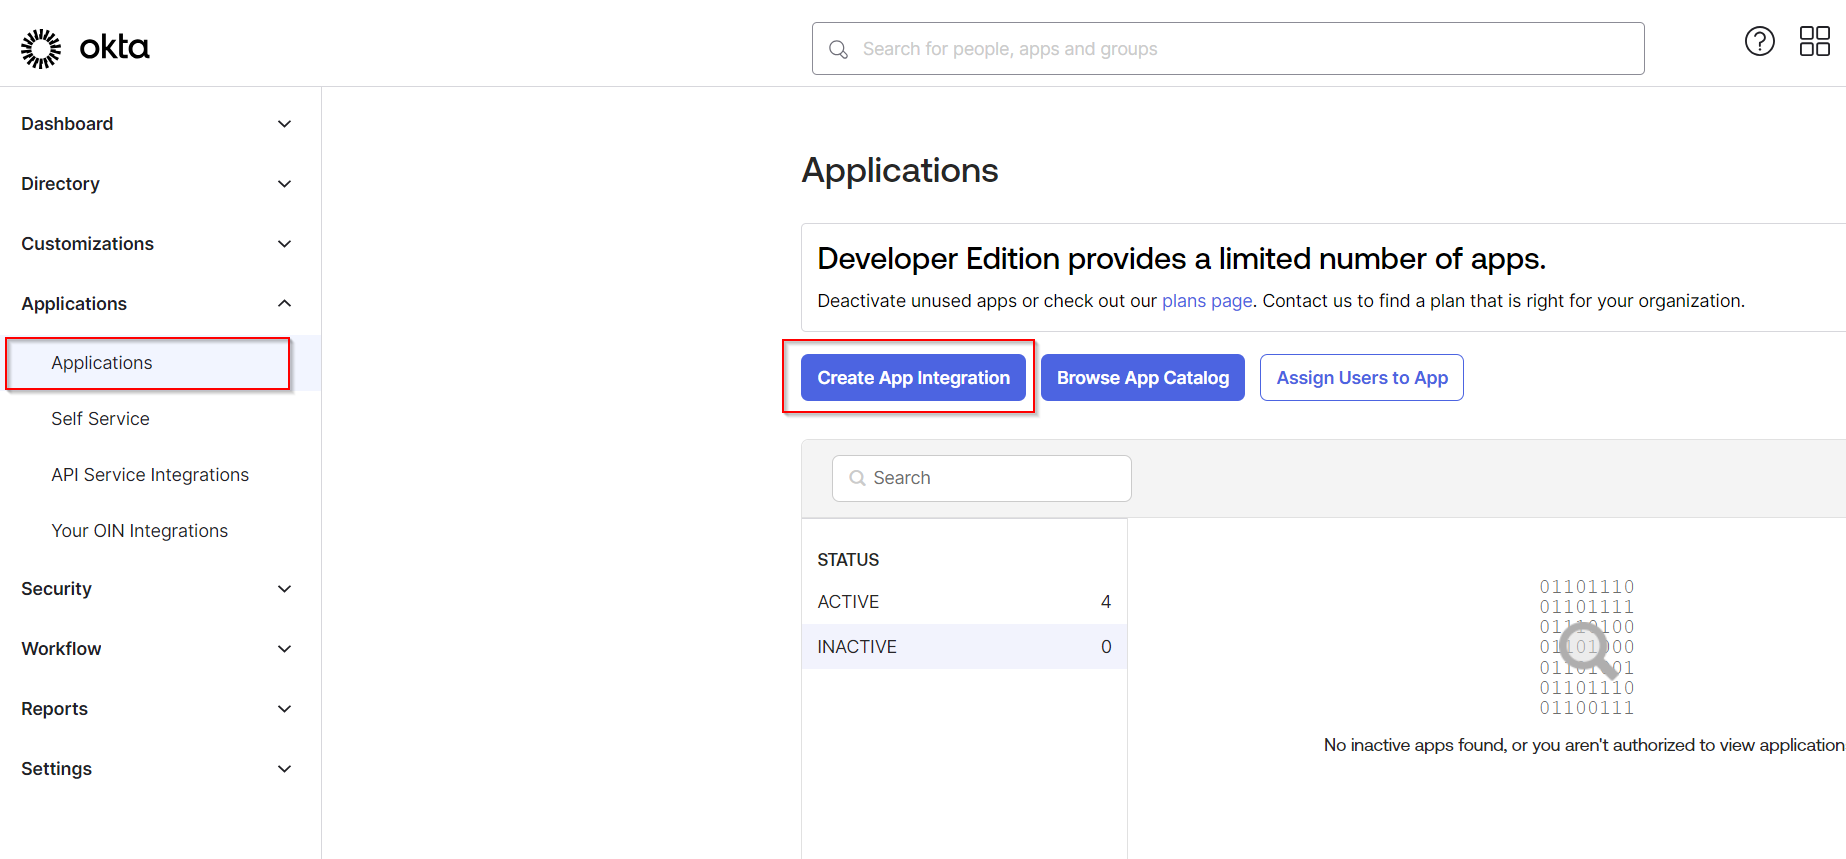
Log in to OKTA administration UI and go to Applications. Click Create App Integration.
-
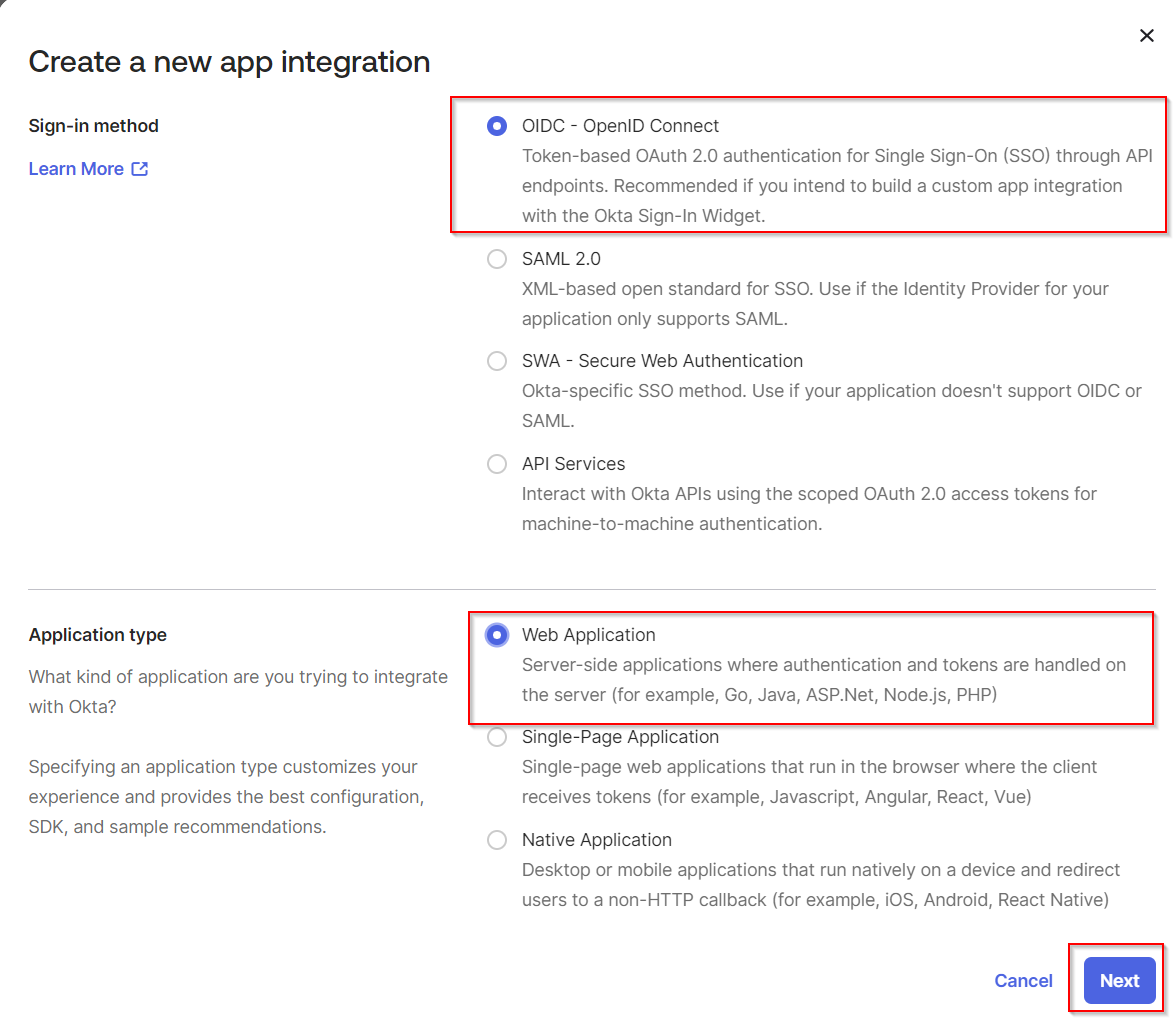
Select OIDC - OpenID Connect. In Application type, choose Web Application. Click Next.
-
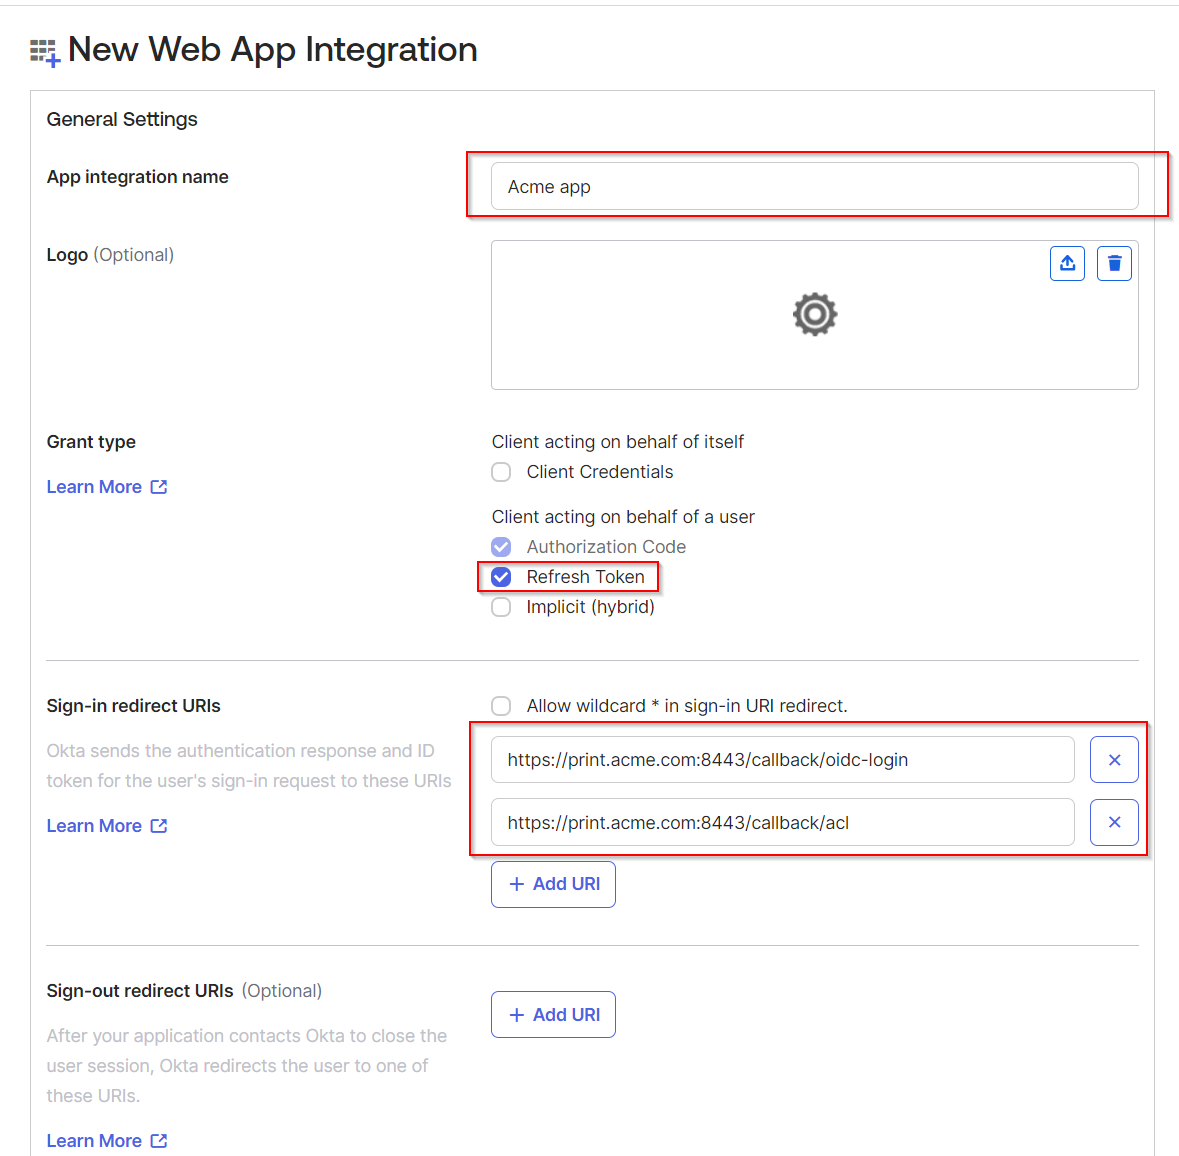
Enter the name of your new application. In Grant type, select Refresh Token (apart from Authorization Code which is selected by default). In Sign-in redirect URIs, add two URIs:
-
https://<domain>:<port>/callback/oidc-login
-
https://<domain>:<port>/callback/acl
-
The domain is your domain defined in SAFEQ Cloud. It must be the same as the domain selected in Authentication that you will fill in later.
-
The port for callback URIs is by default 8443. Example: https://print.acme.com:8443/callback/oidc-login. In environments with reverse proxy, do not specify the port number in the URI. Example: https://print.acme.com/callback/oidc-login.
-
-
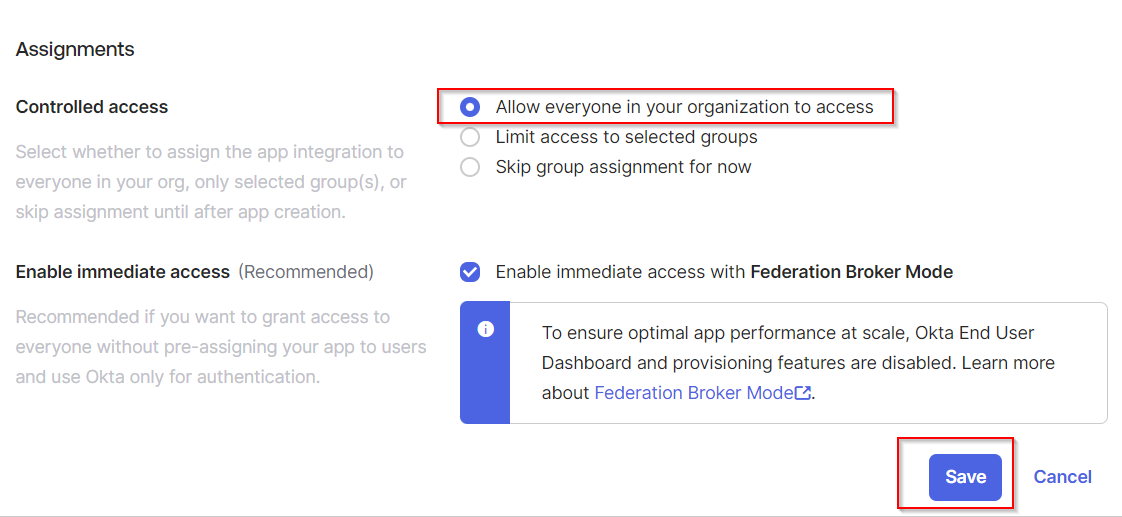
On the same page, in Assignments > Controlled access, select an option that suits your company policy the most. The default is Allow everyone in your organization to access. Click Save.
-
Your new application is now created. Navigate to Sign on tab go to the OpenID Connect Token section and click Edit.
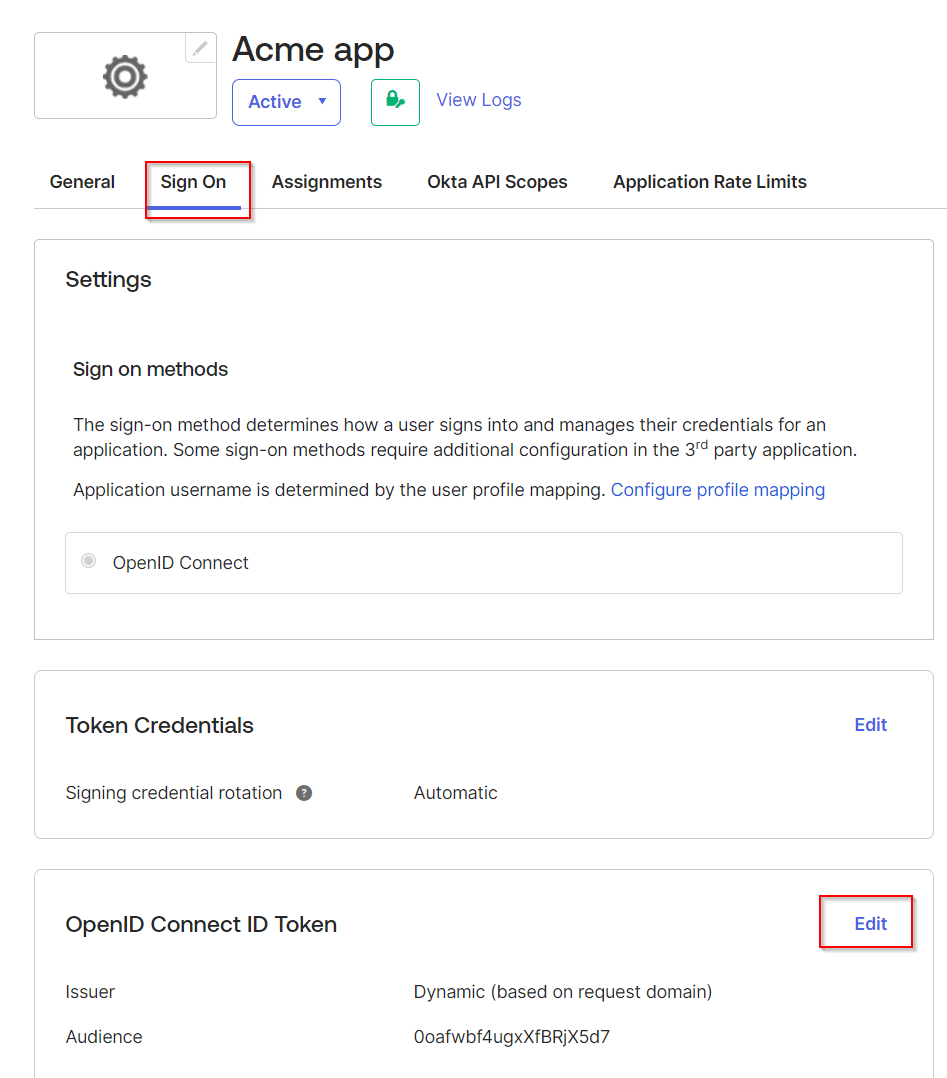
-
In Groups claim type, select Filter. In Groups claim filter, fill in "groups" and "Matches regex" and ".*" Click Save.
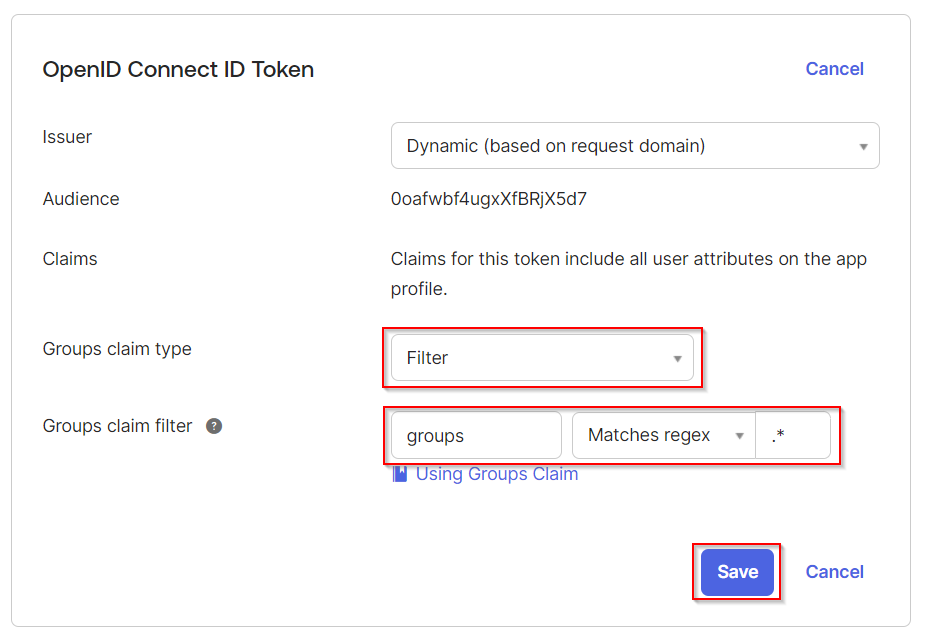
Filter regular expression has to be exactly: .* (dot star) in order to fetch all groups.
-
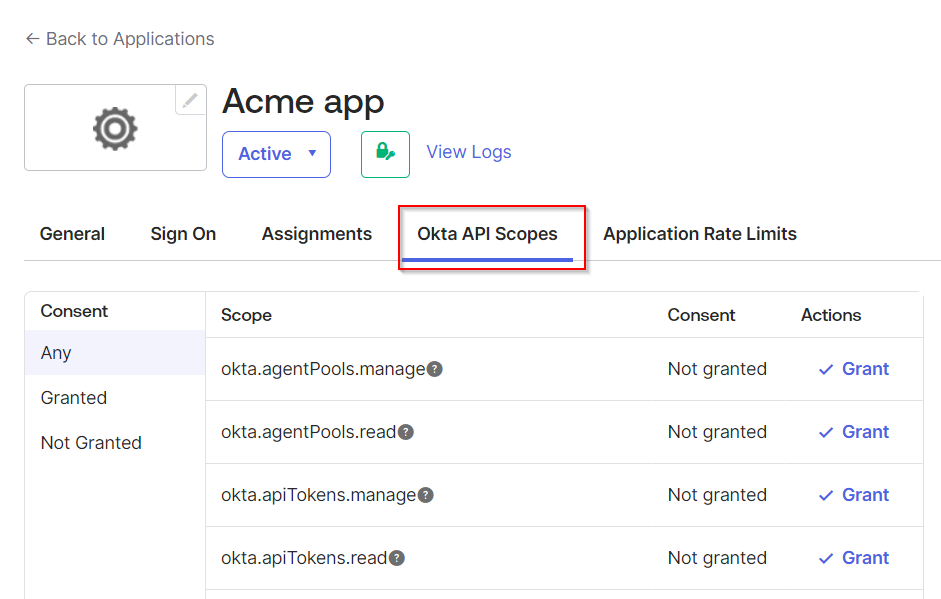
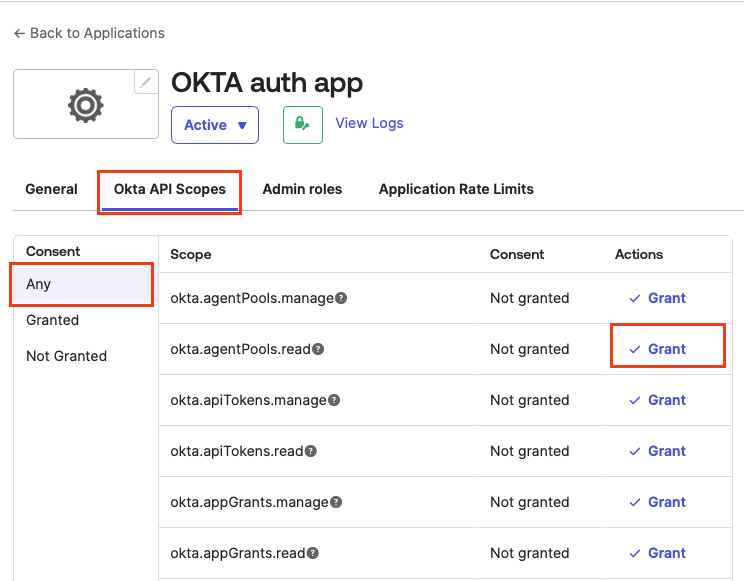
Navigate to Okta API Scopes tab. Find the okta.users.read and okta.groups.read consents. Click Grant.


-
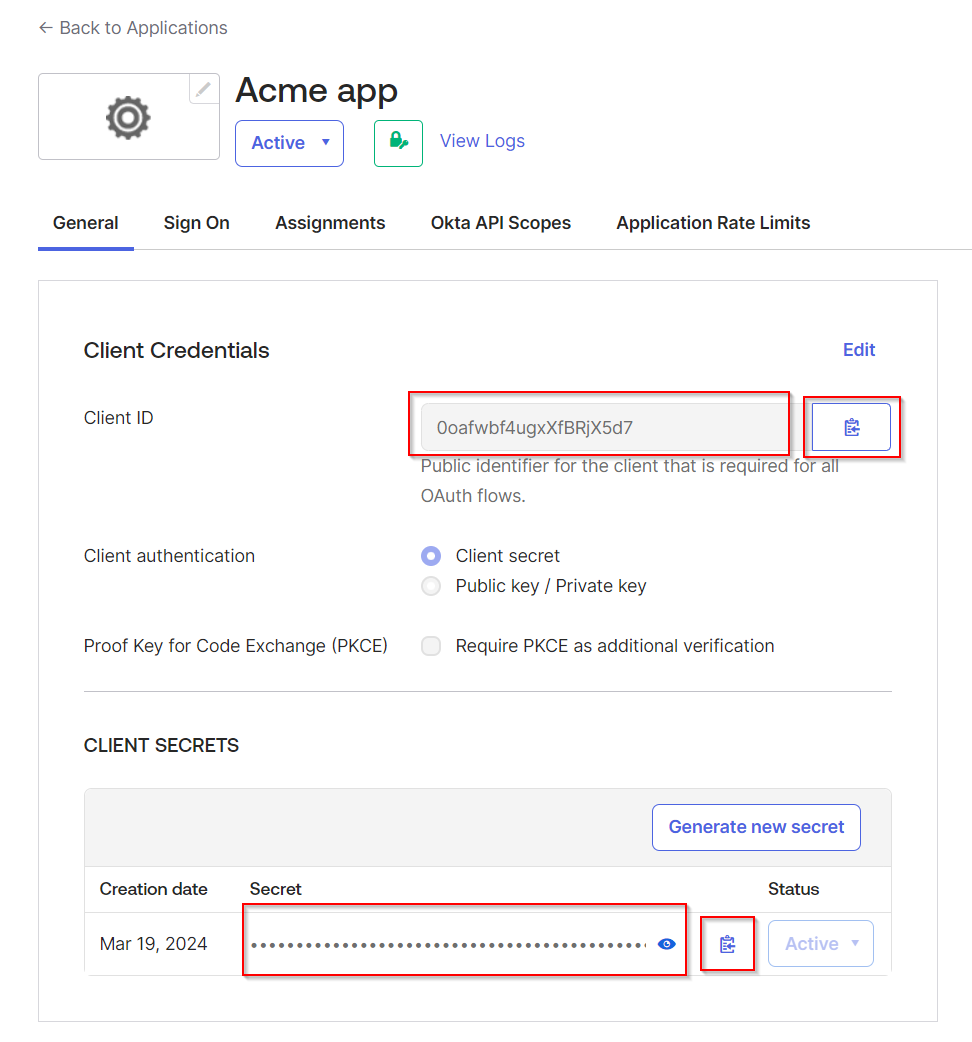
Navigate to the General tab, and copy the Client ID and Client secret values. You will need them later on.
-
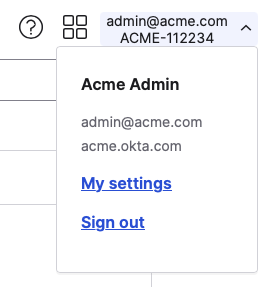
Save the value of your OKTA domain name. You can find it in the top right corner of the OKTA administration UI.
-
This concludes the OKTA application configuration for OIDC authentication.
-
Log in to SAFEQ Cloud Web UI and go to Users page and Authentication providers tab.
-
Click Add and enter the following details:
-
Type – Select OKTA.
-
Name – An internal name used for identifying the particular authentication provider configuration. Should be prefilled with the selected Type.
-
Domains – The domain names of the authenticating users. If you have domain aliases that the users can use to log in, add them to this field. At least one domain in the list should match the domain part of the fully qualified user name passed for authentication. If strict domain validation is disabled, SAFEQ Cloud will attempt to authenticate the user with all domains in the list regardless of the domain entered in the credentials, in the order defined in the list. If strict domain validation is enabled, SAFEQ Cloud will attempt to authenticate only with the domain in the credentials. For example, if the domain name of the OKTA authentication provider is okta.domain.com, then the user added in Access Control should be user@okta.domain.com.
Specifying the correct domain name is especially important if using the Strict domain validation feature. Otherwise, it is not possible to detect to which domain a user belongs.
-
Priority – A number that determines the order in which authentication providers will be called until one succeeds. Higher-priority providers will be called first.
-
Active – If enabled, the authentication provider will be used for authentication. If disabled, this authentication provider will not be searched.
-
OKTA endpoint address – The address of the OKTA server for which you created the OKTA application. For example, acme.okta.com.
-
OIDC Authentication section - enable Active toggle and select Type Customizable and fill in the fields accordingly:
-
Client ID – The ID of your application created in OKTA.
-
Client secret – The Secret value for your application created in OKTA.
-
Callback domain for custom application – Select from the list of available domains the one that you defined in OKTA administration UI as Sign-in redirect URIs. In the above example, it was print.acme.com.
-
Custom token claim name – This allows you to remap Username, Full name, Email, Groups and External ID. Note that all these custom claims need to be defined in the ID token in the OKTA OIDC application.
-
Hide on Login page – Keep this disabled to show OKTA button on the login page. The name on the button is the name you entered in the Name field.
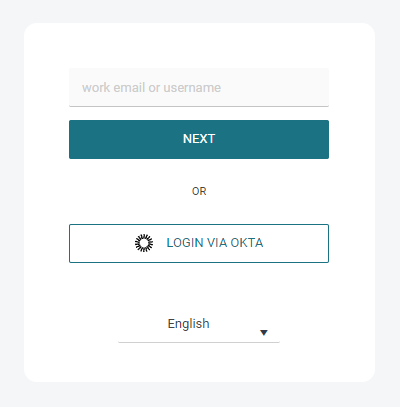
If the Hide on Login Page option is enabled, the username's domain part is still utilized to search for a domain among the configured authorization providers. If a domain is found and has active OIDC Authentication, the user is then directed to the OKTA login page.
-
-
Service account Authentication section – switch off the Active toggle, if you don't wish to use service account as well.
-
Click Save.
-
-
The OKTA users will now be able to log in to SAFEQ Cloud.
Every user logged-in via this provider will have Authenticated Users group assigned. You can use this group to manage access controls. See Access Control.
Service account authentication
To configure OKTA authentication using OKTA APIs, perform the following steps:
-
Log in to OKTA administration UI and click Applications. Click Create App Integration.
-
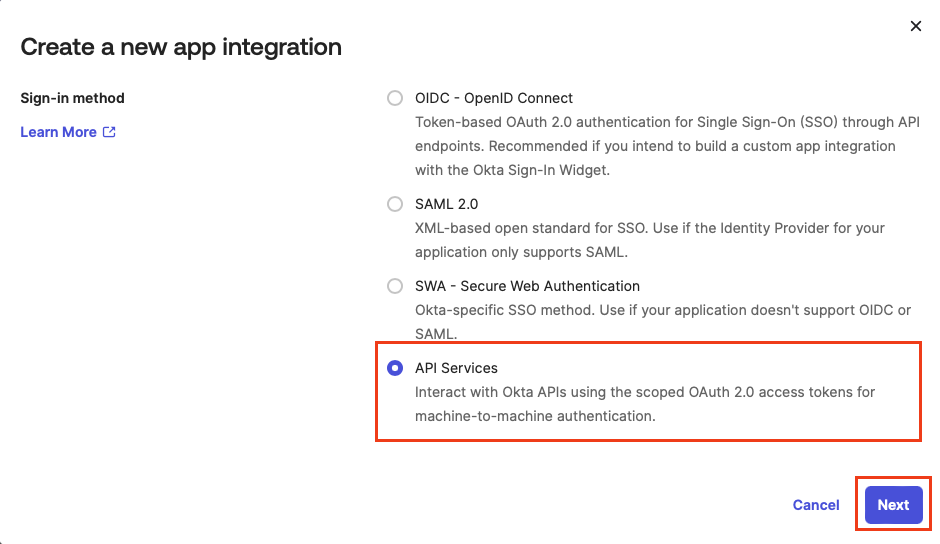
Select API Services. Click Next.
-
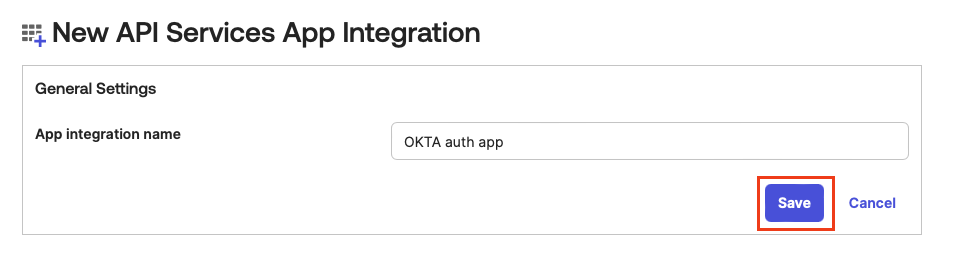
Enter the name of your new application and click Save.
-
Got to the Okta API Scopes tab. Under Consent, click Any and search for okta.users.read and okta.groups.read. Select Grant for both.
-
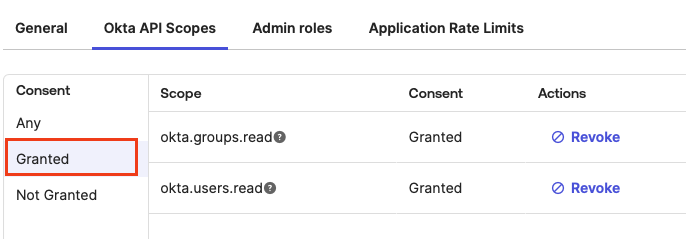
The result in Consent Granted will look like this:
-
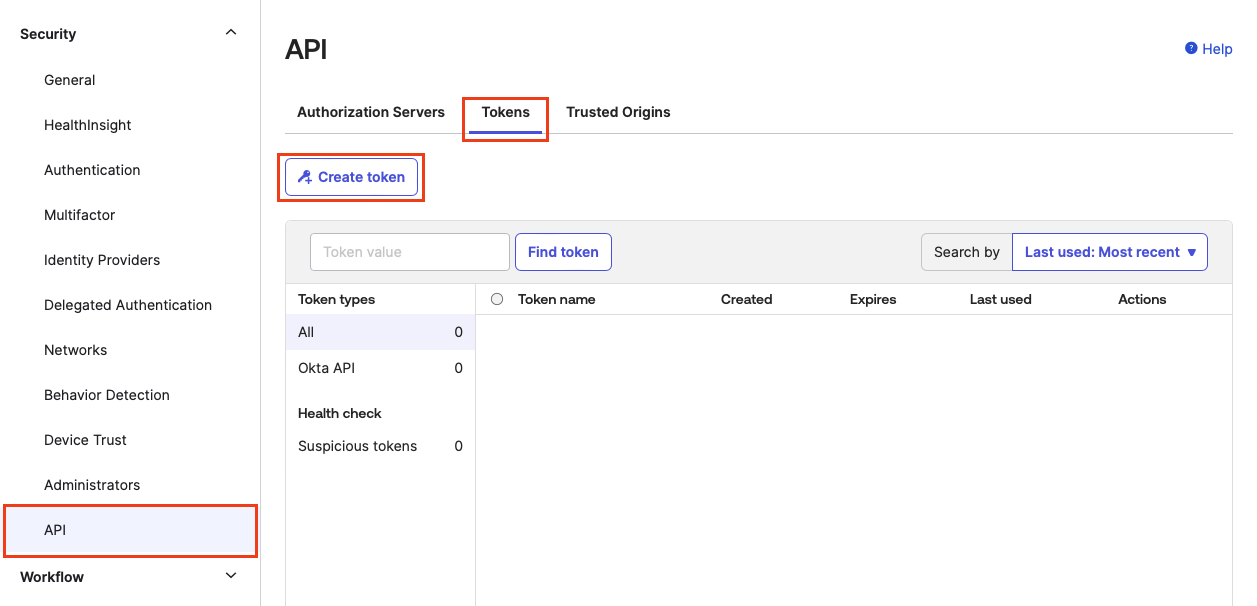
In the main menu, go to Security > API. Click the Tokens tab and then click Create token.
-
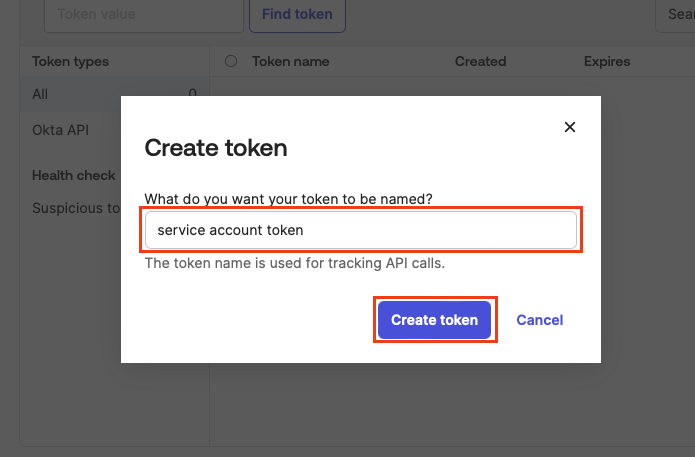
Enter the name of your token and click Create token.
-
Copy the Token value. Save the secret value in a secure way. You will need it later on in SAFEQ Cloud Authentication provider configuration form. Click OK, got it to proceed.
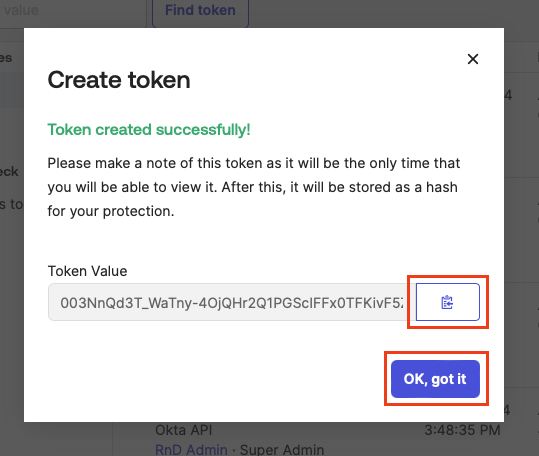
For security reasons, you can only see the secret value at the time of creation. Once you leave the screen, the value will not be shown again.
-
This concludes the OKTA application configuration for Service account authentication.
-
Log in to SAFEQ Cloud Web UI and go to Users page and Authentication providers tab.
-
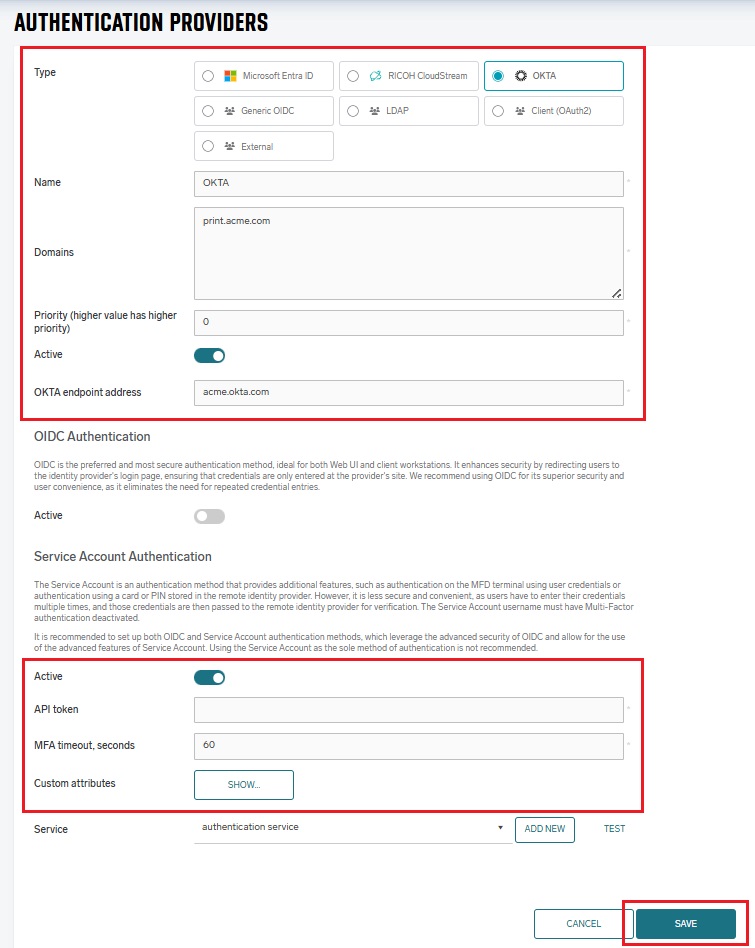
Click Add and enter the following details:
-
Type – Select OKTA.
-
Name – An internal name used for identifying the particular authentication provider configuration. Should be prefilled with the selected Type.
-
Domains – The domain names of the authenticating users. If you have domain aliases that the users can use to log in, add them to this field. At least one domain in the list should match the domain part of the fully qualified user name passed for authentication. If strict domain validation is disabled, SAFEQ Cloud will attempt to authenticate the user with all domains in the list, regardless of the domain entered in the credentials, in the order defined in the list. If strict domain validation is enabled, SAFEQ Cloud will attempt to authenticate only with the domain in the credentials. For example, if the domain name of OKTA authentication provider is okta.domain.com, the user added in Access Control should be user@okta.domain.com.
Specifying the correct domain name is especially important if using the Strict domain validation feature, as it is otherwise not possible to detect to which domain a user belongs.
-
Priority – A number that determines the order in which authentication providers will be called until one succeeds. Higher-priority providers will be called first.
-
Active – If enabled, the authentication provider will be used for authentication. If disabled, this authentication provider will not be searched.
-
OKTA endpoint address – The address of the OKTA server for which you created the OKTA application. Example: acme.okta.com.
-
OIDC Authentication section – Toggle Active off if you don't want to use OIDC, otherwise toggle it on and select Customizable, see OIDC Authentication section above.
-
Service Account Authentication – This section applies to service account settings.
-
Active – The service account authentication is used when Active is enabled.
-
API token – The Token you created in OKTA application in the previous steps.
-
MFA timeout, seconds – The maximum time in seconds for which the server will wait for Multi-factor authentication to complete.
-
Custom token claim names – Click Show to change the mapping within ID token and OKTA user attributes, such as preferred_username, name, email, groups, and sub .
-
-
Click Save.
-
-
The OKTA users can now log in to SAFEQ Cloud.
Every user logged-in via this provider will have Authenticated Users group assigned. You can use this group to manage access control. See Access Control.