
Relevant Products
Single sign-on tab is available in pro print pro mfp
To set up a single sign-on (SSO) with the PingID provider, you must create two applications in your PingID environment:
-
OAuth2 Worker application for authentication and group synchronization
-
SAML application for users’ SSO
Overview of steps
Make sure to perform the following actions in the correct order, otherwise you might disable your existing authentication to your SAFEQ Cloud tenant. These steps are:
-
Set up the authentication provider in SAFEQ Cloud using a PingID Worker application.
-
Perform group synchronization for your PingID authentication provider.
-
Create Access Control records for the imported groups. Make sure that you will retain an administrative role in SAFEQ Cloud when you log in using your PingID identity. You must create access control records with the Administrator role for the group where you are a member.
-
Set up SAML SSO for your SAFEQ Cloud tenant.
Setting up the OAuth2 Worker application
For steps 1-3 from the above overview, see Add a custom app in the Ping identity platform.
SAML Configuration
The redirect URL for the PingID SAML application is https://<your SAFEQ Cloud domain>:8443/assertion/saml. For example, https://acme.eu.ysoft.cloud:8443/assertion/saml. The port is 8443. In environments with reverse proxy infrastructure, do not specify the port number in the URL (https://<your SAFEQ Cloud domain>/assertion/saml), meaning the default HTTPS port 443 will be used.
-
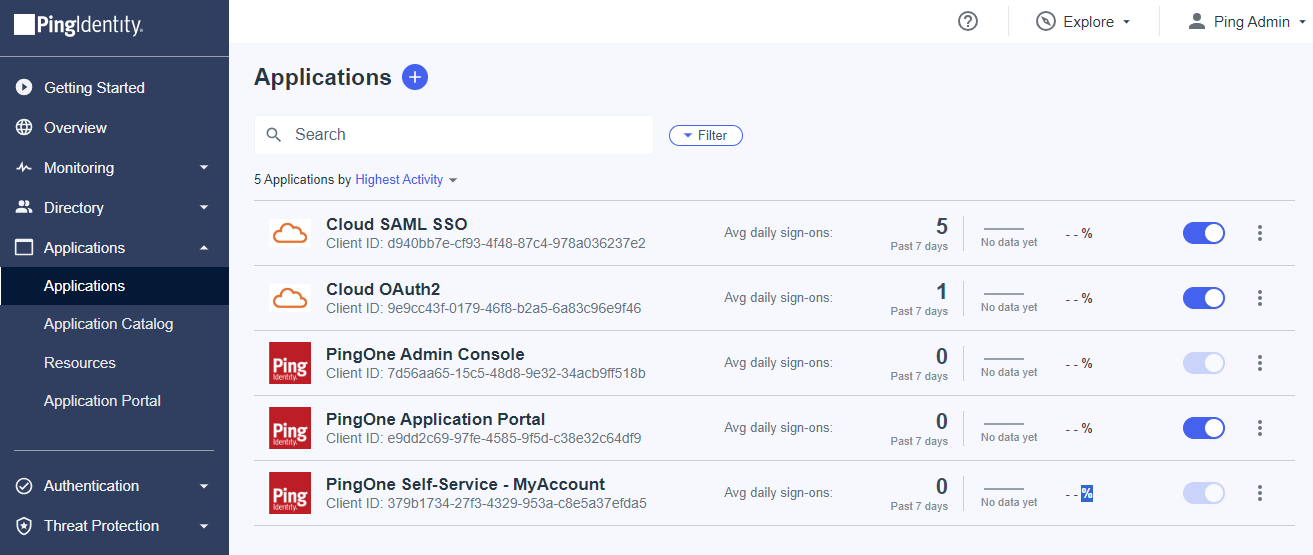
To create a SAML application, log into your PingID environment and go to Applications. Click + to create a new application.
-
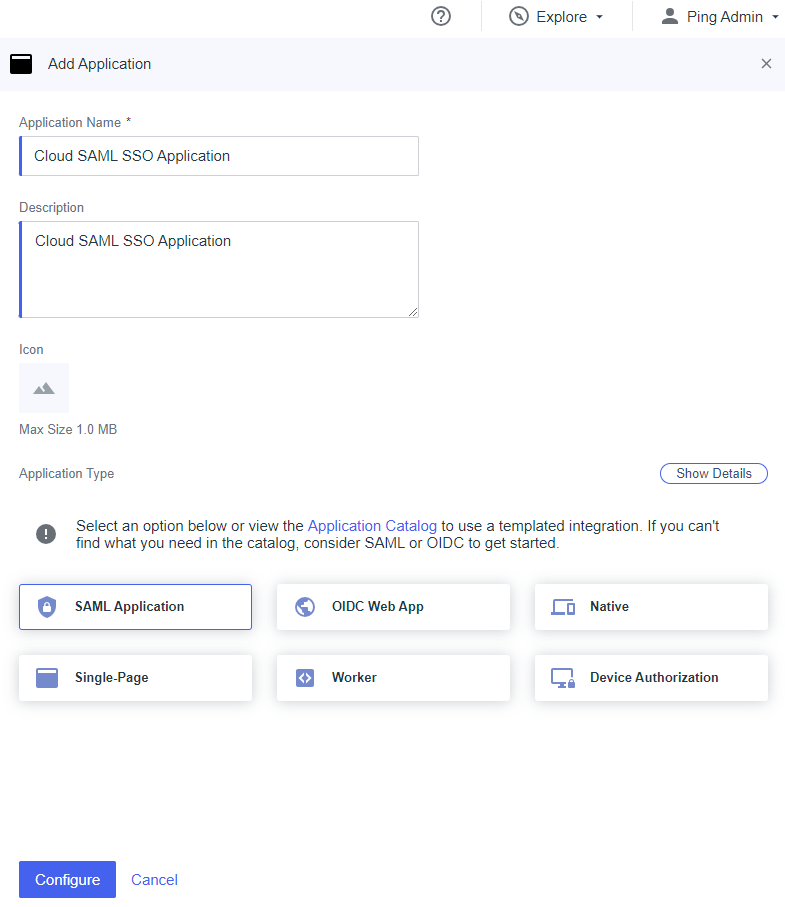
Enter the Application Name , and an optional Description. Select SAML Application as the Application Type.
-
Click Configure .
-
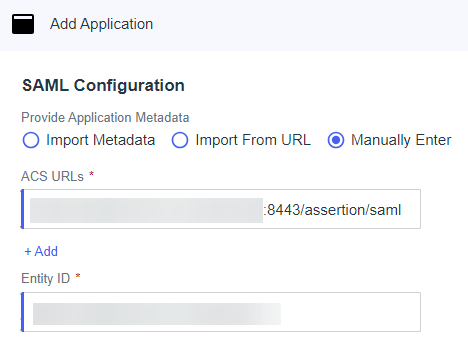
In Provide Metadata Configuration, select Manually Enter, and add the following:
-
In ACS URL, enter
https://<yourSAFEQ Clouddomain>:8443/assertion/saml. The port is 8443. In environments with reverse proxy infrastructure, do not specify the port number in the URL (https://<yourSAFEQ Clouddomain>/assertion/saml), meaning the default HTTPS port 443 will be used. -
In Entity ID, enter a unique identifier for this application. We recommend you to use your SAFEQ Cloud tenant address.
-
-
Next, click the Attribute Mappings tab and create attribute mappings as per the following table. Be aware that it is likely PingID will default the attribute saml_subject to User ID . You must change it to Username.
Attributes
PingOne Mappings
saml_subject
Username
fname
Given Name
group_membership
Groups IDs
group_membership_names
Group Names
lname
Family Name

-
Once the attribute mappings are complete, enable the application using the slider in the top right of the page.
-
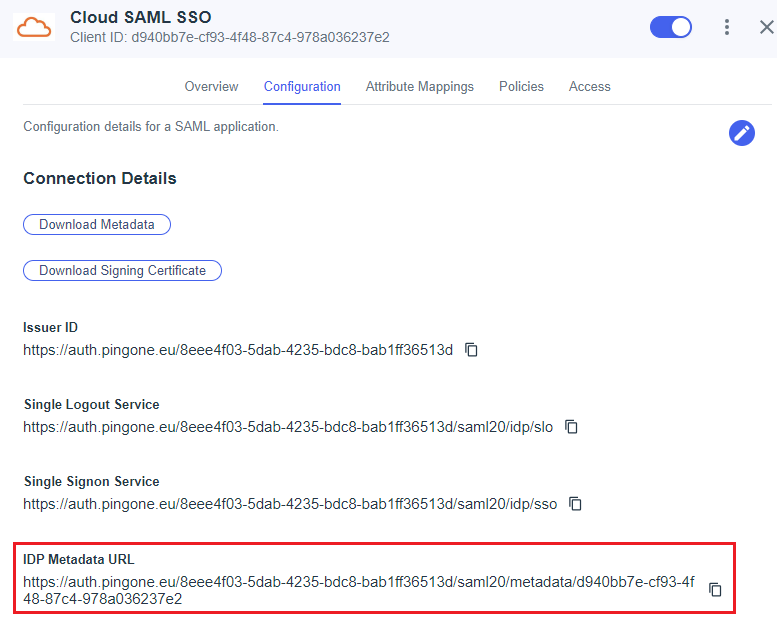
Click the Configuration tab of your SAML application and copy the IDP Metadata URL .
-
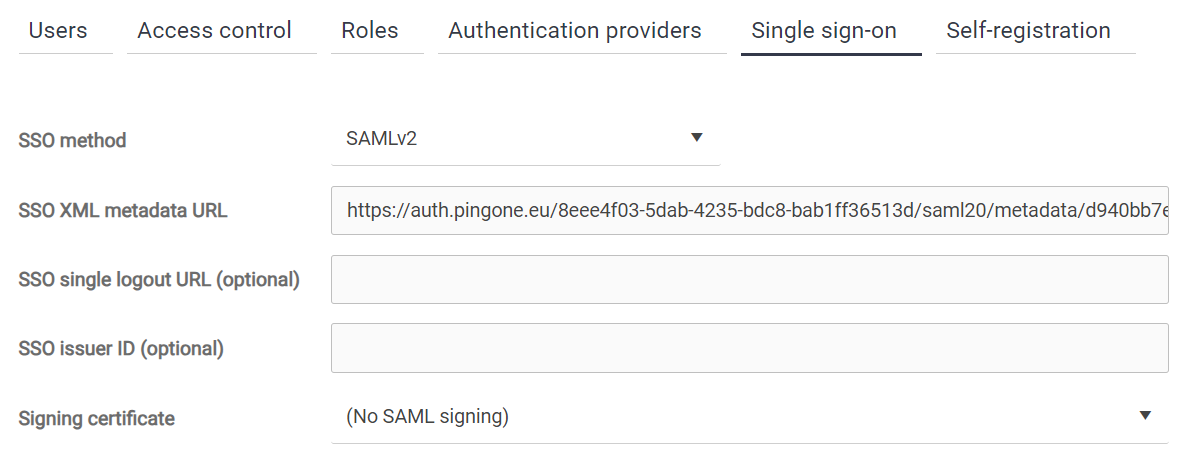
Log in to SAFEQ Cloud Web UI and go to Users page and to Single sign-on tab.
-
Paste the IDP Metadata URL into the SSO XML metadata URL field.
-
The SSO issuer ID must be the same string that you entered as the Entity ID in your PingID application configuration.
-
Set SSO method to SAMLv2.
-
Click Save.
-
Test your SSO by opening the SAFEQ Cloud Web UI login page. This will redirect you to the PingID authentication page. Log in with any user account from your PingID environment.
Every time a user logs into SAFEQ Cloud using SAML SSO, their given/family names and group membership will be synchronized from PingID.