Relevant Products
Client-side authentication is available in pro print pro mfp
To set up authentication and group synchronization with the PingID provider, you must create an OAuth2 Worker application in your PingID environment:
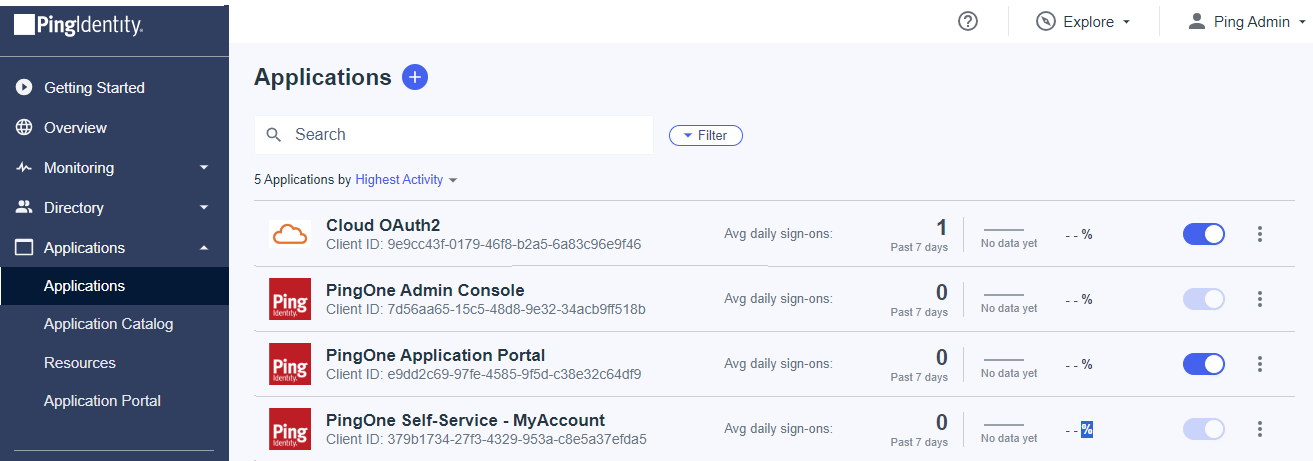
Overview of steps
Make sure to perform the following actions in the correct order, otherwise you might disable your existing authentication to your SAFEQ Cloud tenant. These steps are:
-
Set up the authentication provider in SAFEQ Cloud using a PingID Worker application.
-
Perform group synchronization for your PingID authentication provider.
-
Create Access Control records for the imported groups. Make sure that you will retain an administrative role in SAFEQ Cloud when you log in using your PingID identity. You must create access control records with the Administrator role for the group where you are a member.
OAuth2 Configuration
Authentication to PingID is done via the PingID OAuth Worker application.
Group synchronization with PingID is done via OAuth2 authentication of a user with administrative privileges for the Worker application.
Creating the Worker application
-
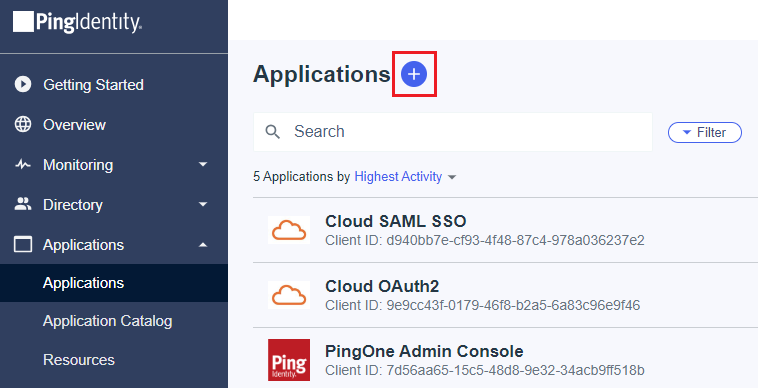
Log into your PingID environment. Go to Applications and click + to create a new application.
-
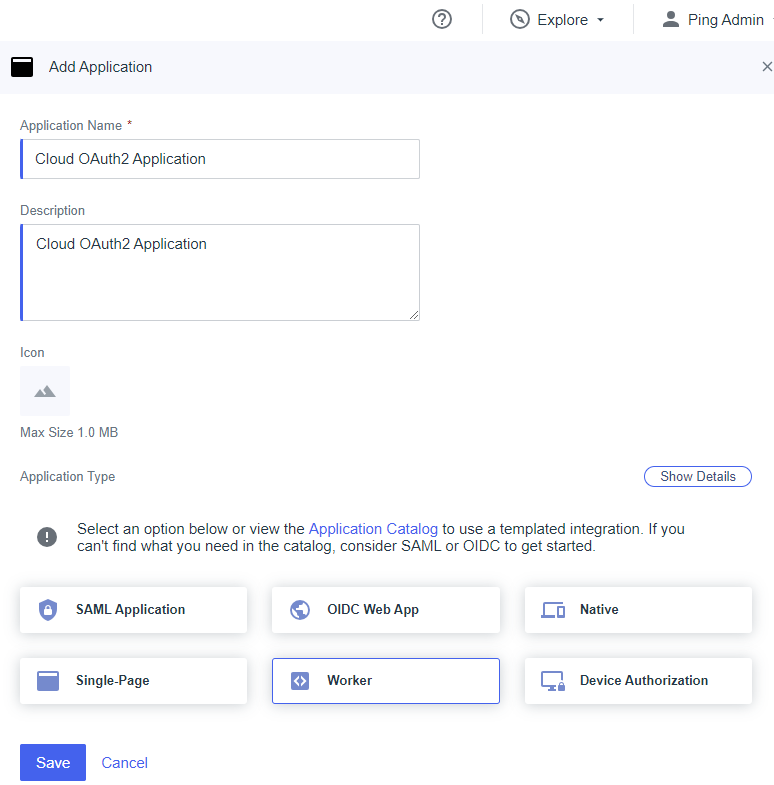
Enter the Application Name , an optional Description , and select Worker as the Application Type.
-
Click Save .
Configuring the Worker application
-
Once saved, select the Configuration tab, and click the pencil icon to edit it.
-
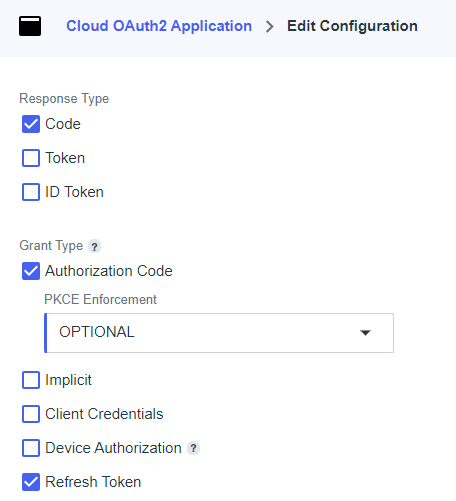
In Response Type, select Code.
-
In Grant Type, select:
-
Authorization Code. Also, in the PKCE Enforcement field, select OPTIONAL.
-
Refresh Token.
-
-
Disable (uncheck) the Client Credentials grant type.
-
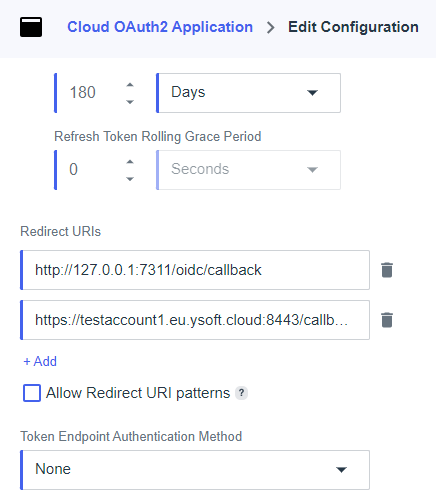
In Redirect URIs, enter the following:
-
http://127.0.0.1:7311/oidc/callbackThis redirect address is essential for the SAFEQ Cloud Client to work correctly with PingID authentication.
-
https://<yourSAFEQ Clouddomain>:8443/callback/ping. In environments with reverse proxy infrastructure, do not specify the port number in the URL, meaning the default HTTPS port 443 will be used.
-
-
In Token Endpoint Authentication Method, select None.
-
Click Save.
Selecting Resources
-
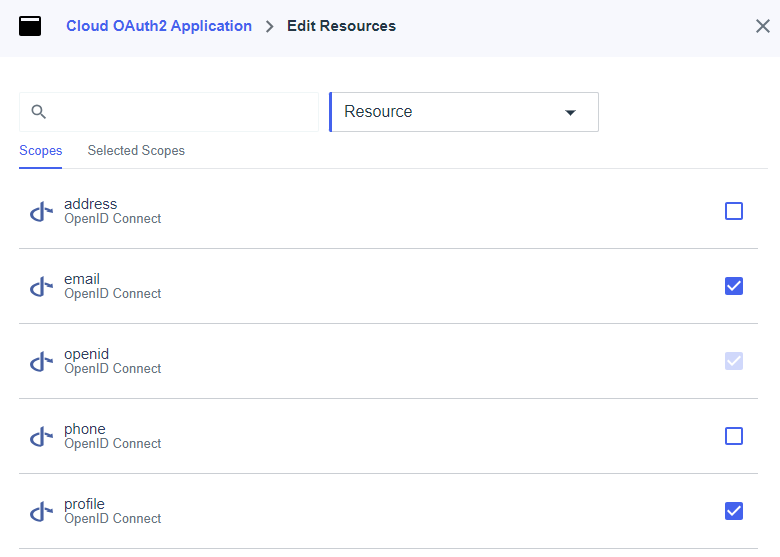
Once saved, click the Resources tab, then click the pencil icon to edit it. Enable the following scopes:
-
email (OpenID Connect)
-
profile (OpenID Connect)
-
-
Click Save.
Mapping the attributes
-
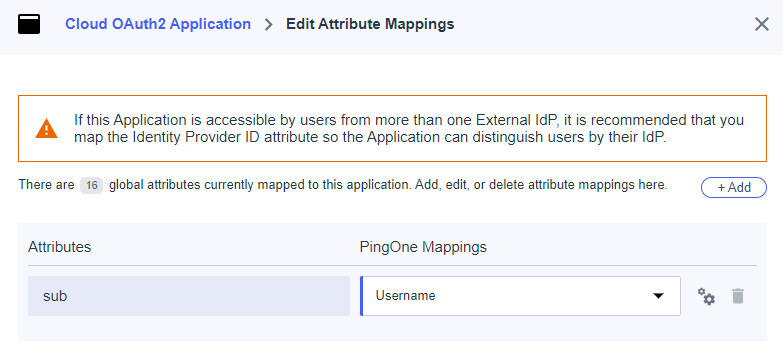
Once saved, click the Attribute Mappings tab, then click the pencil icon to edit. You should see one Attribute Mapping — sub = User ID.
-
Change this mapping to sub = Username.
-
Click Save.
Removing roles
-
Once saved, select the Roles tab. If there are any Roles listed, click the Trash icon to delete them, and Save once all are removed. If none are listed, proceed to the next step.
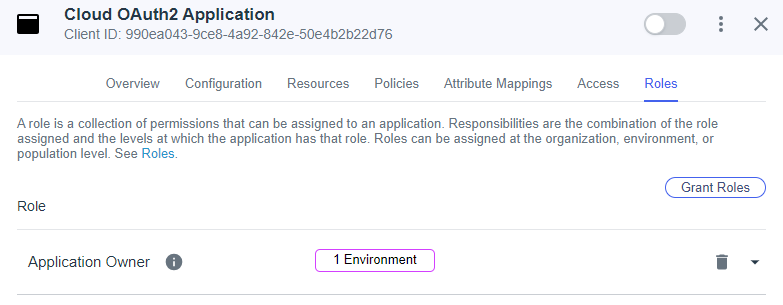
For security reasons, it is essential to remove all roles from this application. This will restrict the ability to use the application without an OAuth2 token. OAuth2 token is more secure because it is not stored anywhere and acquired only in interactive mode.
Enabling the Worker application
-
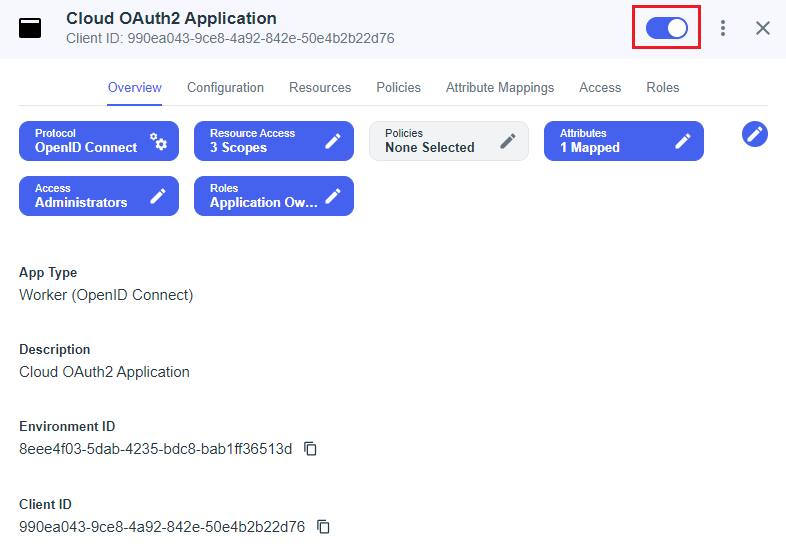
Click the Overview tab and click the slider in the top-right corner to enable your application. This will automatically save it.
-
Leave this page open as you will need access to some of the application IDs displayed there.
Configuring the PingID Authentication provider in SAFEQ Cloud Web UI
Now that the configuration on the PingID side is complete, proceed to register and configure the Authentication Provider in SAFEQ Cloud.
-
Log into SAFEQ Cloud Web UI and go to Users page and to Authentication providers tab.
-
Click Add to add a new provider.
-
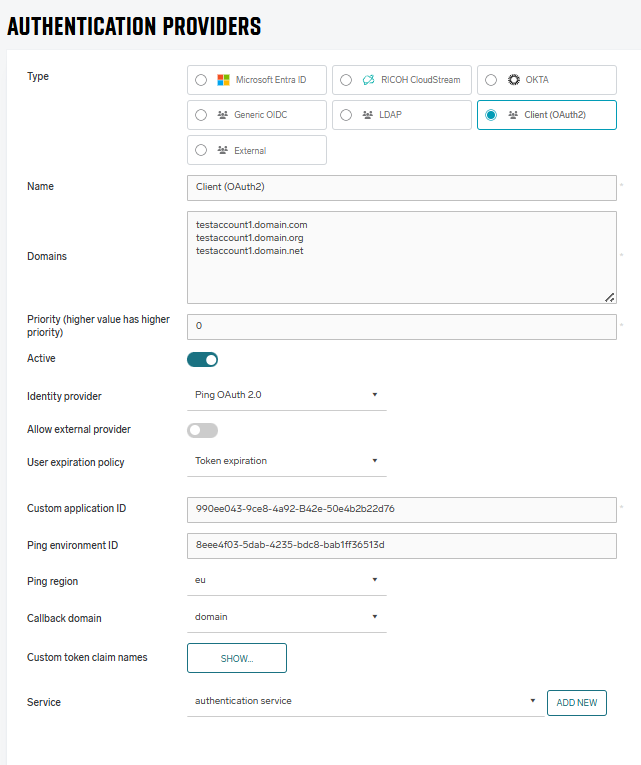
In Type, select Client (OAuth2).
-
In Name, enter the Authentication provider name. Should be prefilled with the selected type.
-
In Domains, list all of the domains present in your PingID environment that will need to authenticate to SAFEQ Cloud. For example, to allow user john.doe@acme.com to log in via this Authentication provider, enter the acme.com domain here.
-
In Identity provider, select Ping OAuth 2.0.
-
In Custom application ID, paste the Client ID from your PingID application Overview tab.
-
In Ping environment ID, paste the Environment ID from your PingID application Overview tab.
-
Ping region is the region in which your PingID environment is registered. You can determine it from your PingID Console URL which is in the format of
https://console.pingone.[region].Alternatively, you can find it in any of the URLs listed under your PingID OAuth application Configuration tab such ashttps://auth.pingone.[region]/[client]/as/authorize -
In Callback domain for custom application, enter the SAFEQ Cloud tenant address you used as the Redirect URI in your PingID OAuth application configuration.
-
Click Save.
For more details on the available options for OAuth2 authentication, see Client authentication.
Synchronizing groups
After creating and saving your new Authentication provider, you can perform group synchronization, which will allow you to manage Access Control of your SAFEQ Cloud tenant via PingID group membership.
To synchronize groups perform the following steps:
-
On the SAFEQ Cloud Web UI Users page, under the Authentication providers tab, click the Edit icon for your PingID provider.
-
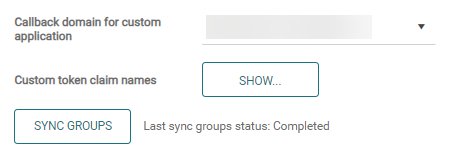
Click SYNC GROUPS.
-
You will be redirected to the PingID login page.
-
Log in with an account that has permission to read groups and follow the on-screen instructions. When the form closes, group synchronization is complete. For more details, see Client authentication, section Sync groups.
-
You will now be able to search for PingID groups on the Access Control tab of the Users page. For more details, see Access Control.
