Relevant Products
Vendor/Customer account section is available in BREEZE print BREEZE MFD pro print pro mfp
Custom Domains are available in pro print pro mfp
Show logo on applicable embedded terminals option is available in BREEZE MFD pro mfp
Mobile release printer QR code text option is available in pro print pro mfp
Target node is visible in pro print pro mfp
Each Vendor primary account, Customer primary account, or standard Account in the YSoft SAFEQ Cloud system tree has a Settings > Vendor account or Customer account menu item. It holds the general settings for the entity in the system, such as Name, logo branding, and any domain names that identify their system in the SAFEQ Cloud.
Adding Vendor accounts and Customer accounts
-
Select a parent node within the SAFEQ Cloud system tree.
-
If you wish to add a Vendor account, click Create new and select Vendor.
-
If you wish to add a Customer account, click Create new and select Customer.

Vendor accounts and Customer accounts can only be added to Primary nodes or Vendor nodes, not to Customer account nodes.
General setup
Configure the Vendor account or Customer account settings. Most options are the same for both types of accounts.
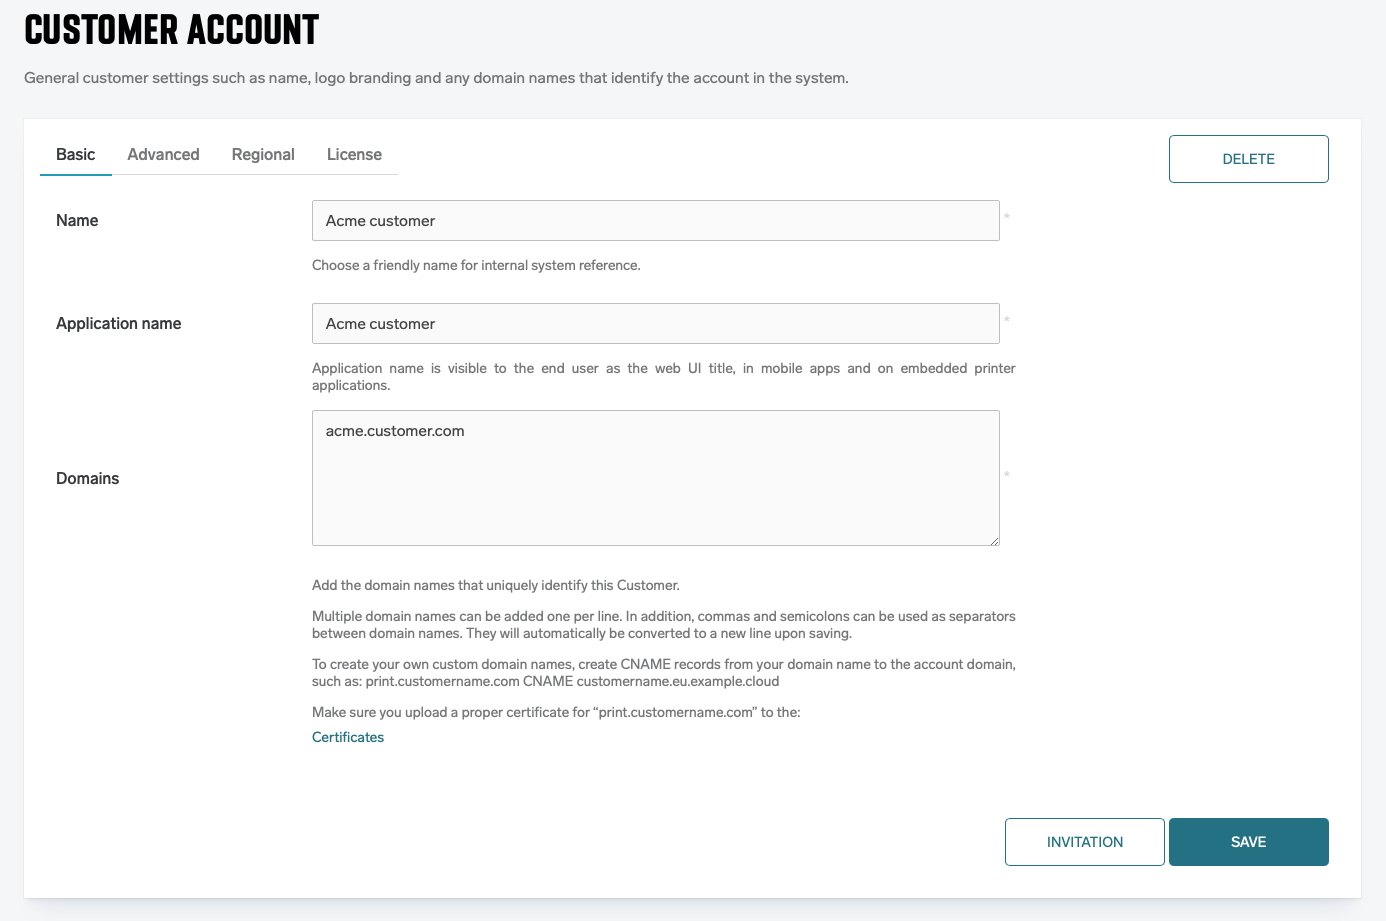
Basic

-
Name – Enter a user-friendly name of the Vendor or Customer within the SAFEQ Cloud system.
-
Application Name – The application name is automatically copied from the Name field when creating the account but you can modify it. Note that the Application name is primarily for display purposes.
-
Domains – Add the domain names that uniquely identify this Vendor or Customer. You can add multiple domain names, one per line. You can use commas and semicolons as separators between domain names. They will automatically be converted to a new line upon saving. When creating the account, the first domain name will be automatically copied from the Name field. During the copying, it will be converted to a valid domain name format. If any parent Vendor account of this new Vendor or Customer account has the "Default domain for new accounts" set, then this value from the closest Vendor will be used as a suffix to your domain name. See the above screenshot where the ".eu.example.cloud" part was inherited from a parent Vendor.
-
Application Name – Add an application name for the Vendor or Customer. This is primarily for display purposes only.
-
OEM Logo – Upload a logo image file that will be displayed both in the top right side of the SAFEQ Cloud Web UI and on the login screen for this Vendor or Customer.
Advanced

-
Default location – This value indicates the Vendor or Customer location. If no location is set on the Vendor or Customer, the no data value will automatically be assigned to the Location parameter.
-
Default duplex mode – Duplex mode for default Configuration profile. Note: This setting serves only for creating default profile during customer creation and will not be visible once customer has been created.
-
Default color mode – Color mode for default Configuration profile. Note: This setting serves only for creating default profile during customer creation and will not be visible once customer has been created.
-
Target Node – This read-only value displays the parent node where the Vendor or Customer will be placed.
-
Default domain for new accounts – Available only for Vendor accounts. The subdomain that all new Vendor or Customer accounts created under this new Vendor account will receive. The format is <account>.<Default domain for new accounts>. Make sure that the cloud server contains a correct wildcard certificate and that your DNS points correctly to the cloud.
-
Mobile release printer QR code text – The text displayed under QR codes used to release print jobs via the Mobile application
-
Policy for unknown location – This policy determines which print queues are available to the SAFEQ Cloud Client if it does not belong to any known location.
-
Default theme – Allows you to change the visual style of the SAFEQ Cloud Web UI.
-
Custom logo – Upload a logo image file that is displayed in the upper left corner of the SAFEQ Cloud Web UI and on the login screen for this vendor/customer account. The maximum size of the logo is 200 kB.
-
Login screen background – Upload an image file that is displayed on the login screen of the SAFEQ Cloud Web UI. The maximum size of the background is 1000 kB.
-
Customer reference number - Available only for Customer accounts. Allows to save any kind of ID as the reference from the external systems.
Some options are specific only for customer accounts:

-
Show logo on applicable embedded terminals – Check the checkbox so the image uploaded in Custom logo appears also in the upper left corner of an installed Embedded Terminal.
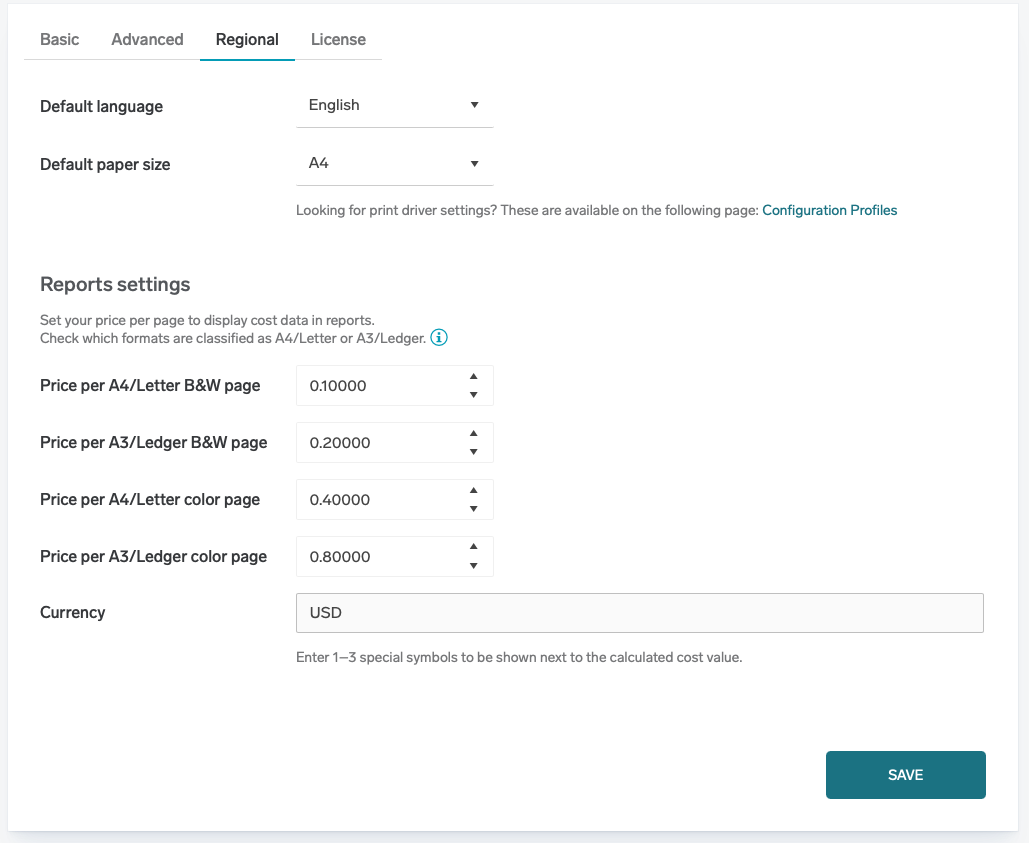
Regional
-
Default language – The default language of the account.
-
Default paper size – The default paper size of the account.
-
Report settings - Available only for Customer accounts. Set your price per page to display cost data in reports. Different price can be set for small/large page and color/B&W page. Currency in which prices are entered can be set.

Click SAVE to create the Vendor or Customer entity within the SAFEQ Cloud system.
Editing the settings
Select the appropriate node in the SAFEQ Cloud system tree. This will open the navigation sub-menu. In the sub-menu, click Customer account.

