This manual was created based on Xerox VersaLink C405DN and should be applicable to most VersaLink MFDs, although slight differences may occur.
Before installation of YSoft SafeQ Embedded Terminal
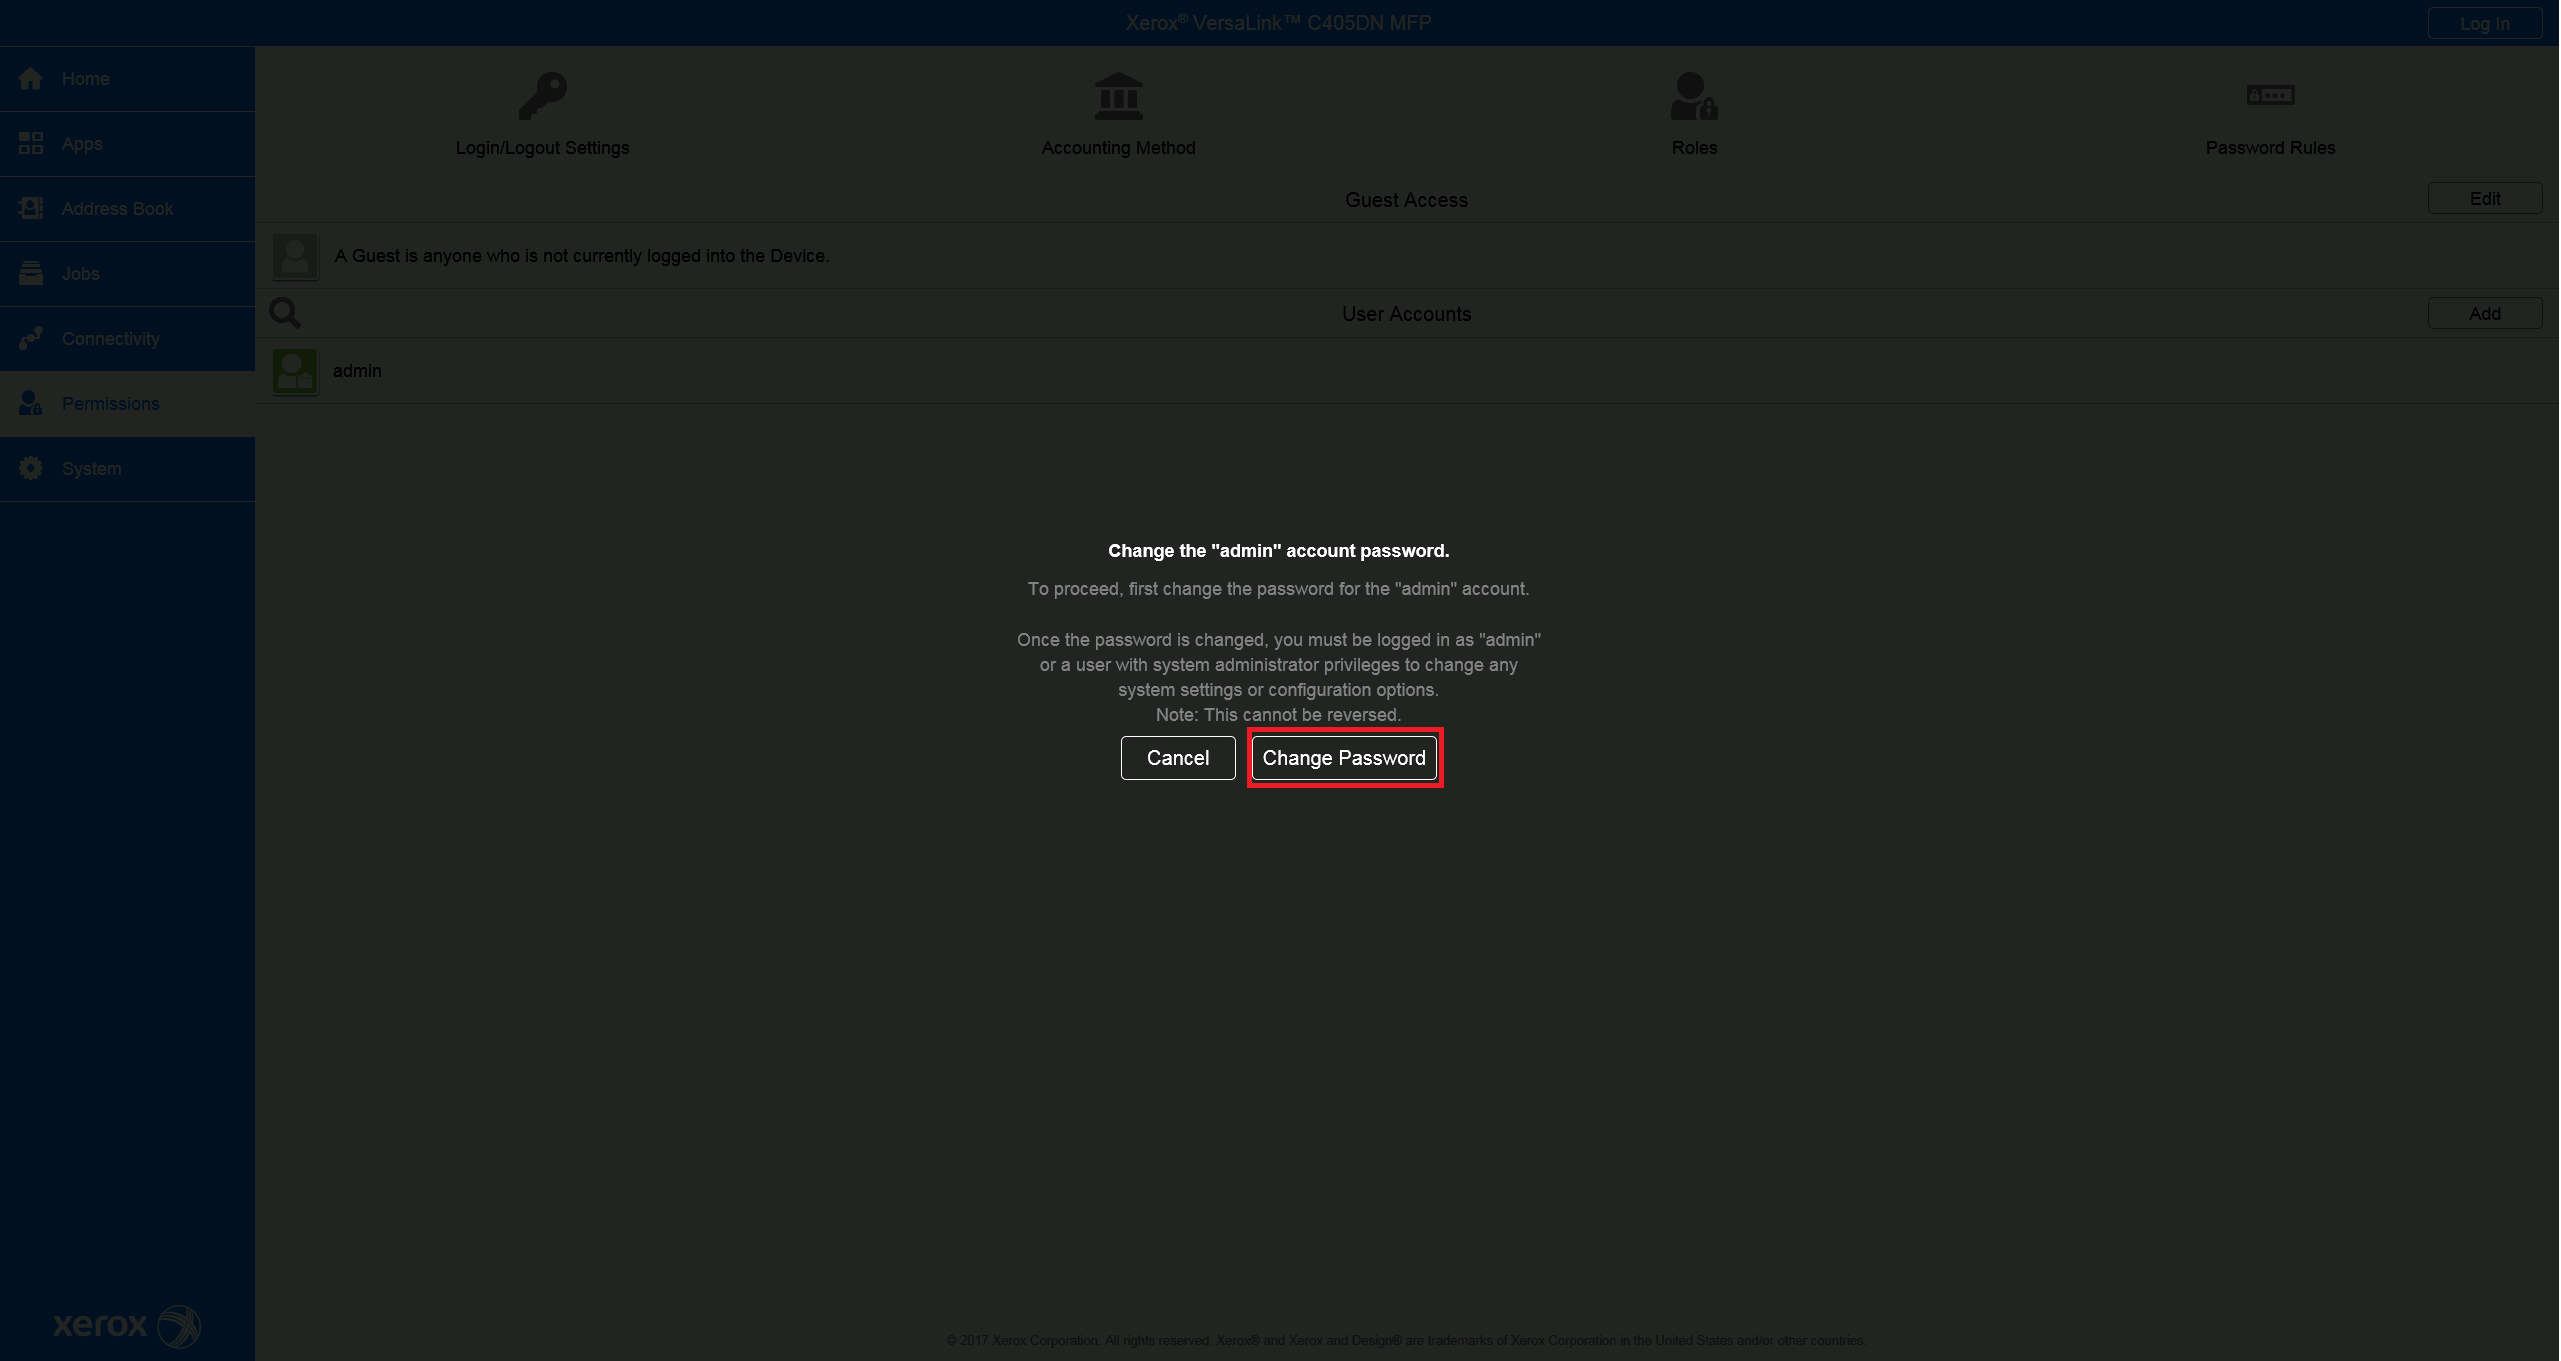
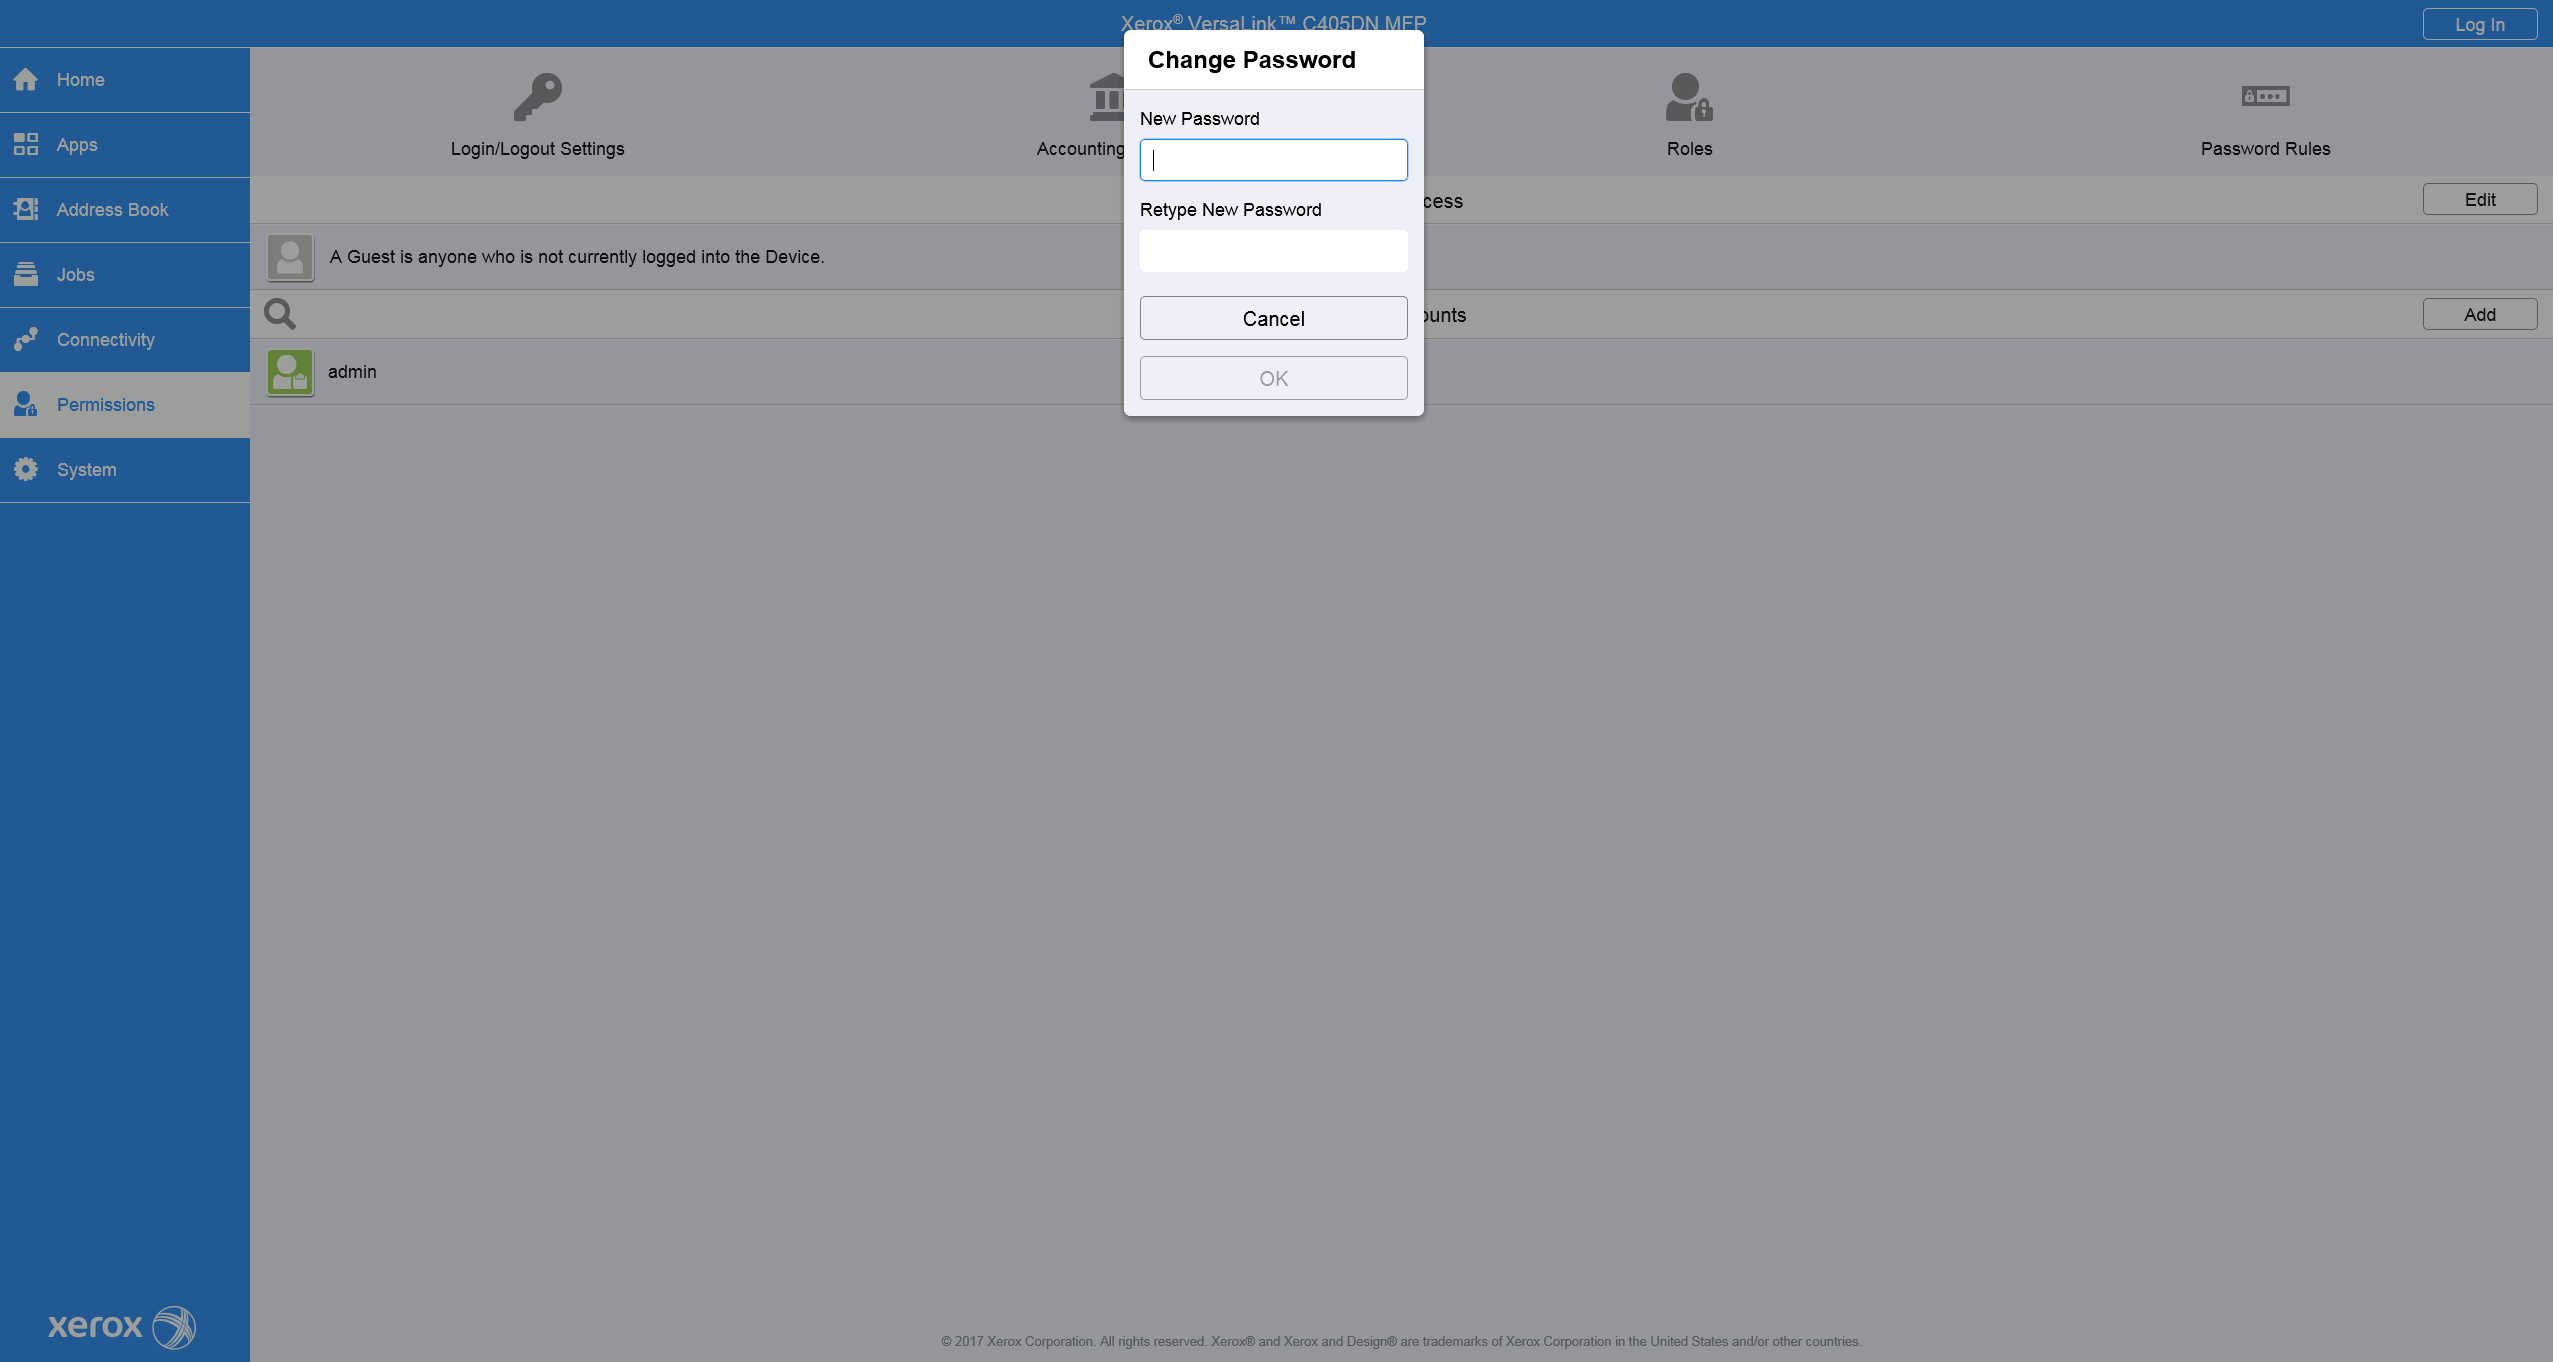
Change Administrator password
For the older printer models, go to Permissions > Login/Logout Settings press the Change Password button, and insert a new administrator password.
For the newer printer models, go to Properties > Security > Password Policies > Admin Password and change the administrator password.
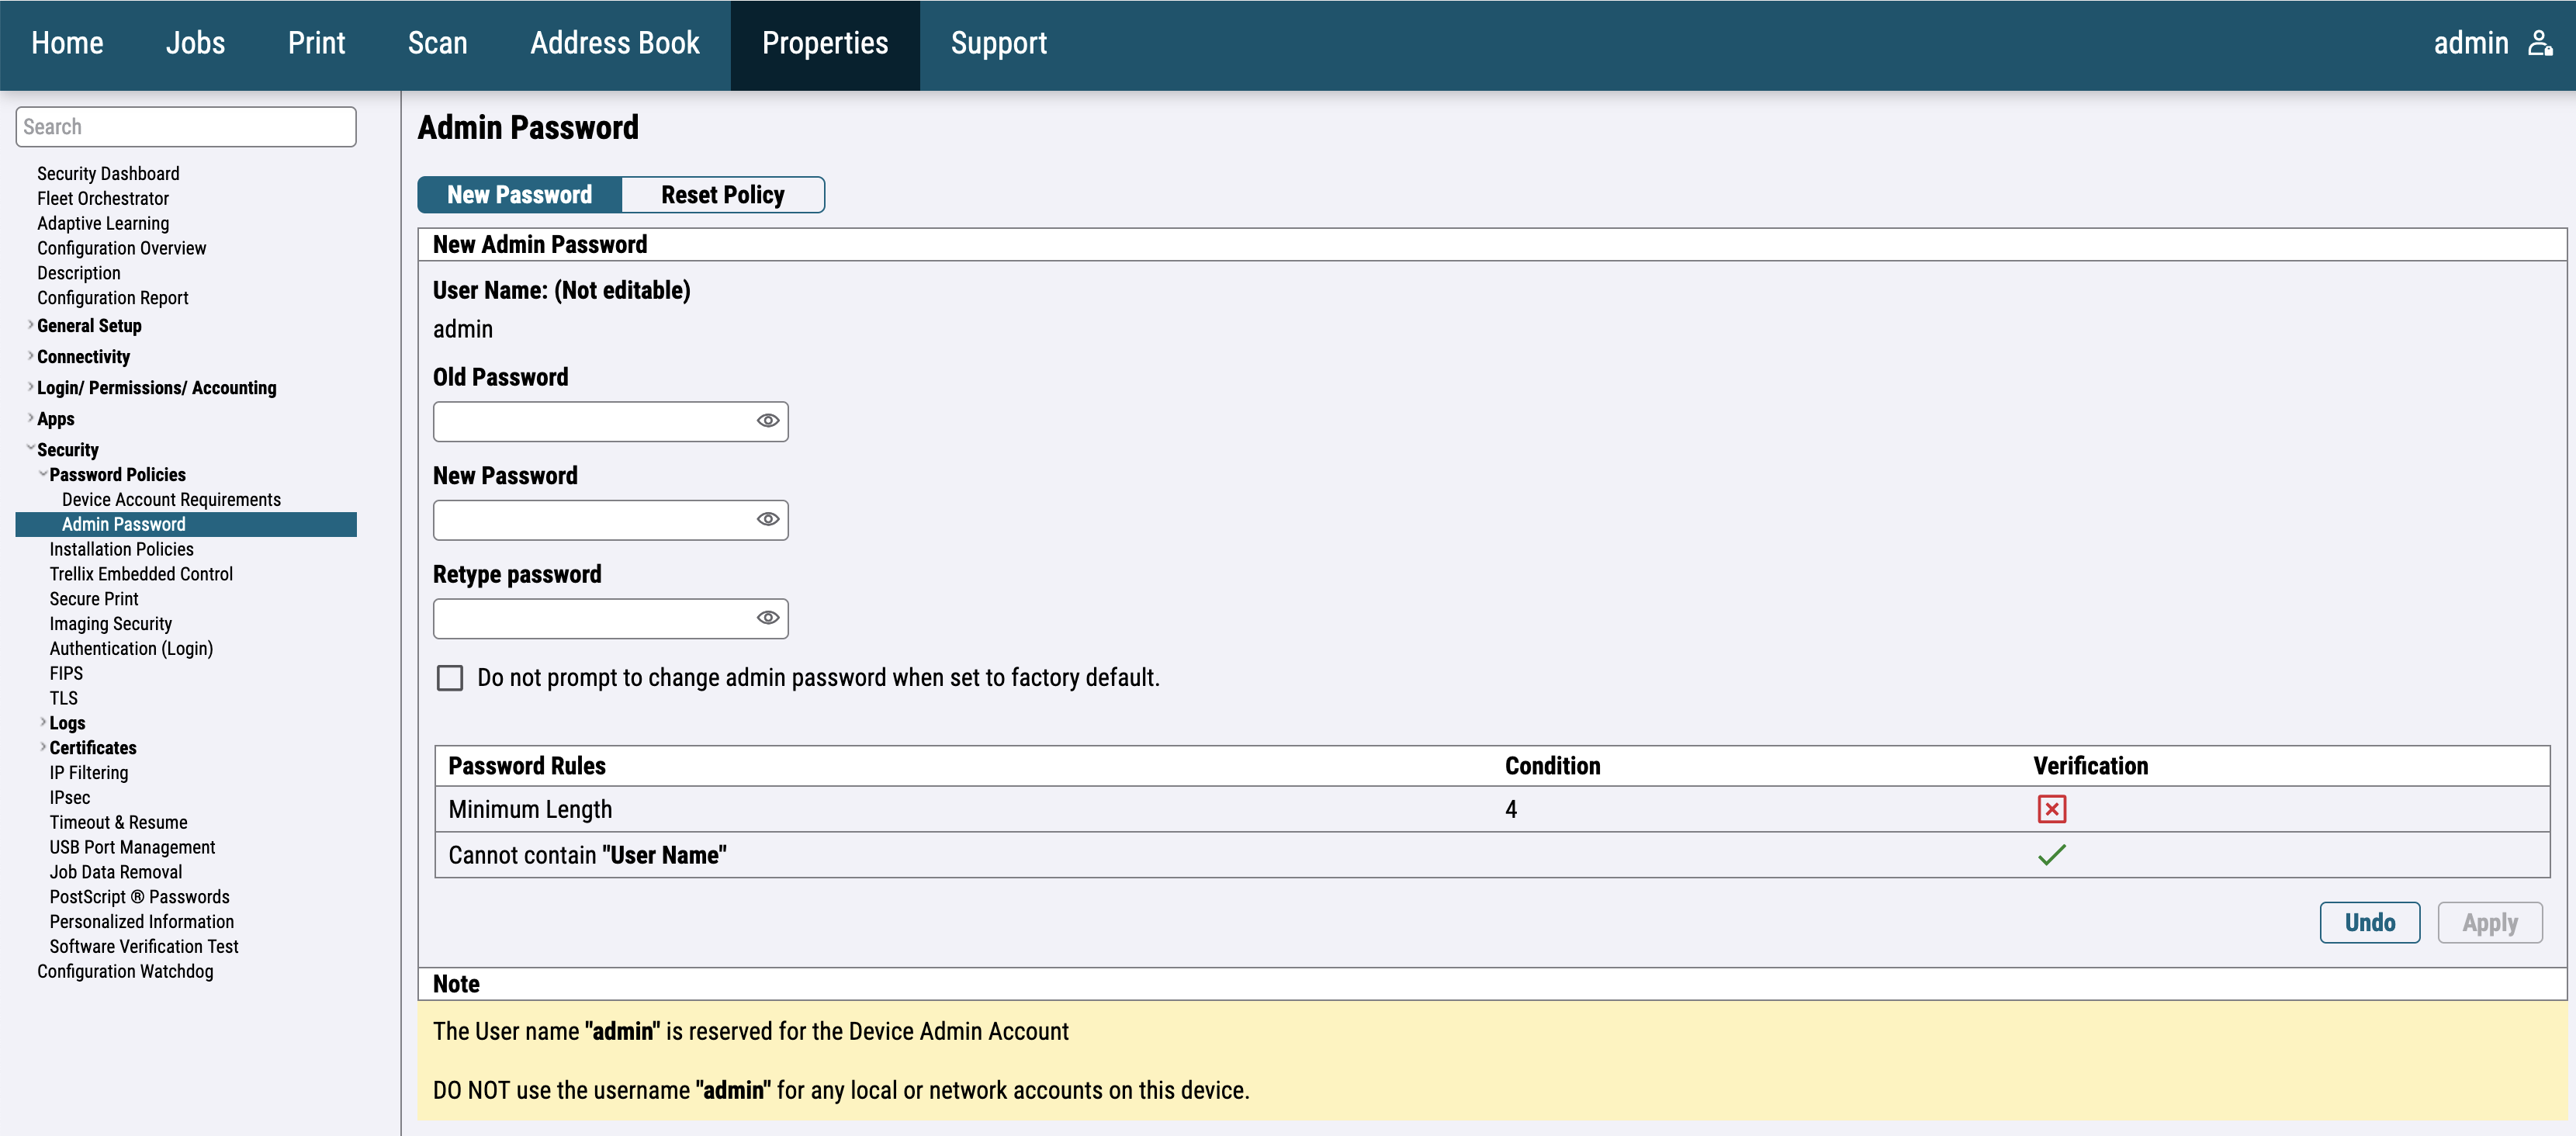
Log in as admin for the next steps.
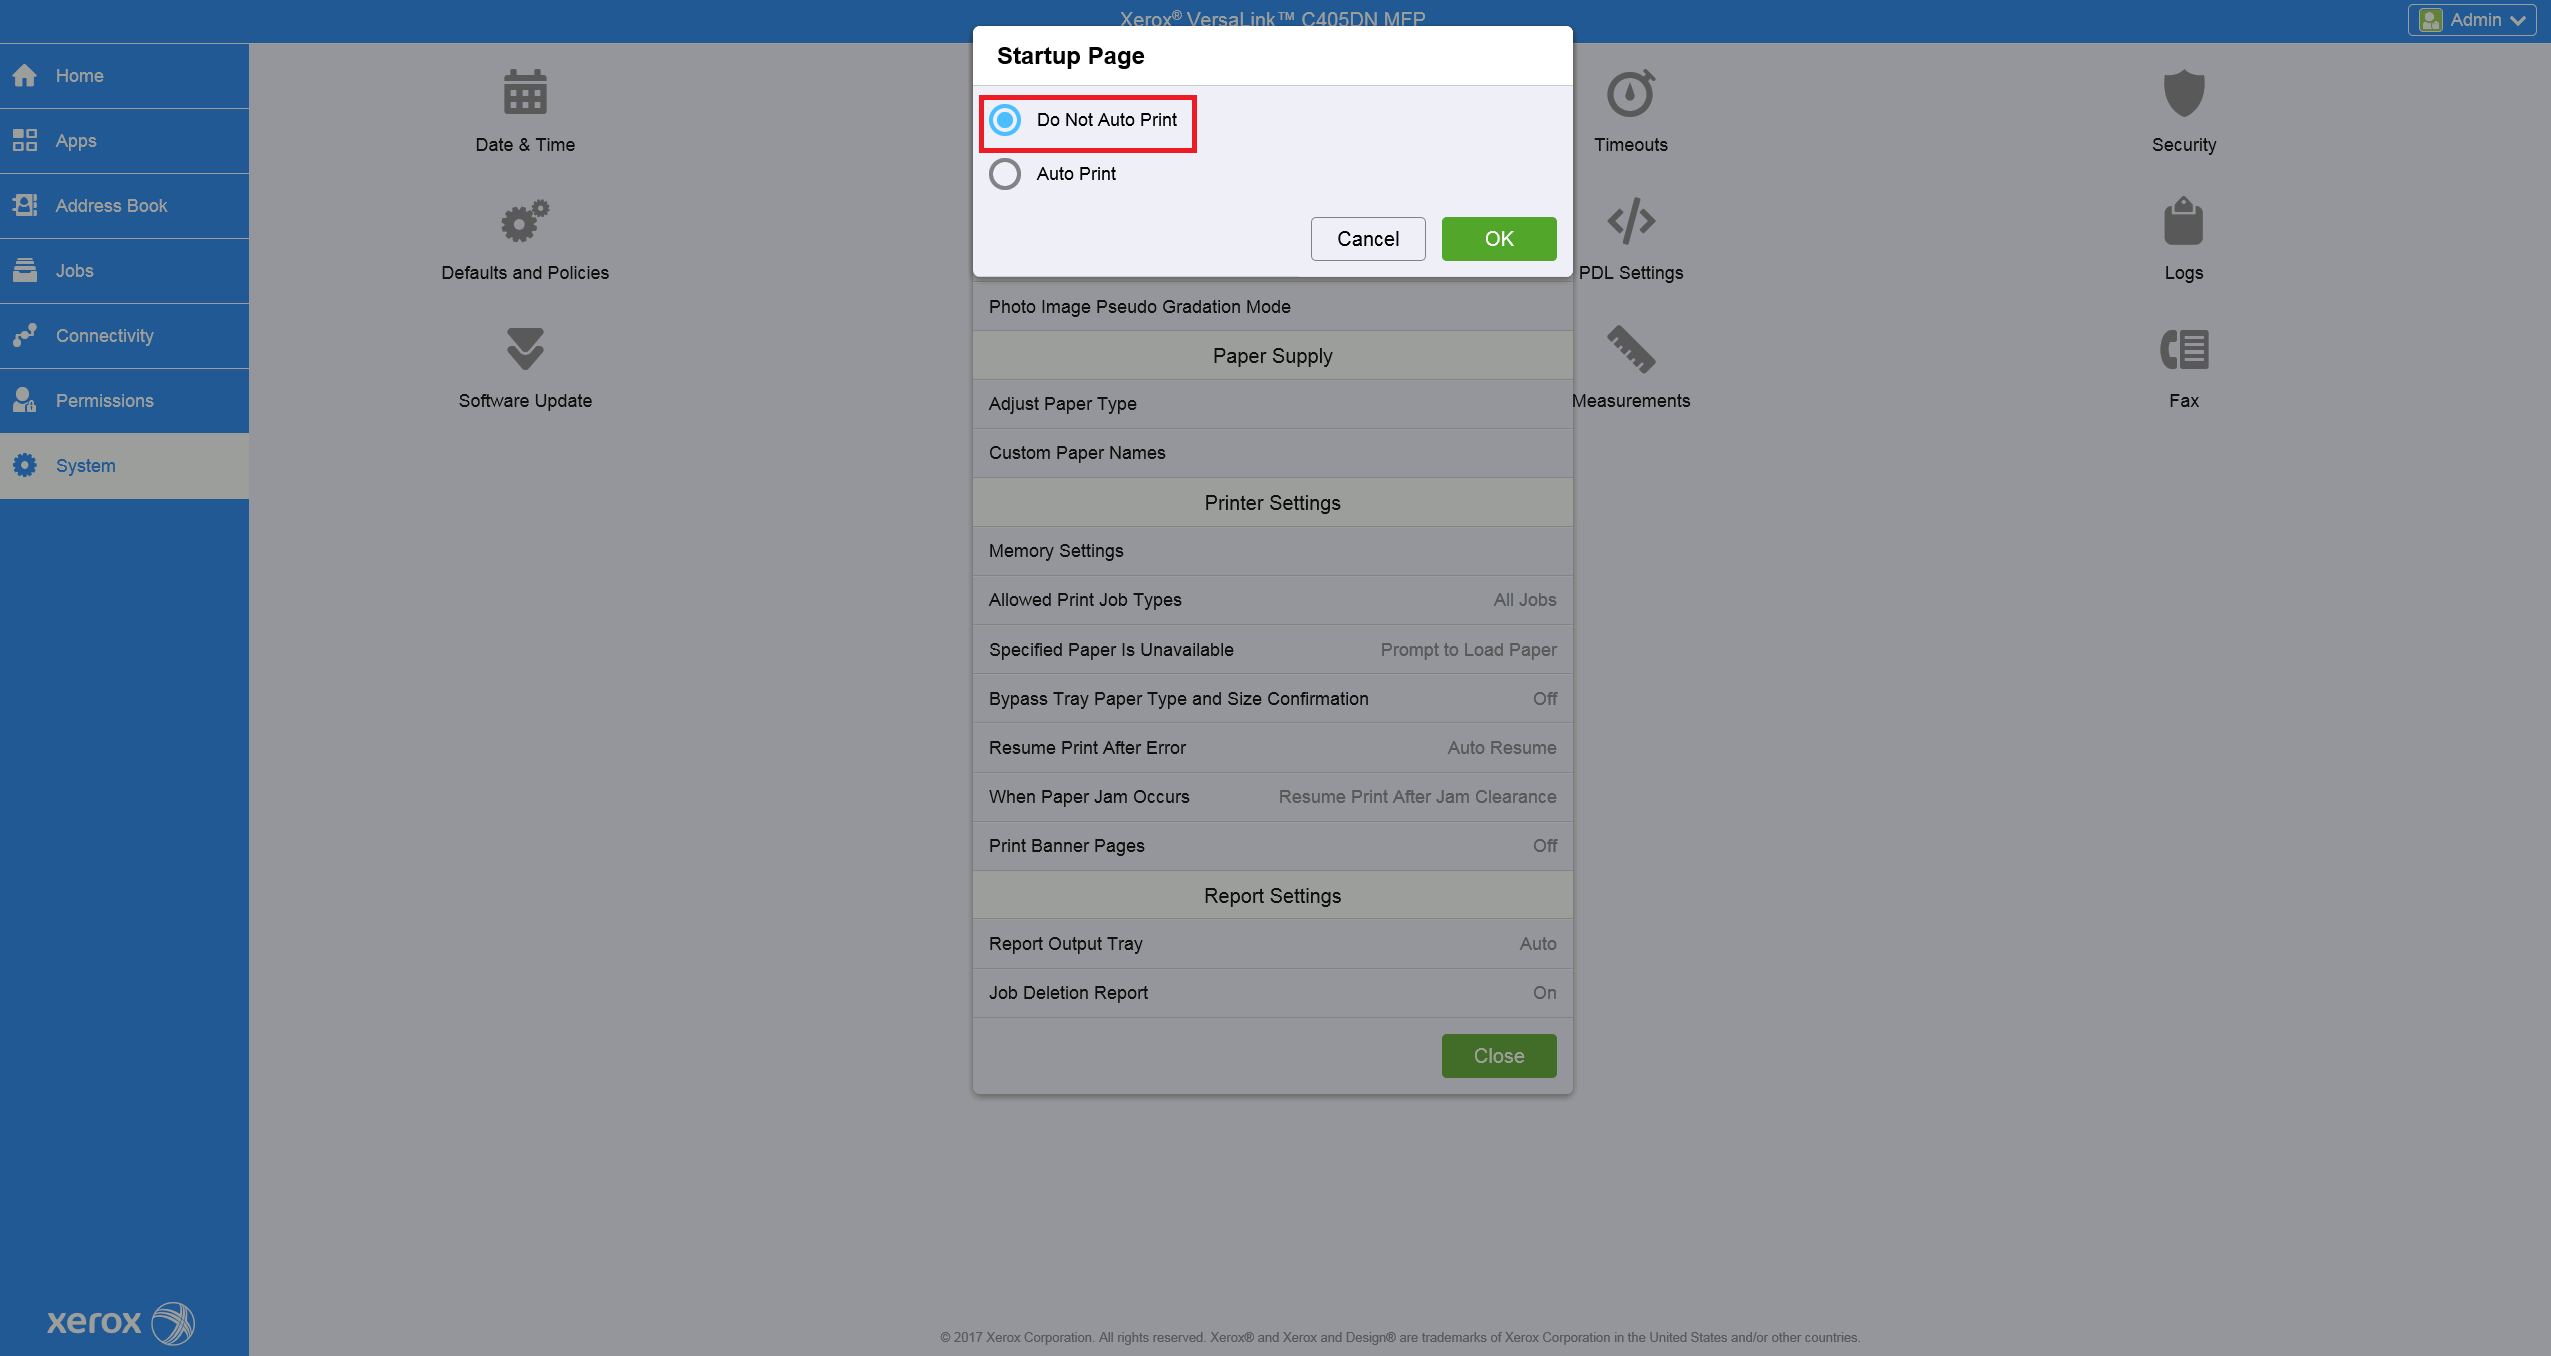
Disable Automatic print of Startup Page
Automatic print of Startup Page can block device installation. Then some installation steps fail.
Go to System > Defaults and Policies and click on Startup Page.

In the new window, choose Do Not Auto Print.
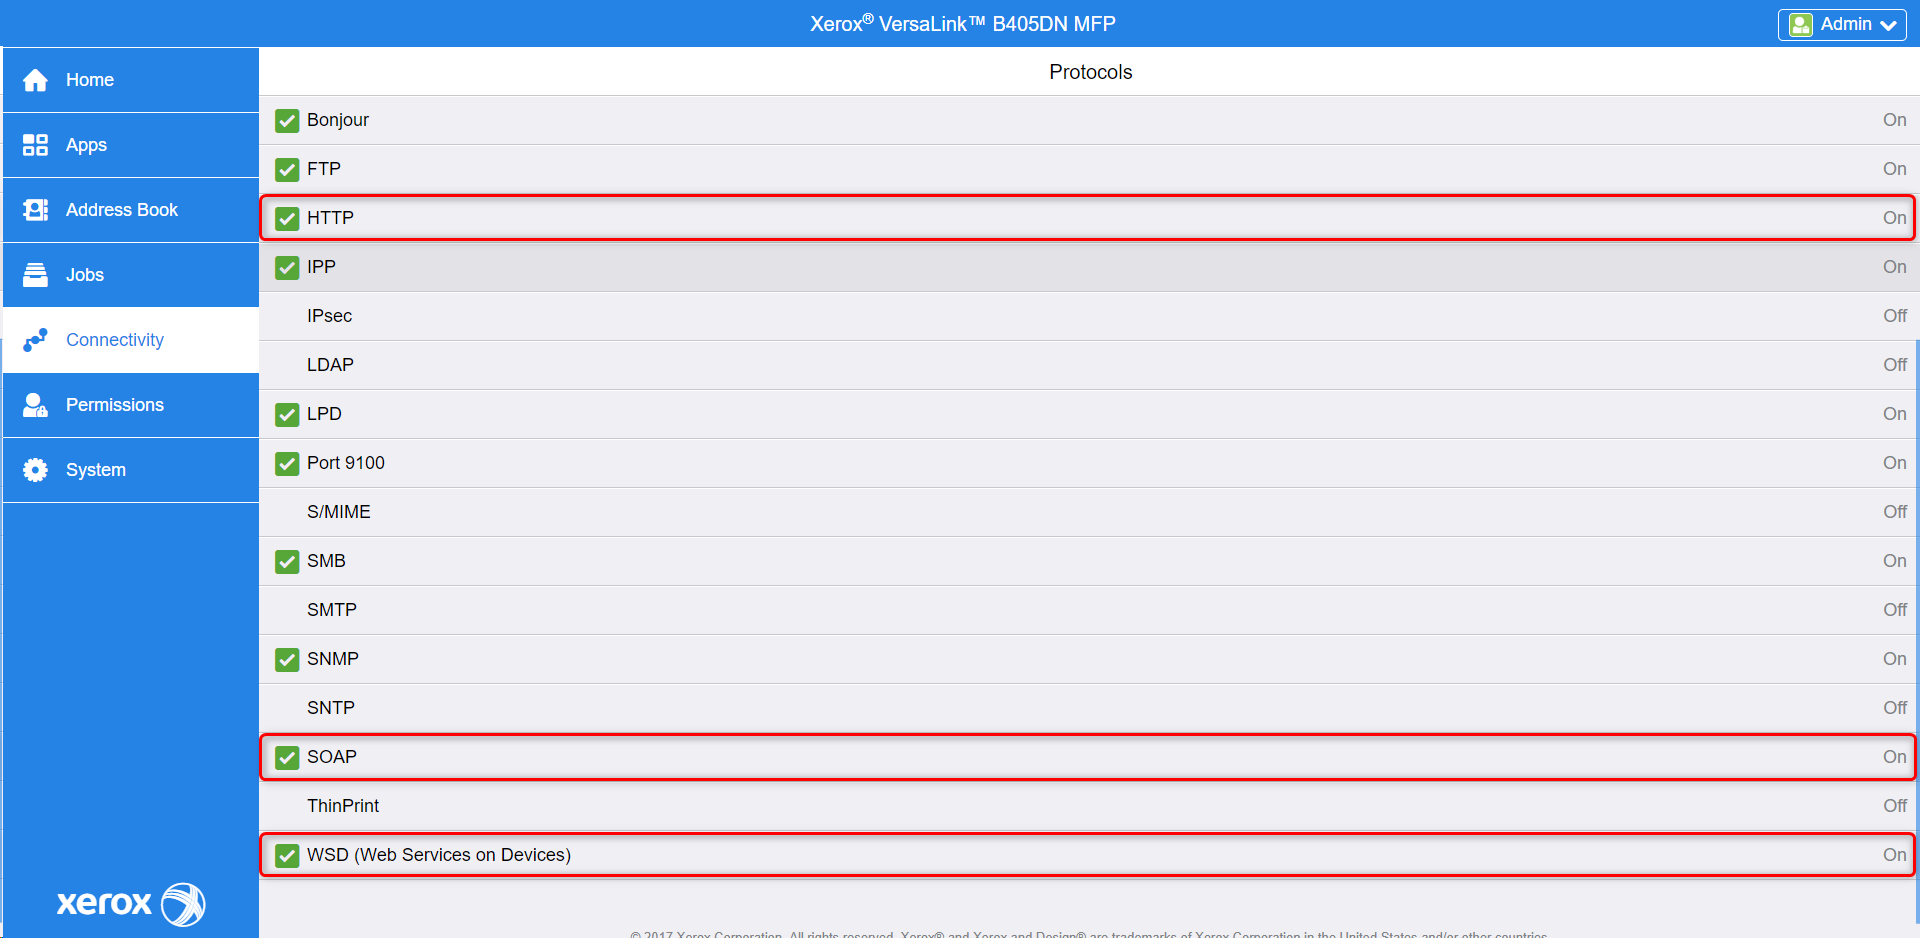
Enable HTTPS, SOAP, and WSD
For the older printer models, go to Connectivity then choose HTTP from the list of protocols and enable HTTPS, SOAP, and WSD.
HTTP configuration:

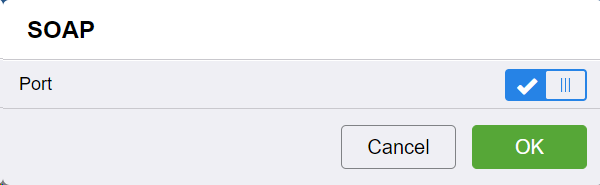
SOAP configuration:
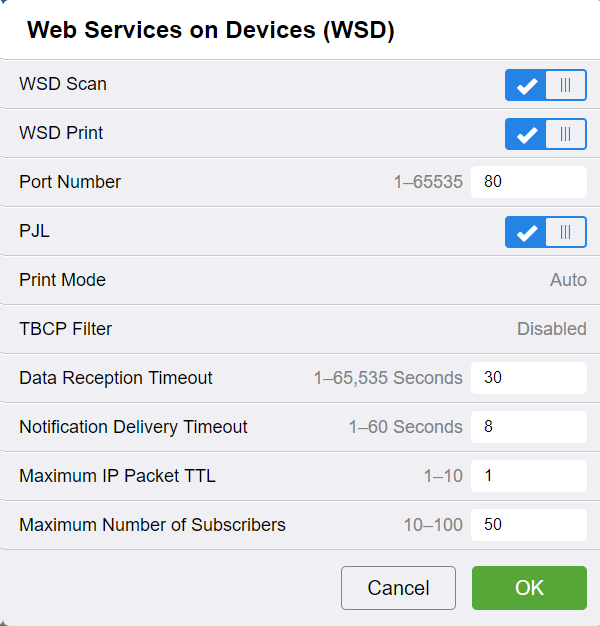
WSD configuration:
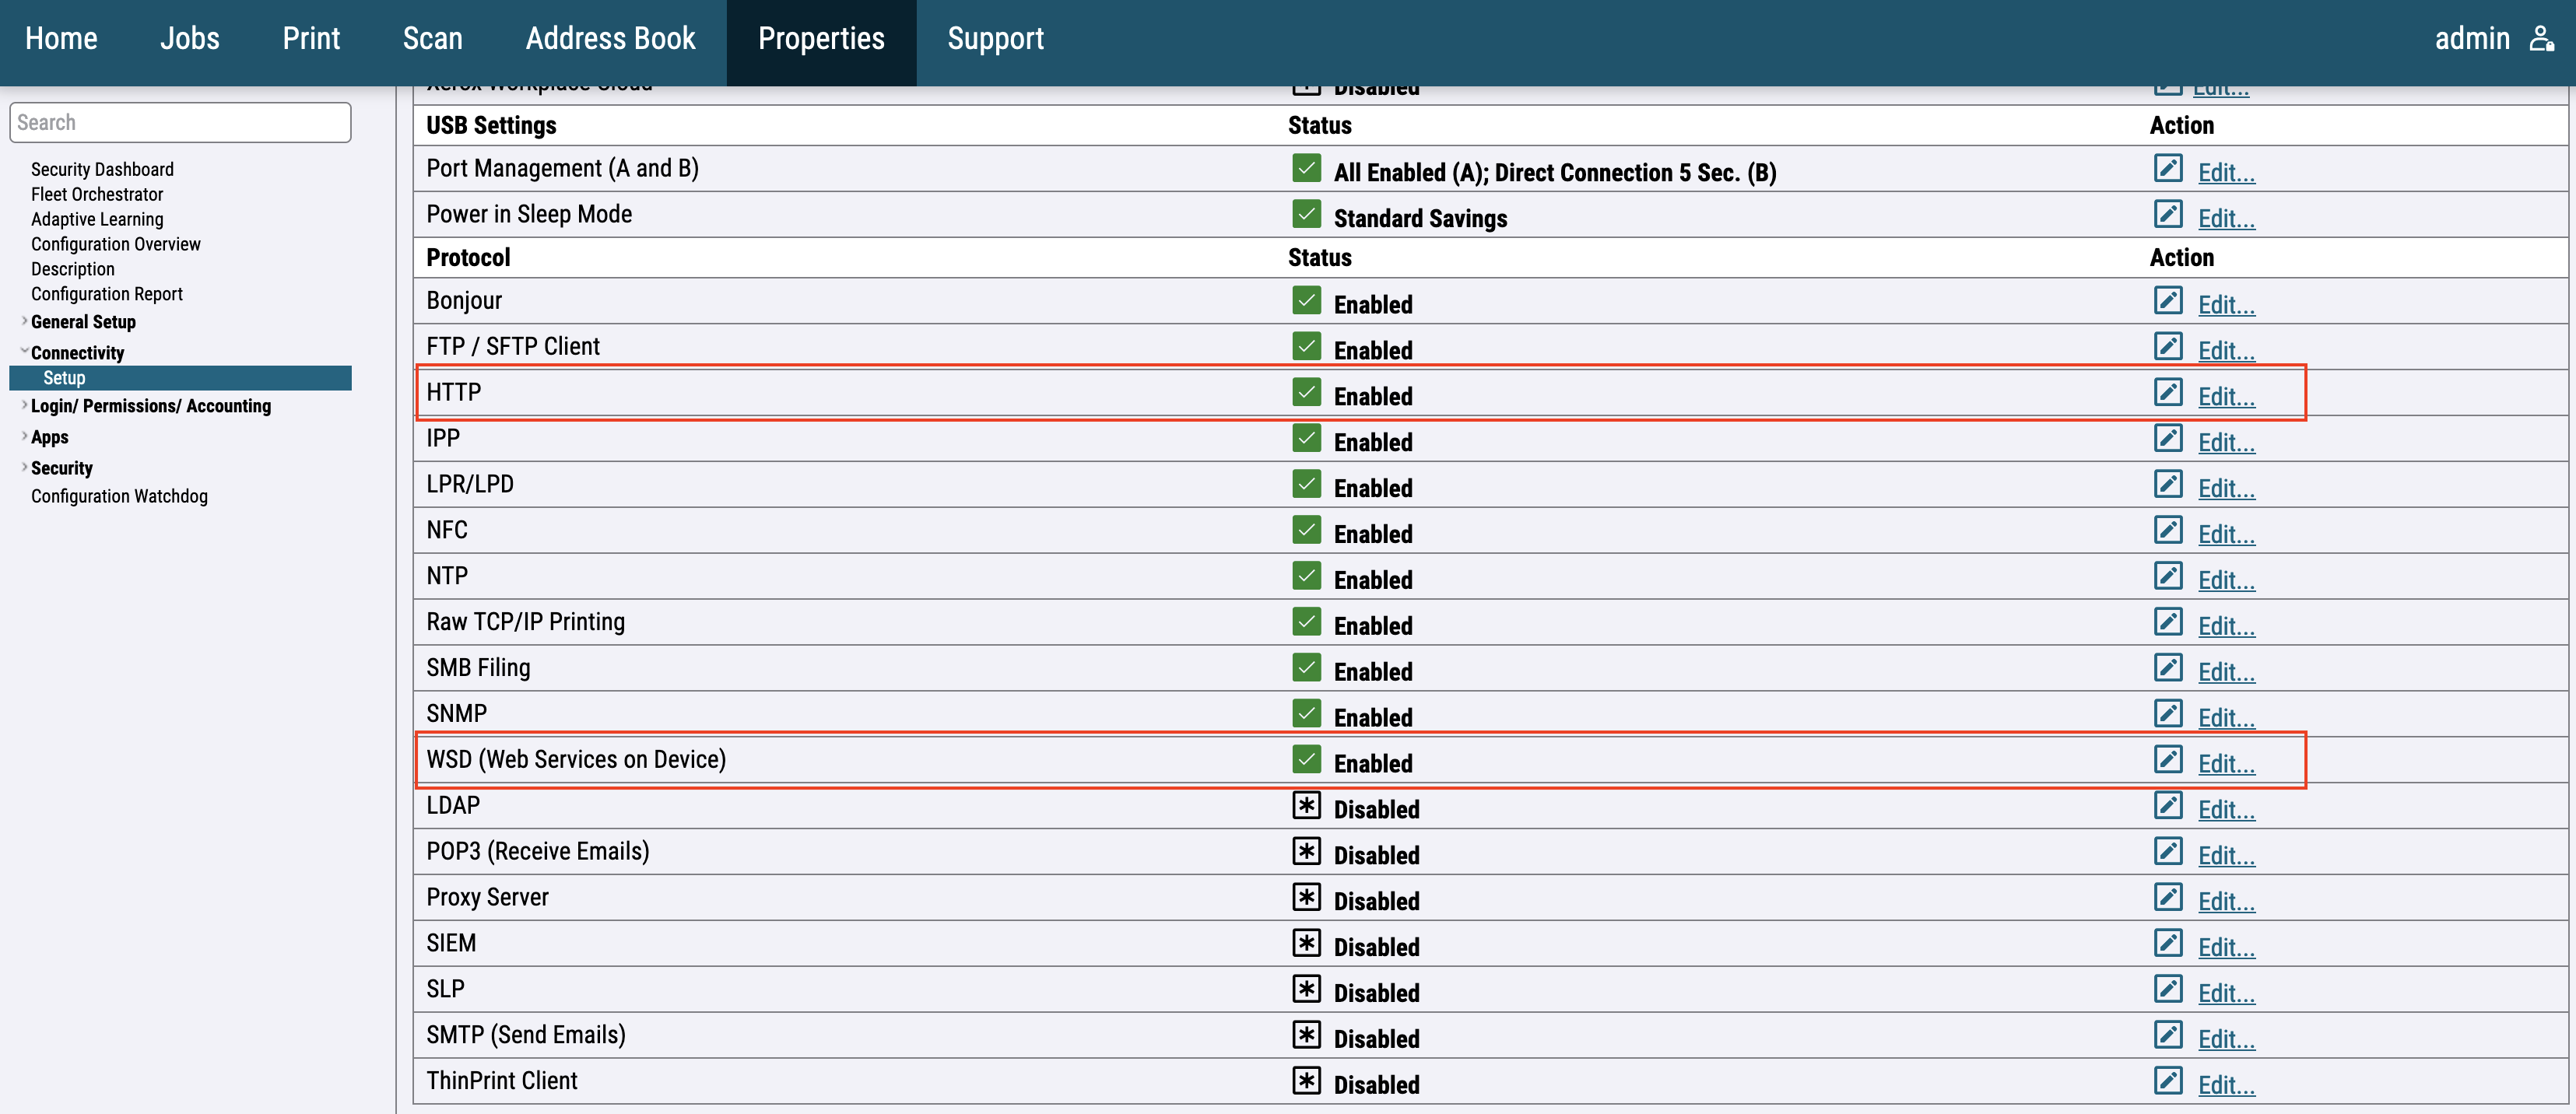
For the newer printer models, go to Connectivity > Setup then choose HTTP and WSD from the list of protocols.
SNMPv3
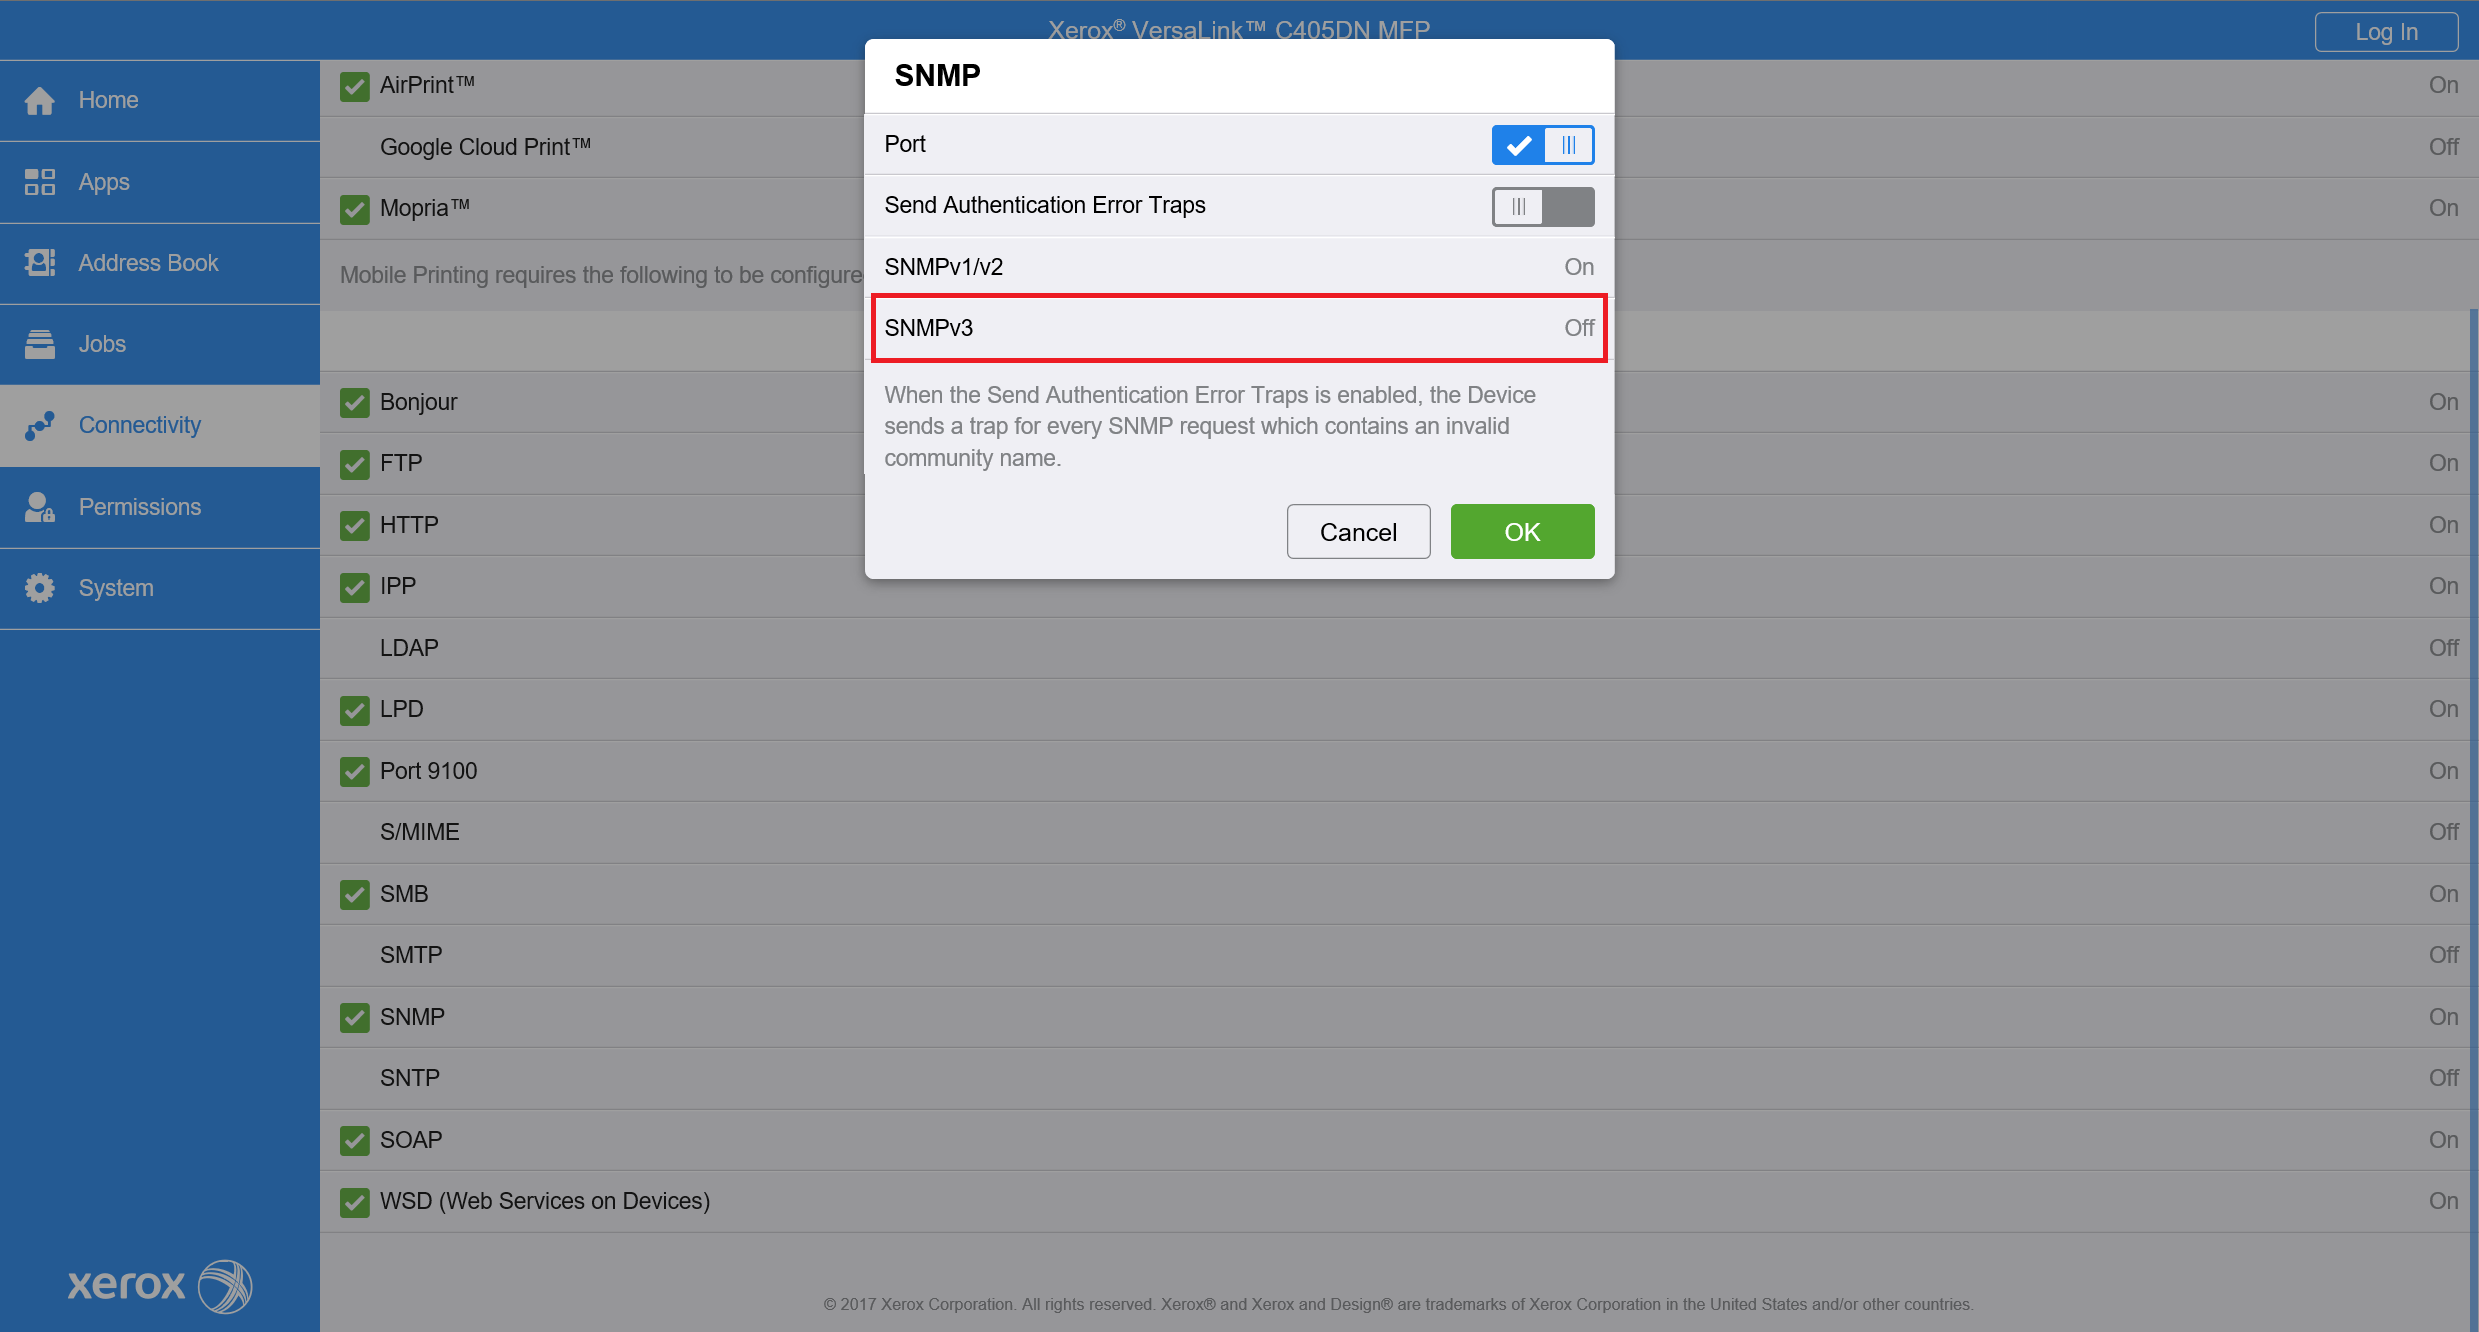
For the older printer models, go to Connectivity then choose SNMP from the list of protocols. A new window will appear and then click on SNMPv3.
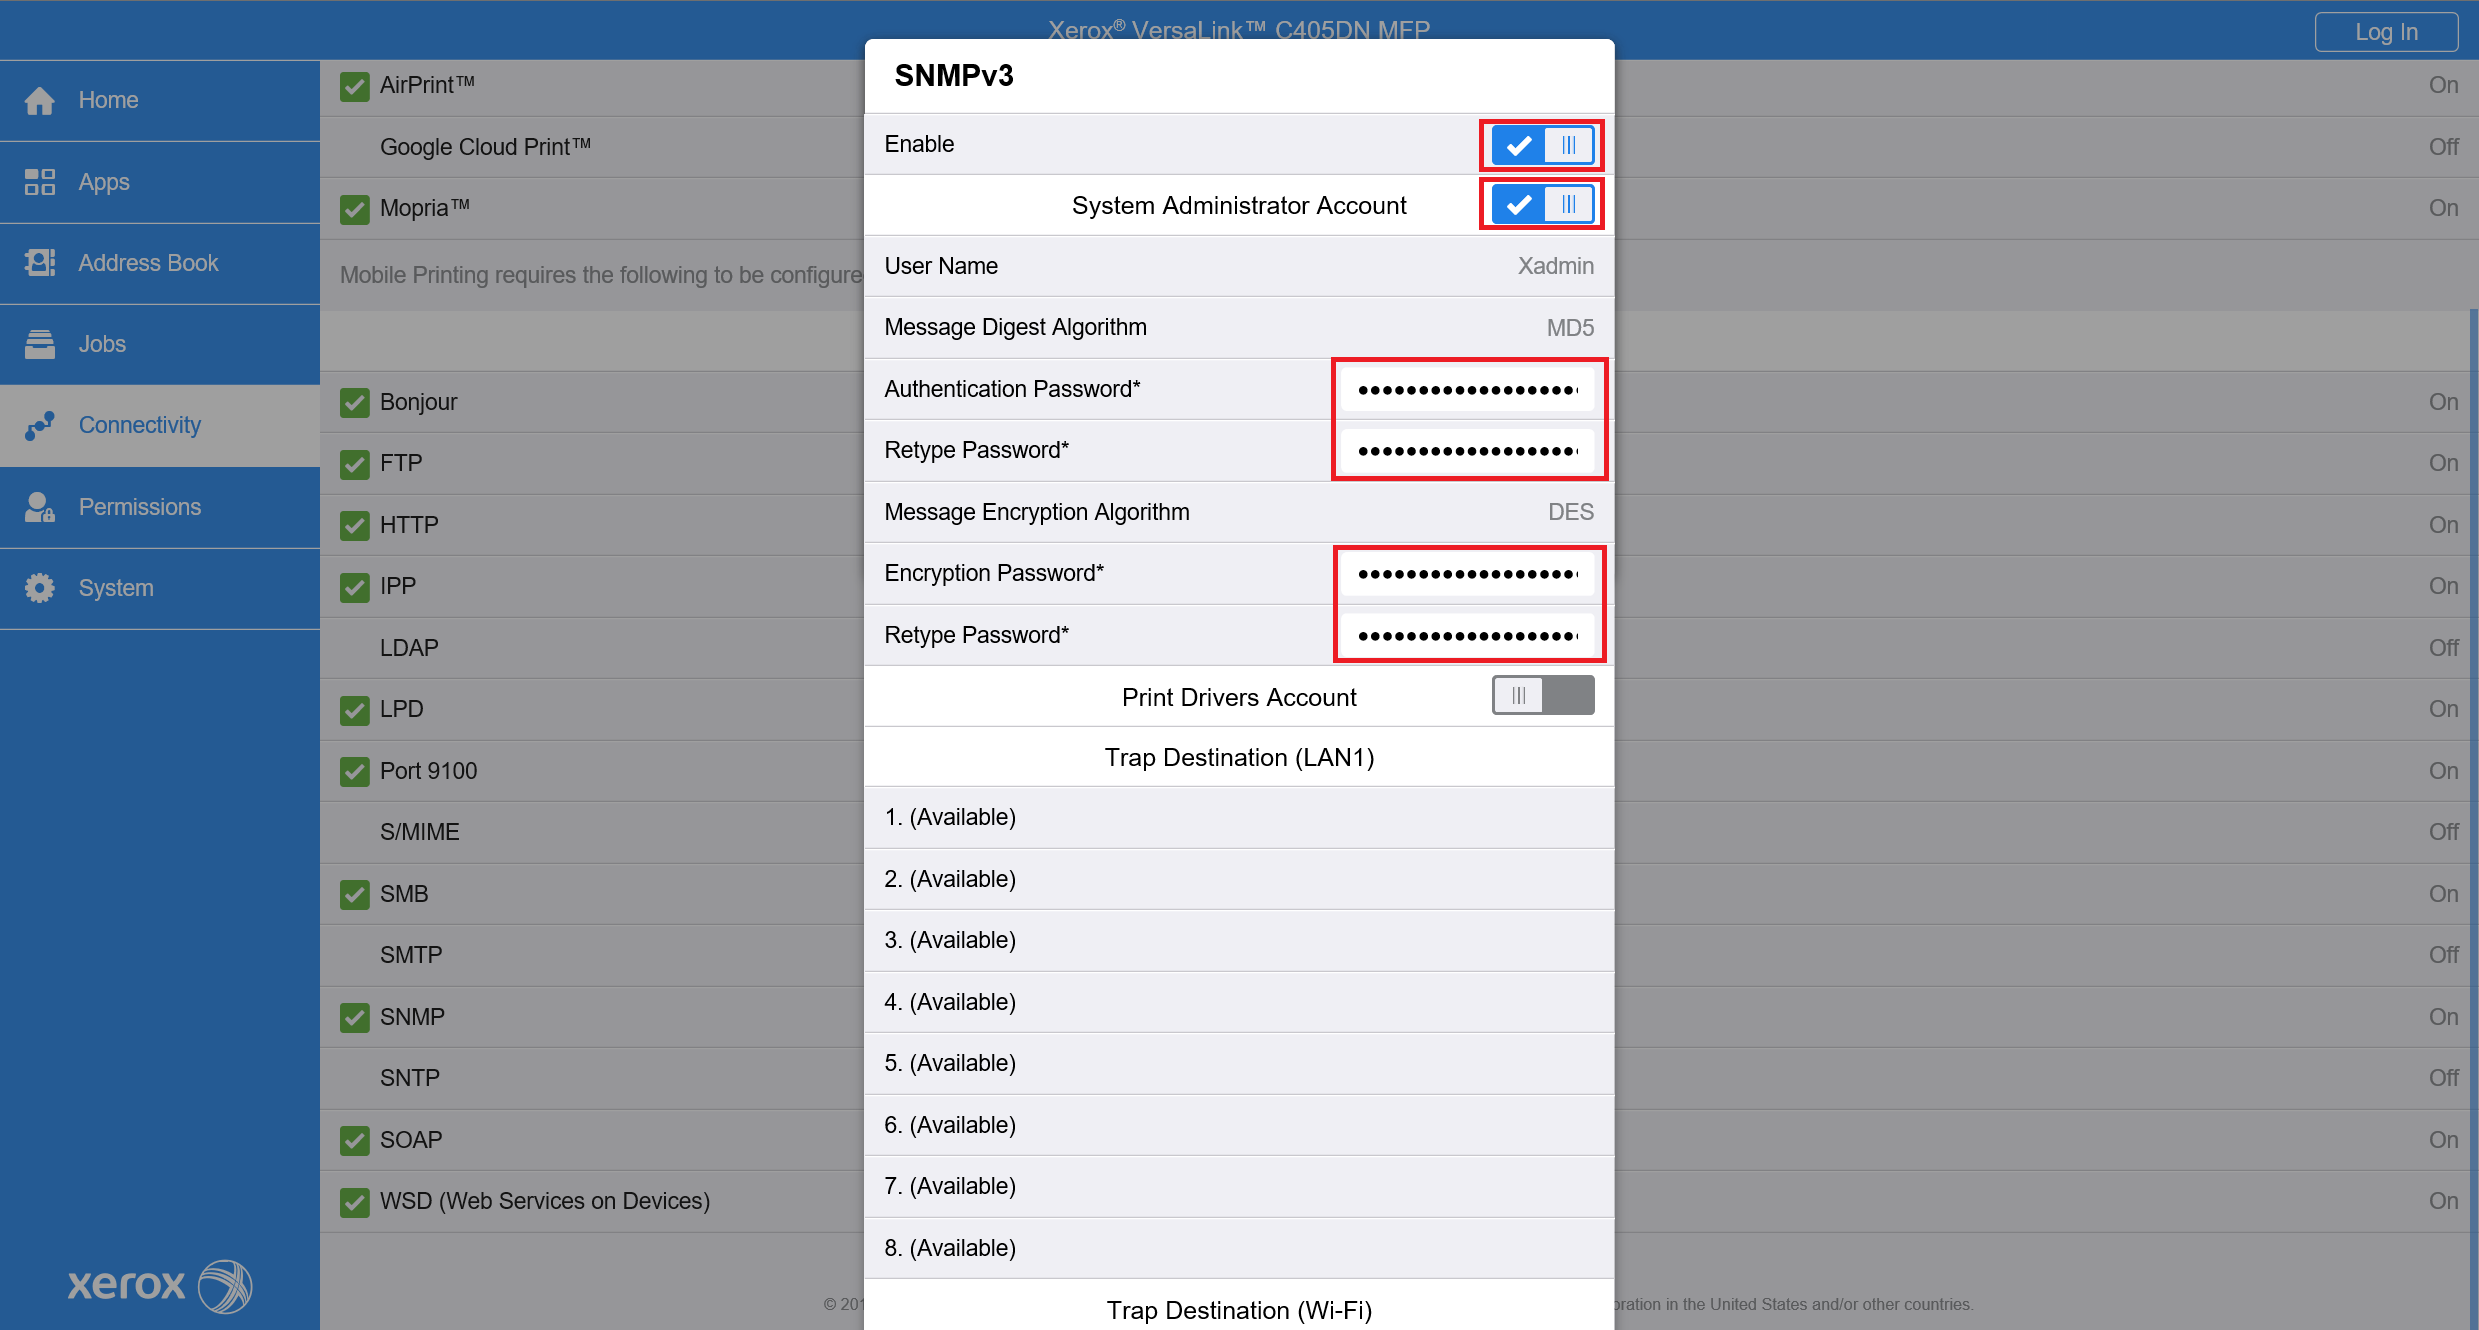
Enable SNMPv3 and System Administrator Account. Enter Authentication Password and Encryption password used in your organization.
For the newer printer models, go to Connectivity > setup then choose SNMP from the list of protocols. A new window will appear and then enable SNMPv3.
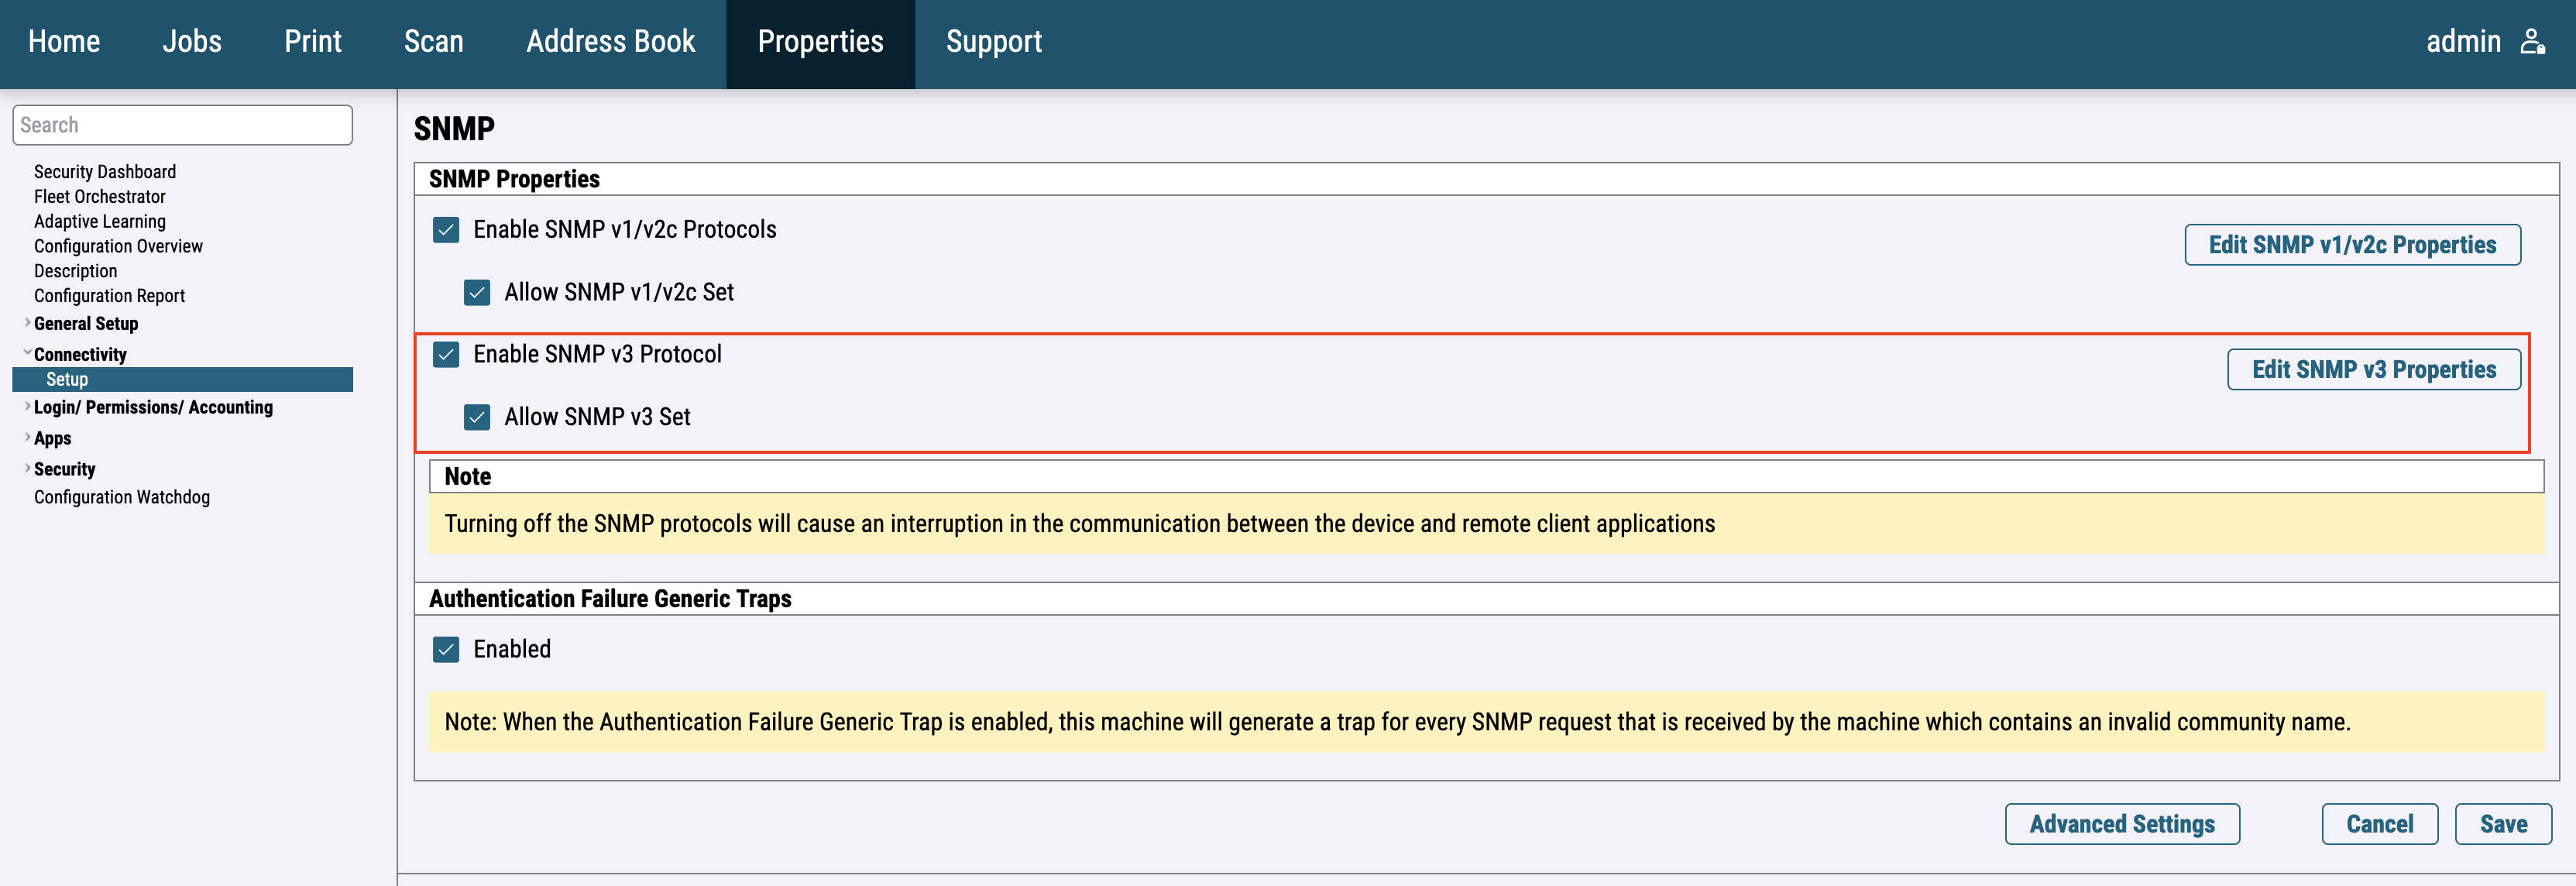
Then edit SNMP v3 Properties. Enable System Administrator Account and fill Authentication Password and Encryption password used in your organization.
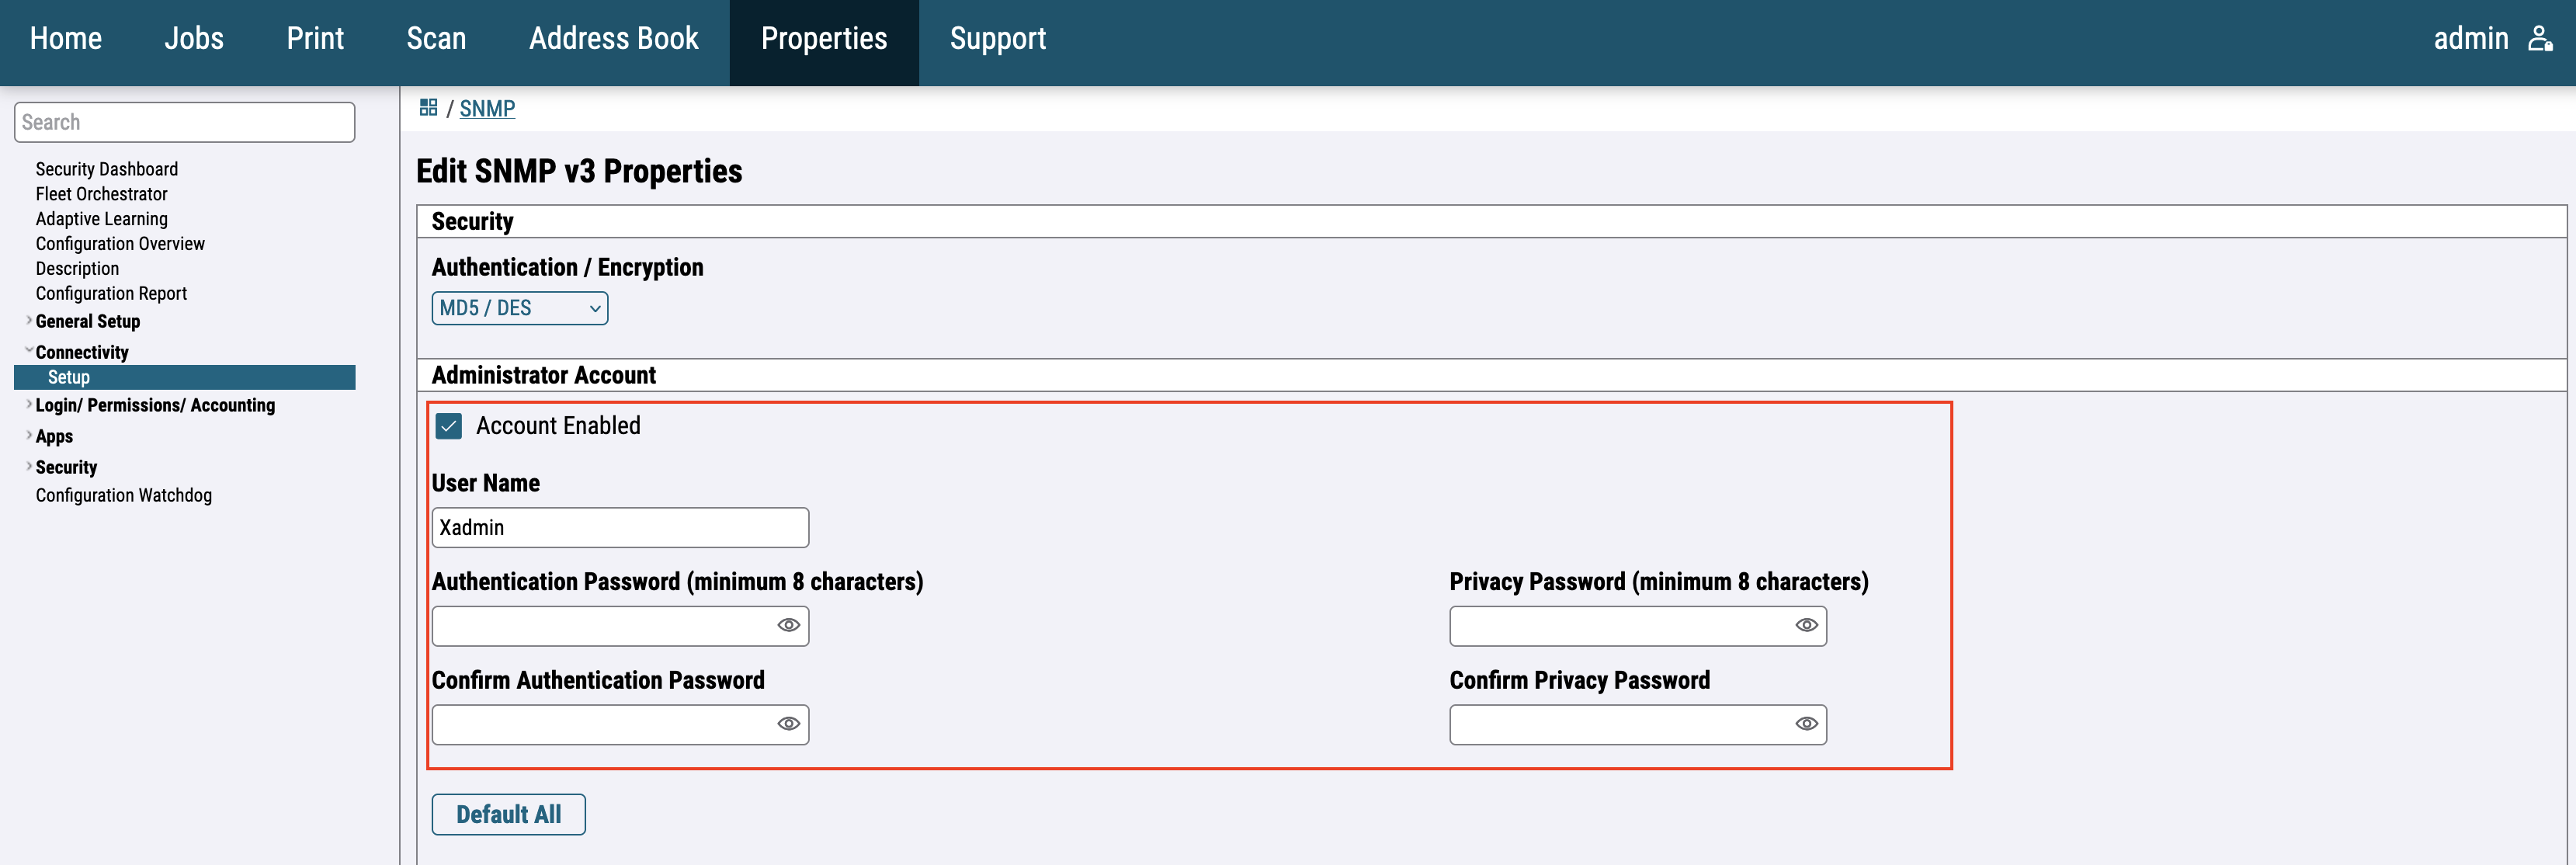
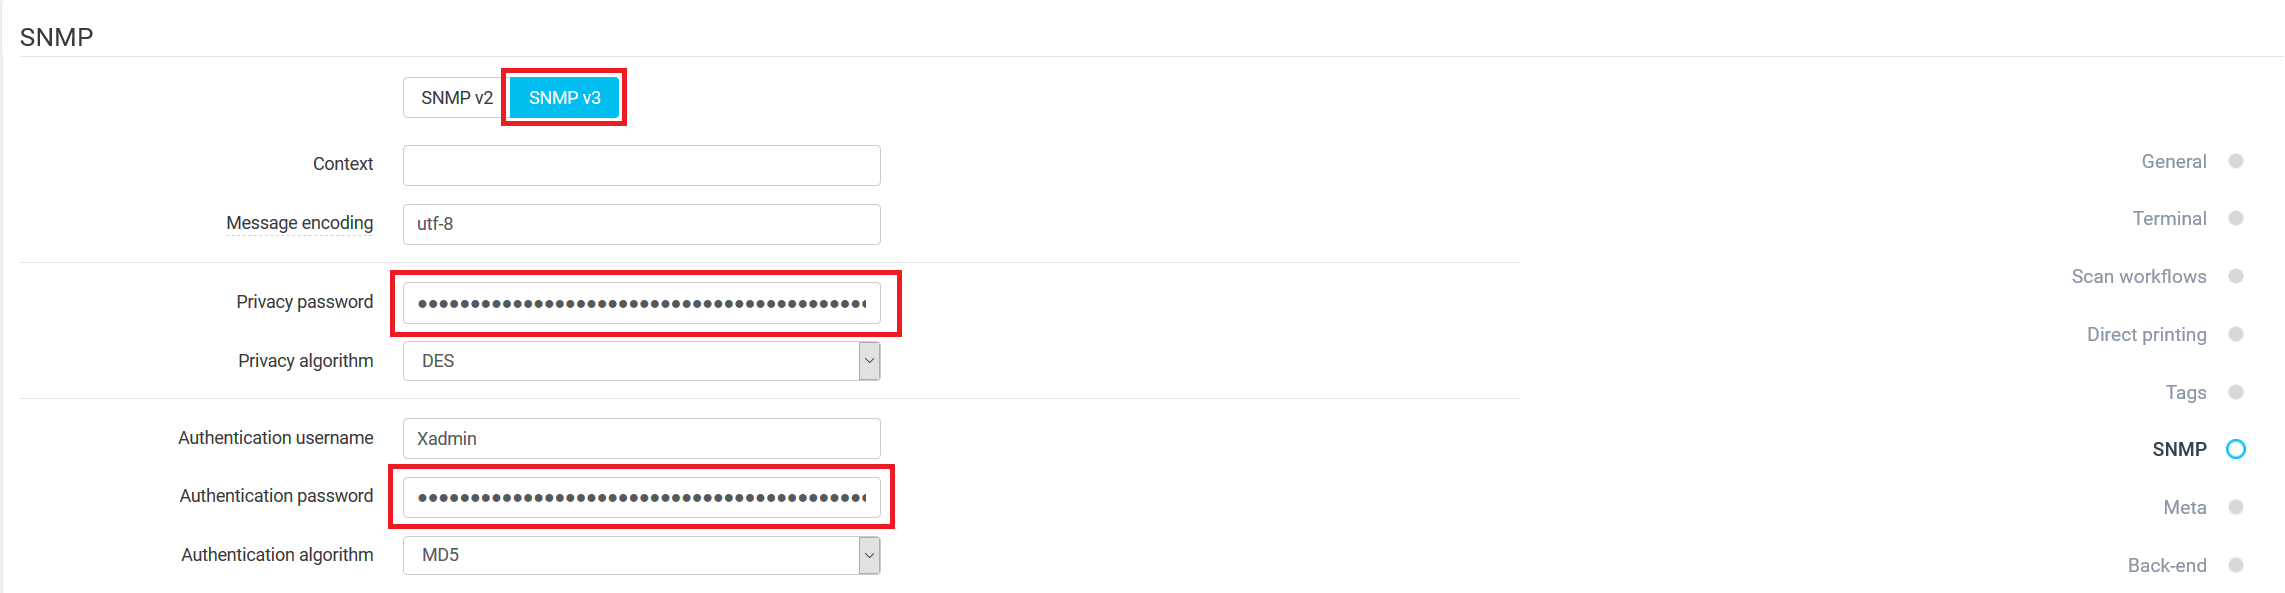
The same Authentication Password and Encryption password have to be used in device configuration in YSoft SafeQ.
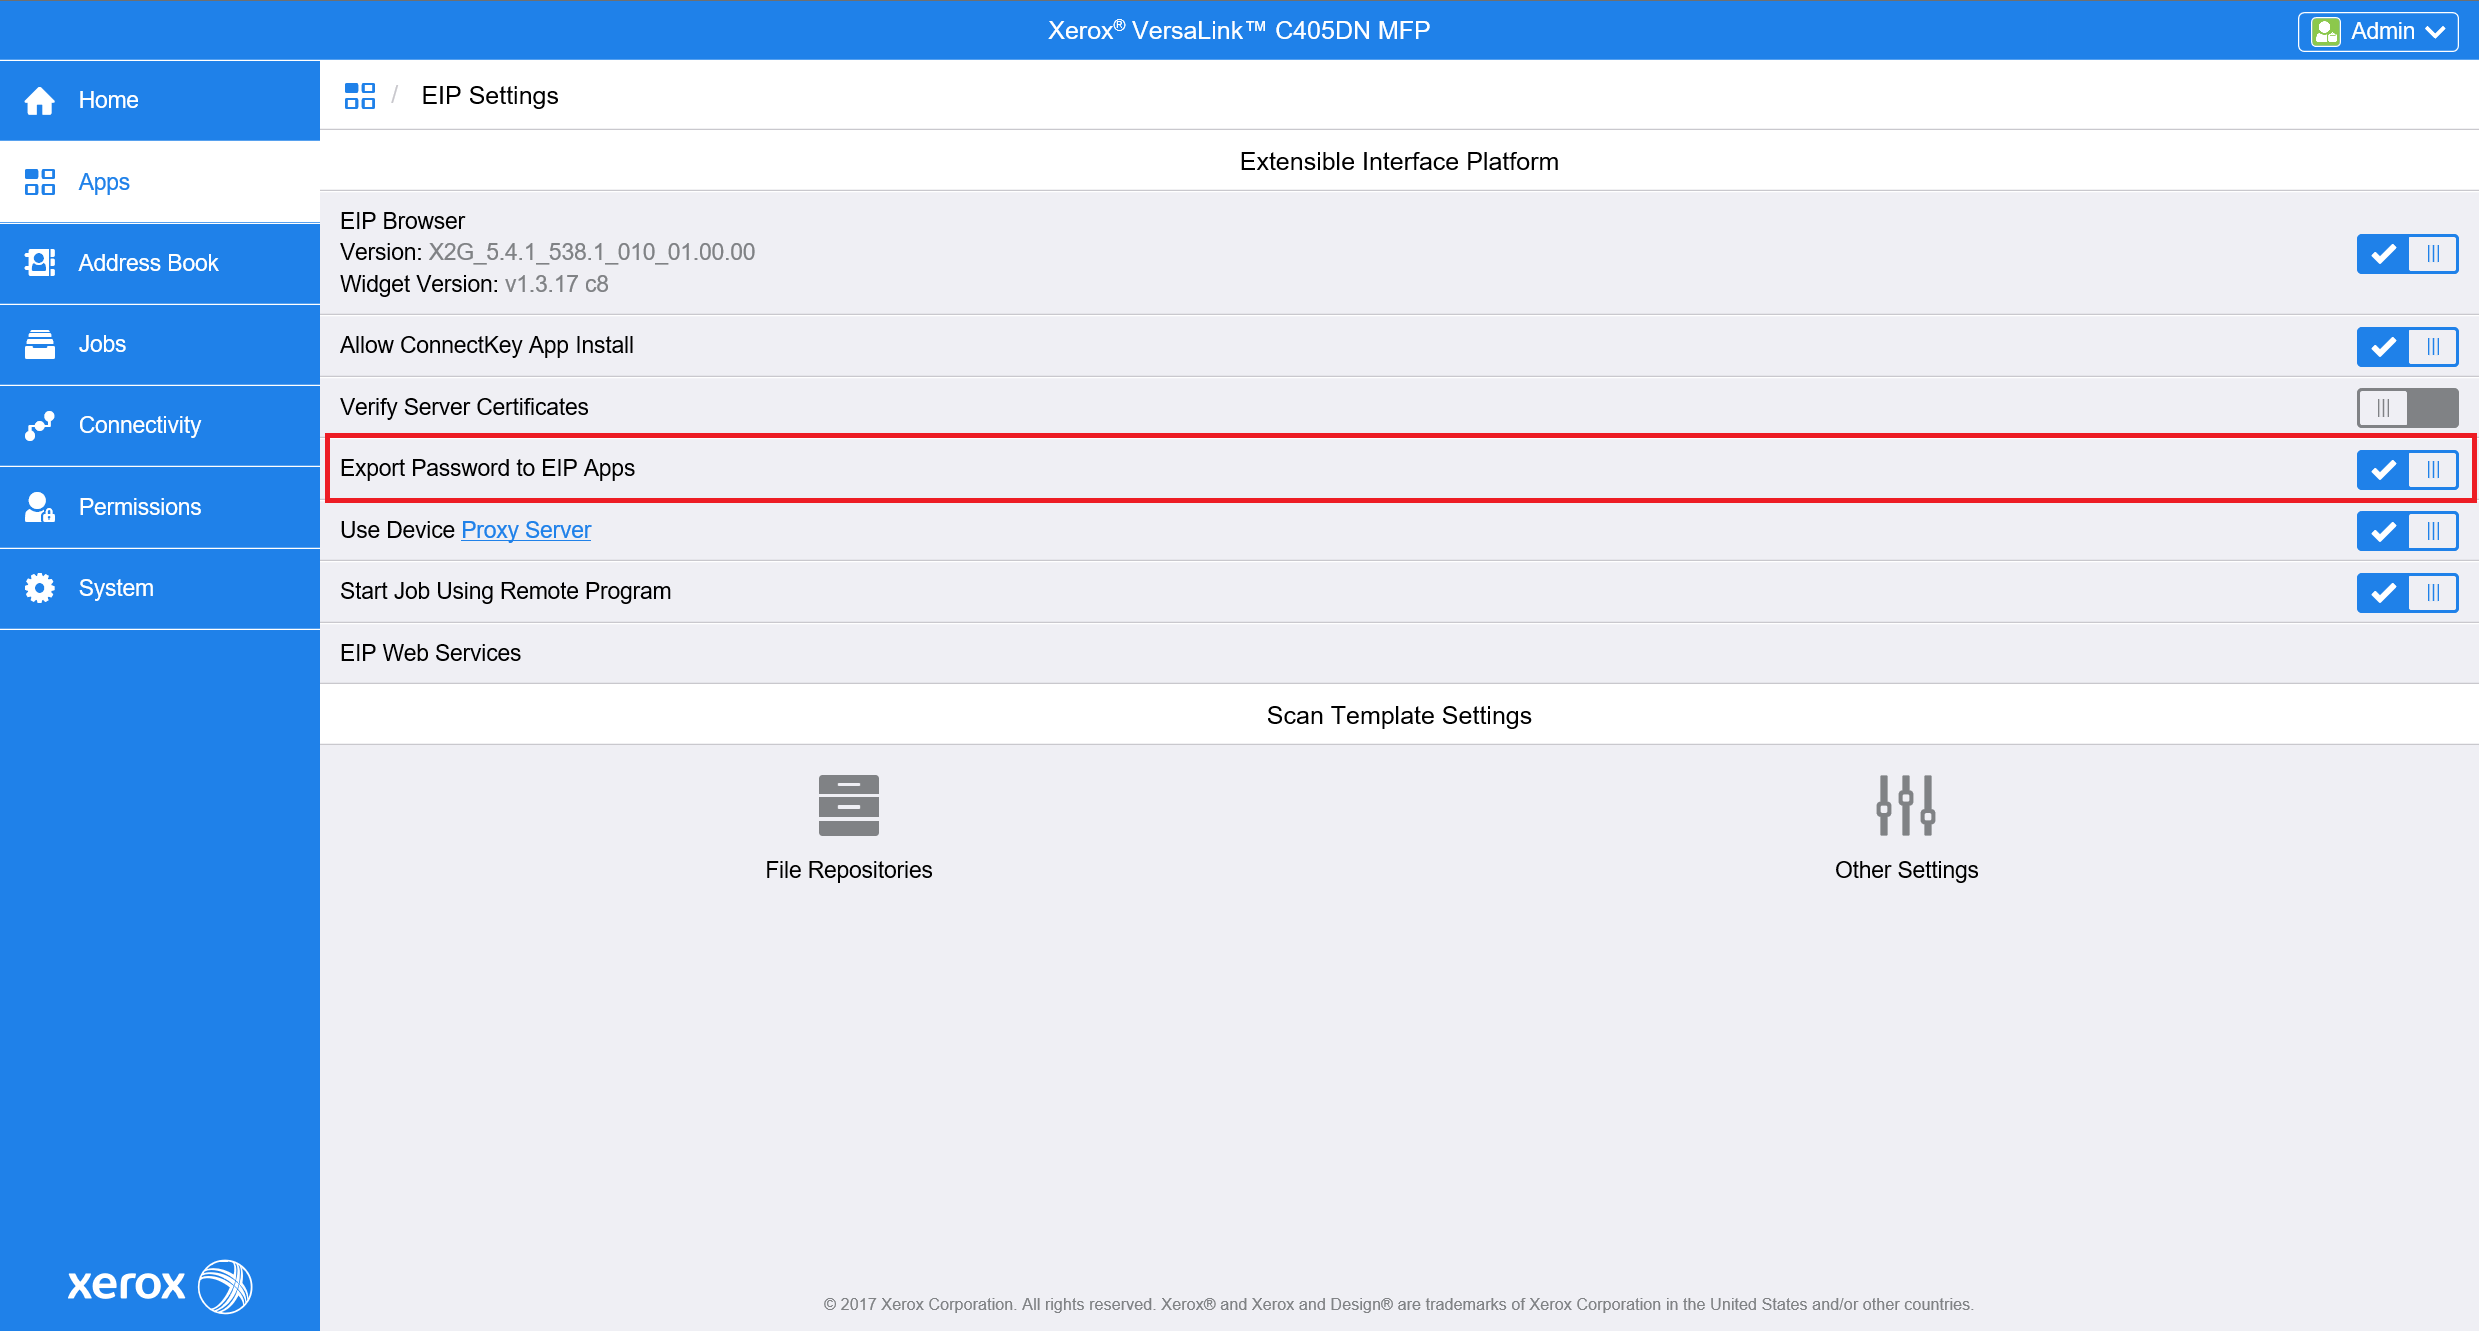
EIP Settings
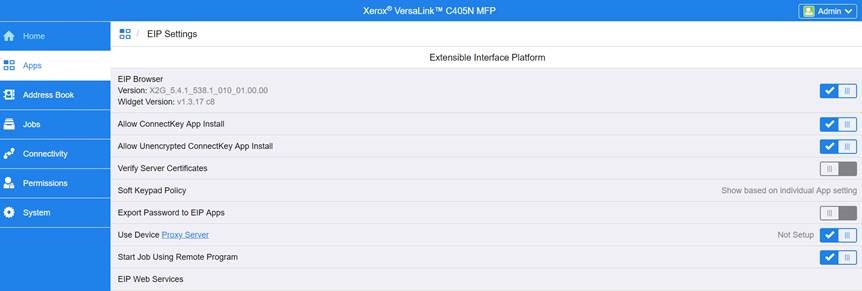
For the older printer models, go to the Apps > EIP Settings and enable Export password to EIP Apps.
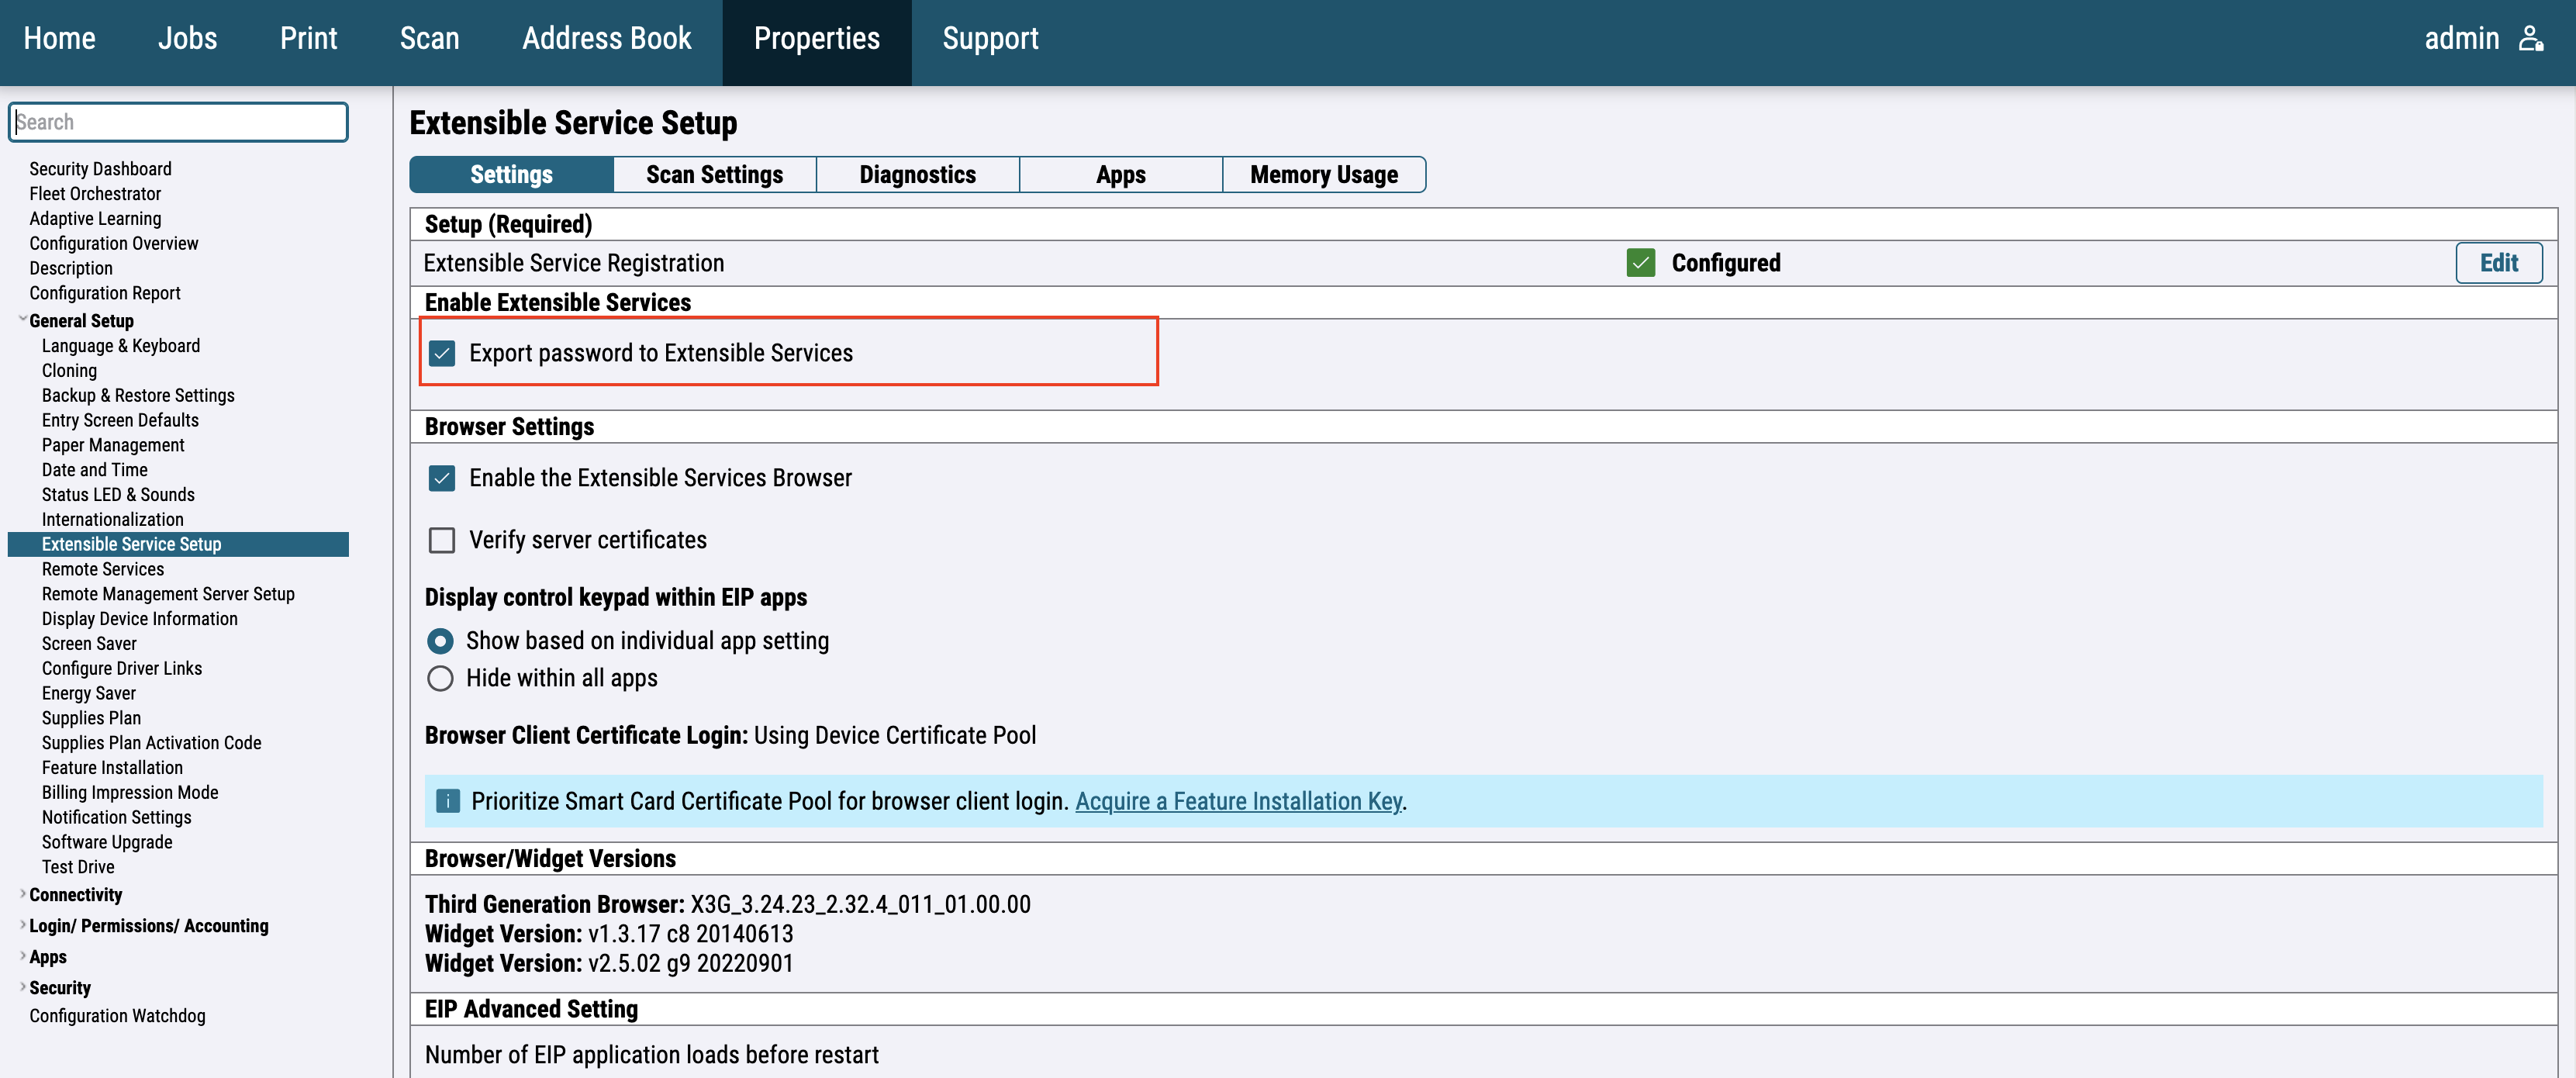
For the newer printer models, go to the General Setup > Extensible Service Setup and enable Export password to Extensible services.
USB Card Reader
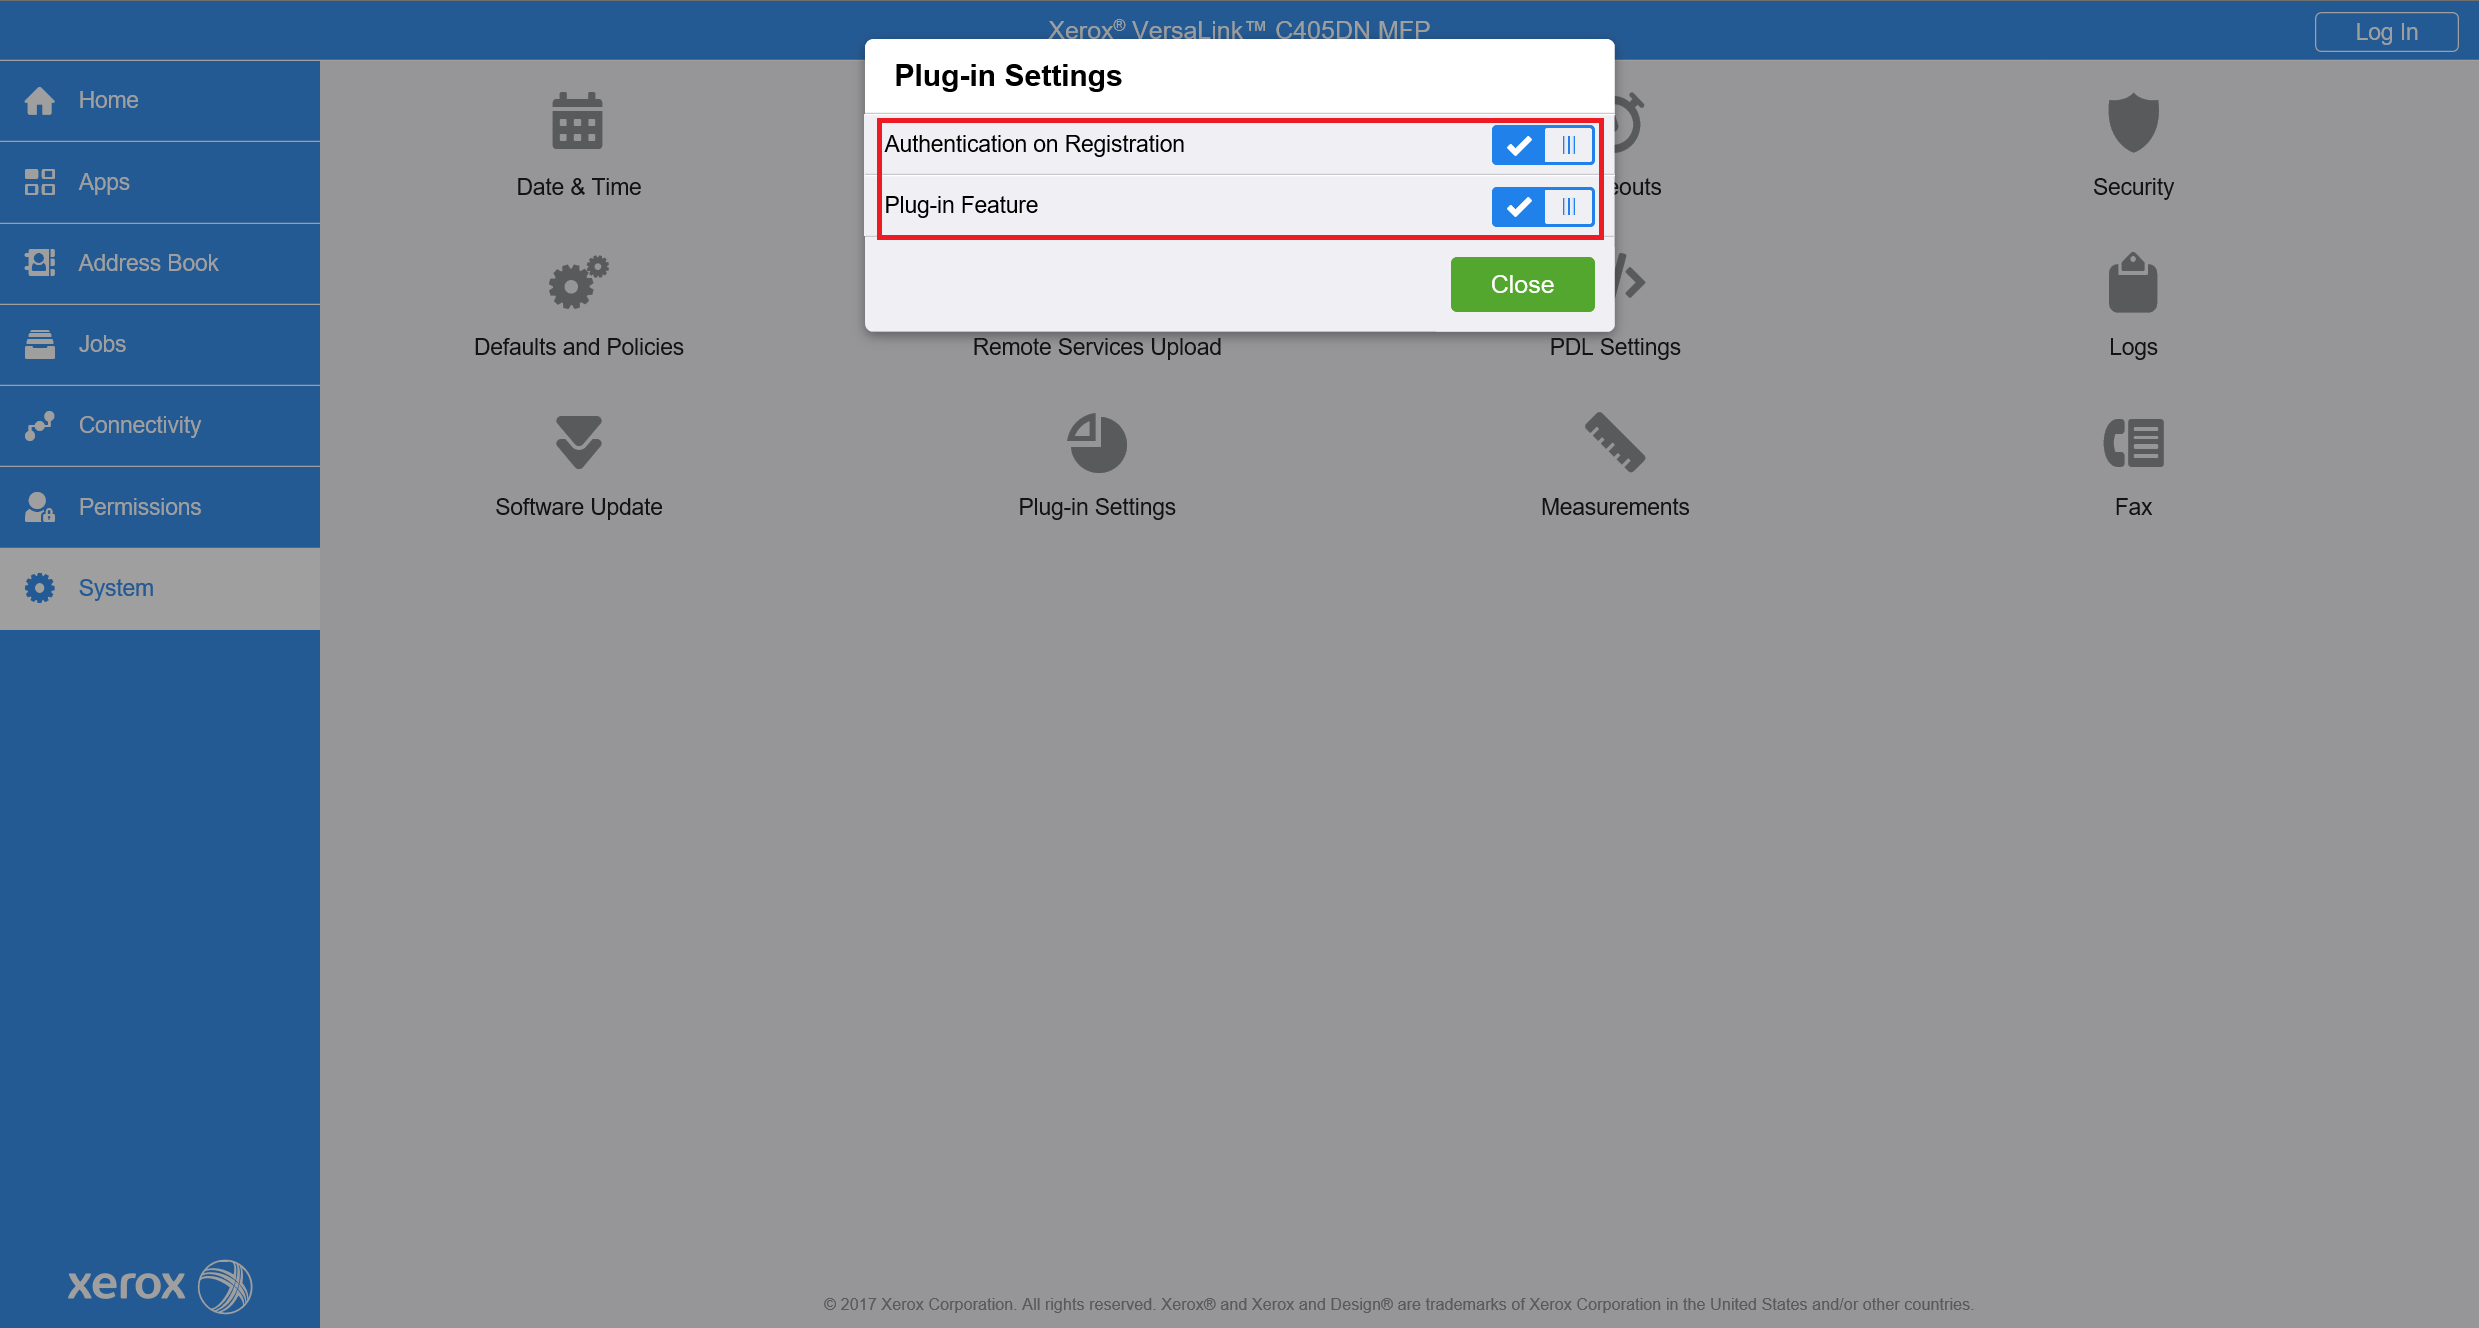
For the older printer models, you will need to enable Plug-in feature in System > Plug-in Settings. Also, enable Authentication on Registration. Restart device will be necessary - press Restart Now.
Please note that you can obtain the plug-in from Xerox, Y Soft Group has no rights to its distribution.
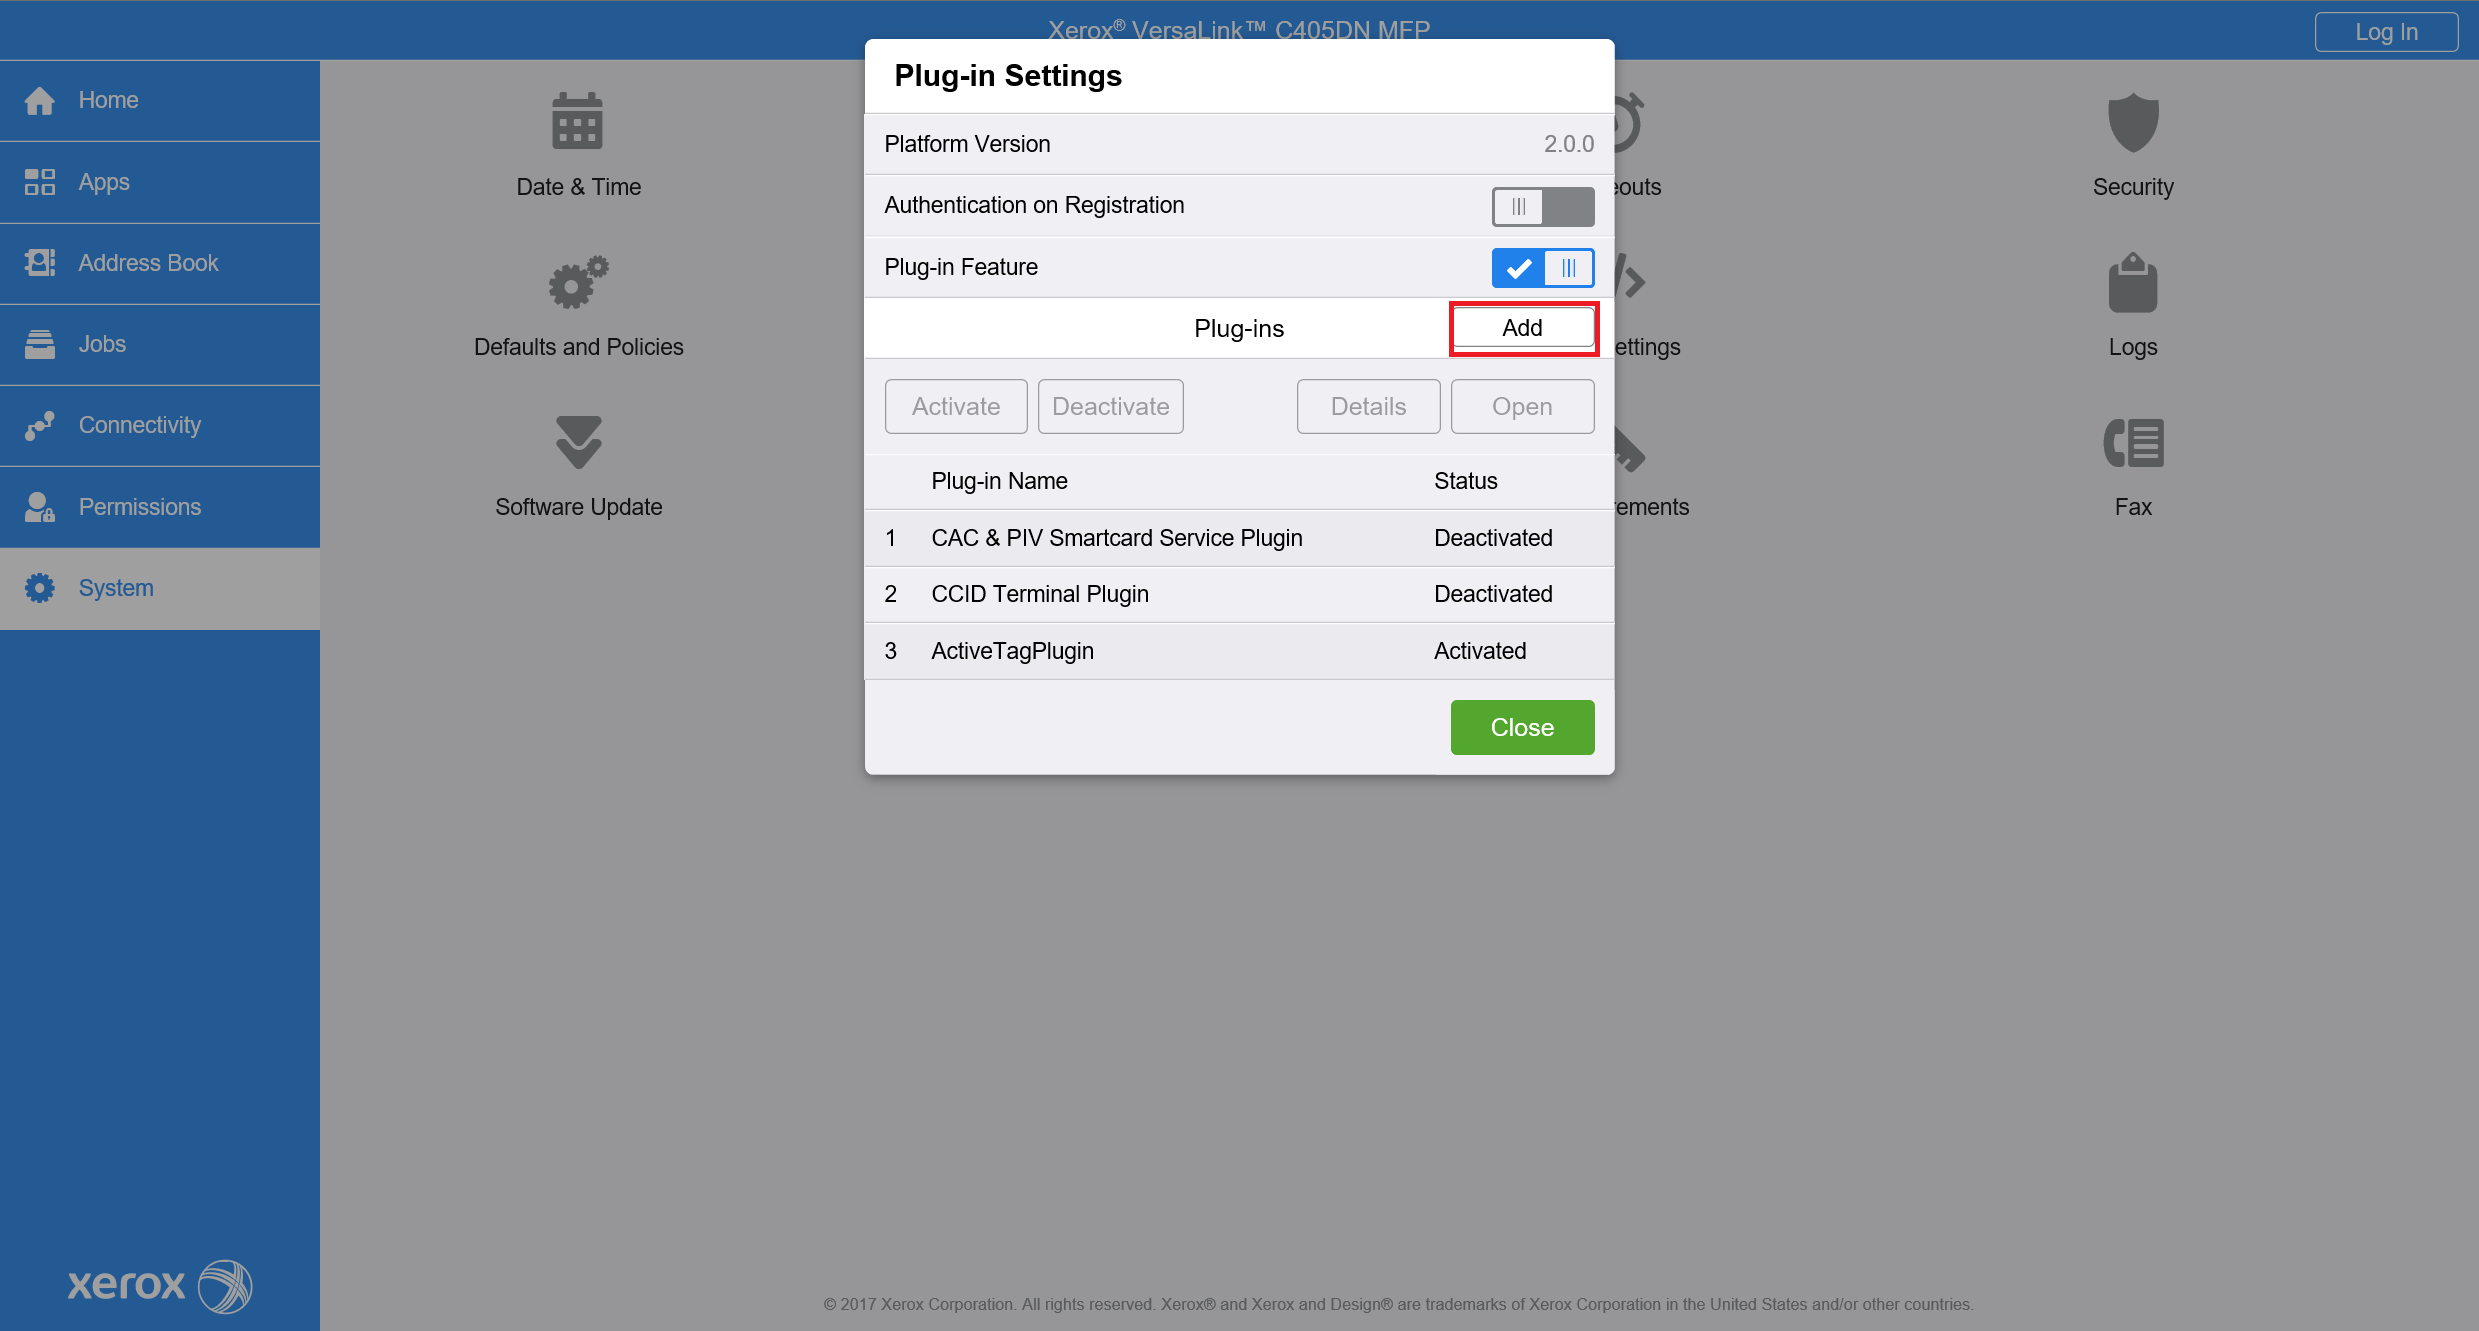
After restart, open the same window (System > Plug-in Settings) and press the Add button.
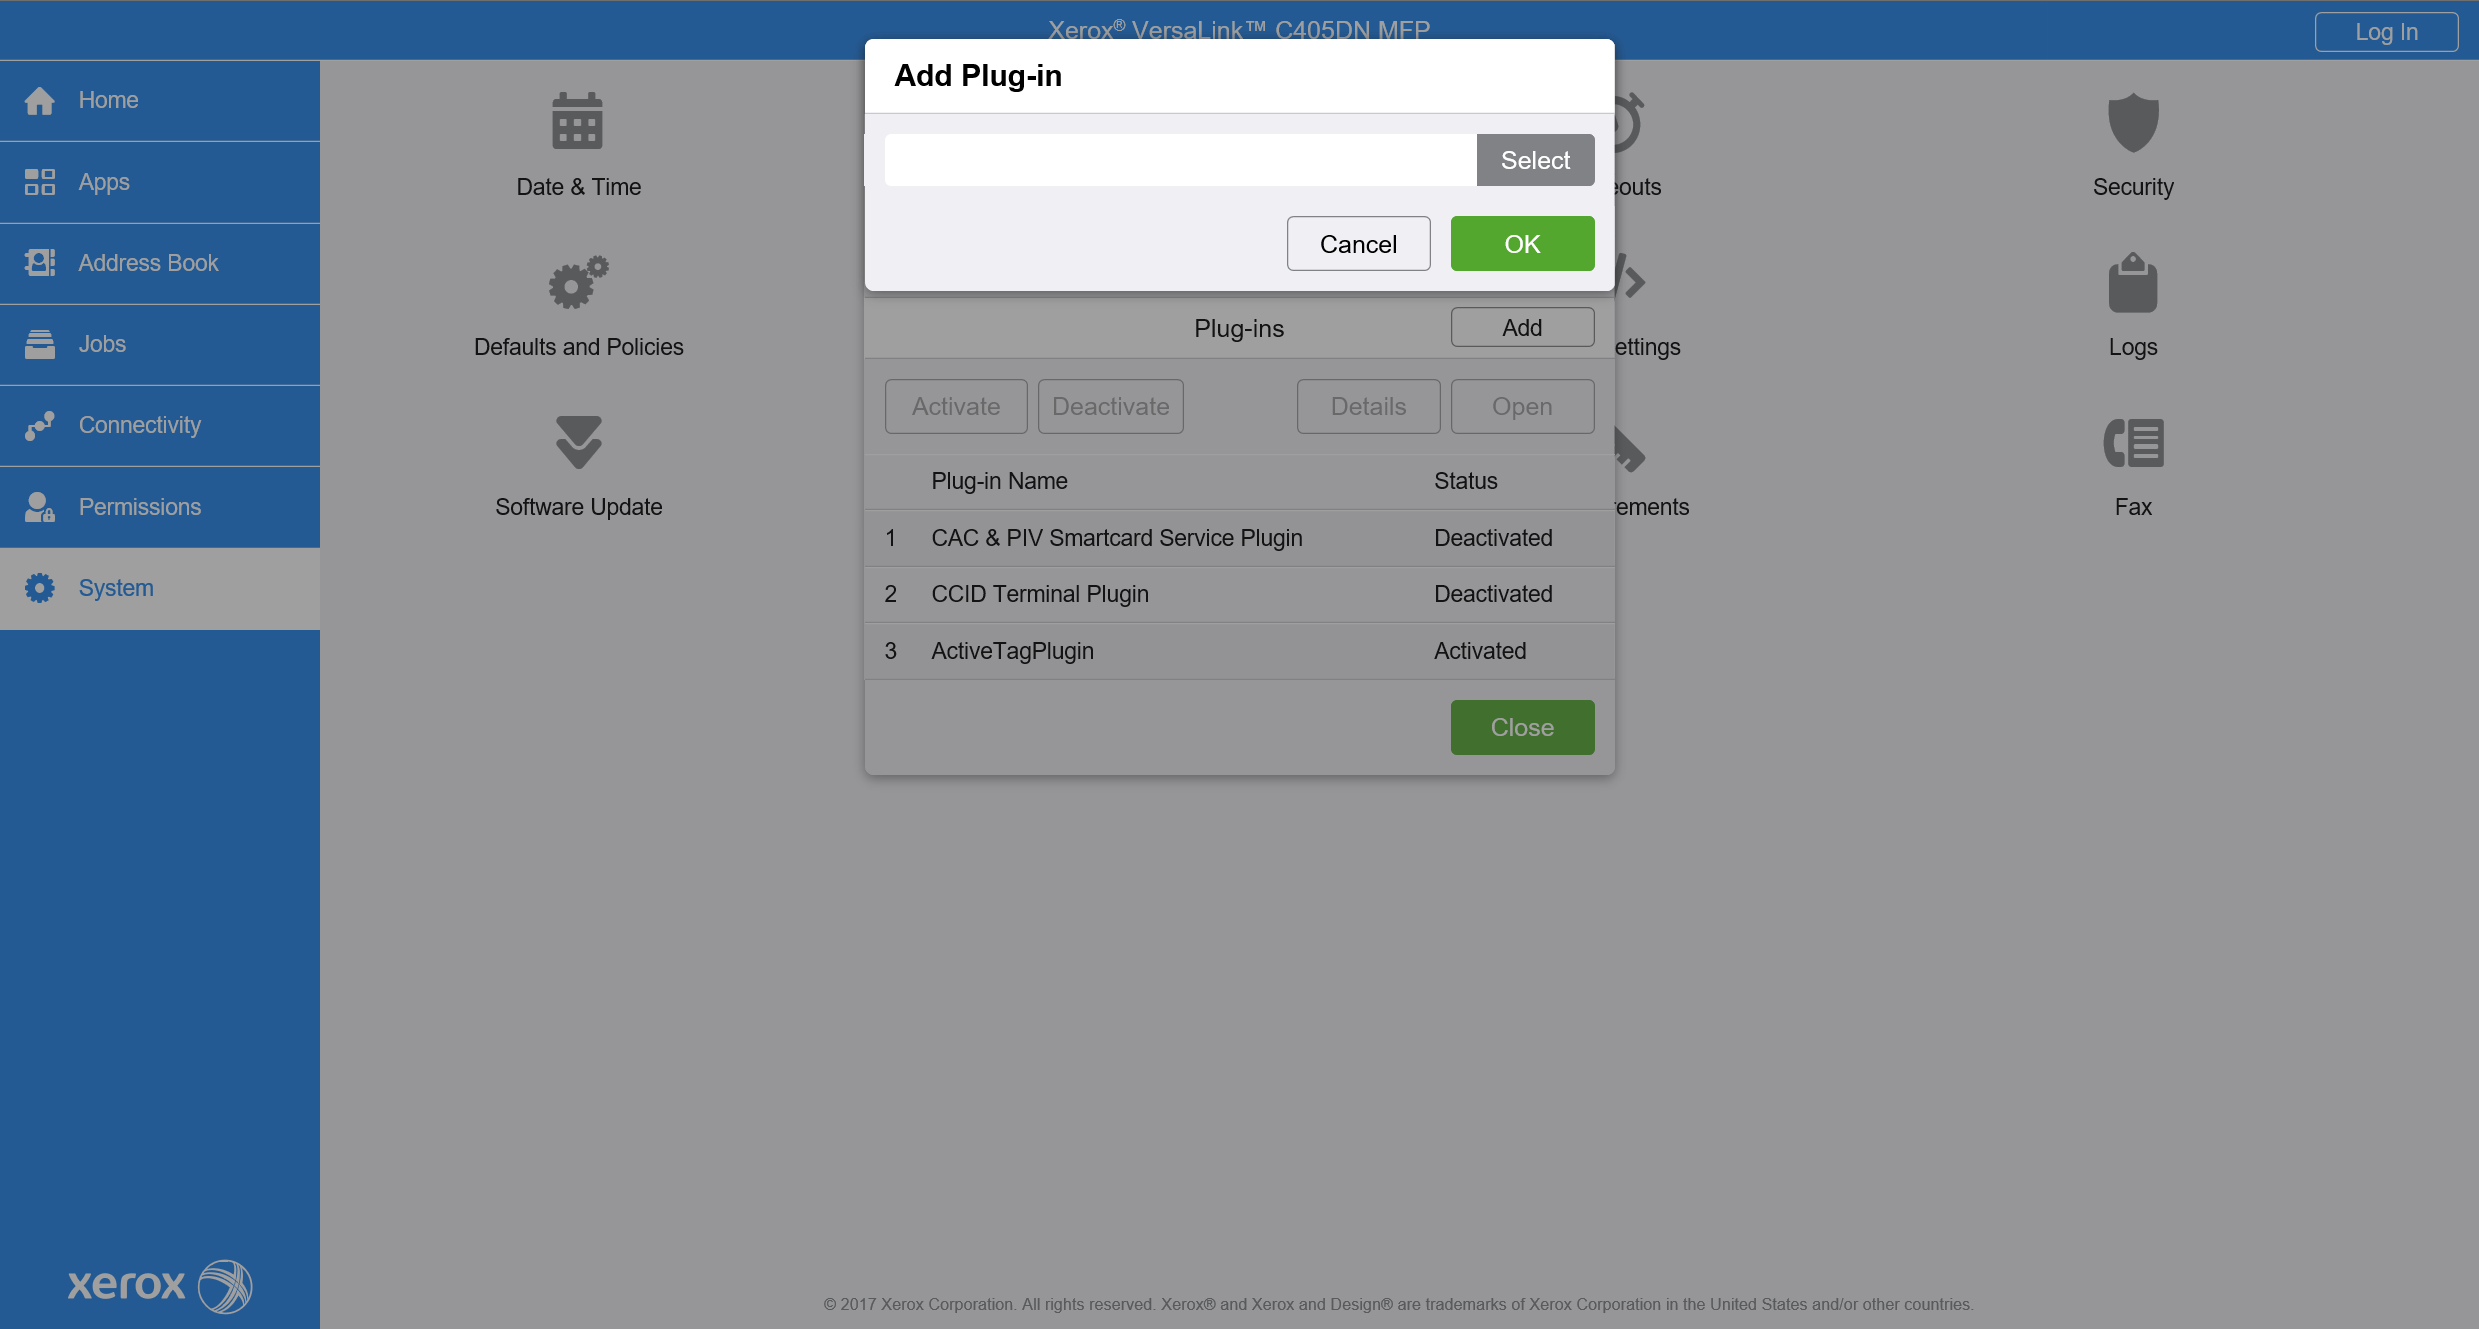
Choose the path to file with the plug-in and upload it to the printer.
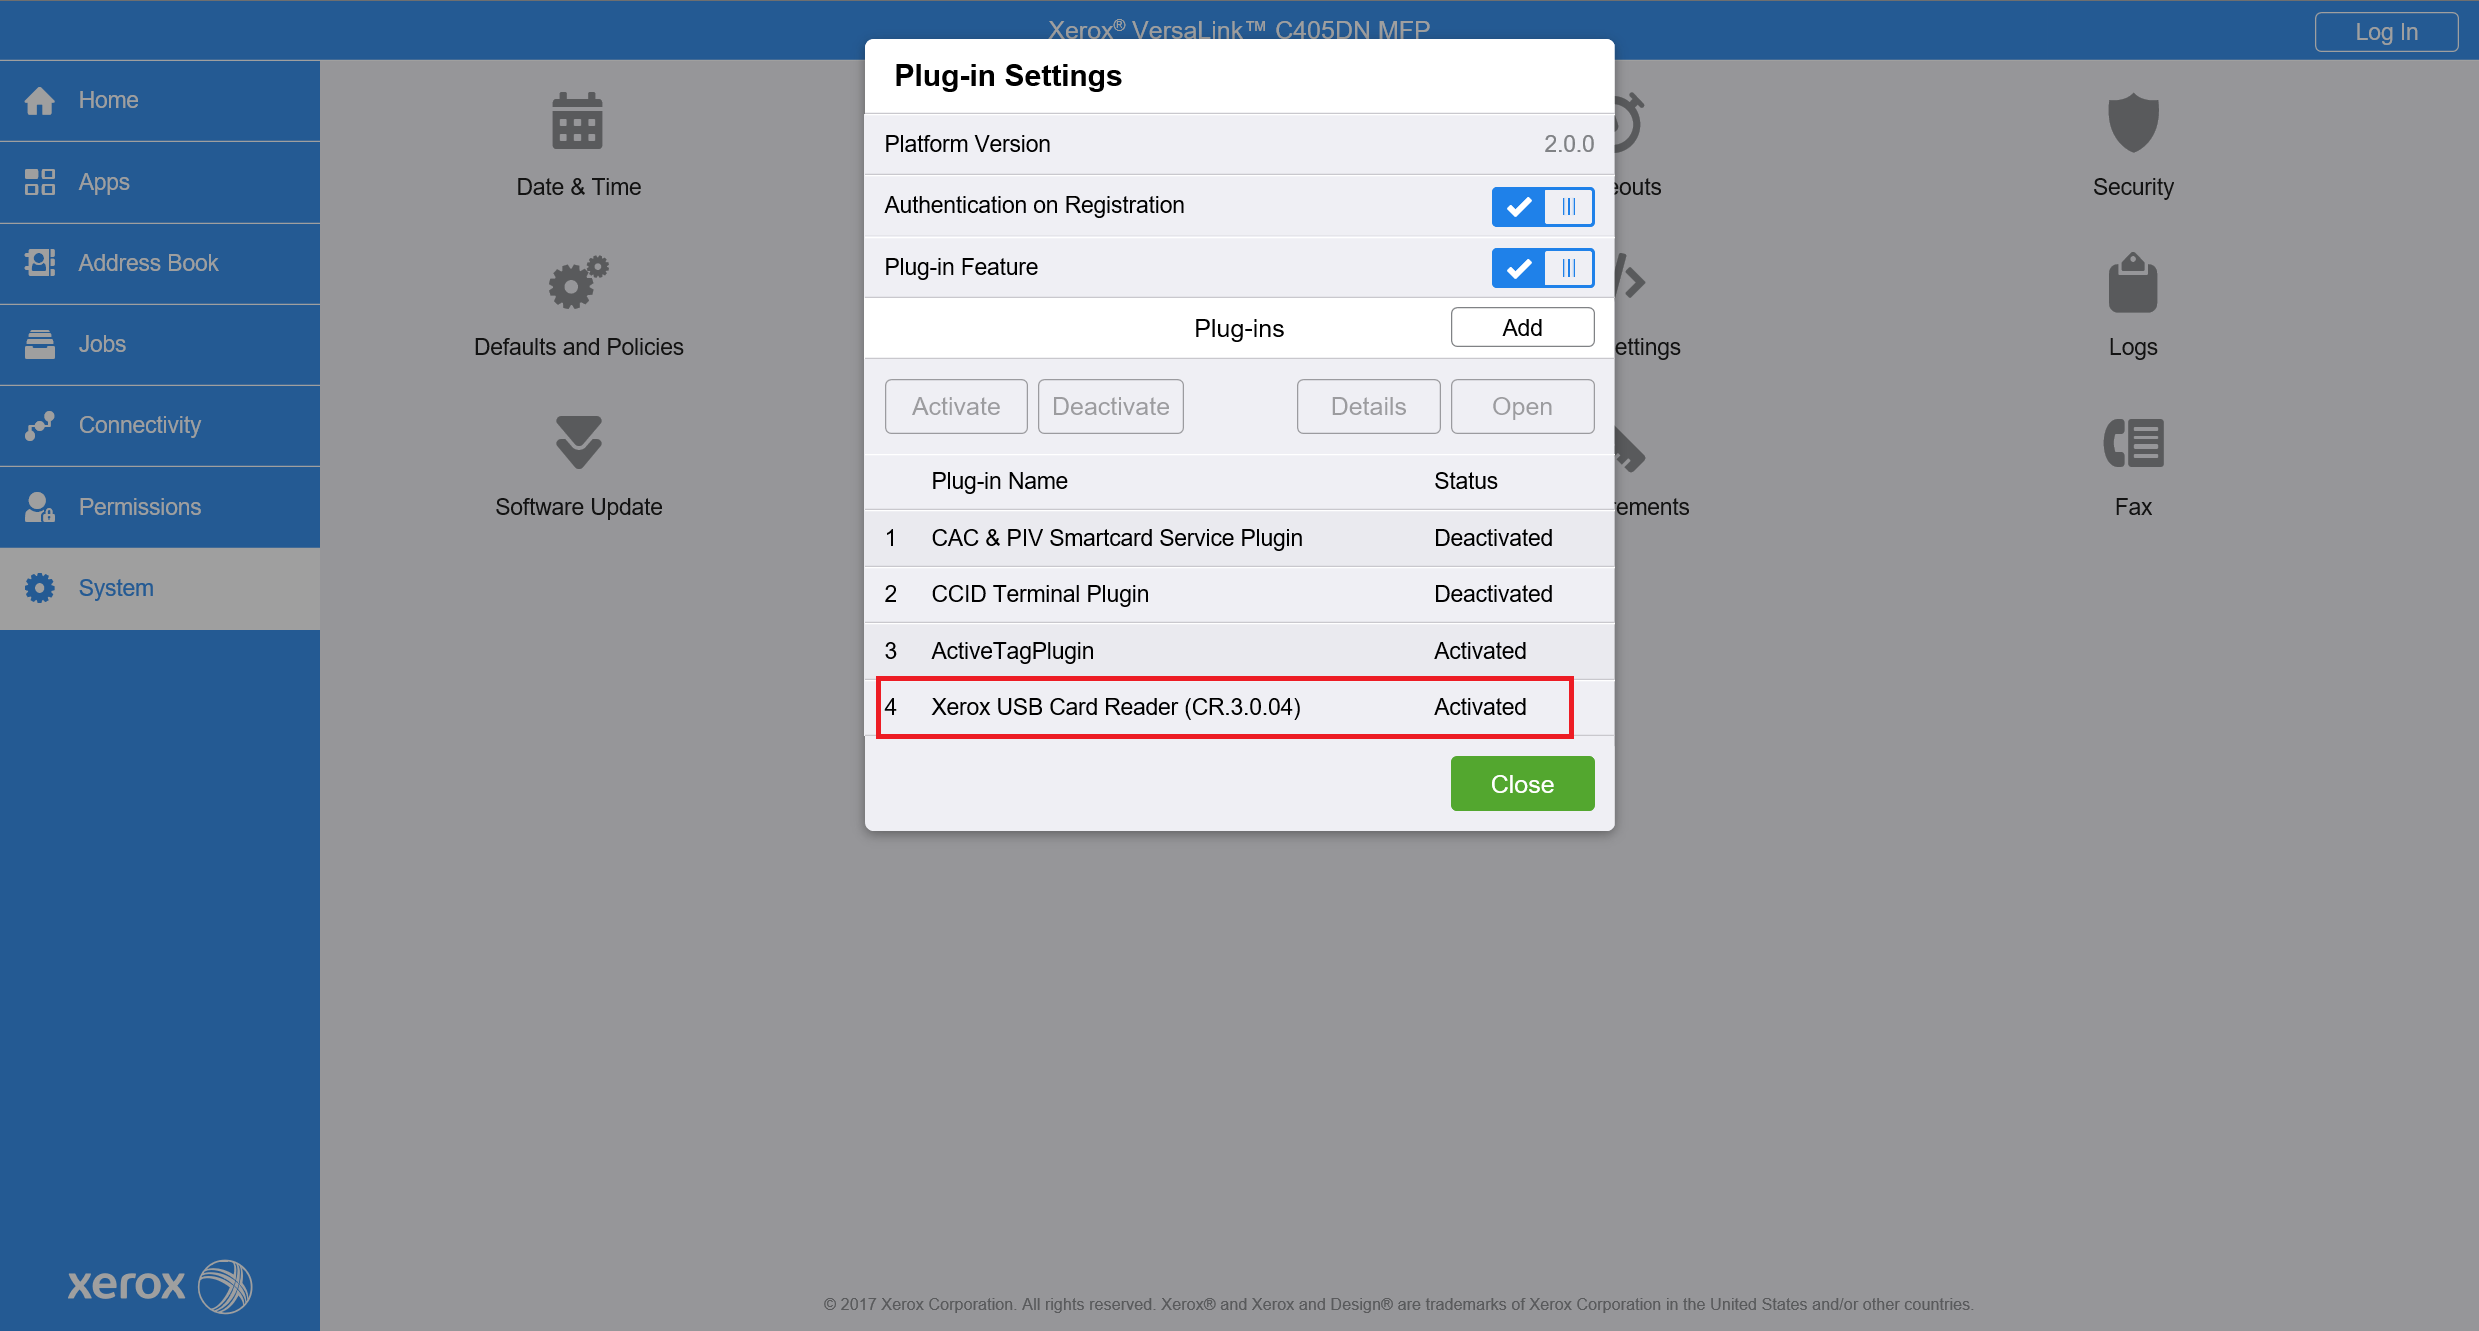
After plugin installation, the restart of the device is needed.

Successful plugin installation and activation can be verified in System > Plug-in Settings in the Status column.
Proceed with the MFD installation in YSoft SafeQ to complete the installation of YSoft SafeQ Embedded Terminal. Check the installation status and installation steps.
If there are some warnings present during the installation, you will need to do some further settings based on the messages.
How to enable Job Management API in the MFD
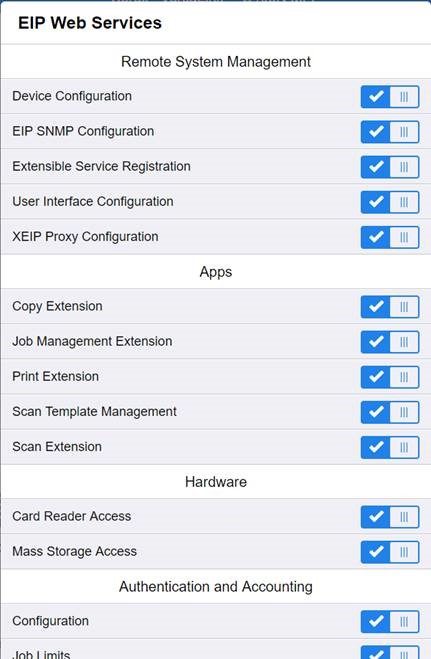
For the older printer models, the option is available in Apps > EIP Settings > EIP Web Services > Job Management Extension.
For the newer printer models, the option is available in General Setup > Extensible Service Setup > Extensible Service Registration.
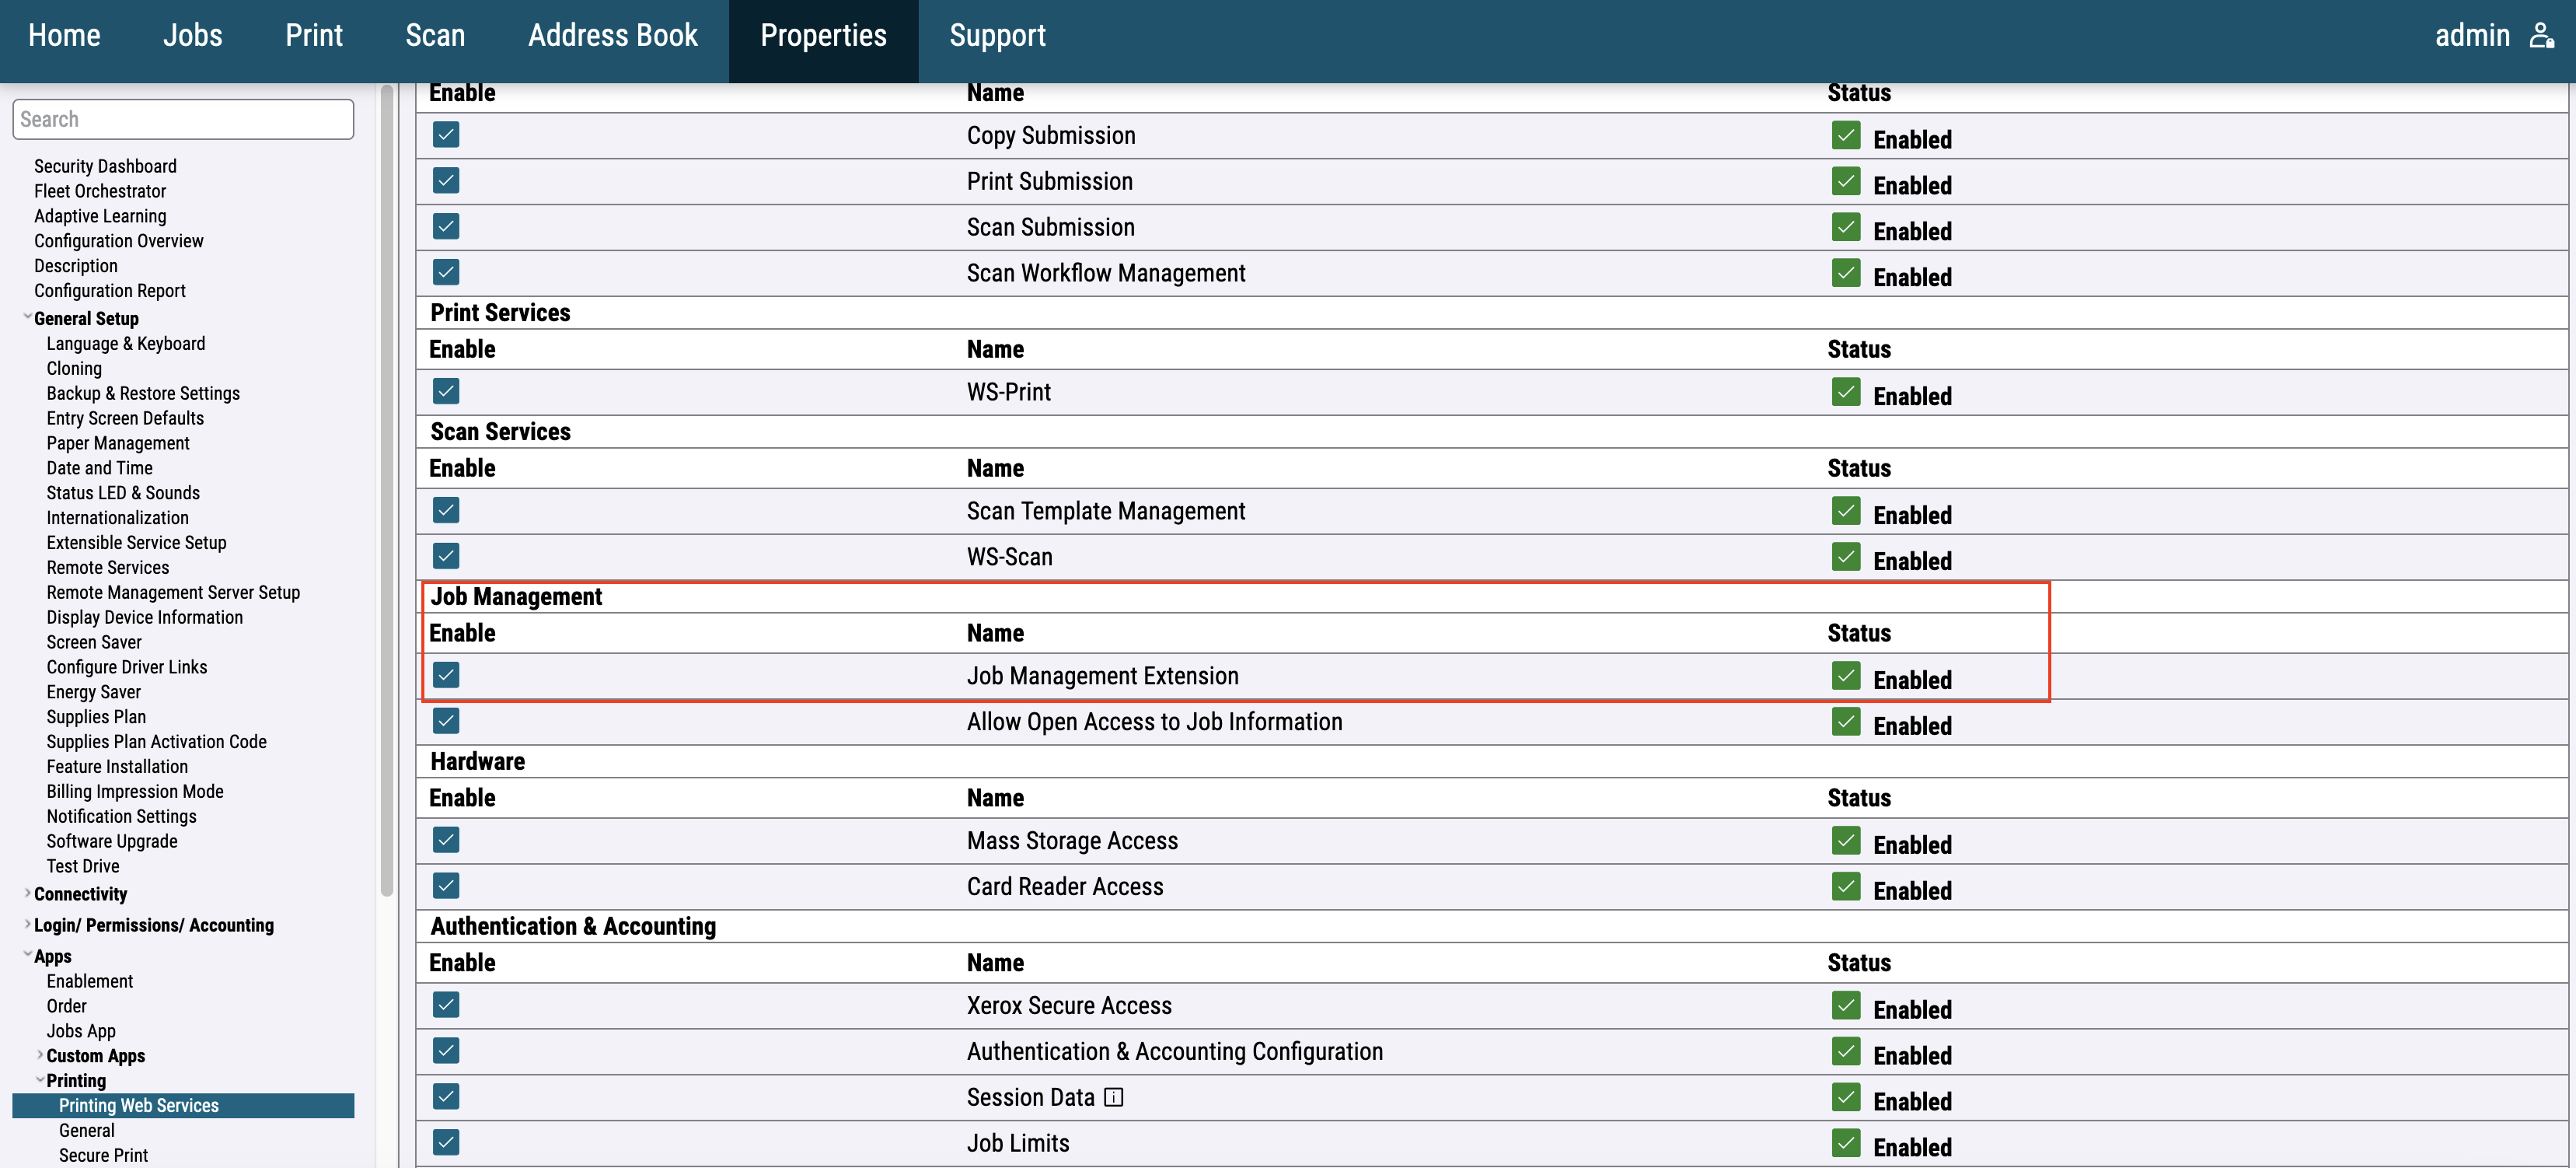
VersaLink does not have an “Allow open access to Job Information” setting. This is enabled by default for localhost calls.
It is important to have the latest software installed in the printer, to avoid any potential problems.
Embedded terminal with PIN only authentication configuration
In case the embedded terminal will use only the PIN authentication method the following configuration is required:
After installation of YSoft SafeQ Embedded Terminal
These settings are necessary only if requested by the Embedded Terminal installation or if some customization of configuration is requested.
Network Accounting
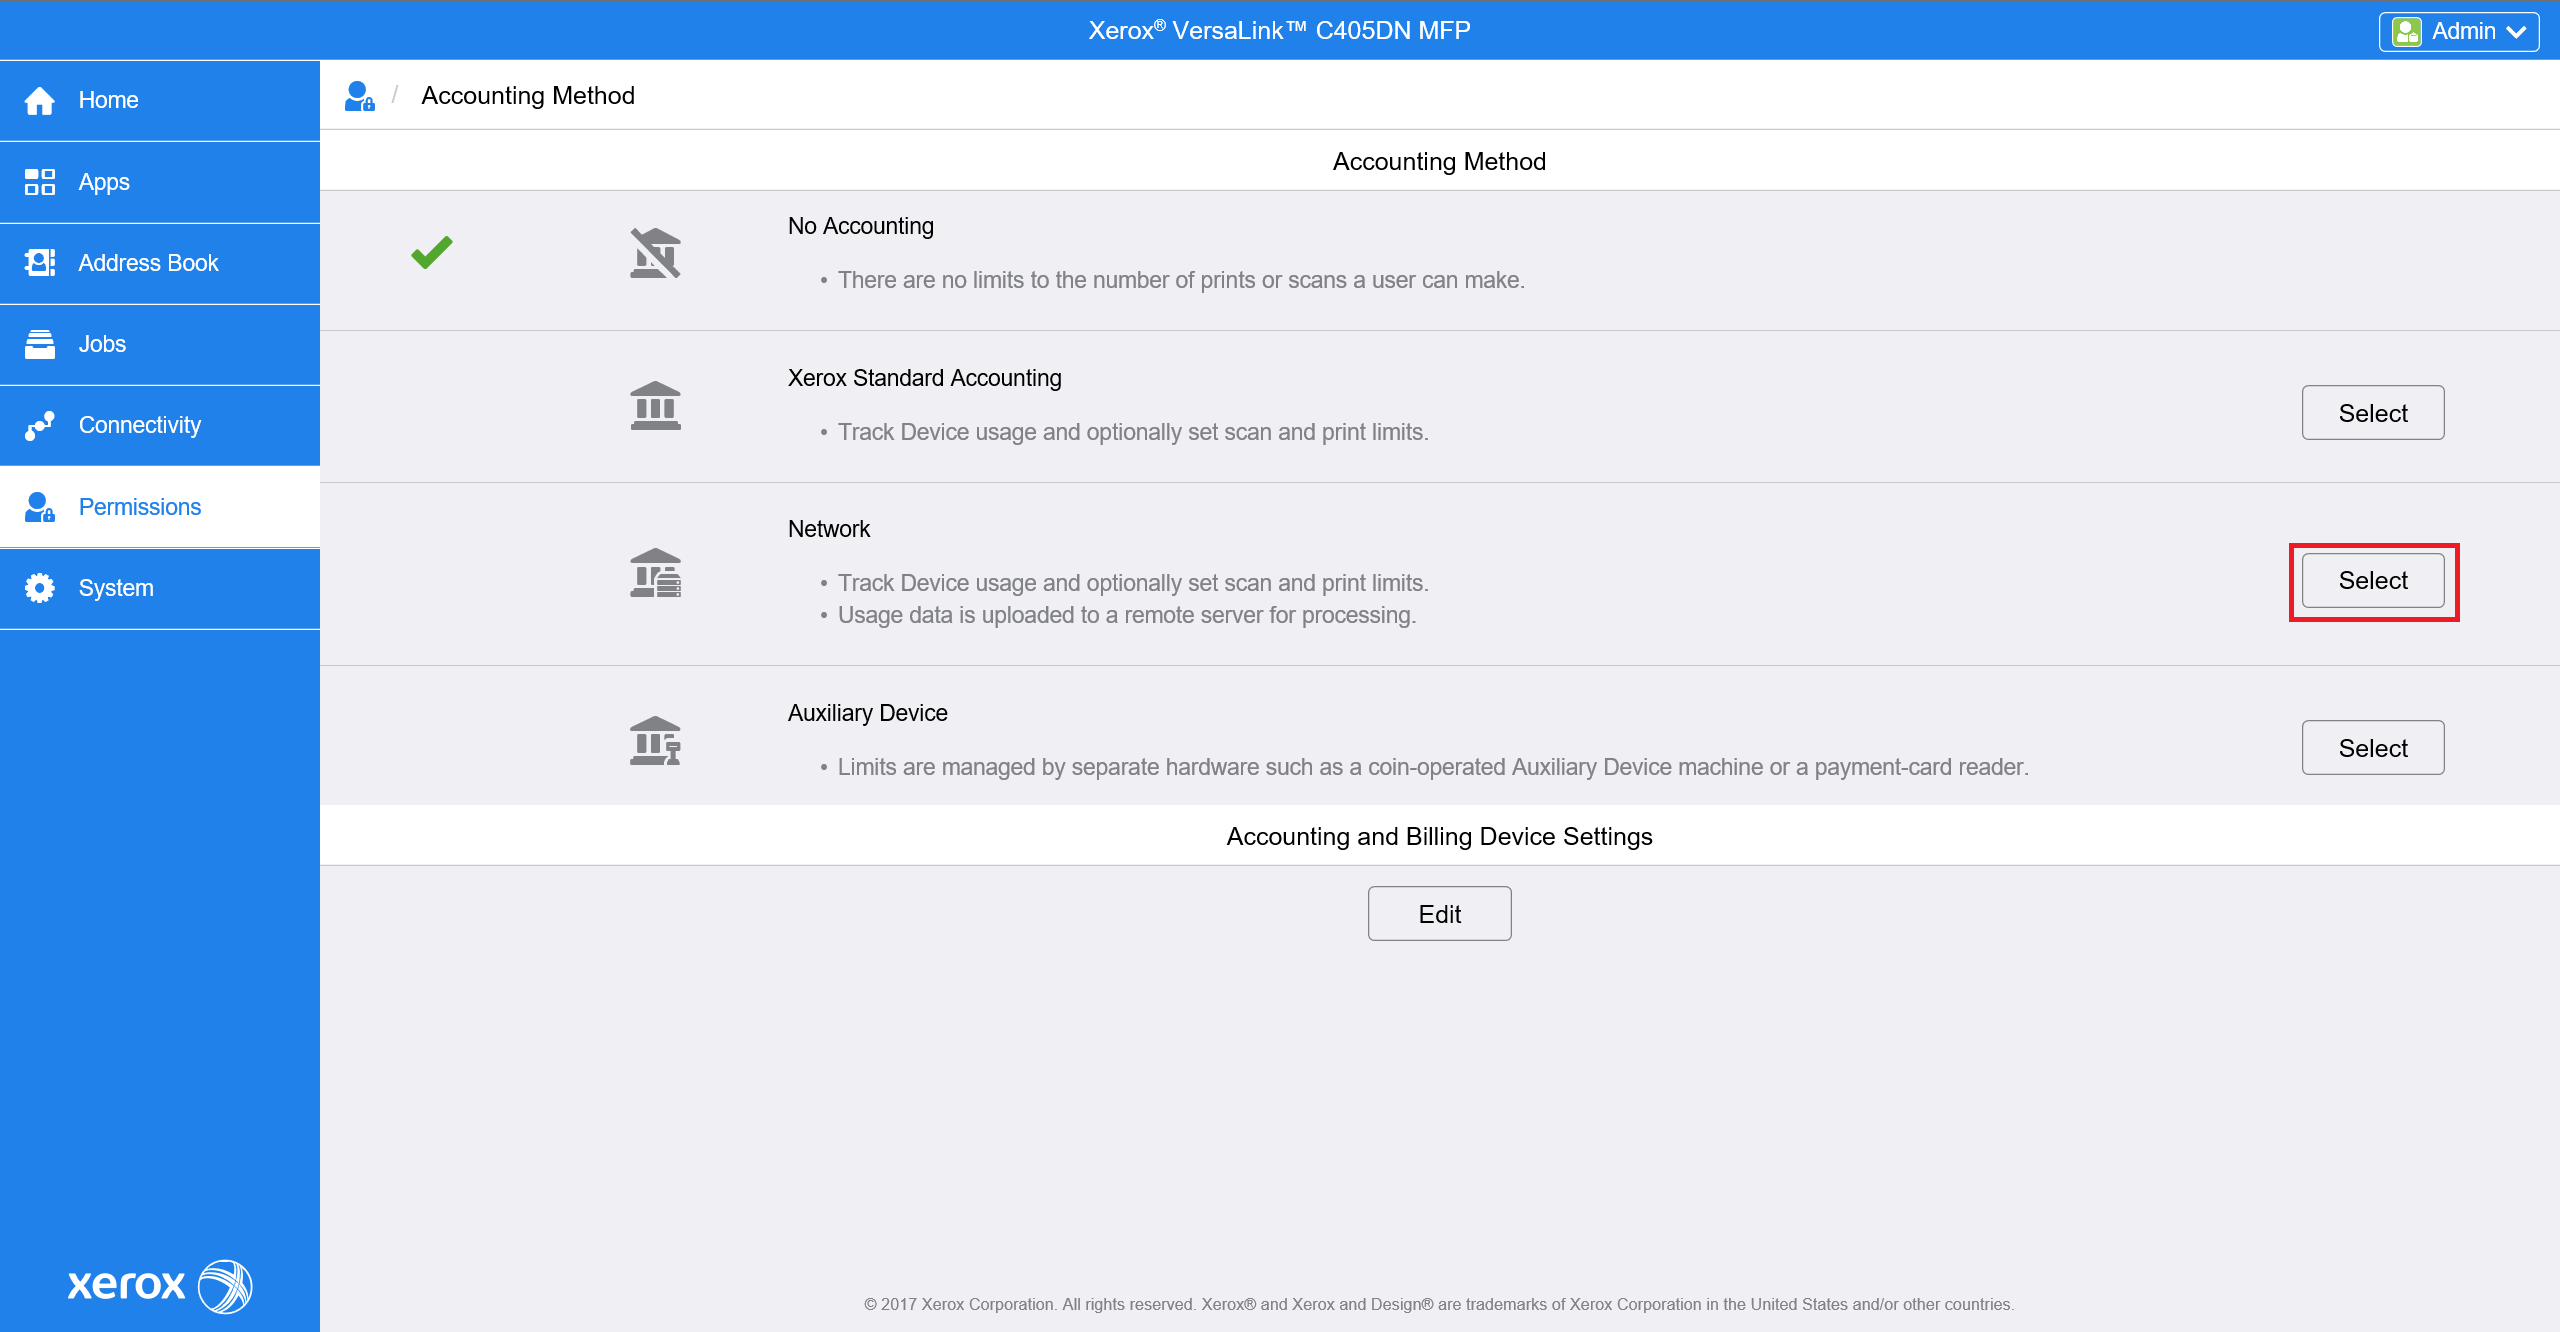
For the older printer models go to Permissions > Accounting Method and Select Network.
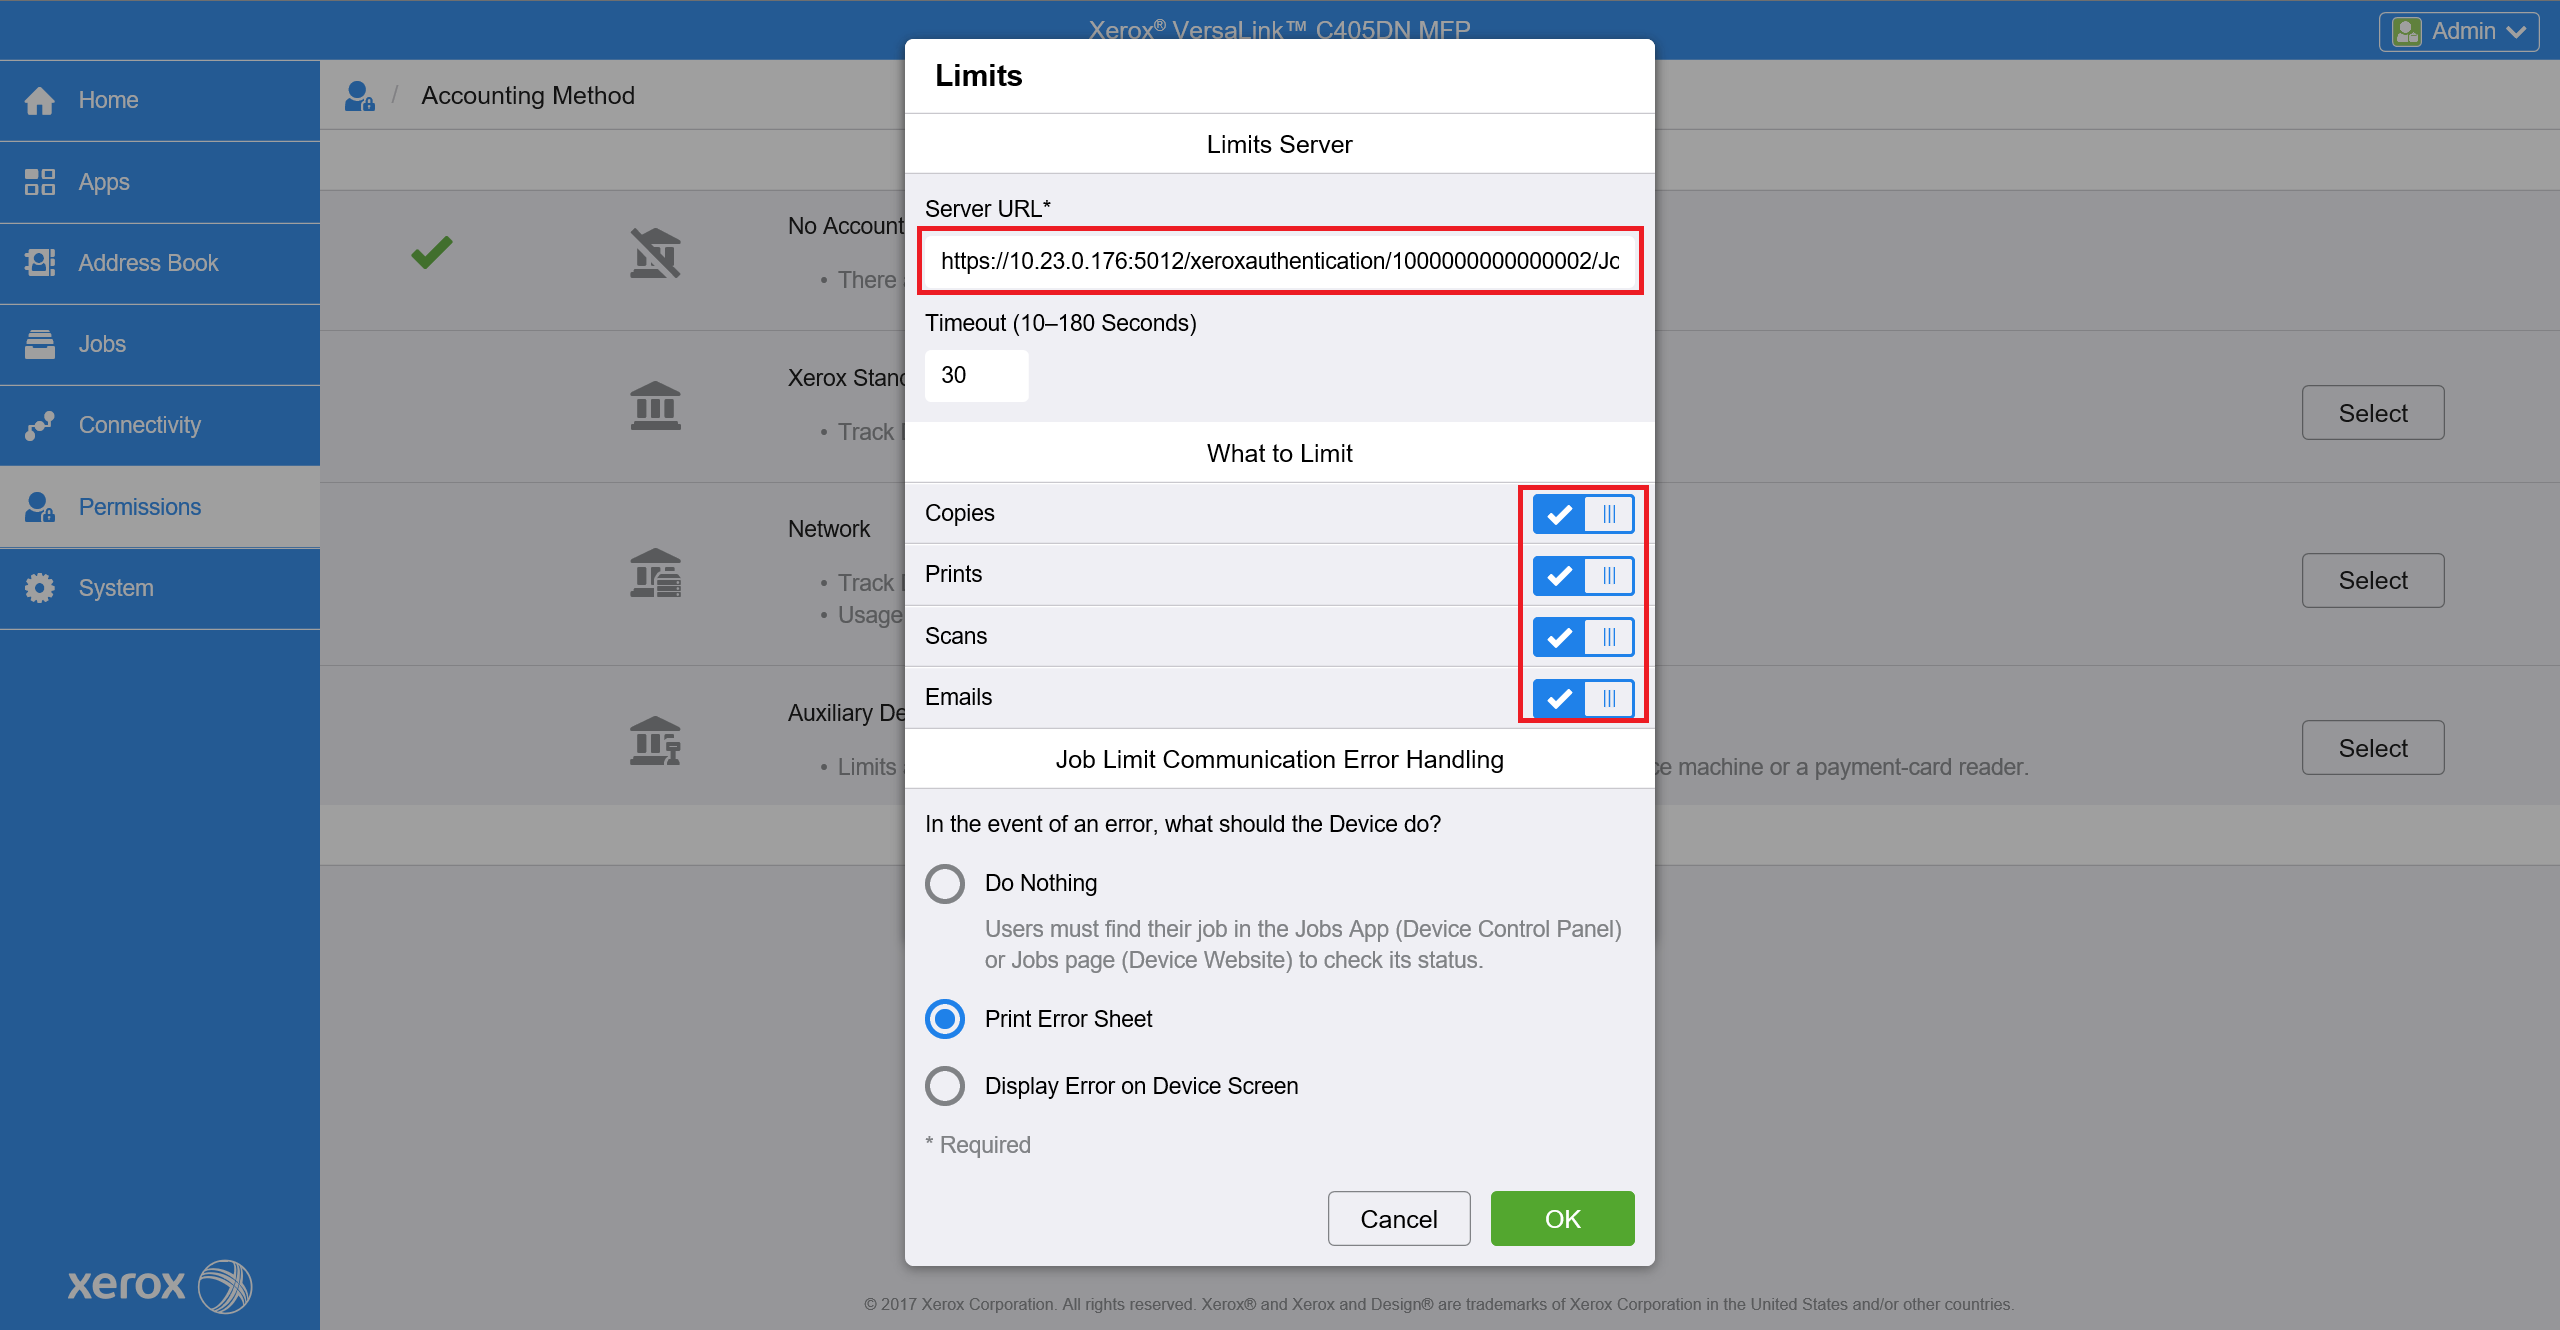
In the new window Setup Limits. Service URL should contain the address of your server and the ID of printer in YSoft SafeQ. In What to Limit section all should be checked.
Pattern of Service URL is https://{ServerIP}:5012/xeroxauthentication/{DeviceId}/JobLimitsAppServer.asmx
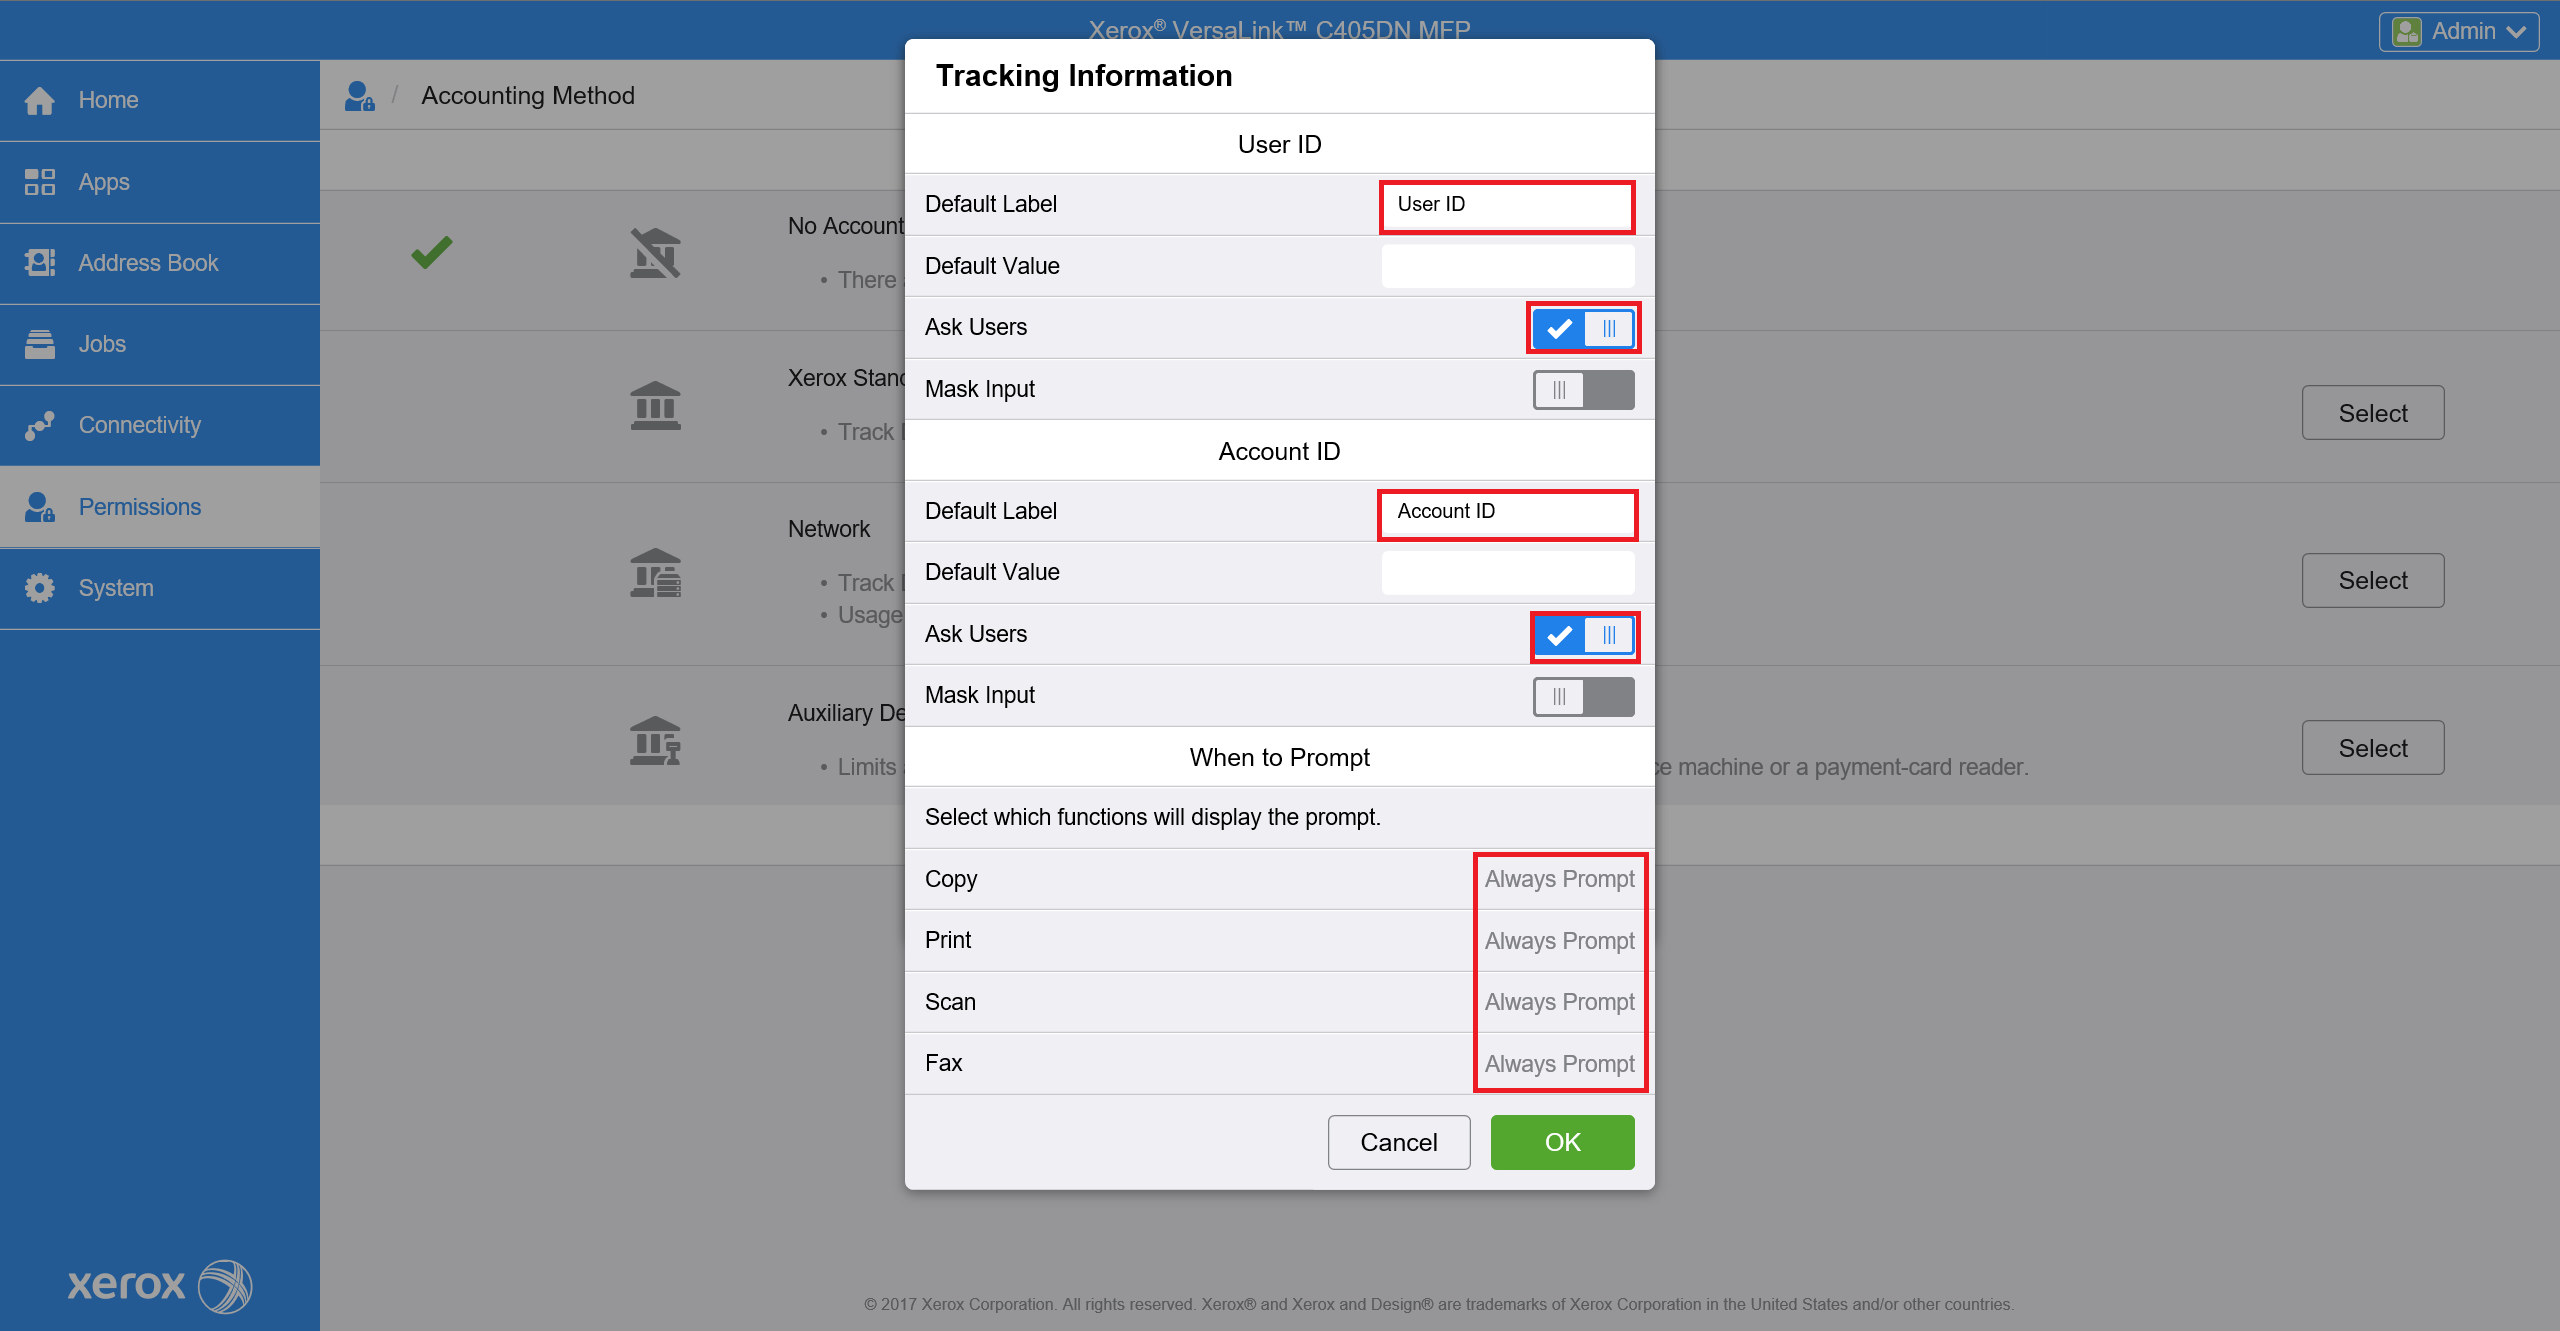
In Tracking Information click on Edit and configure accounting according to the image below.
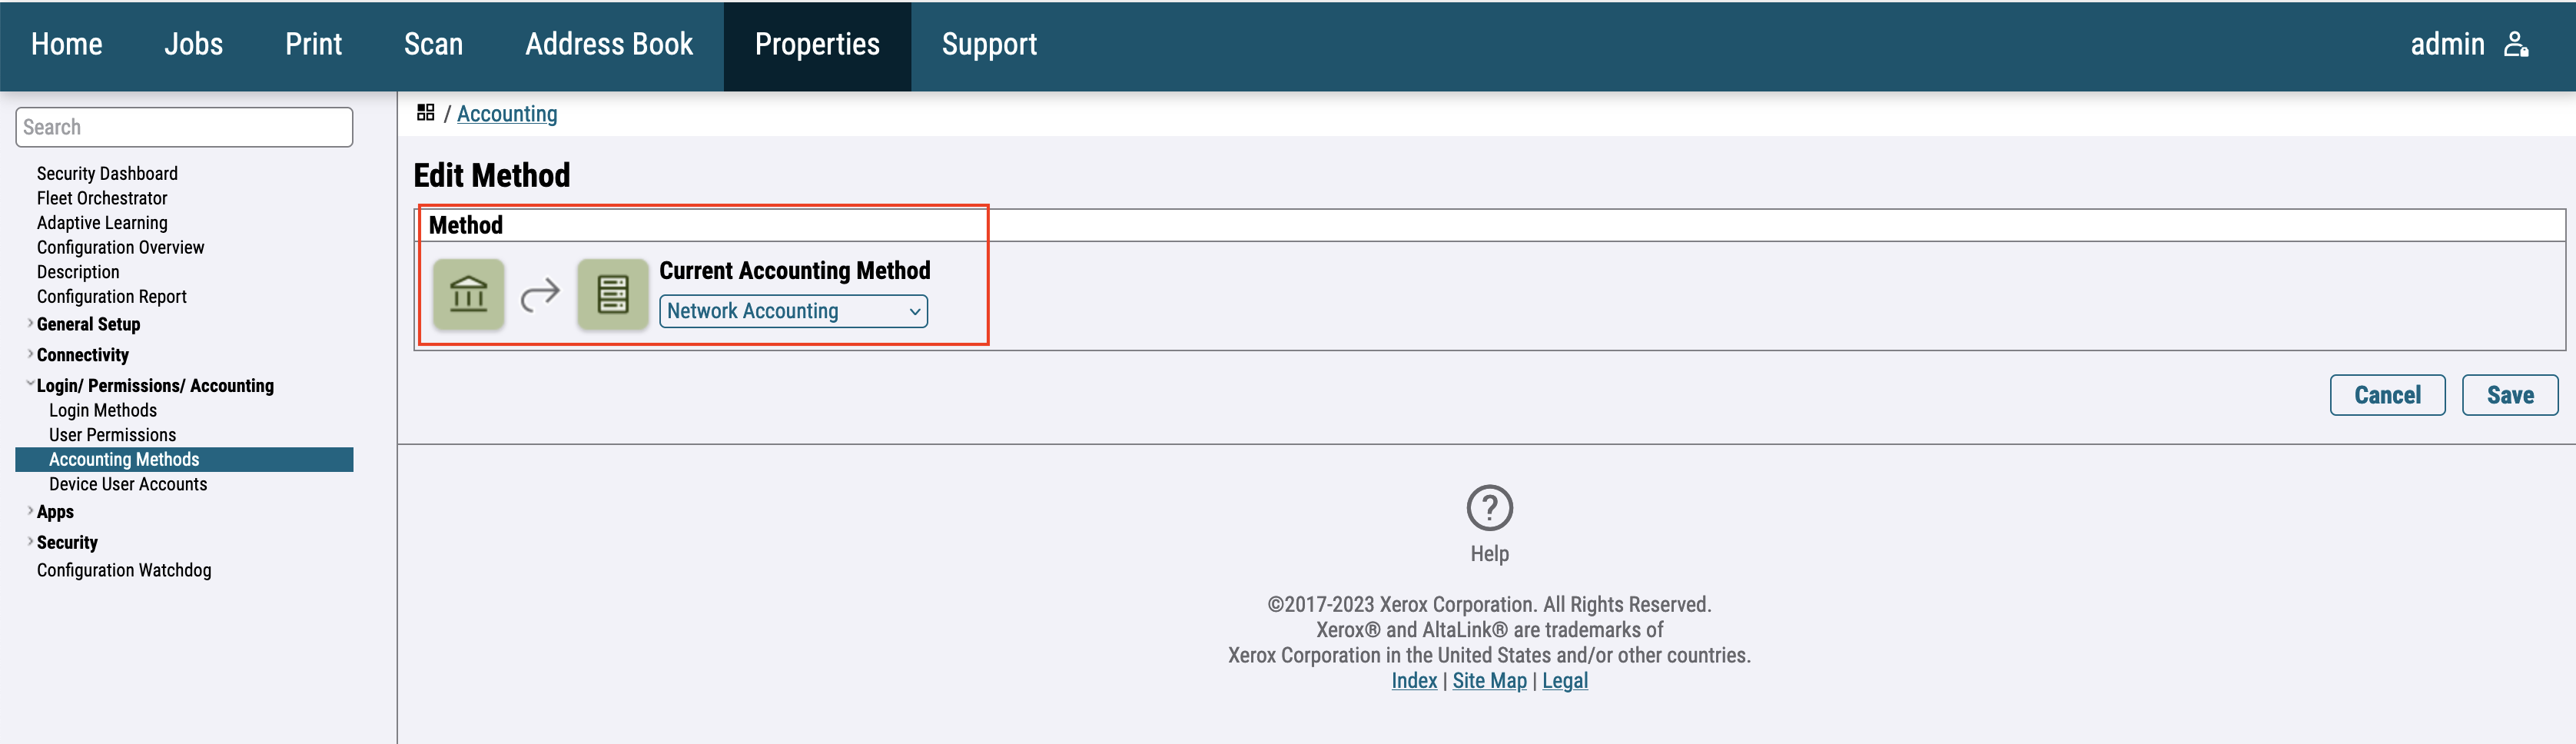
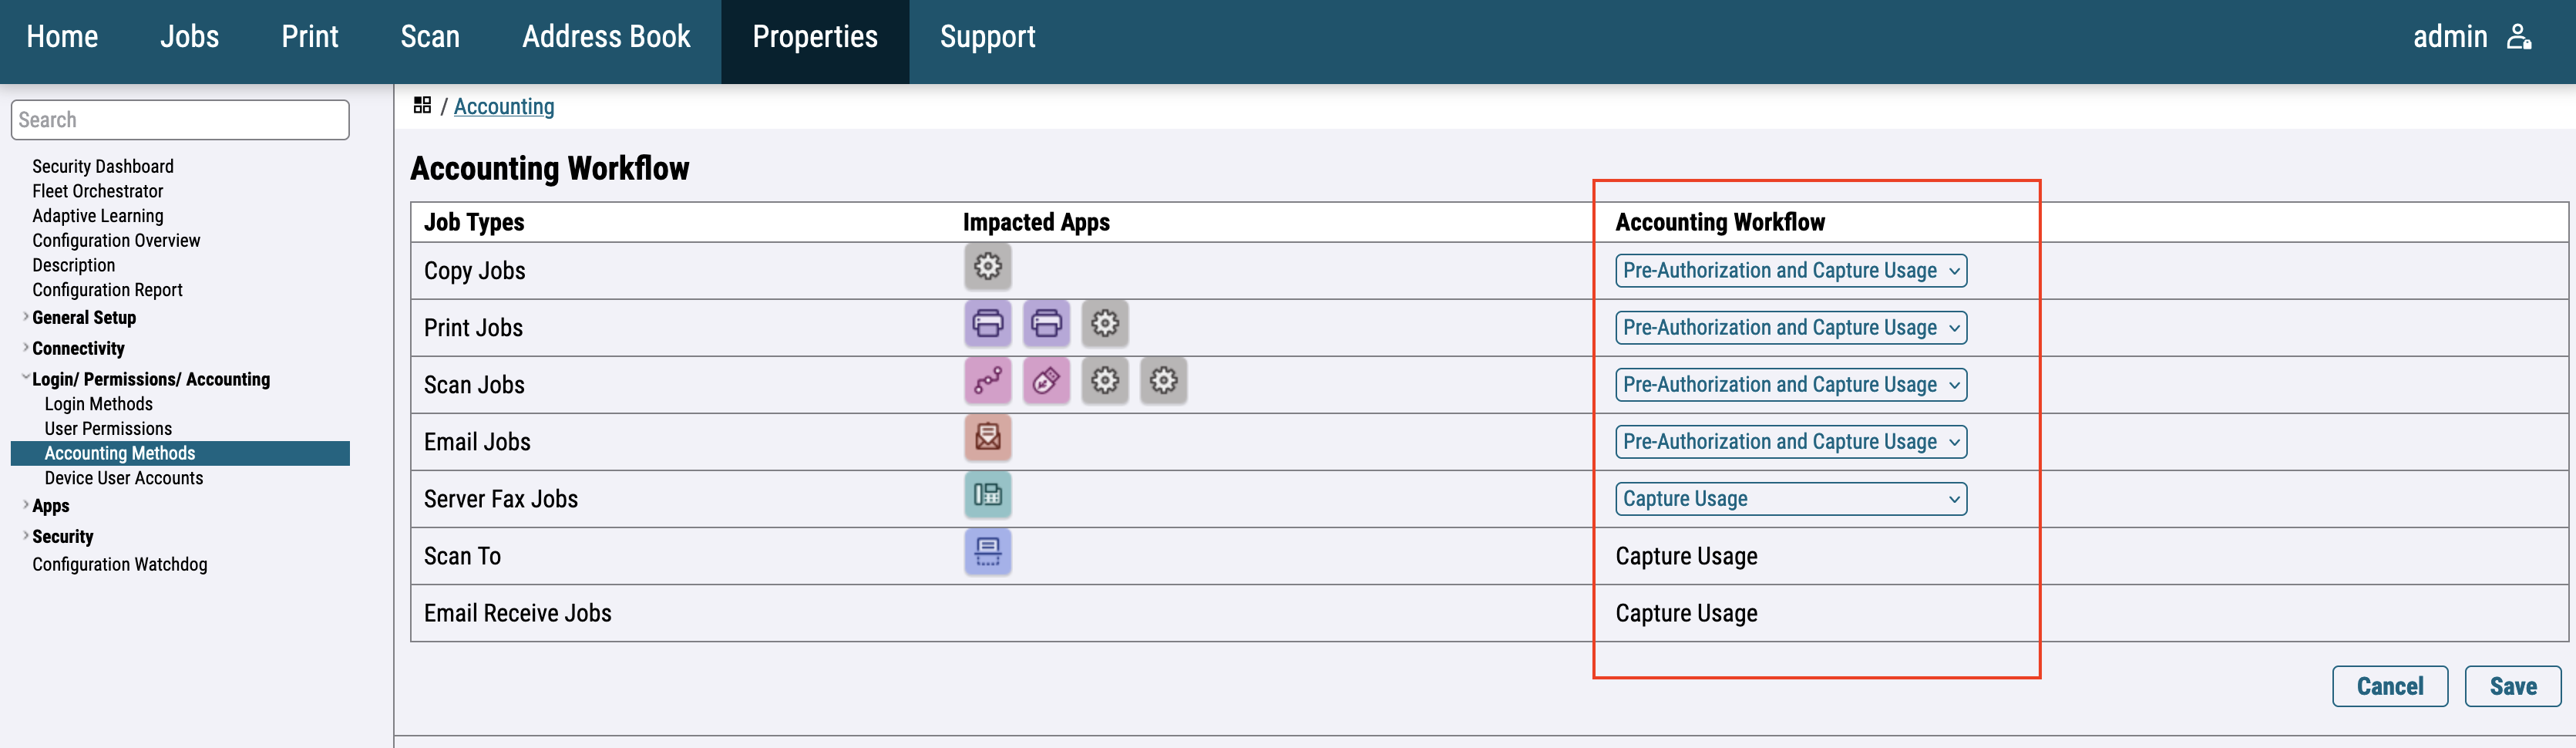
For the newer printer models go to Login / Permissions / Accounting > Accounting Methods > Control Panel & Website Login Methods and Select Network Accounting.
Click on the Accounting Workflow Edit button and configure accounting according to the image below.
In Job Limits Server (Pre-Authorization) fill Server URL.
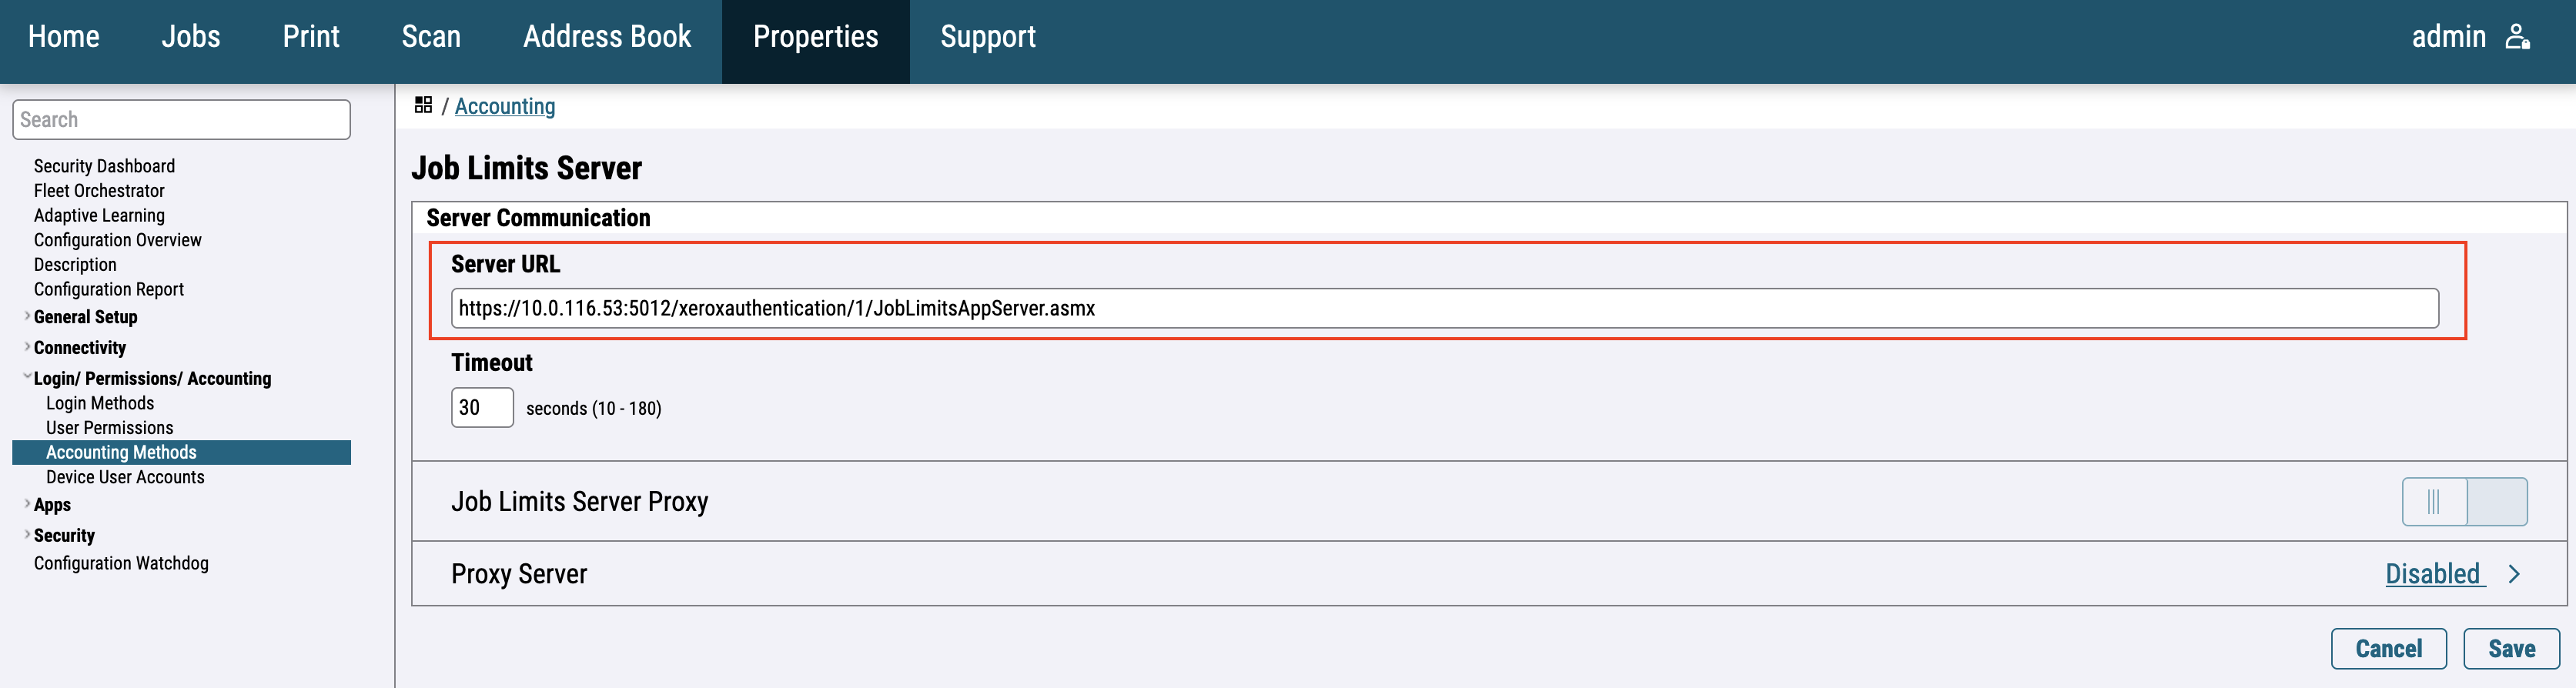
Pattern of Service URL is https://{ServerIP}:5012/xeroxauthentication/{DeviceId}/JobLimitsAppServer.asmx
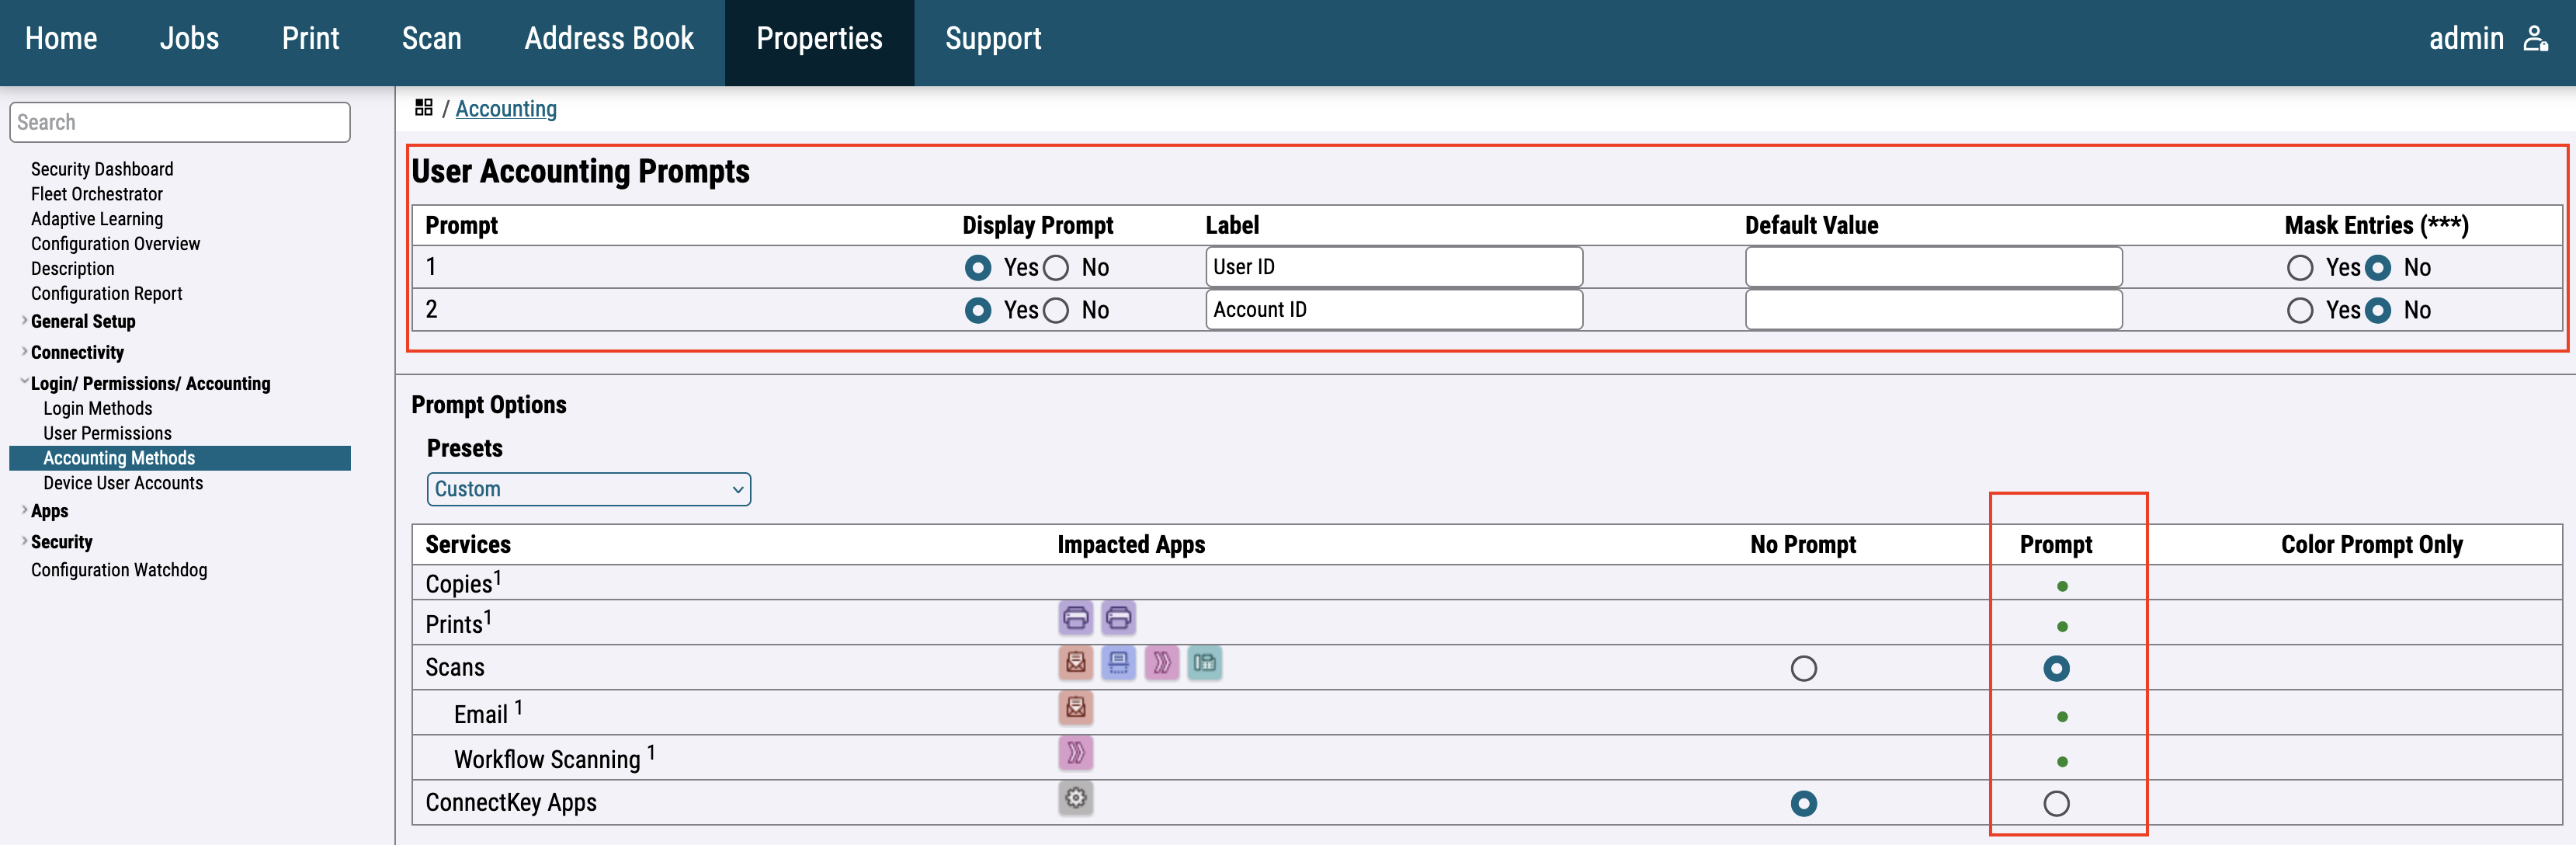
Fill the User Accounting Prompts screen according to the image below.
Lock Guest Access
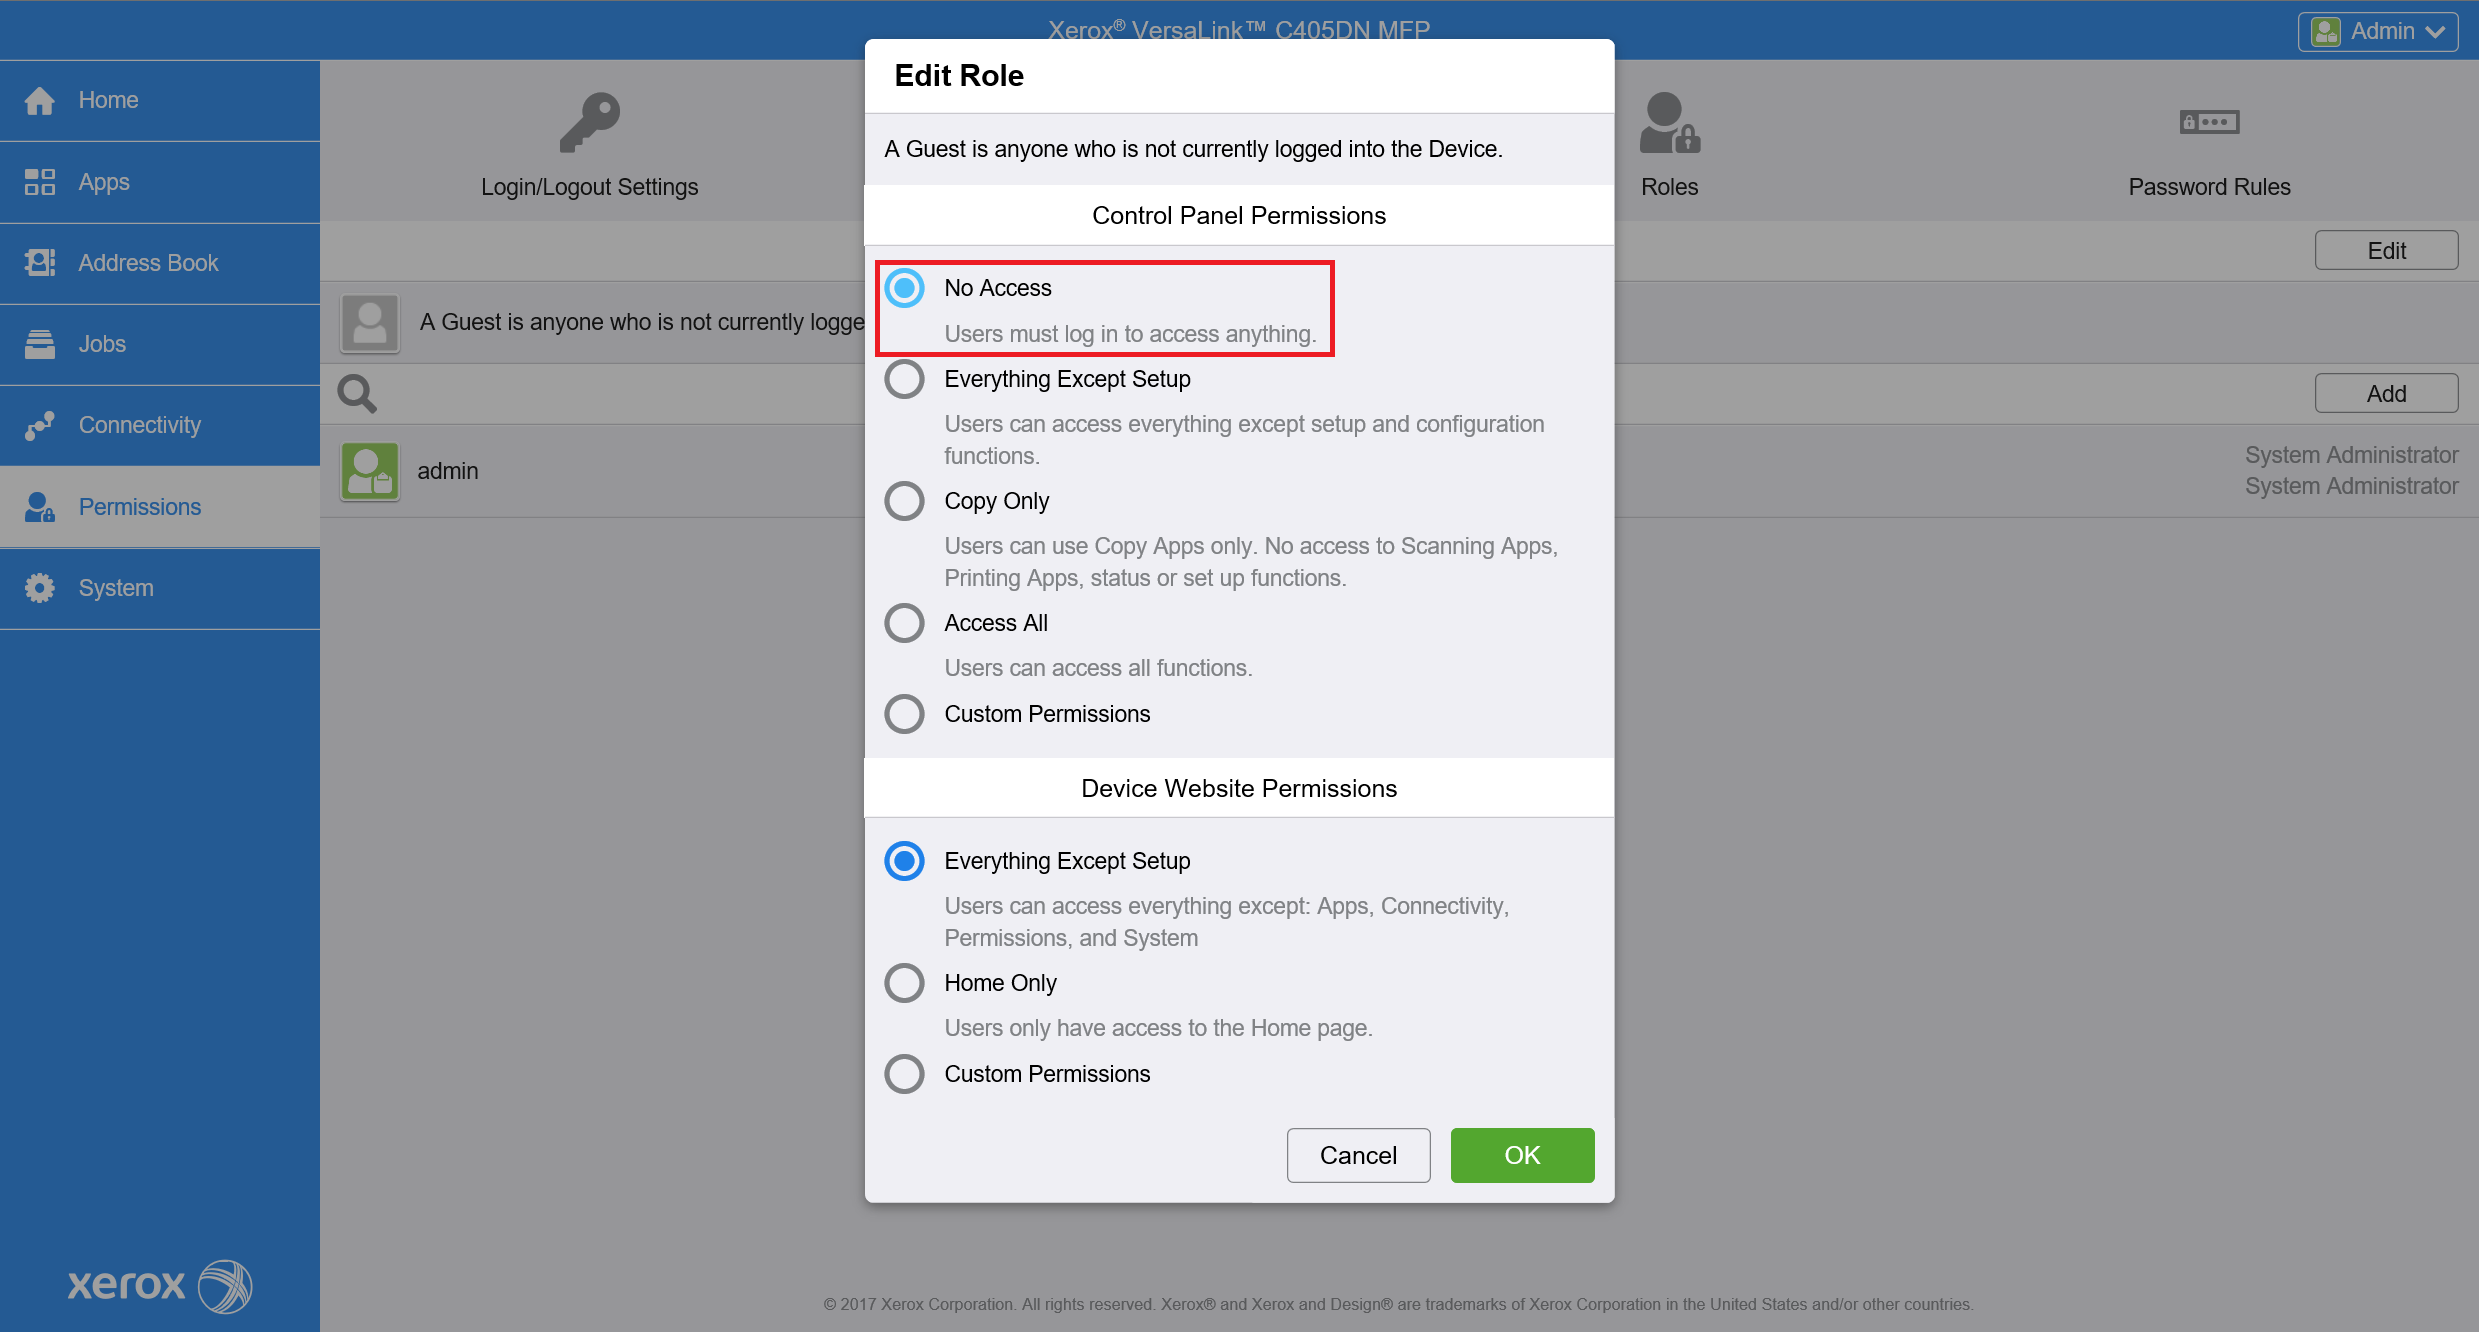
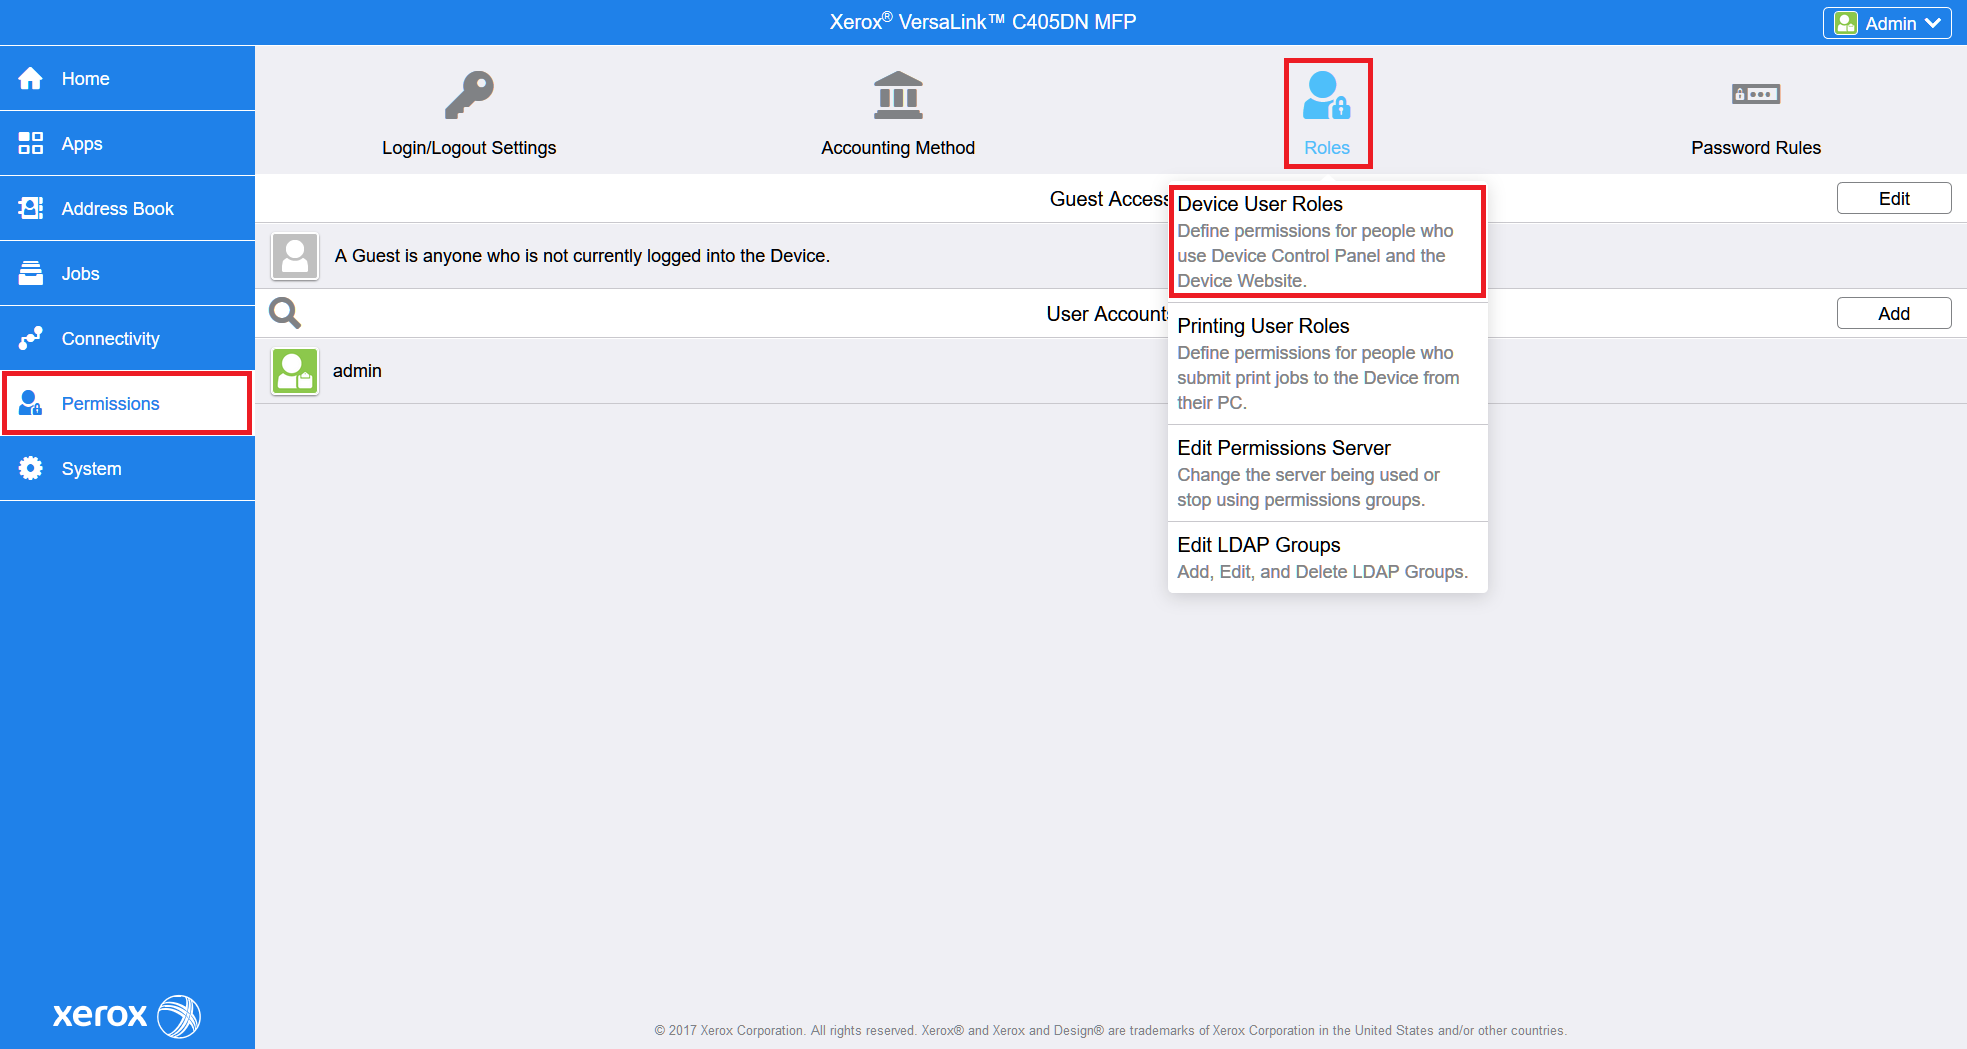
For the older printer models, go to Permissions and in Guest Access click on Edit > Device User Role.
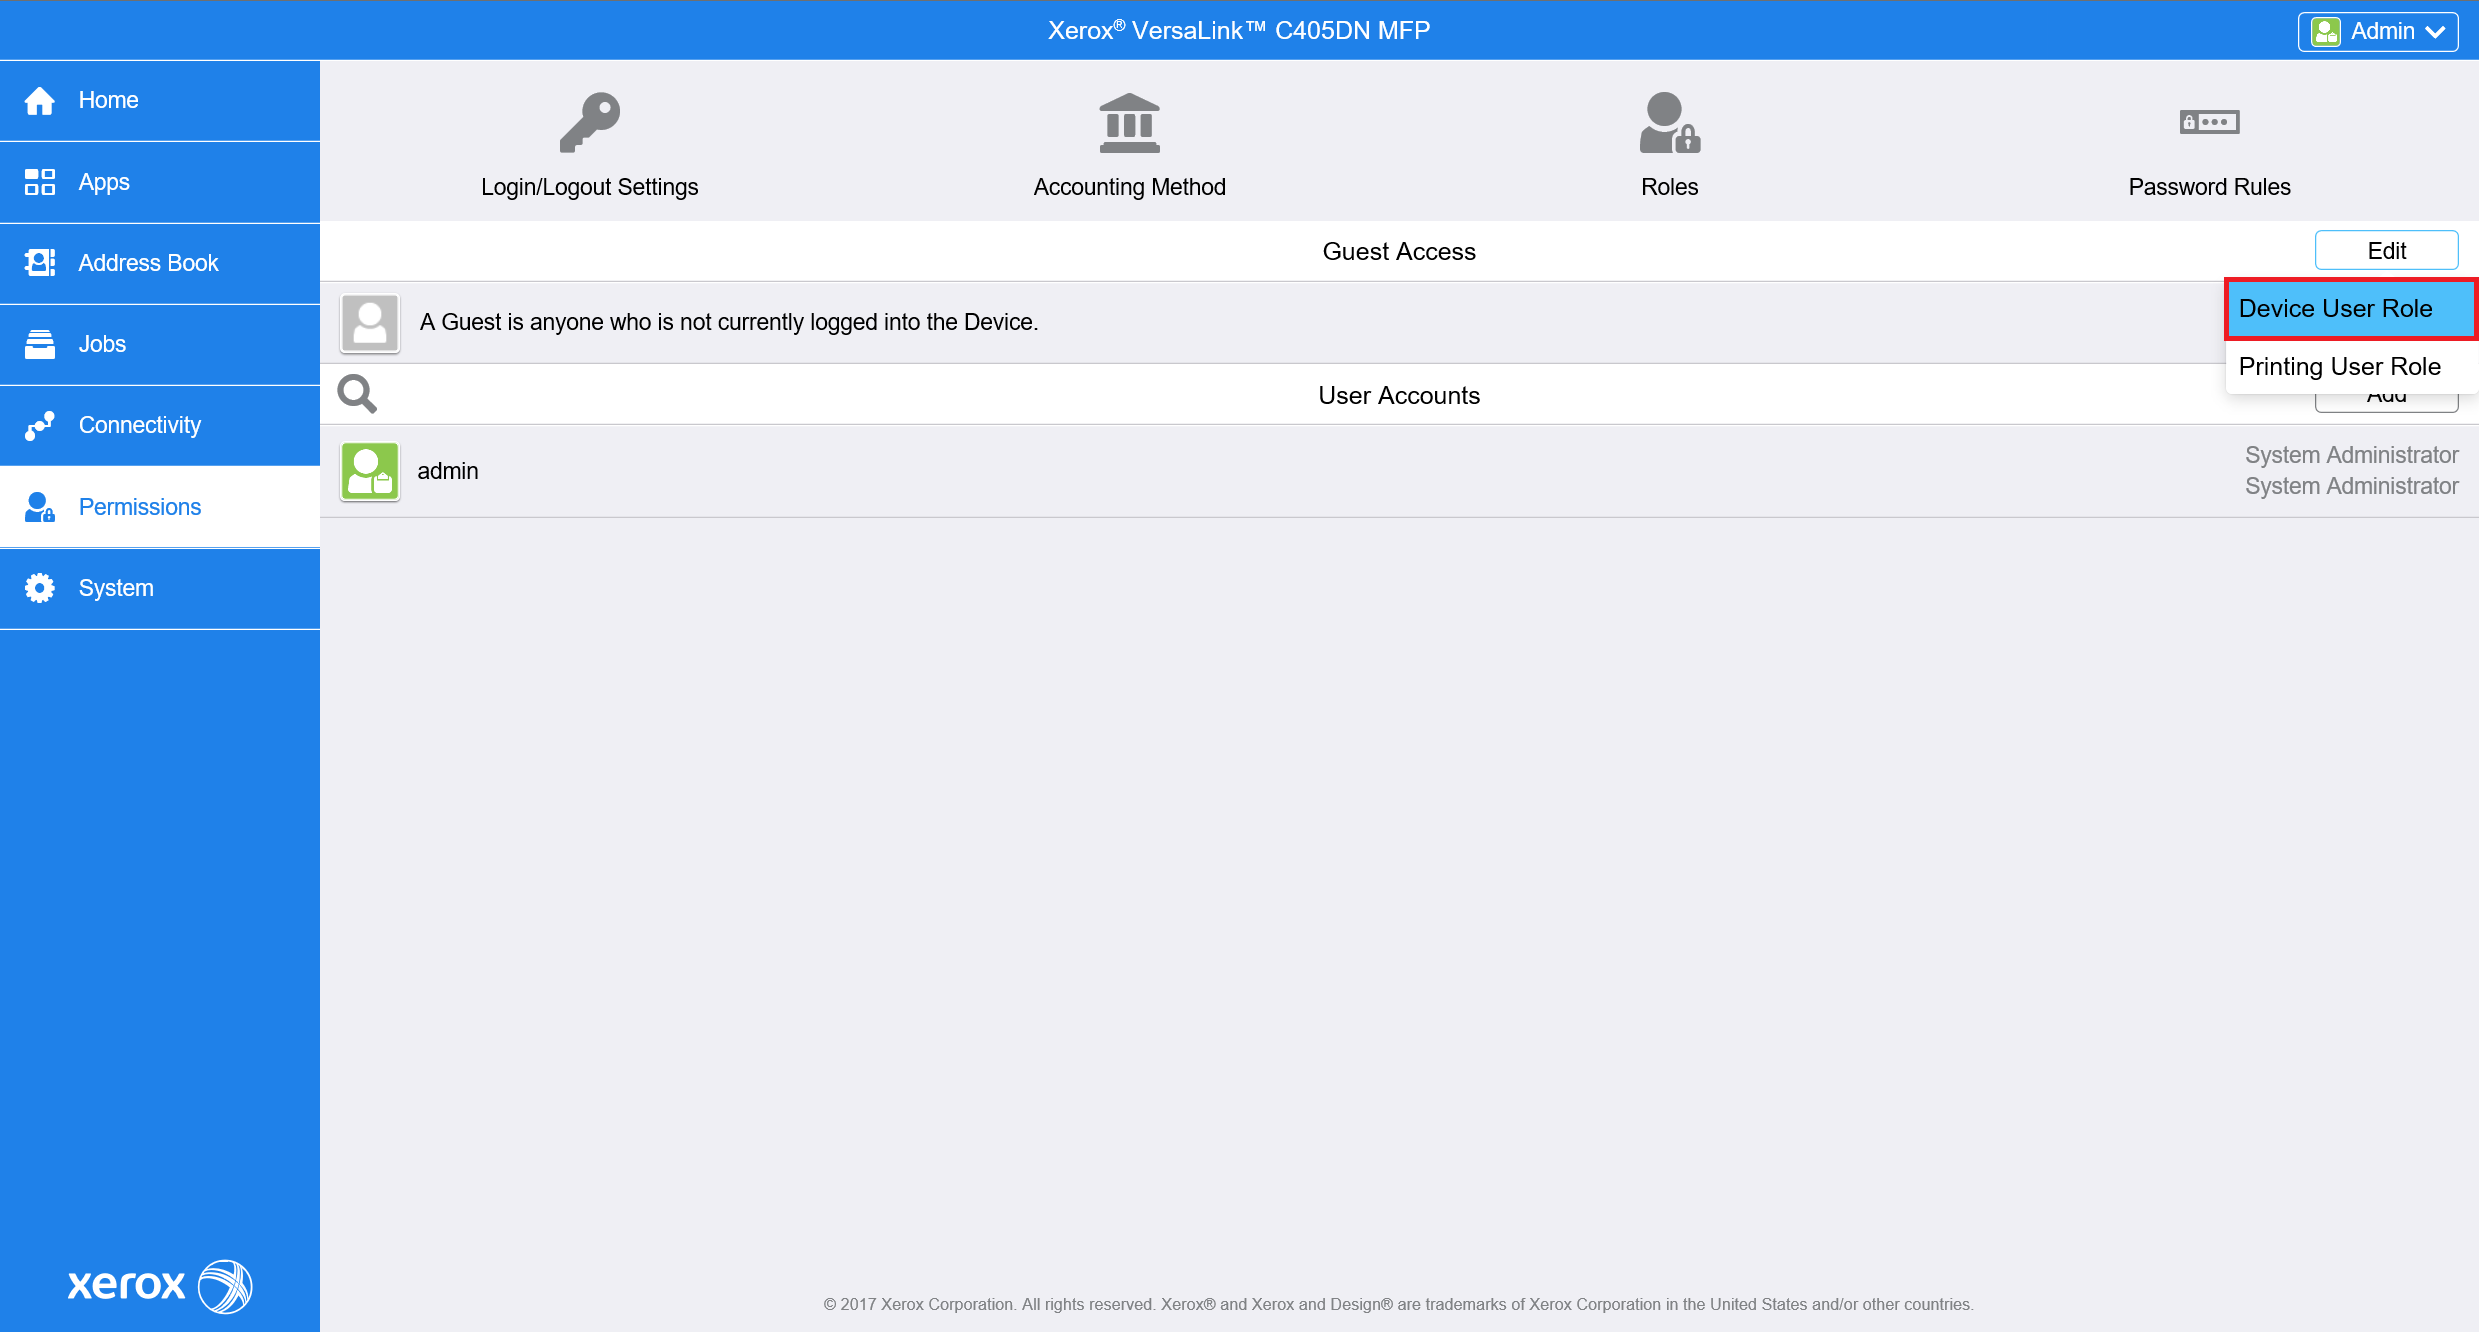
In the new window choose the No Access option.
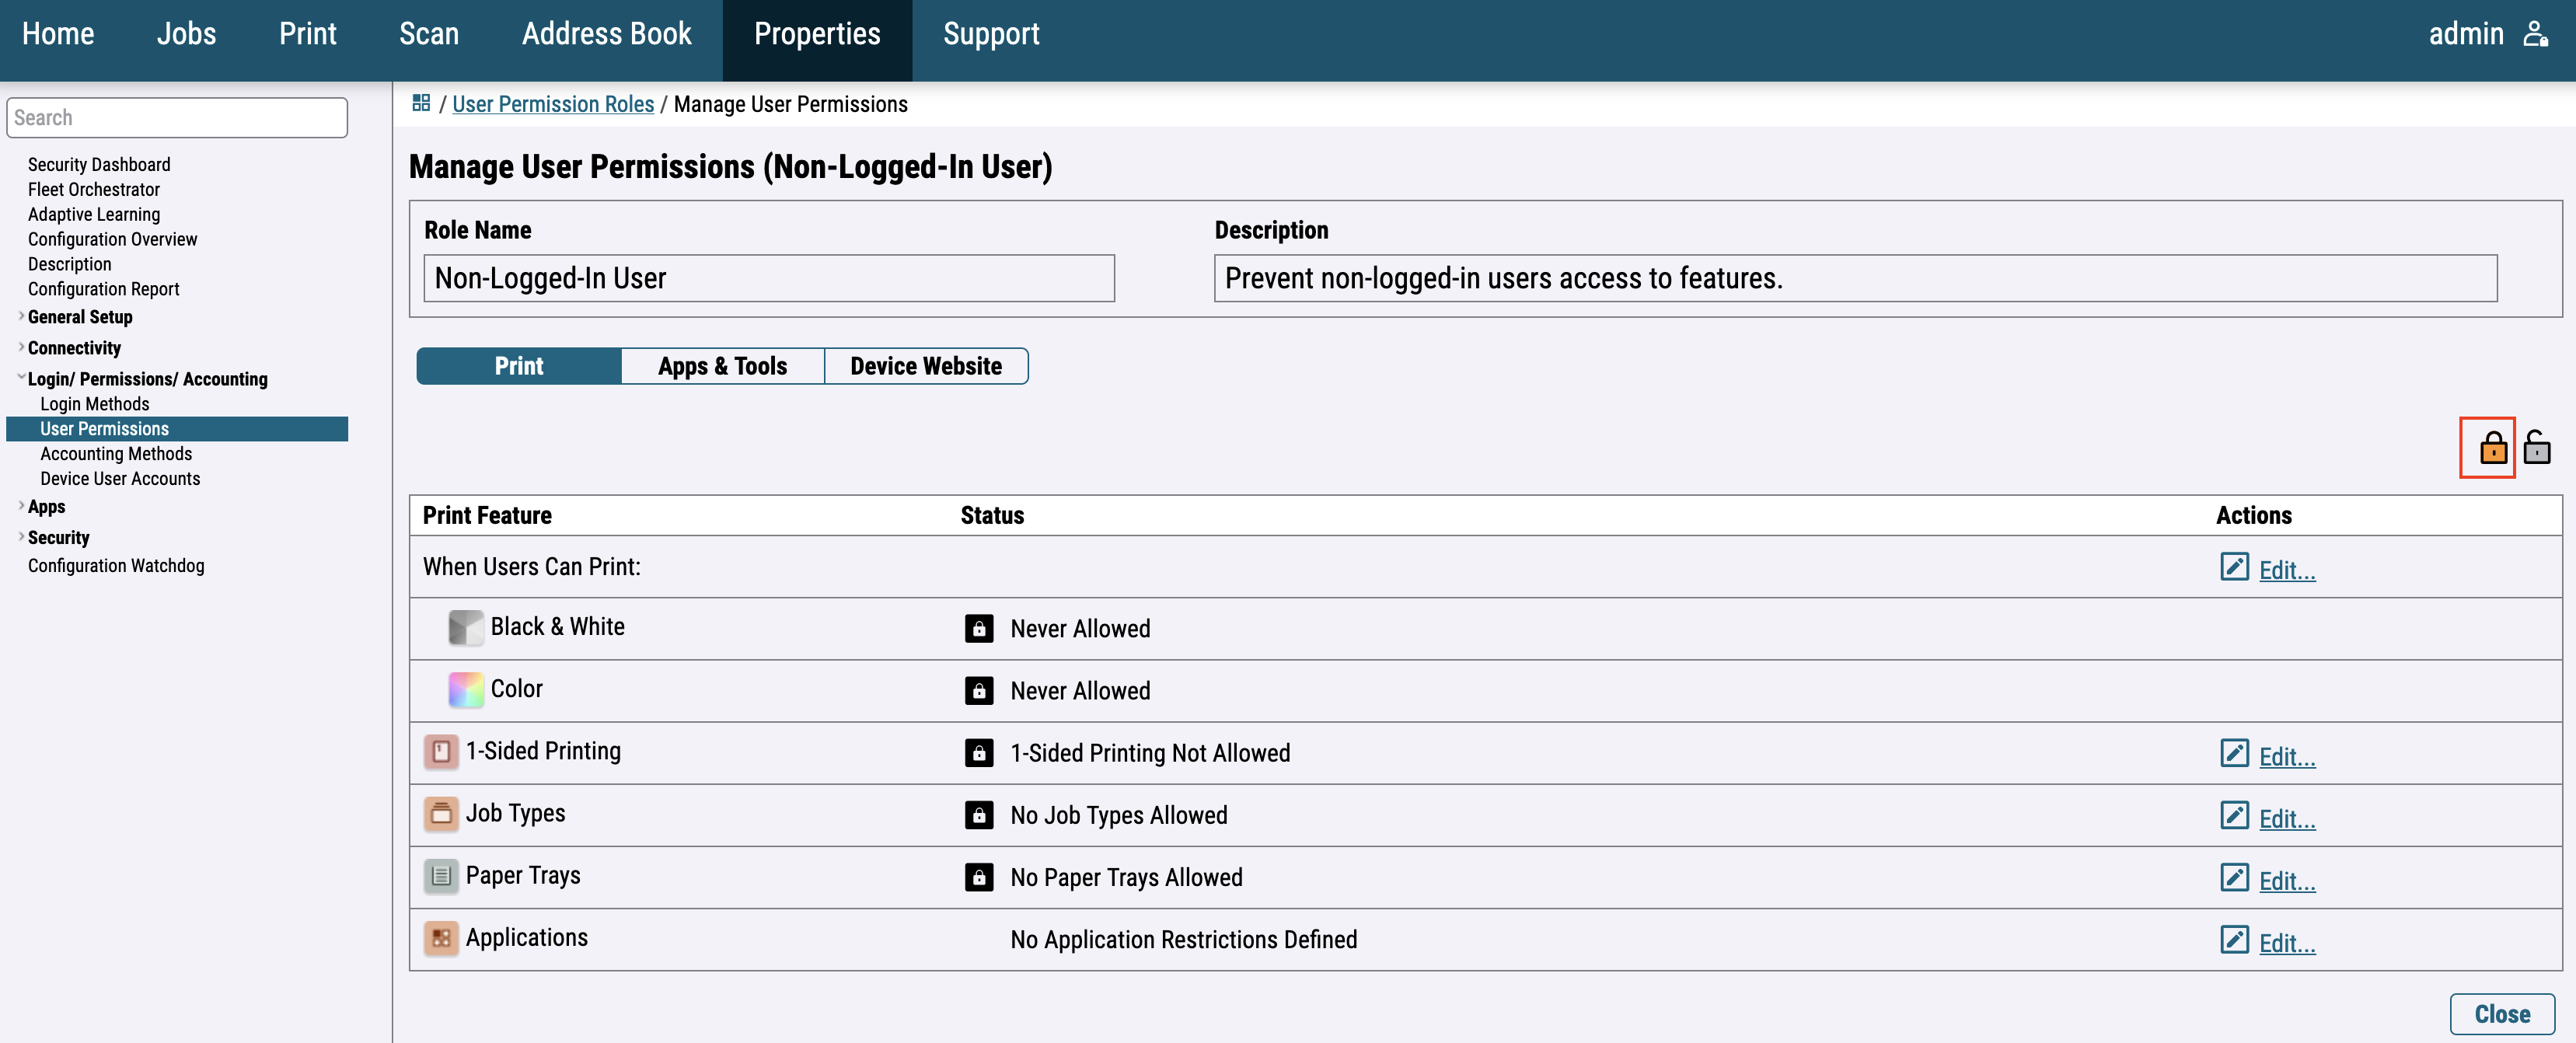
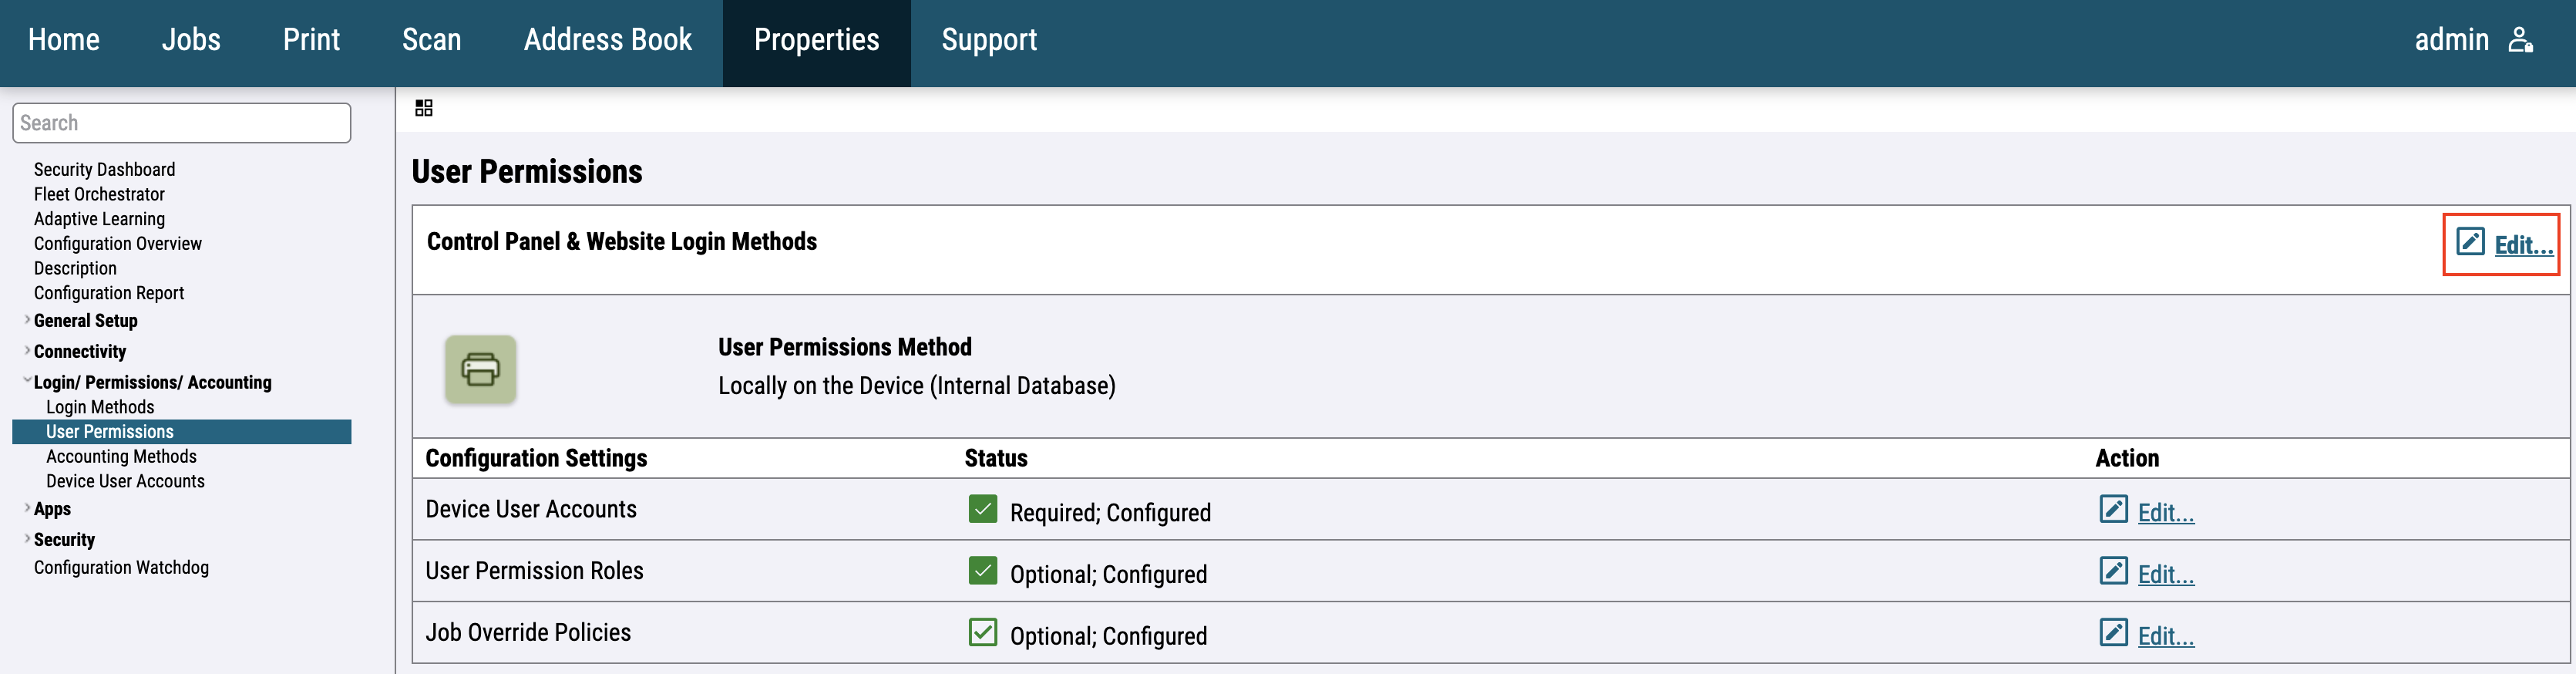
For the newer printer models go to Login / Permissions / Accounting > User permissions and Edit the User permission roles configuration.
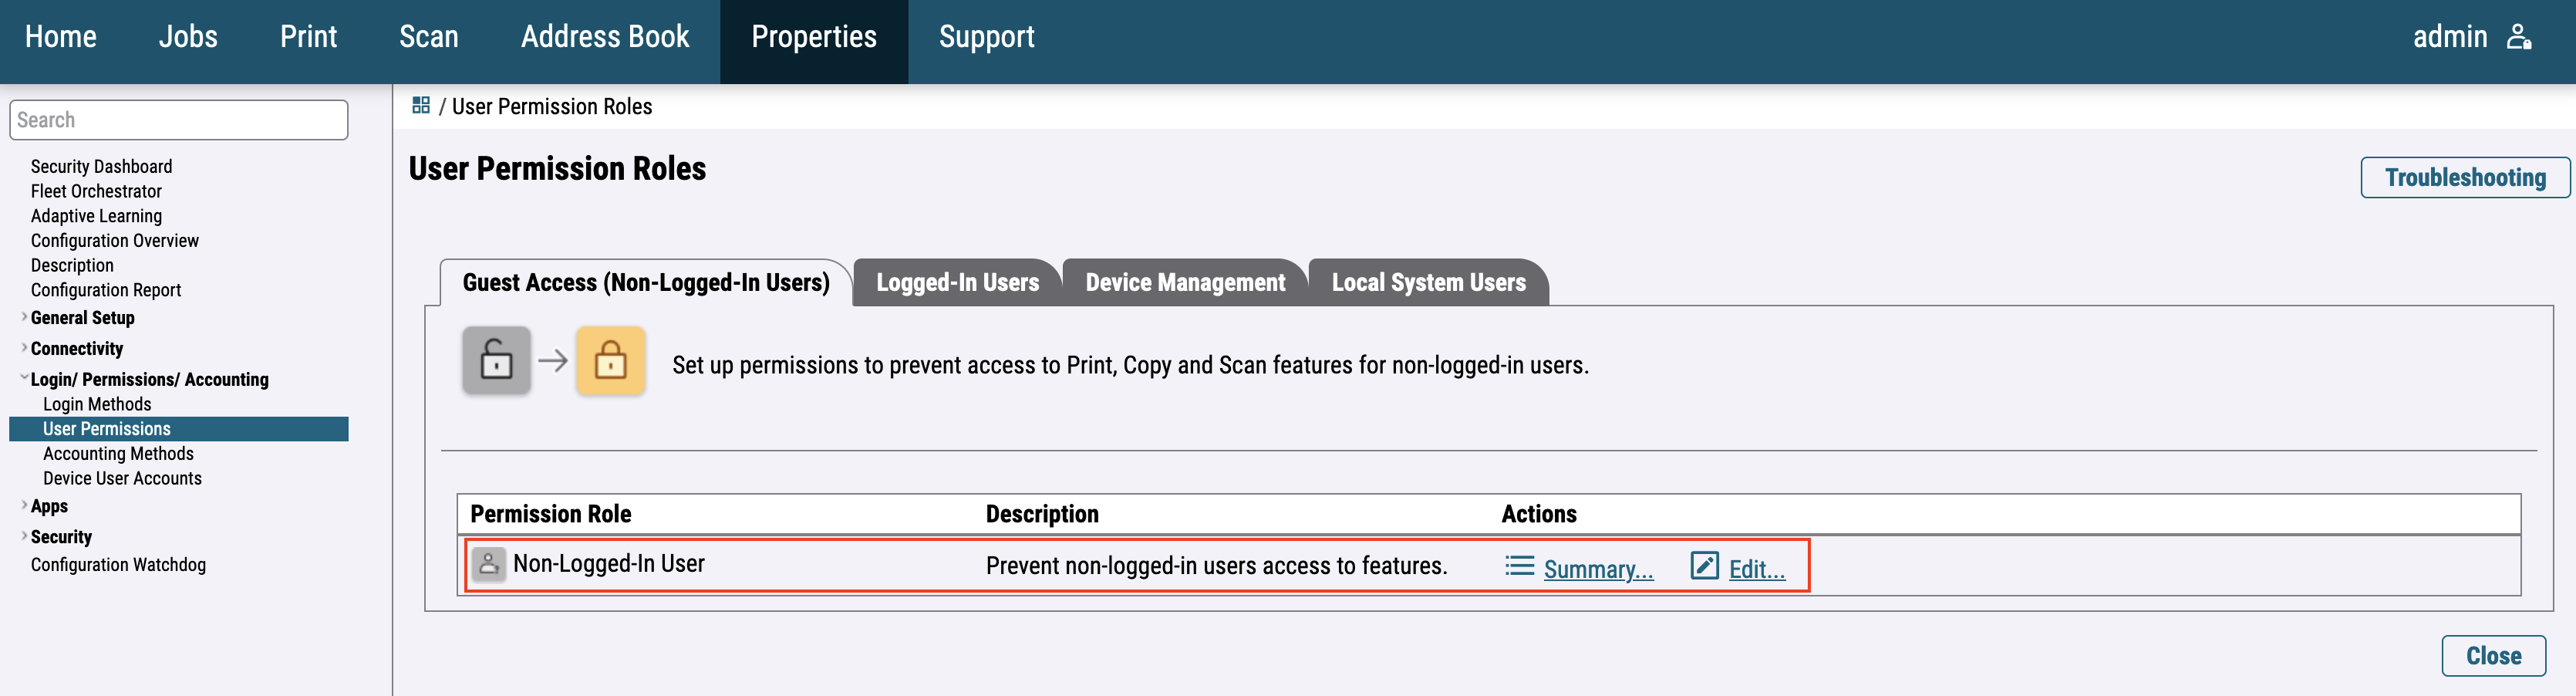
Edit Non-Logged-In User and click Disallow all.
Install Certificate Authority certificate
For the older printer models, go to System > Security and select Security Certificates.

Select Trusted Root CA Certificates from the dropdown menu and press Import.
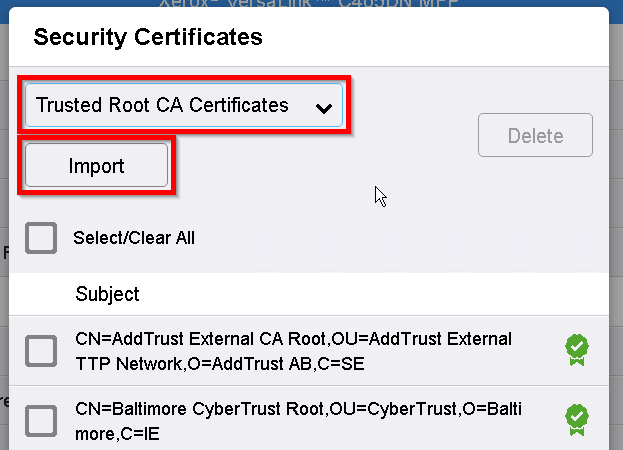
Press Select to select a certificate from the file system. Enter the decryption password.
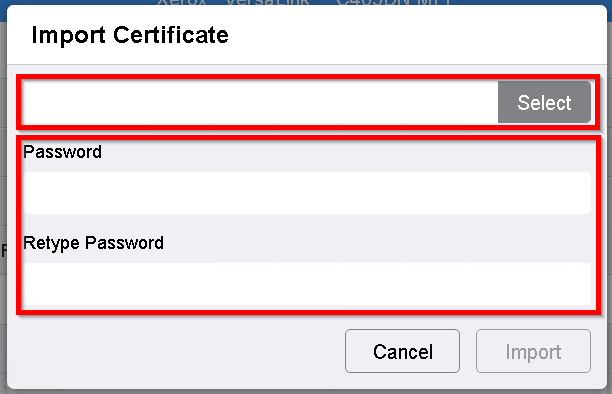
Press Import to import the certificate to the device.
For the newer printer models, go to Security > Certificates > Security Certificates, select Root/Intermediate Trusted Certificate(s), and press Install certificate.
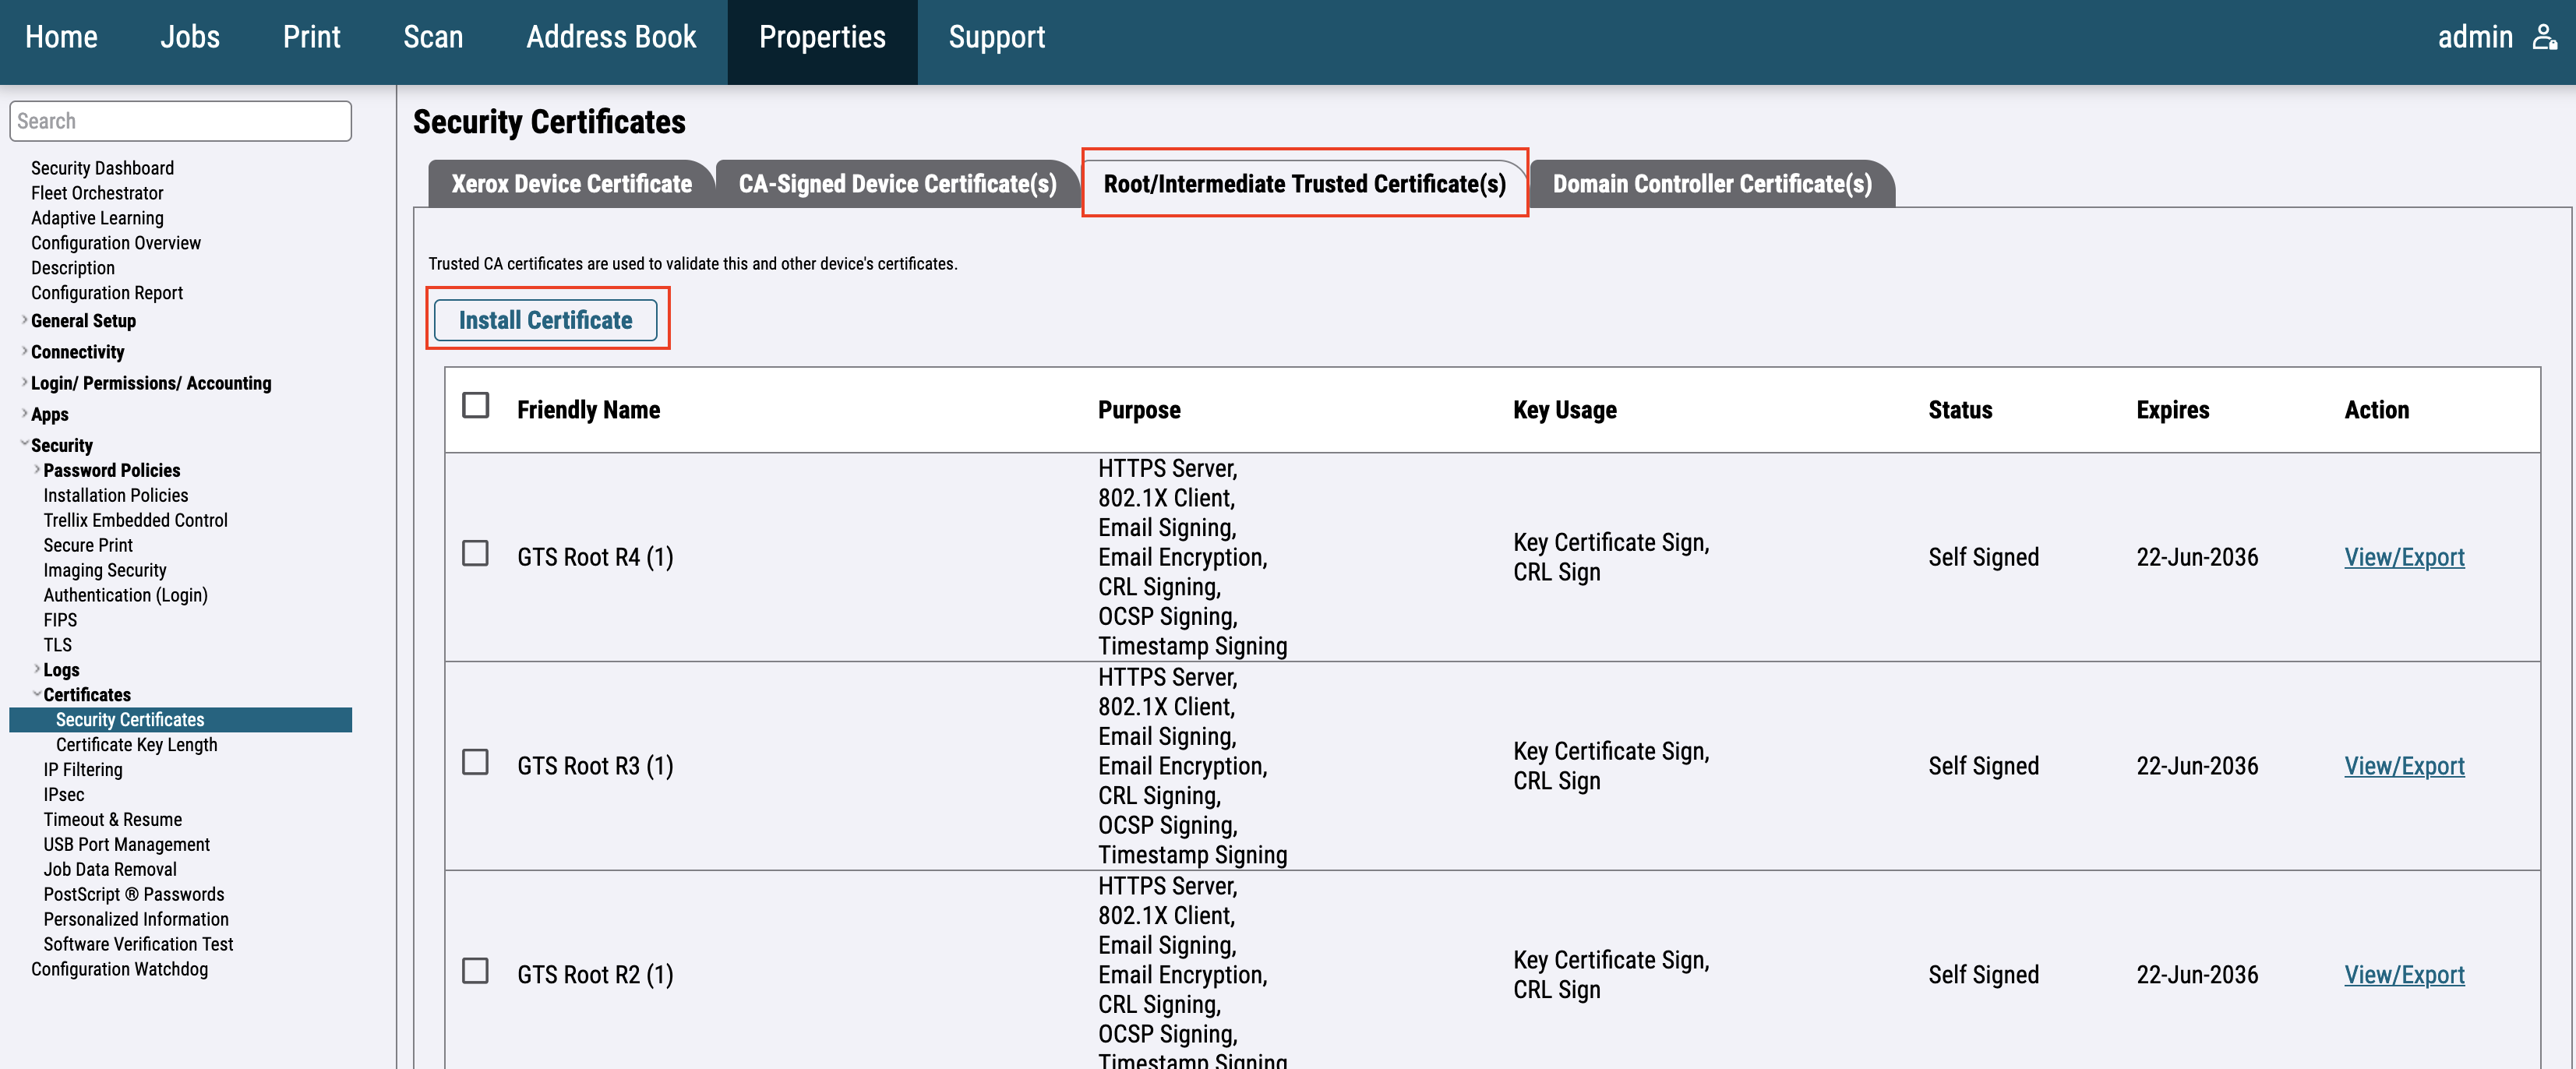
Press Select to select a certificate from the file system. Enter the decryption password if encrypted.
Application and feature (color copy, 1-sided) restrictions
Setup LDAP server
This setup should be done automatically during the installation process.
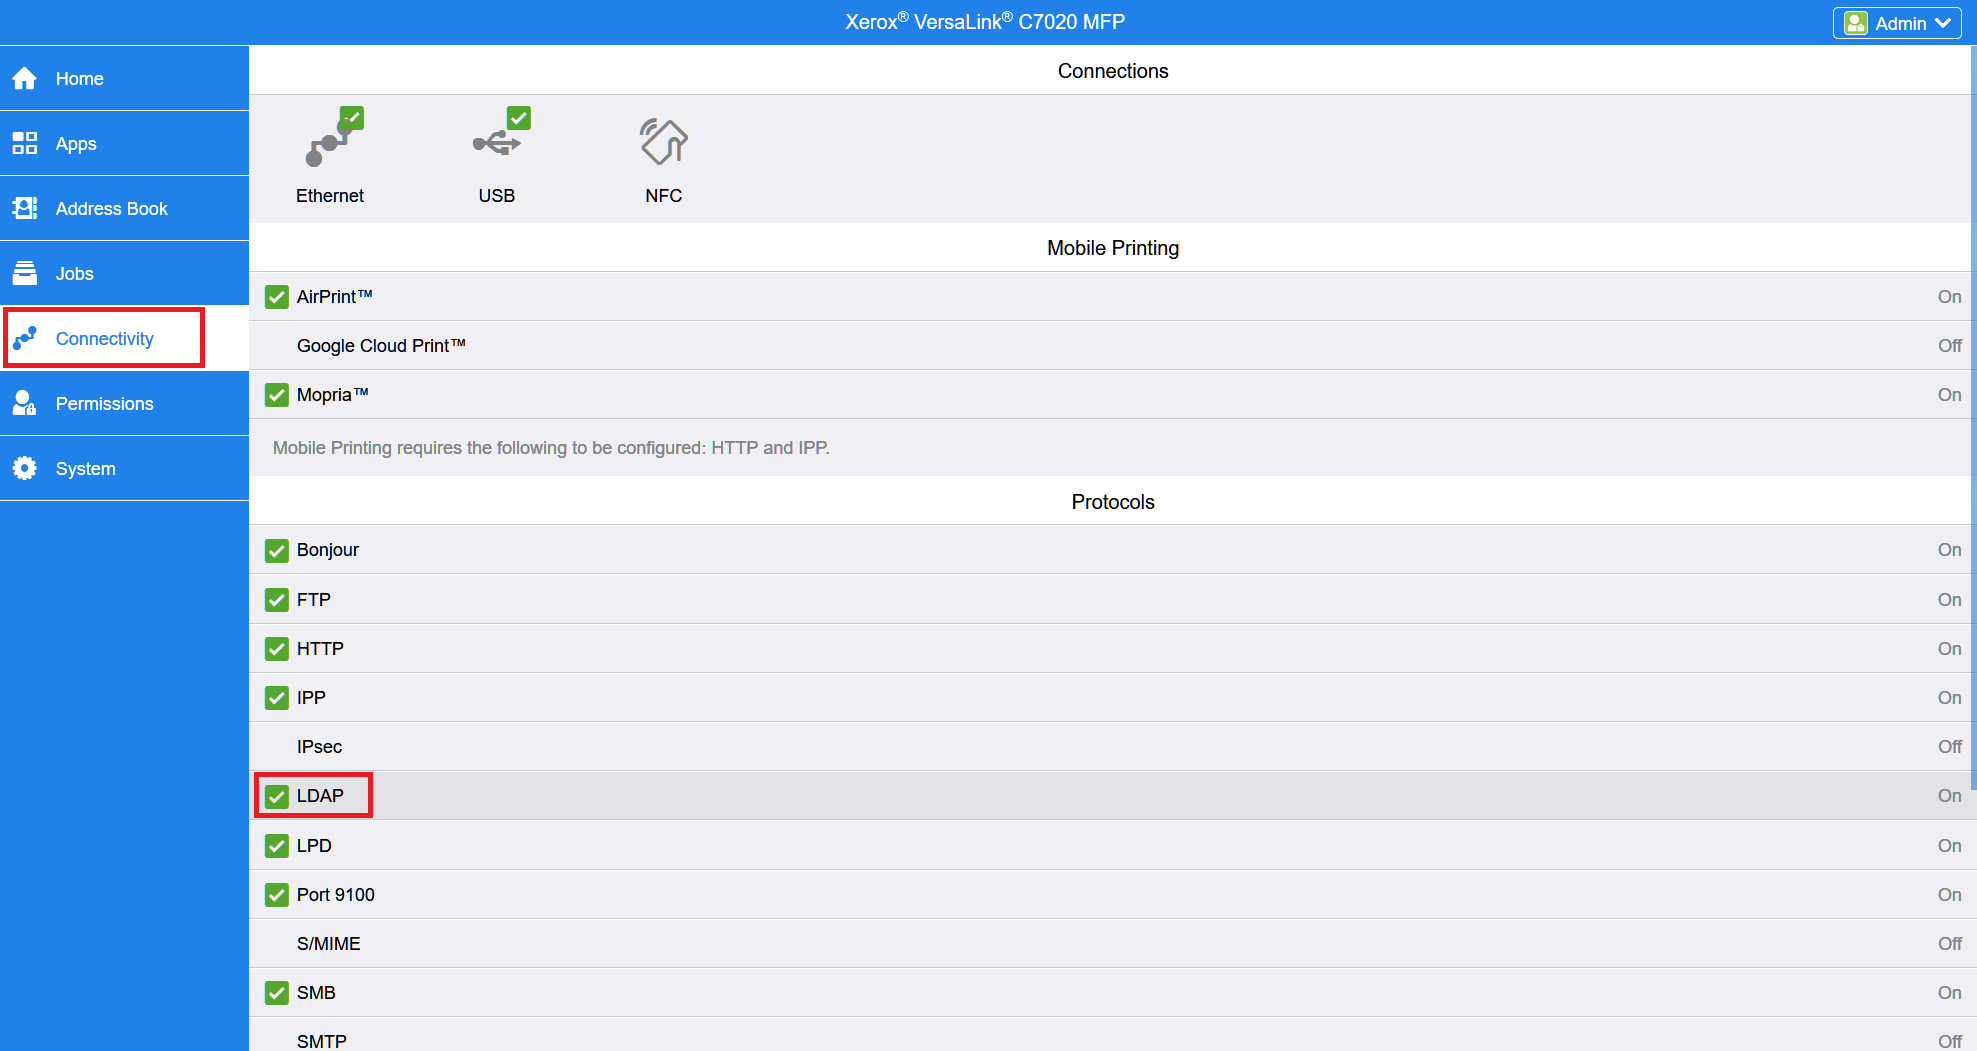
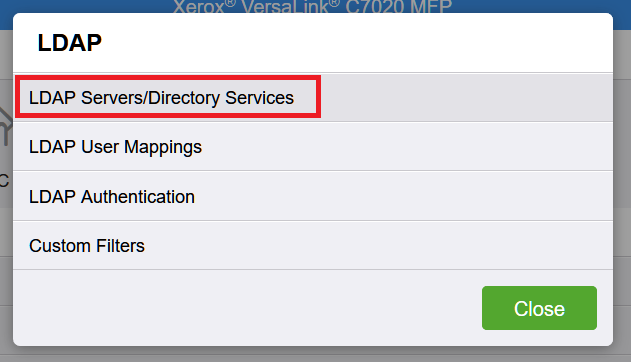
For the older printer models go to Connectivity > LDAP.
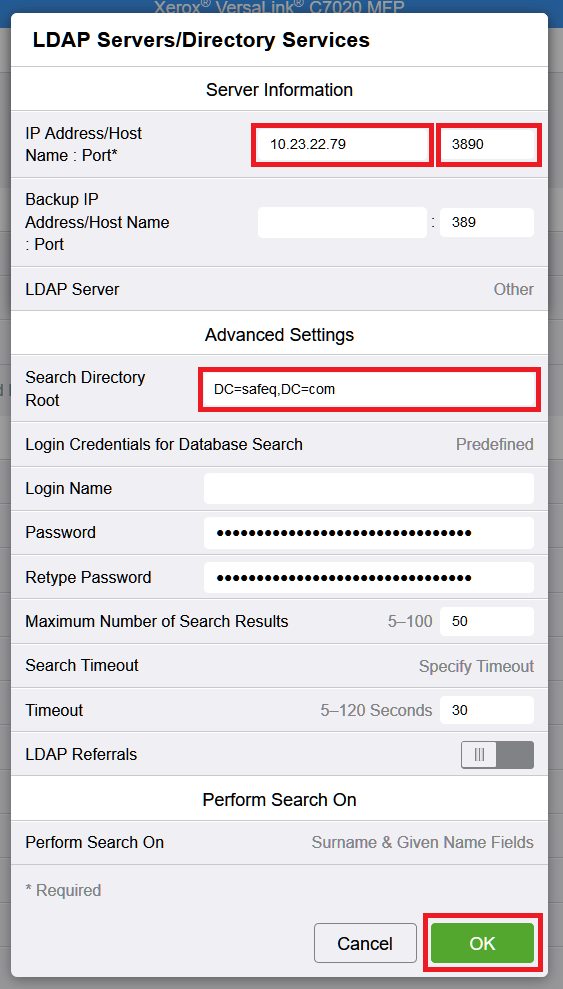
Select LDAP Servers/Directory Services.
Fill in IP Address, Port and Search Directory Root. Click OK.
Search Directory Root format: DC=safeq,DC=com.
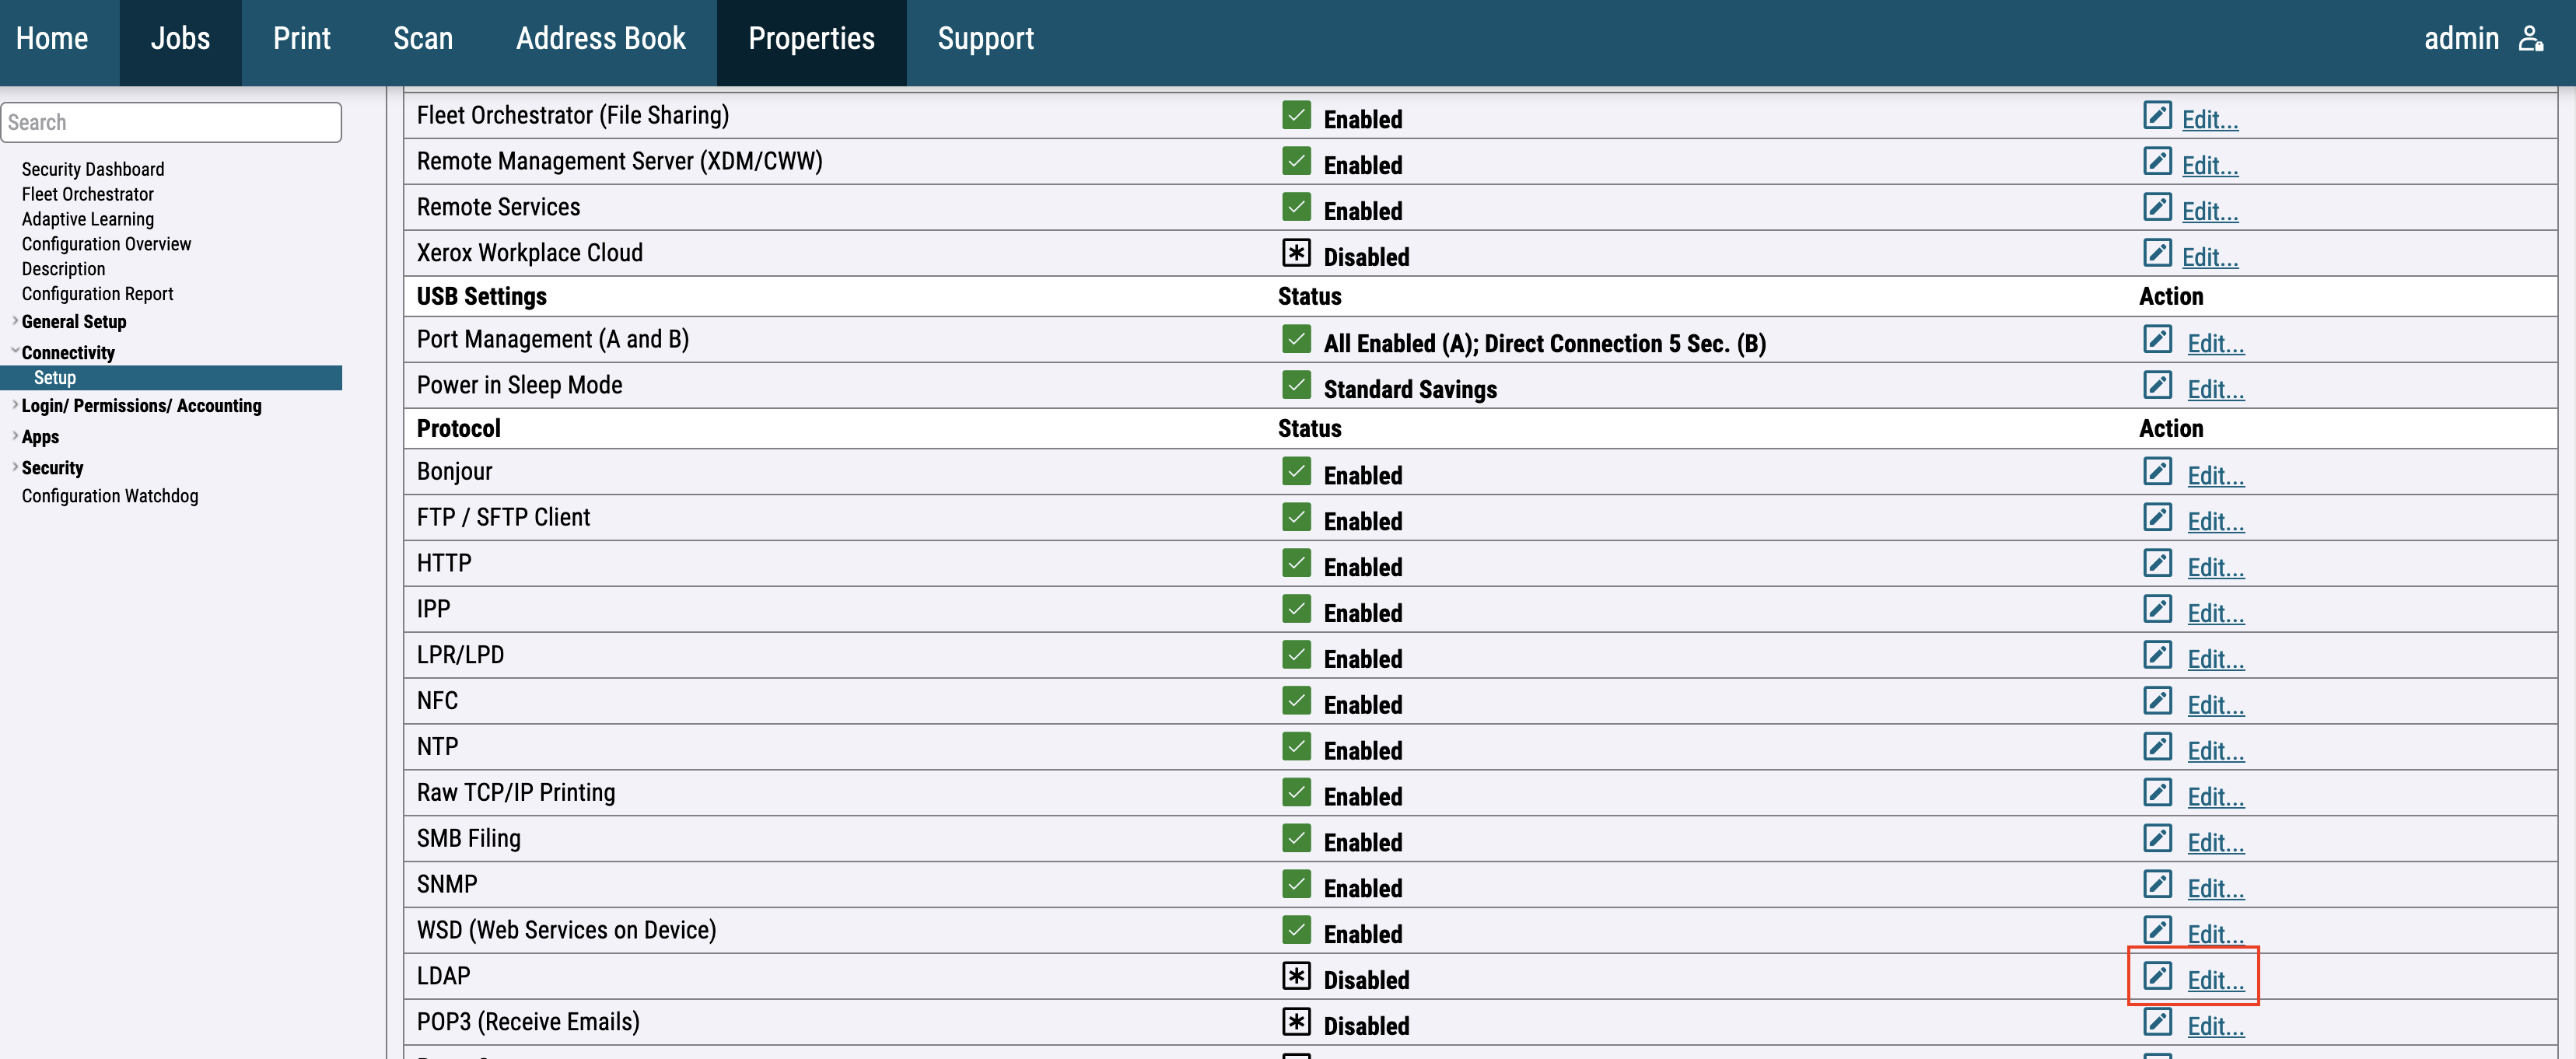
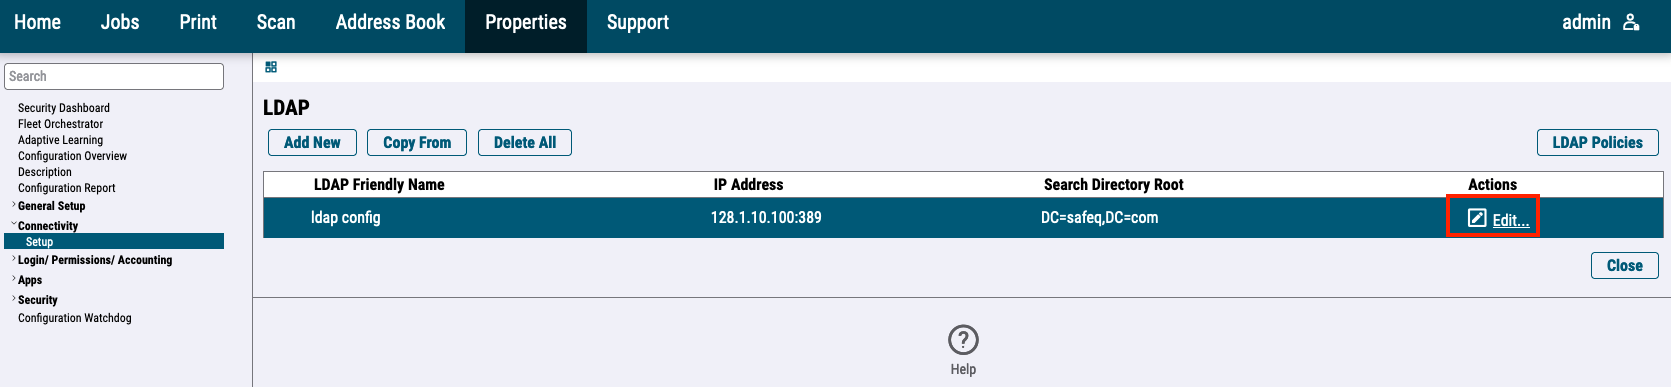
For the newer printer models go to Connectivity > Setup > LDAP and press the Edit button.
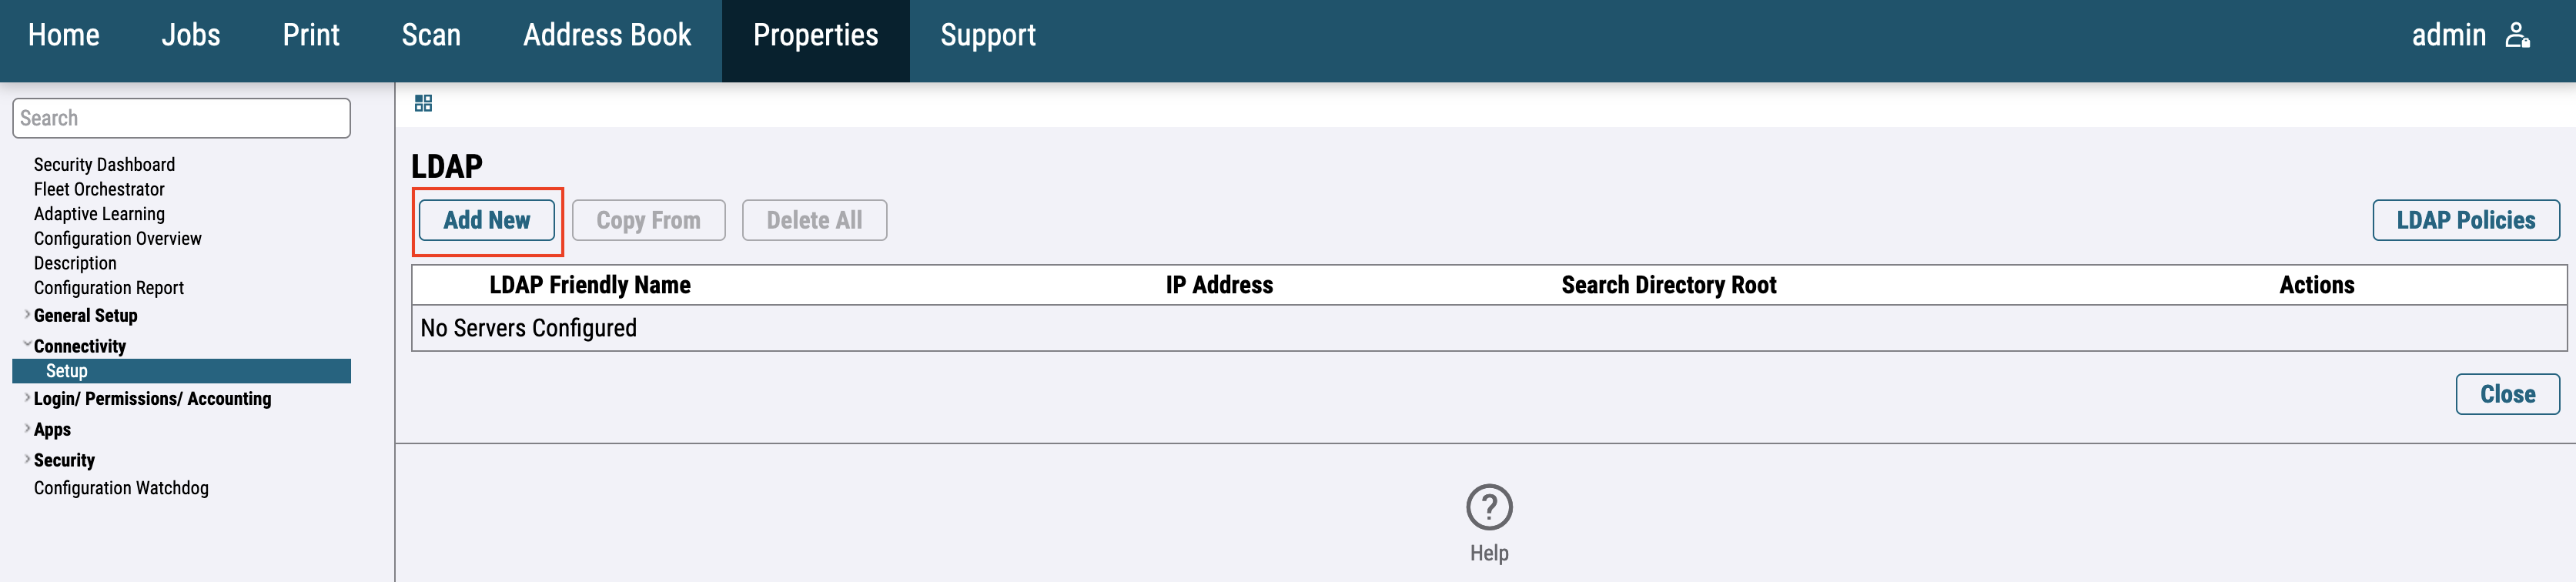
Add a new LDAP server.
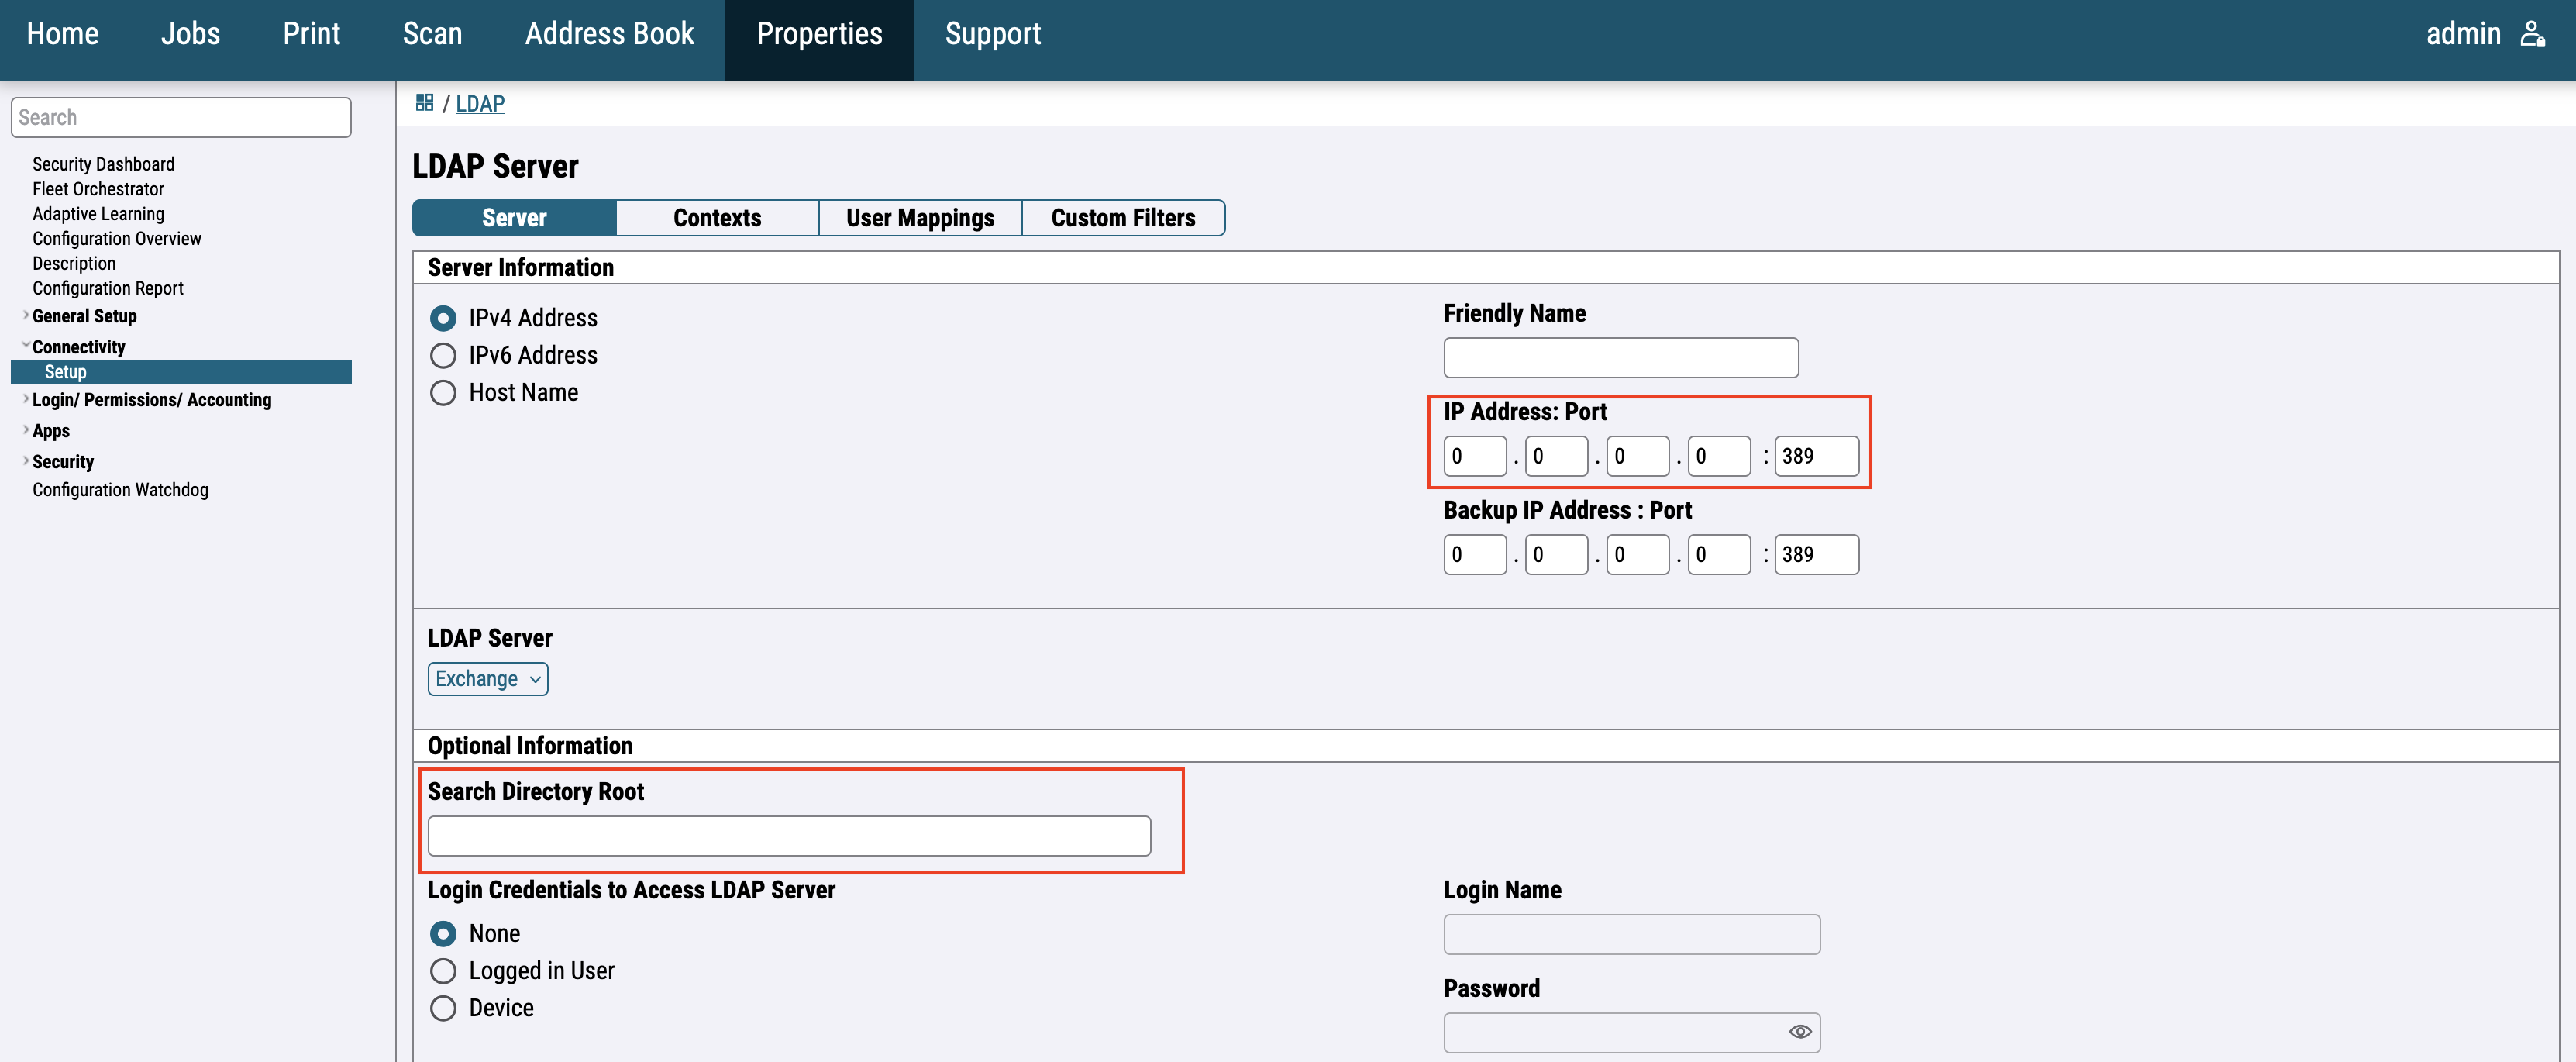
Fill in IP Address, Port and Search Directory Root. Click Apply.
Search Directory Root format: DC=safeq,DC=com.
Enable secured LDAP
You can enable non-secure LDAP communication by enabling the property internalLdapAllowNonsecureProtocol. However, you can allow an attacker to bypass access restrictions for operations on Xerox devices.
For the newer printer models go to System > Security and select SSL/TLS Settings.
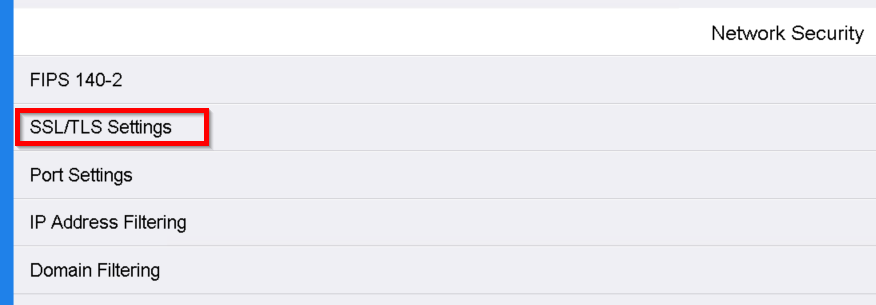
Enable LDAP - SSL/TLS Communication and Verify Remote Server Certificate. Then click OK.
The certificate authority certificate used to sign the server certificate has to be uploaded to the device for the secured LDAP to work.

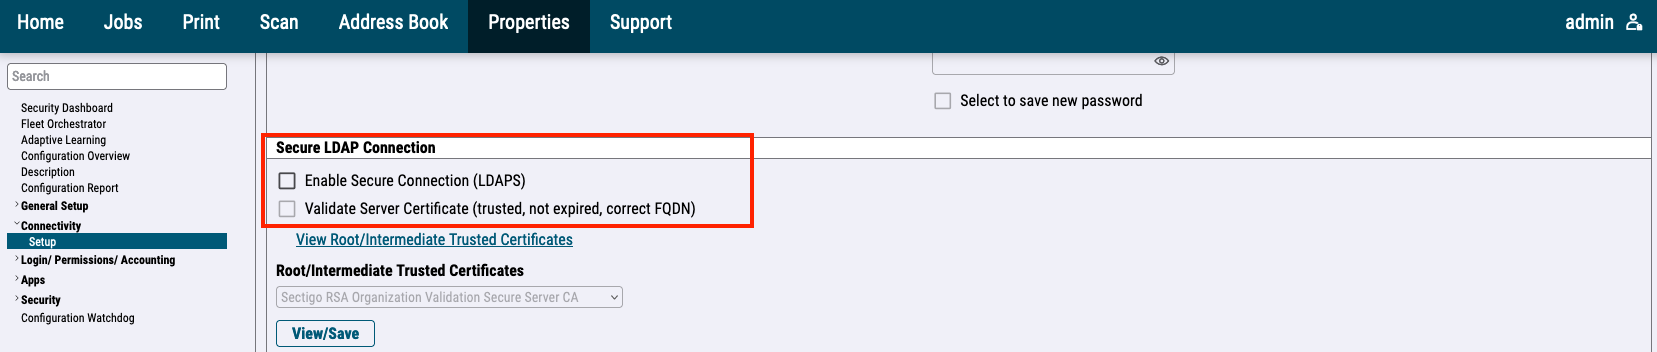
For the newer printer models, go to Connectivity > Setup > LDAP and press the Edit button.
Edit LDAP configuration.
Enable Enable Secure Connection and Validate Server Certificate. Then click Apply.
Enable LDAP for roles permissions
Rules documented below are used only when property xeroxAccessDefinitionMethod is set to LDAP and property enableXeroxAccessDefinition is set to Enabled. Rules for application restriction are created during SafeQ installation.
For the older printer models, go to Permissions > Roles and select Setup LDAP Permissions Groups.
Select LDAP and click OK.
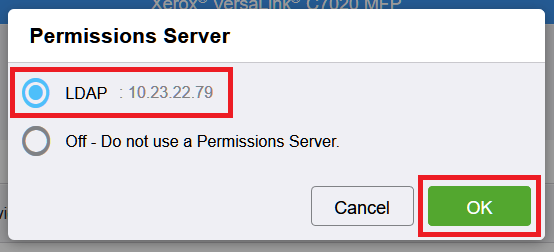
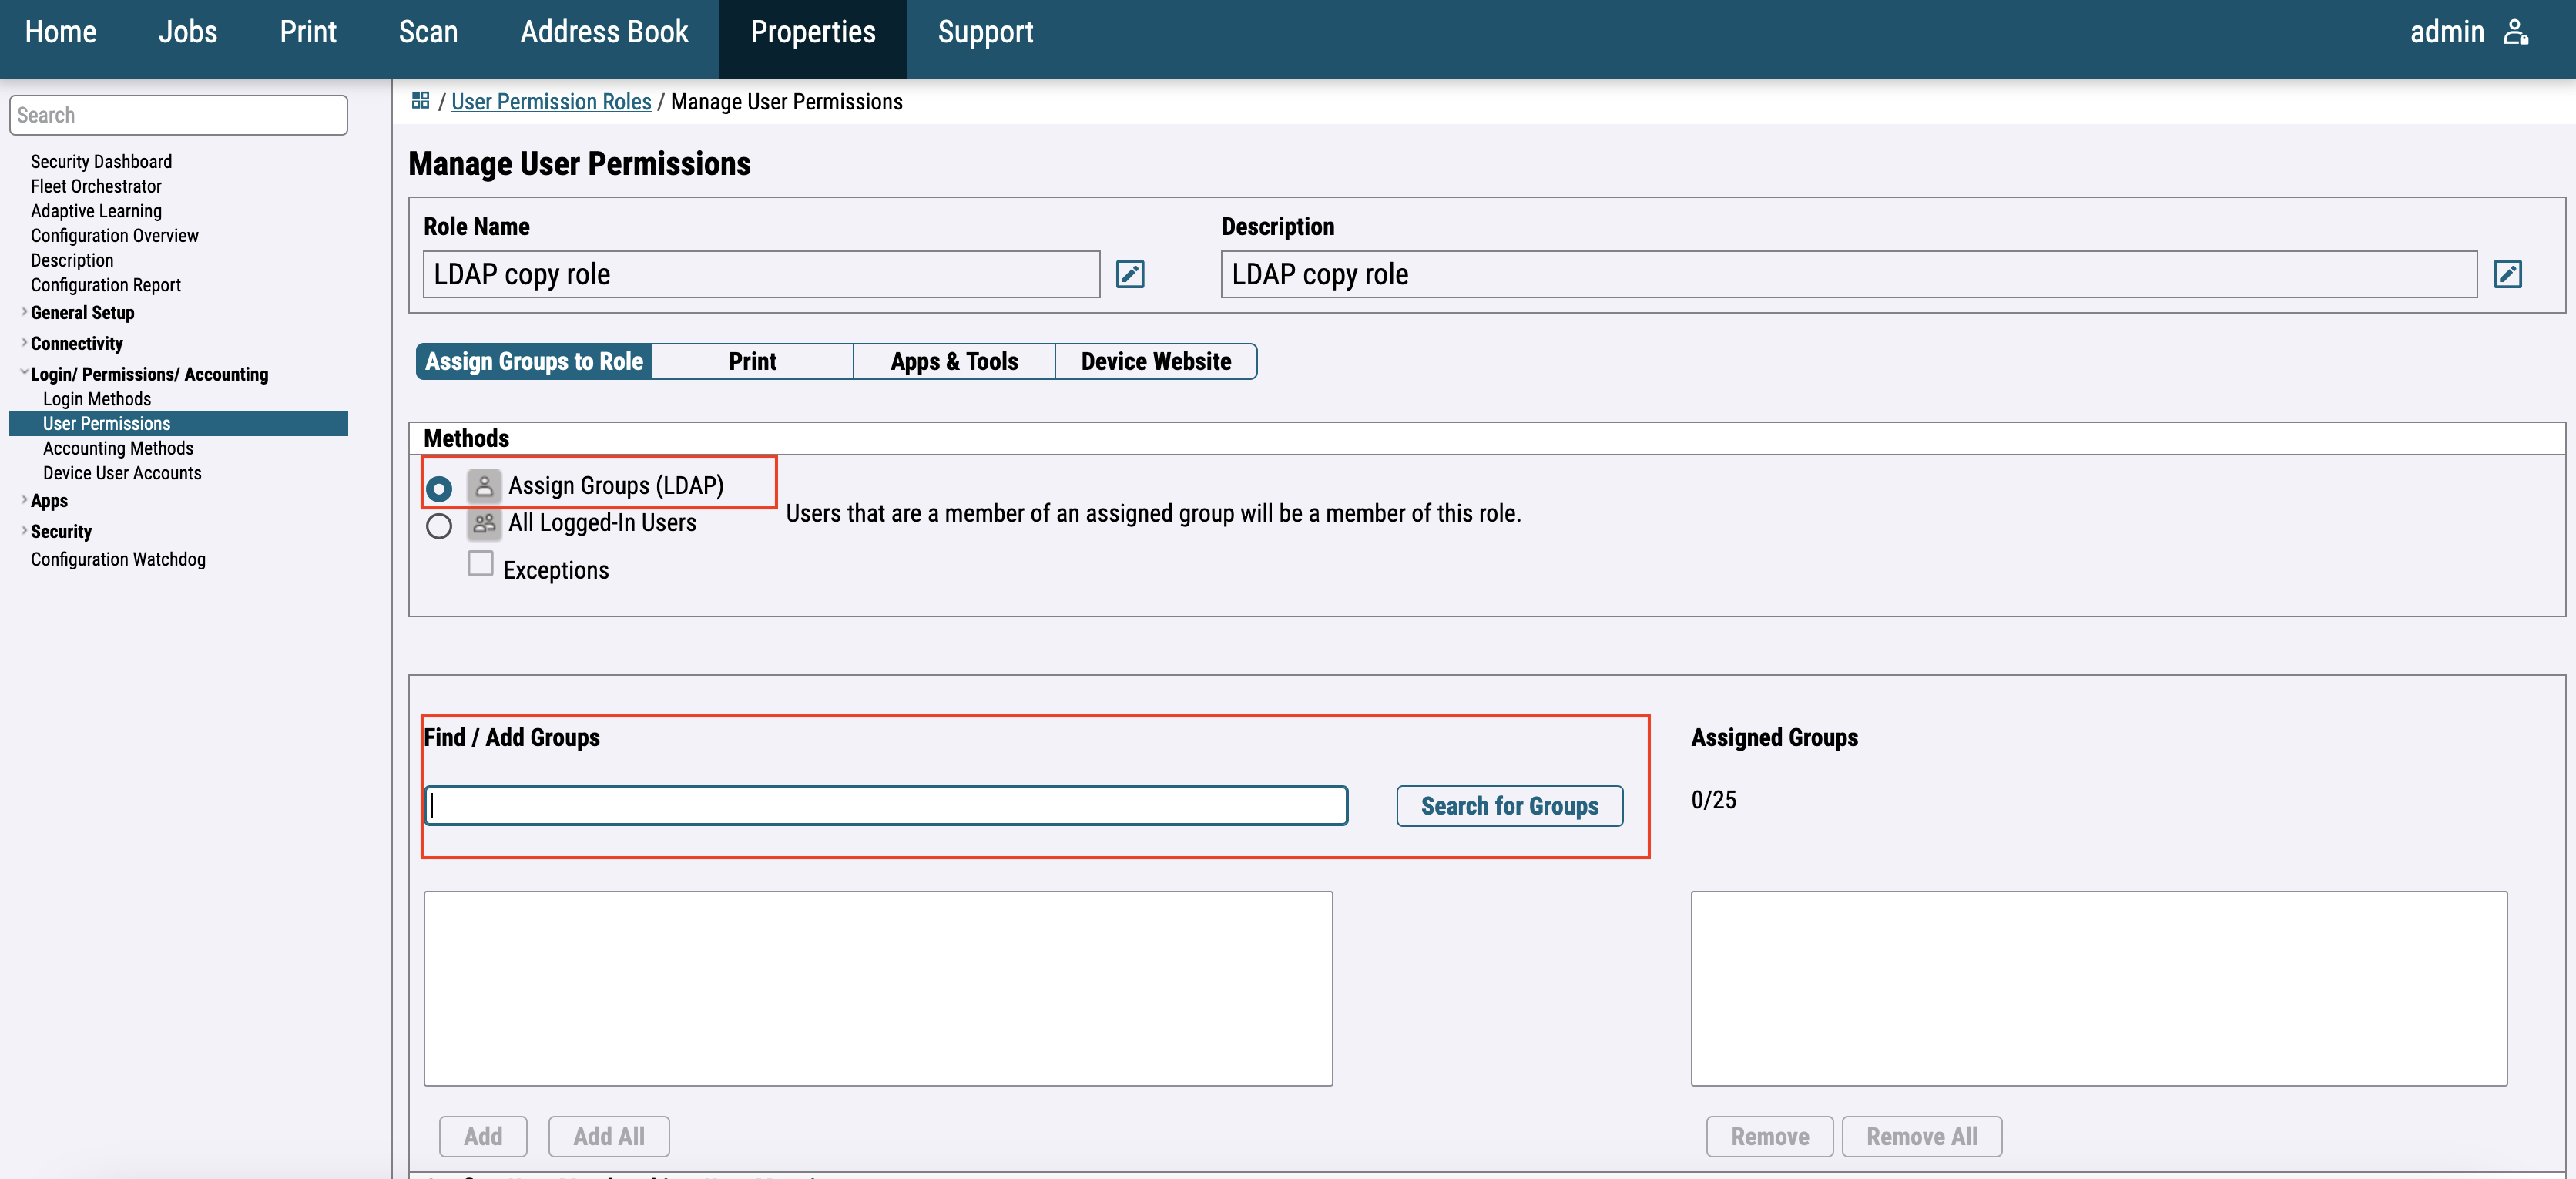
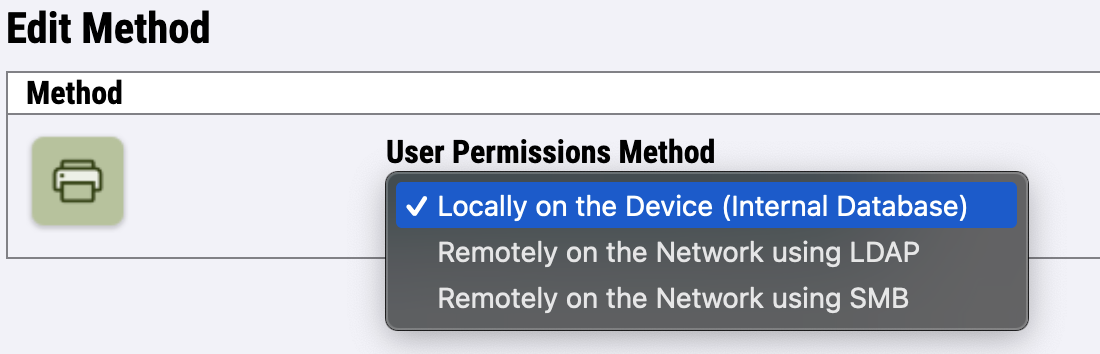
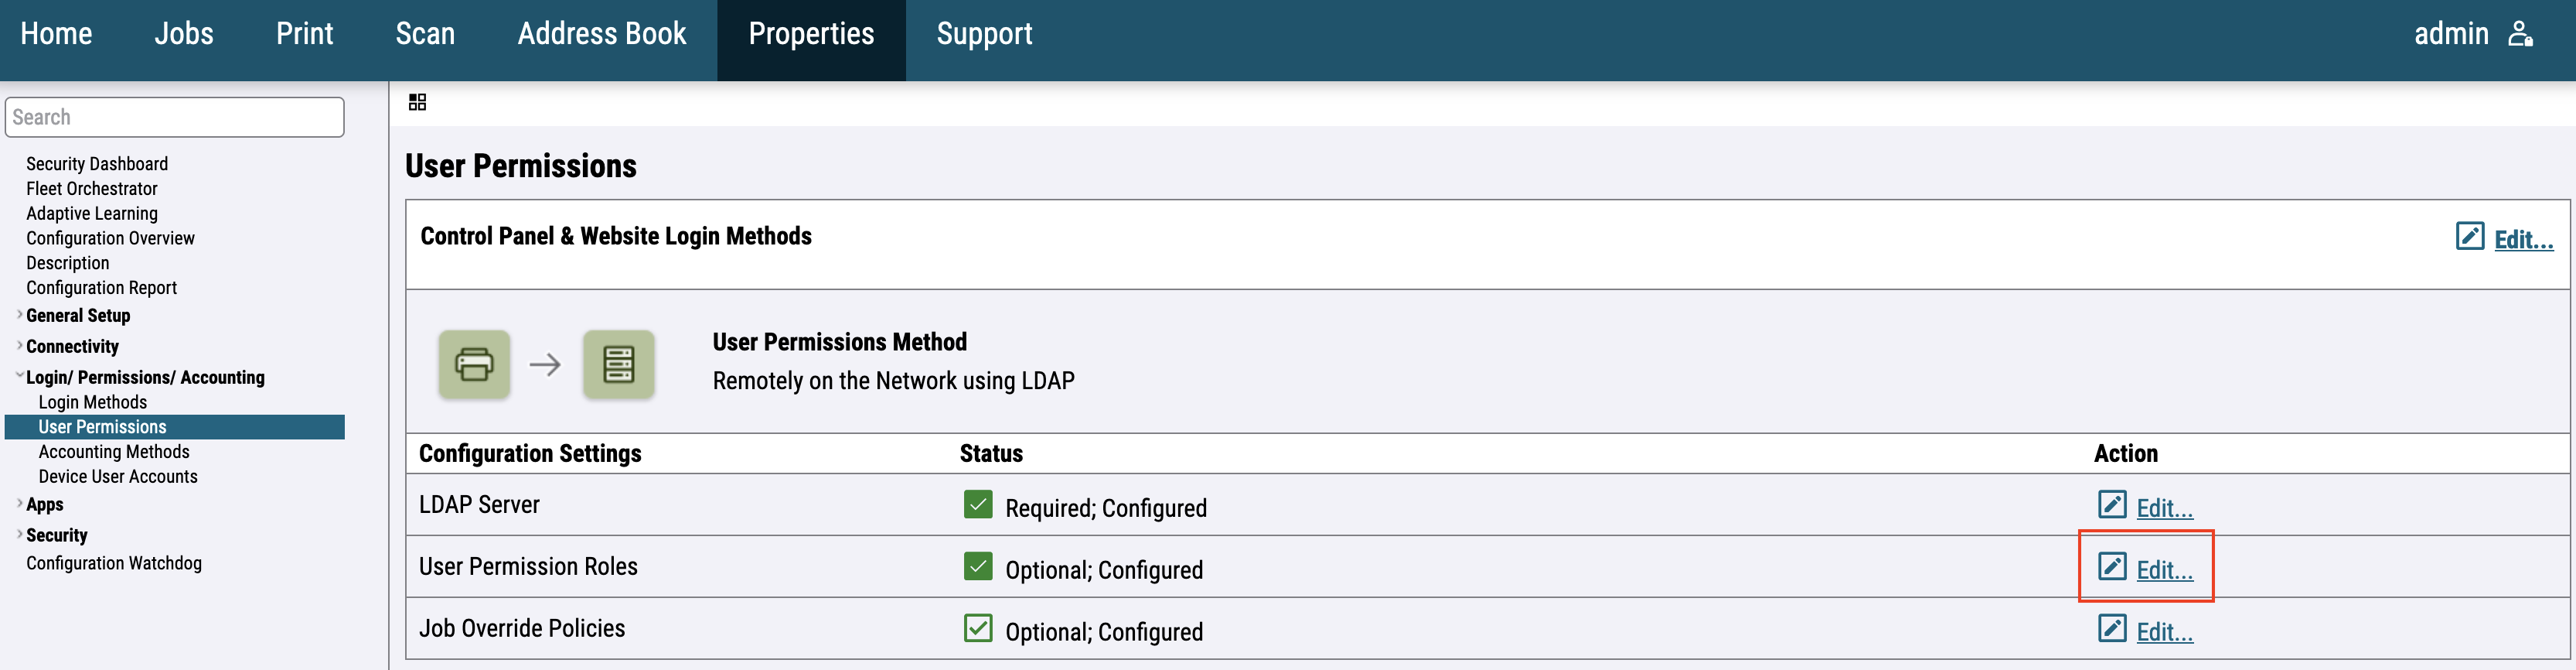
For the newer printer models, go to Login / Permissions / Accounting > User Permissions and edit Control Panel & Website Login Methods.
Select Remotely on the Network using LDAP and save.
Add User Role
Create roles with appropriate permissions for all LDAP groups listed here.
|
copycolor |
Rights to use color copy in native copy application. |
|
copy |
Rights to use native copy application. |
|
fax |
Rights to use native fax application. |
|
notrestricted |
Without any restrictions. |
|
sq |
Rights to use YSoft SafeQ application (YSoft SafeQ Terminal Application - 1st Gen). |
|
sqbillingcodes |
Rights to use YSoft SafeQ Billing Codes application (YSoft SafeQ Terminal Application - 2nd Gen). |
|
sqprint |
Rights to use YSoft SafeQ Print application (YSoft SafeQ Terminal Application - 2nd Gen). |
|
sqscan |
Rights to use YSoft SafeQ Scan application (YSoft SafeQ Terminal Application - 2nd Gen). |
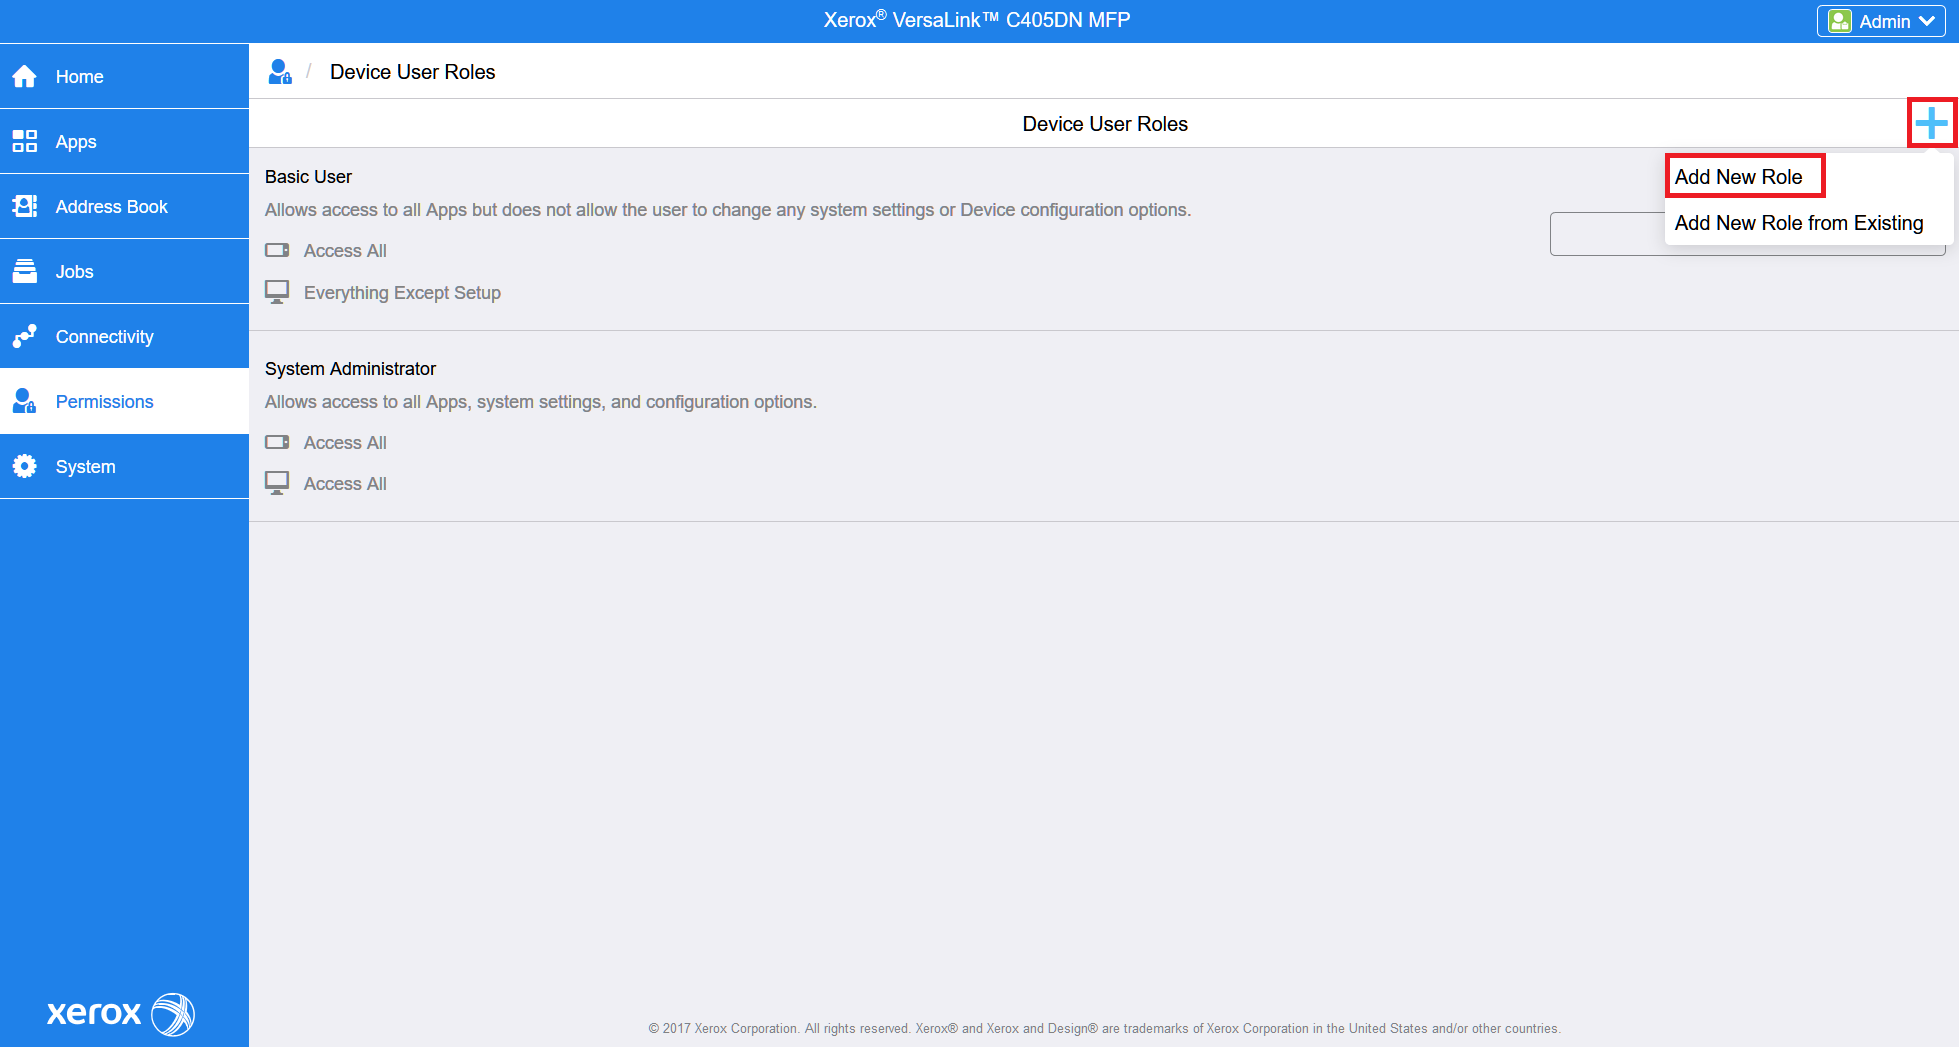
For the older printer models go to Permissions > Roles and select Device User Roles.
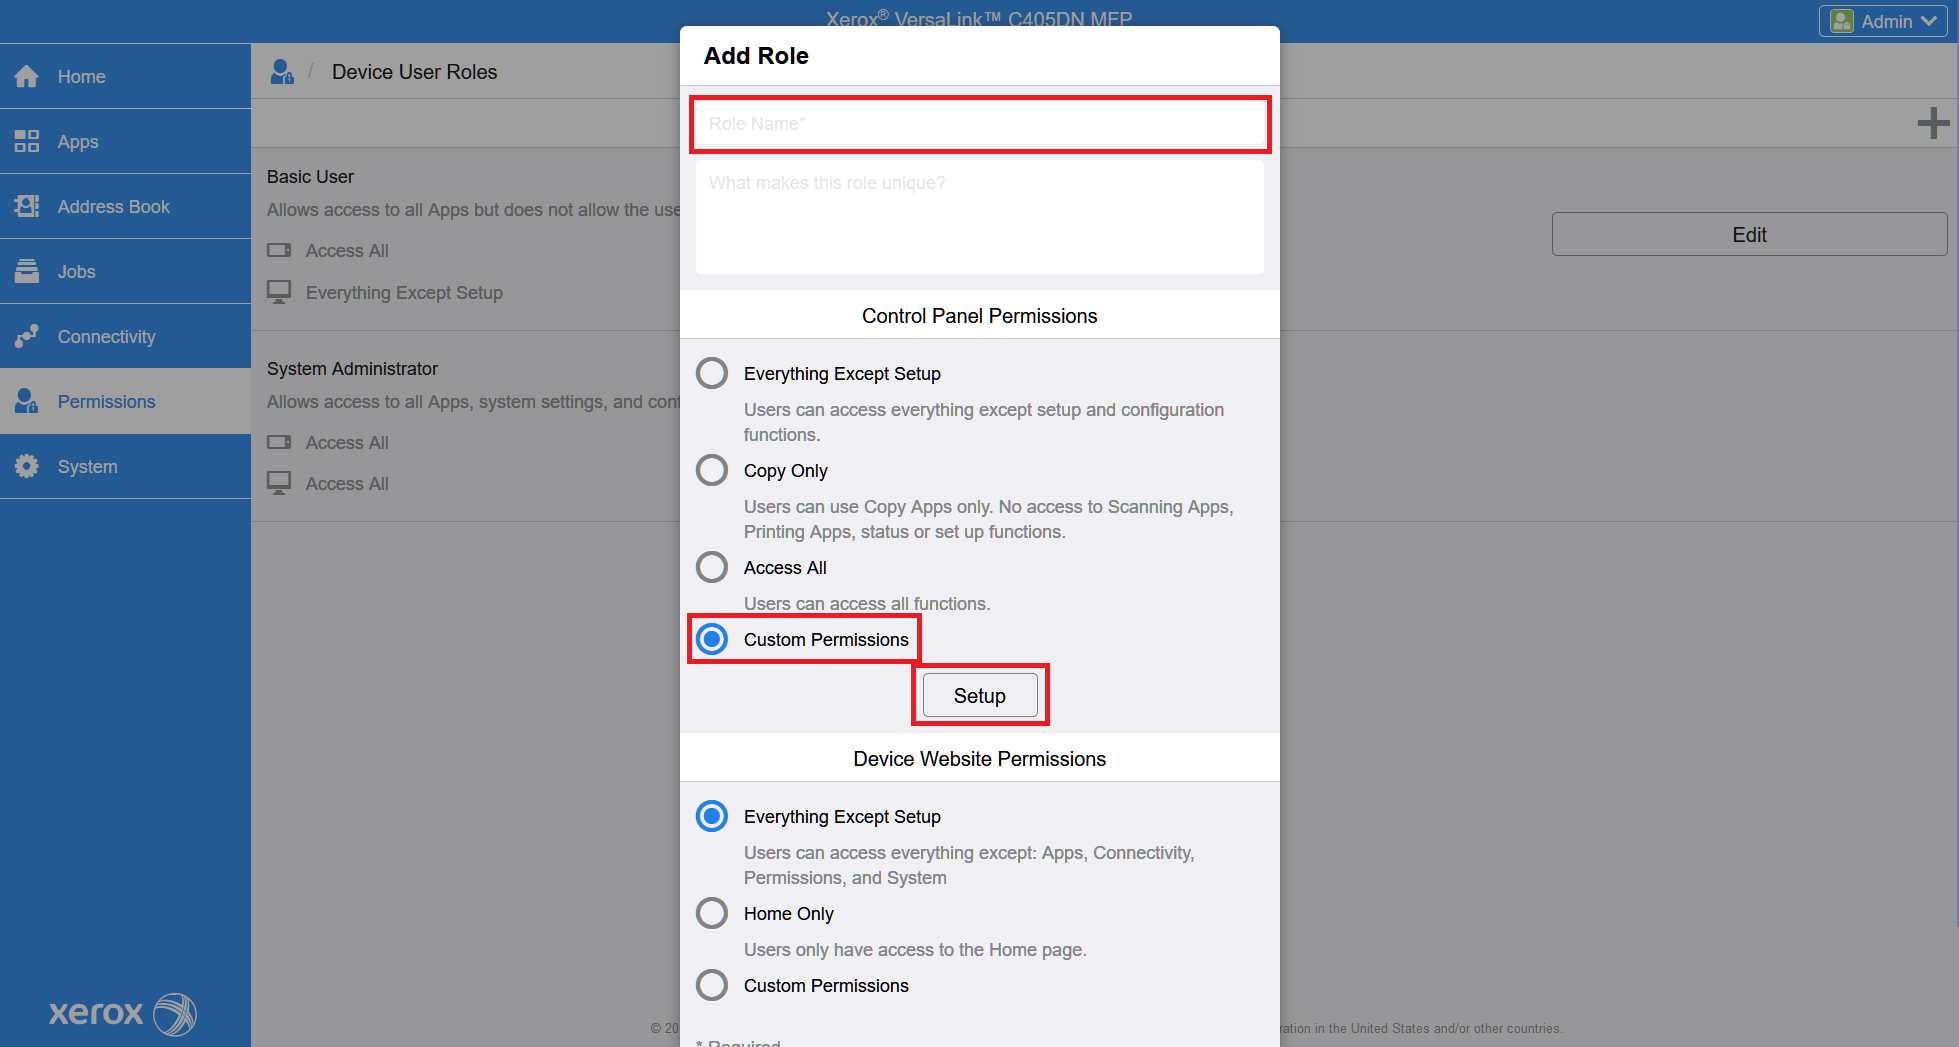
Click on Edit for Basic User. Then choose Custom Permissions and press Setup.
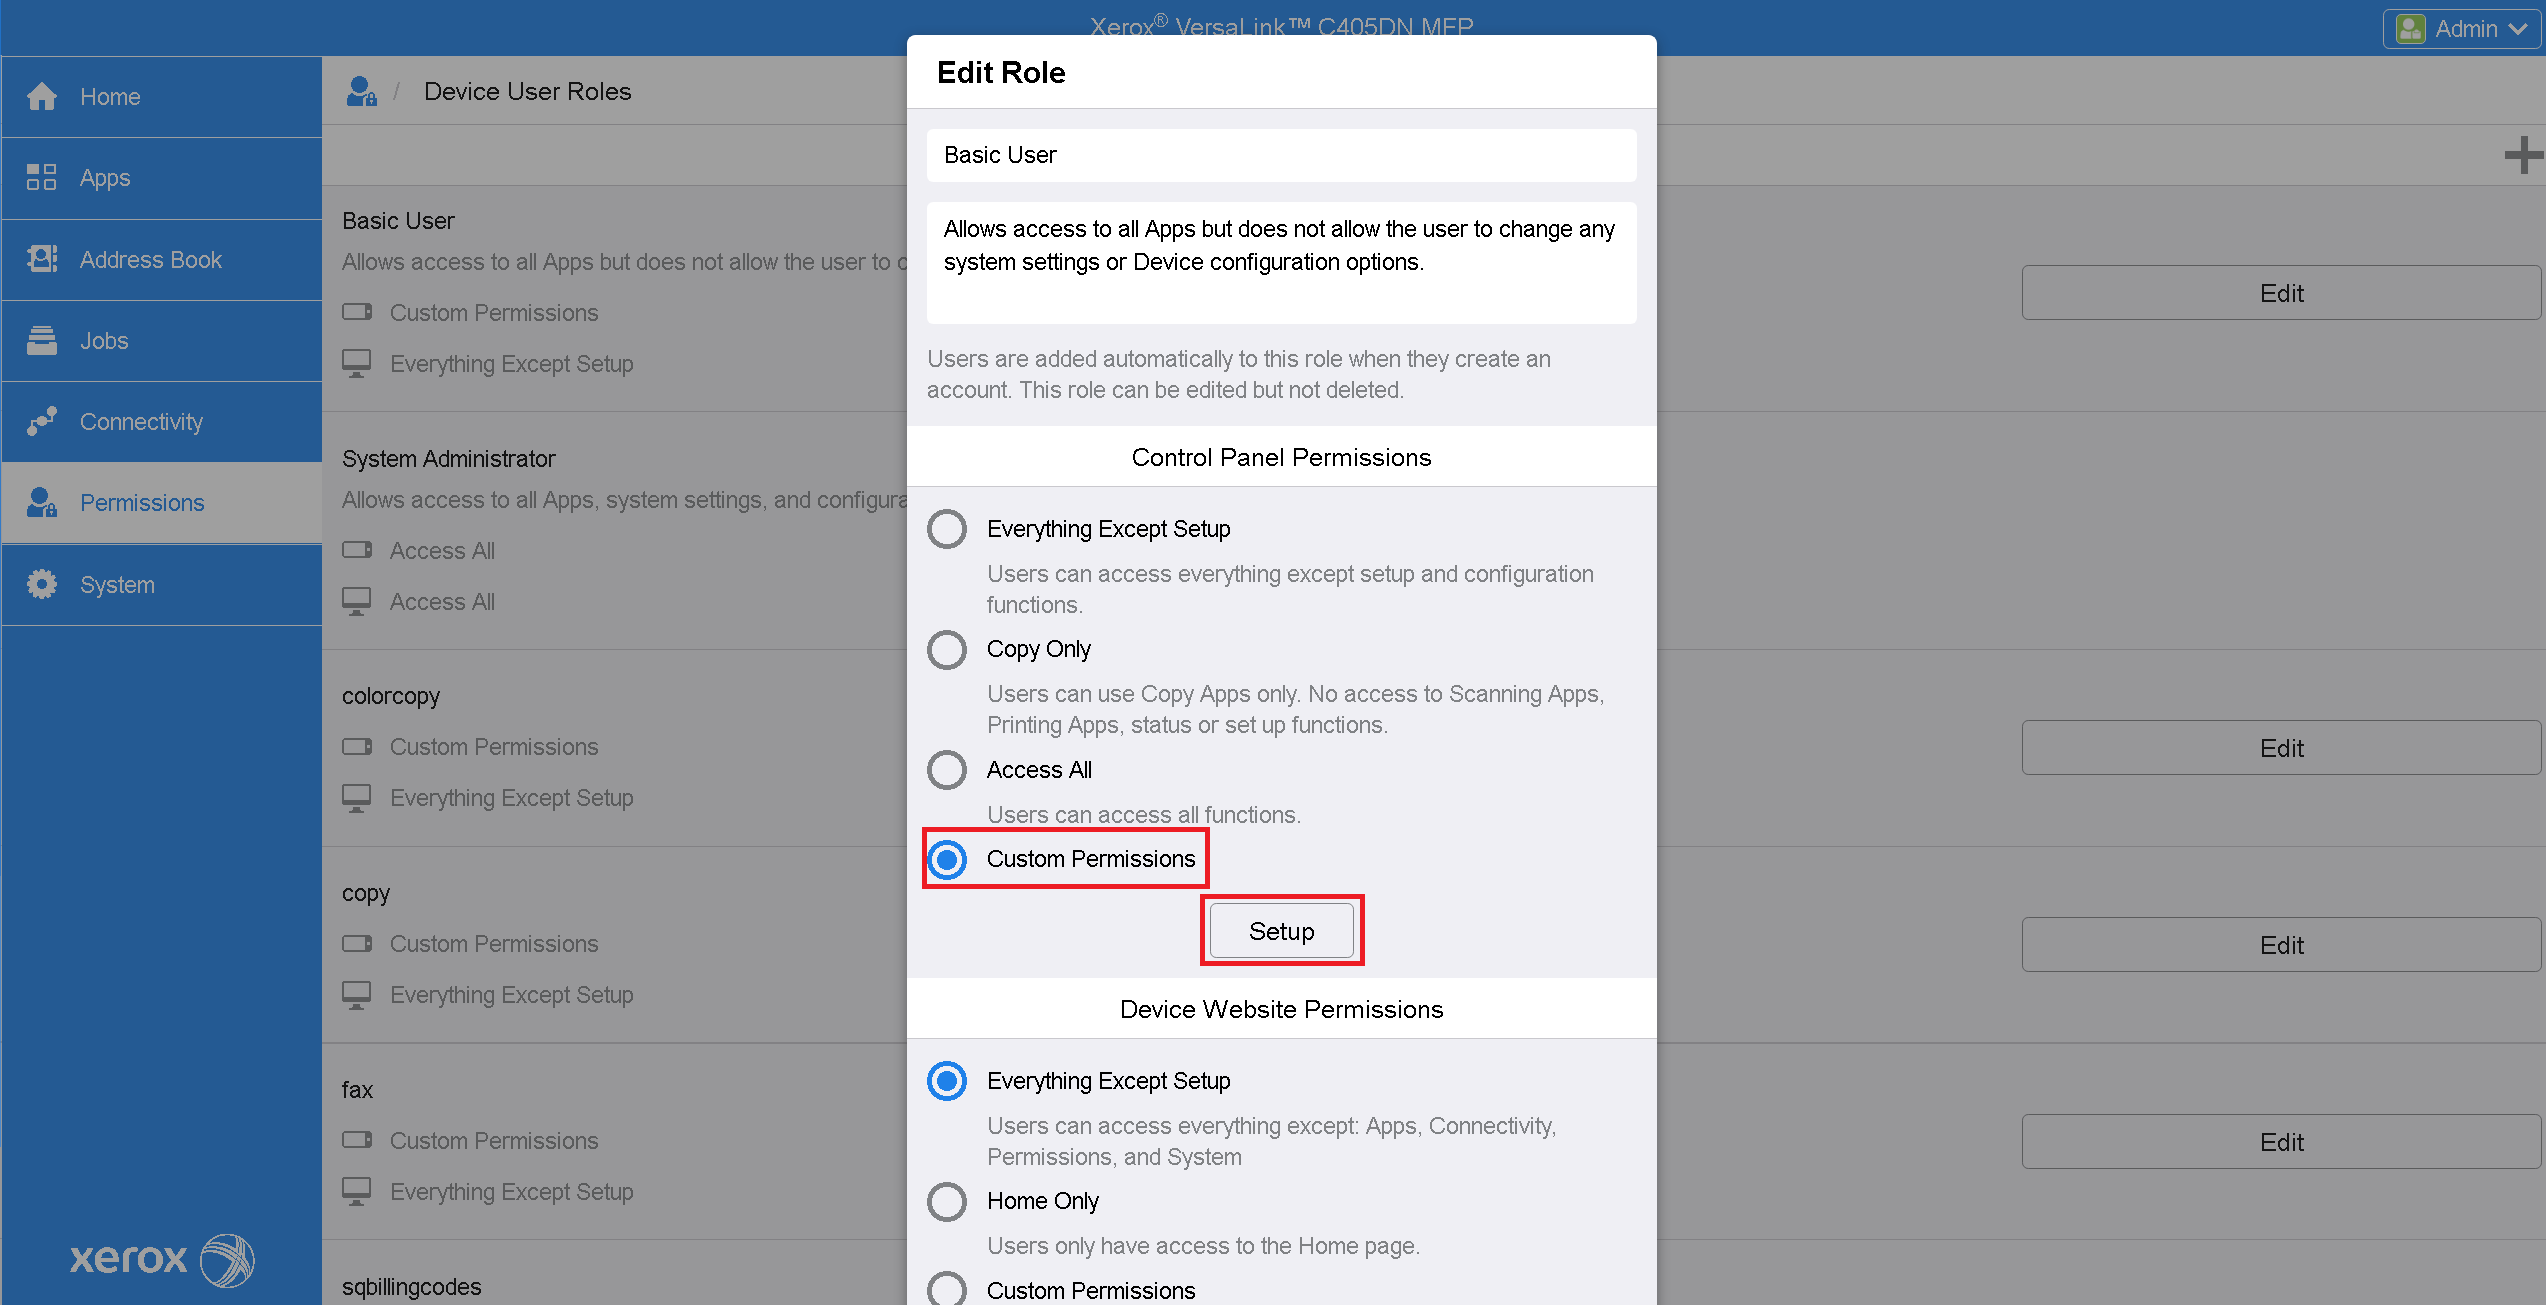
In the Custom permission Setup dialog, set the Access value of each application in the list to Hide.
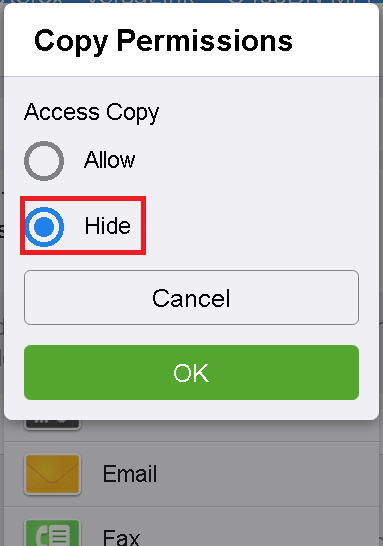
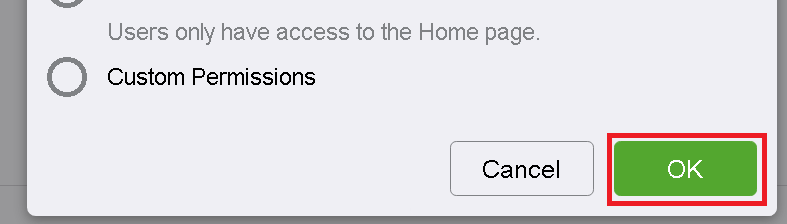
Aftercall applications are set to Hide, close the Custom permission Setup dialog and press OK to save changes.
Click 
Write down any user role name. Select Custom Permissions and then click Setup.
Example of Copy permissions.

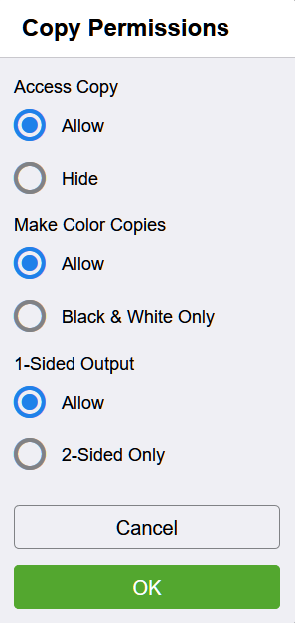
Set access value of others application to Hide to properly working application restriction. Allow value should be set only for role where we expect application will be enabled.
For Basic User set all application to Hide.
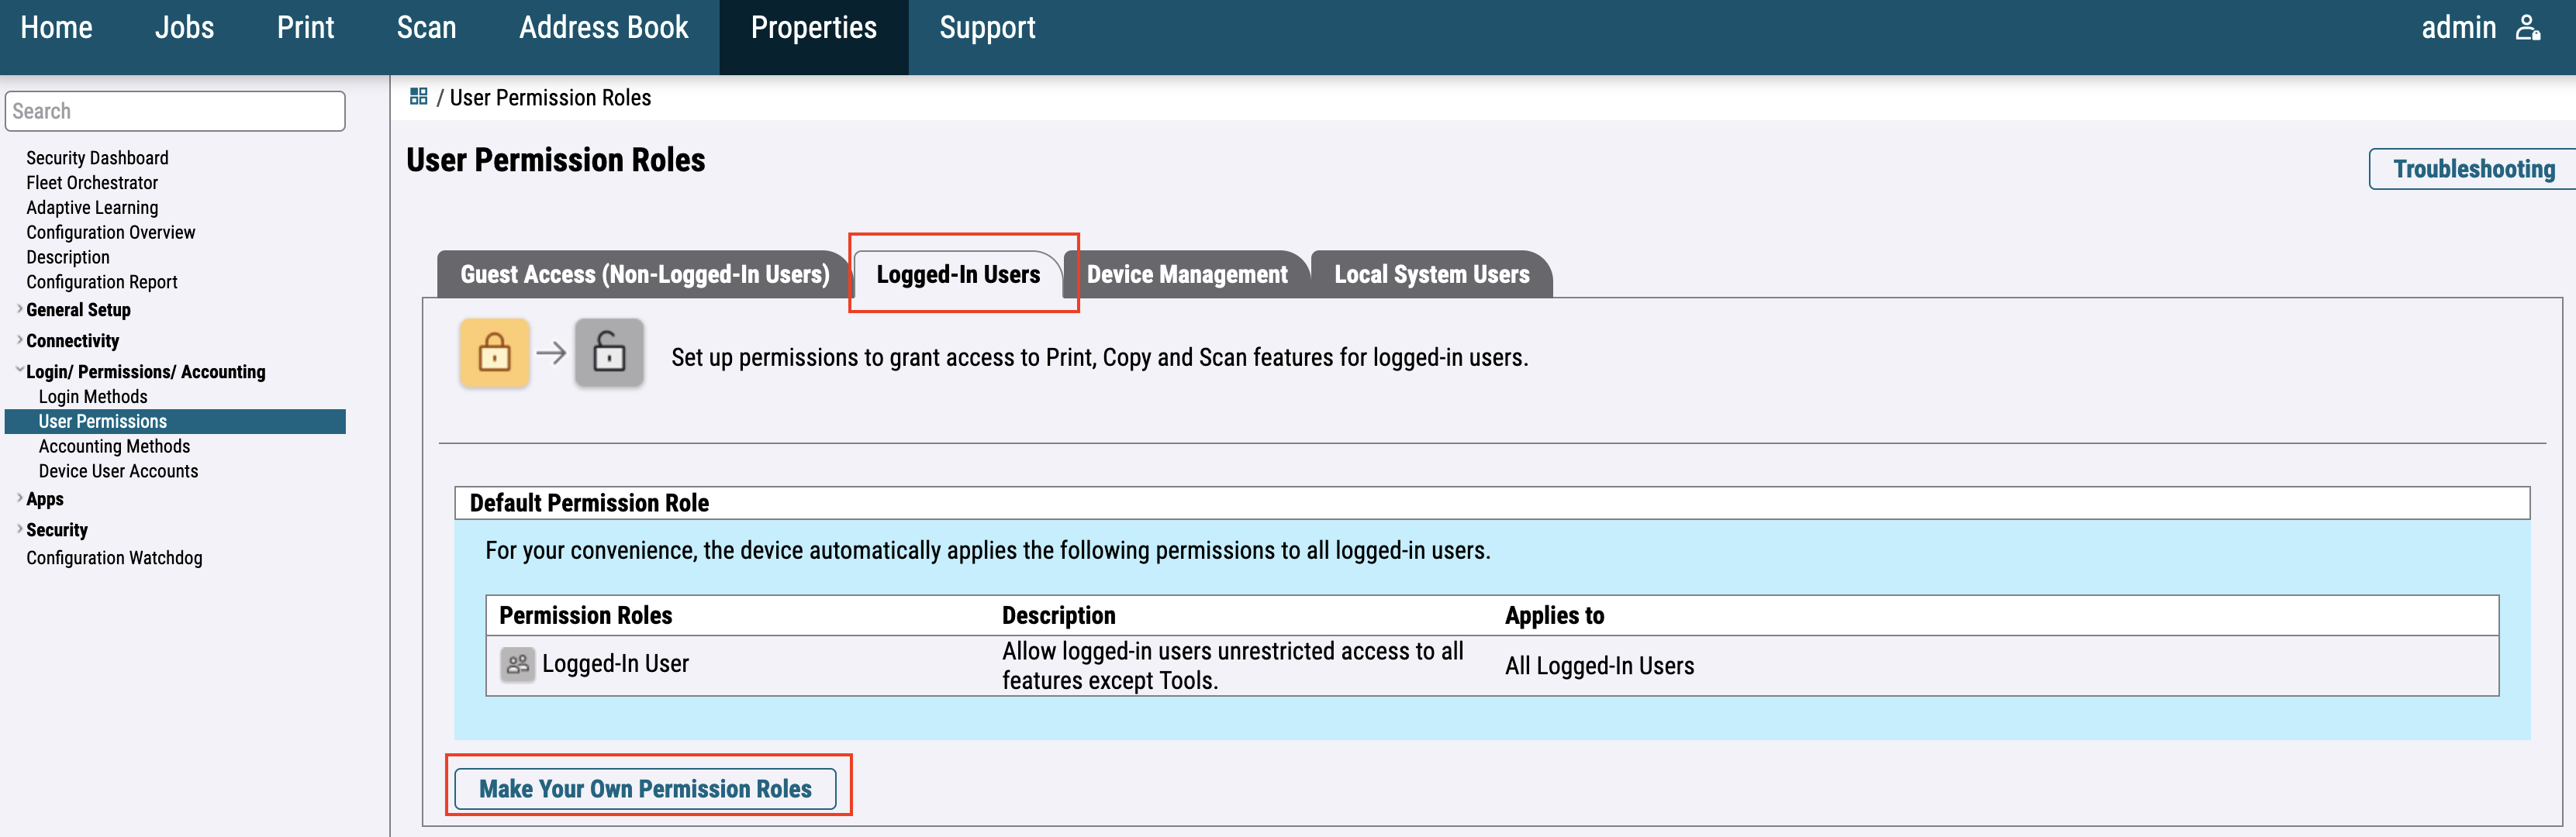
For the newer printer models, go to Login / Permissions / Accounting > User Permissions and edit User Permission Roles.
Switch to Logged-In Users and click on Make Your Own Permission Roles.
Fill in the required information and click on Create.

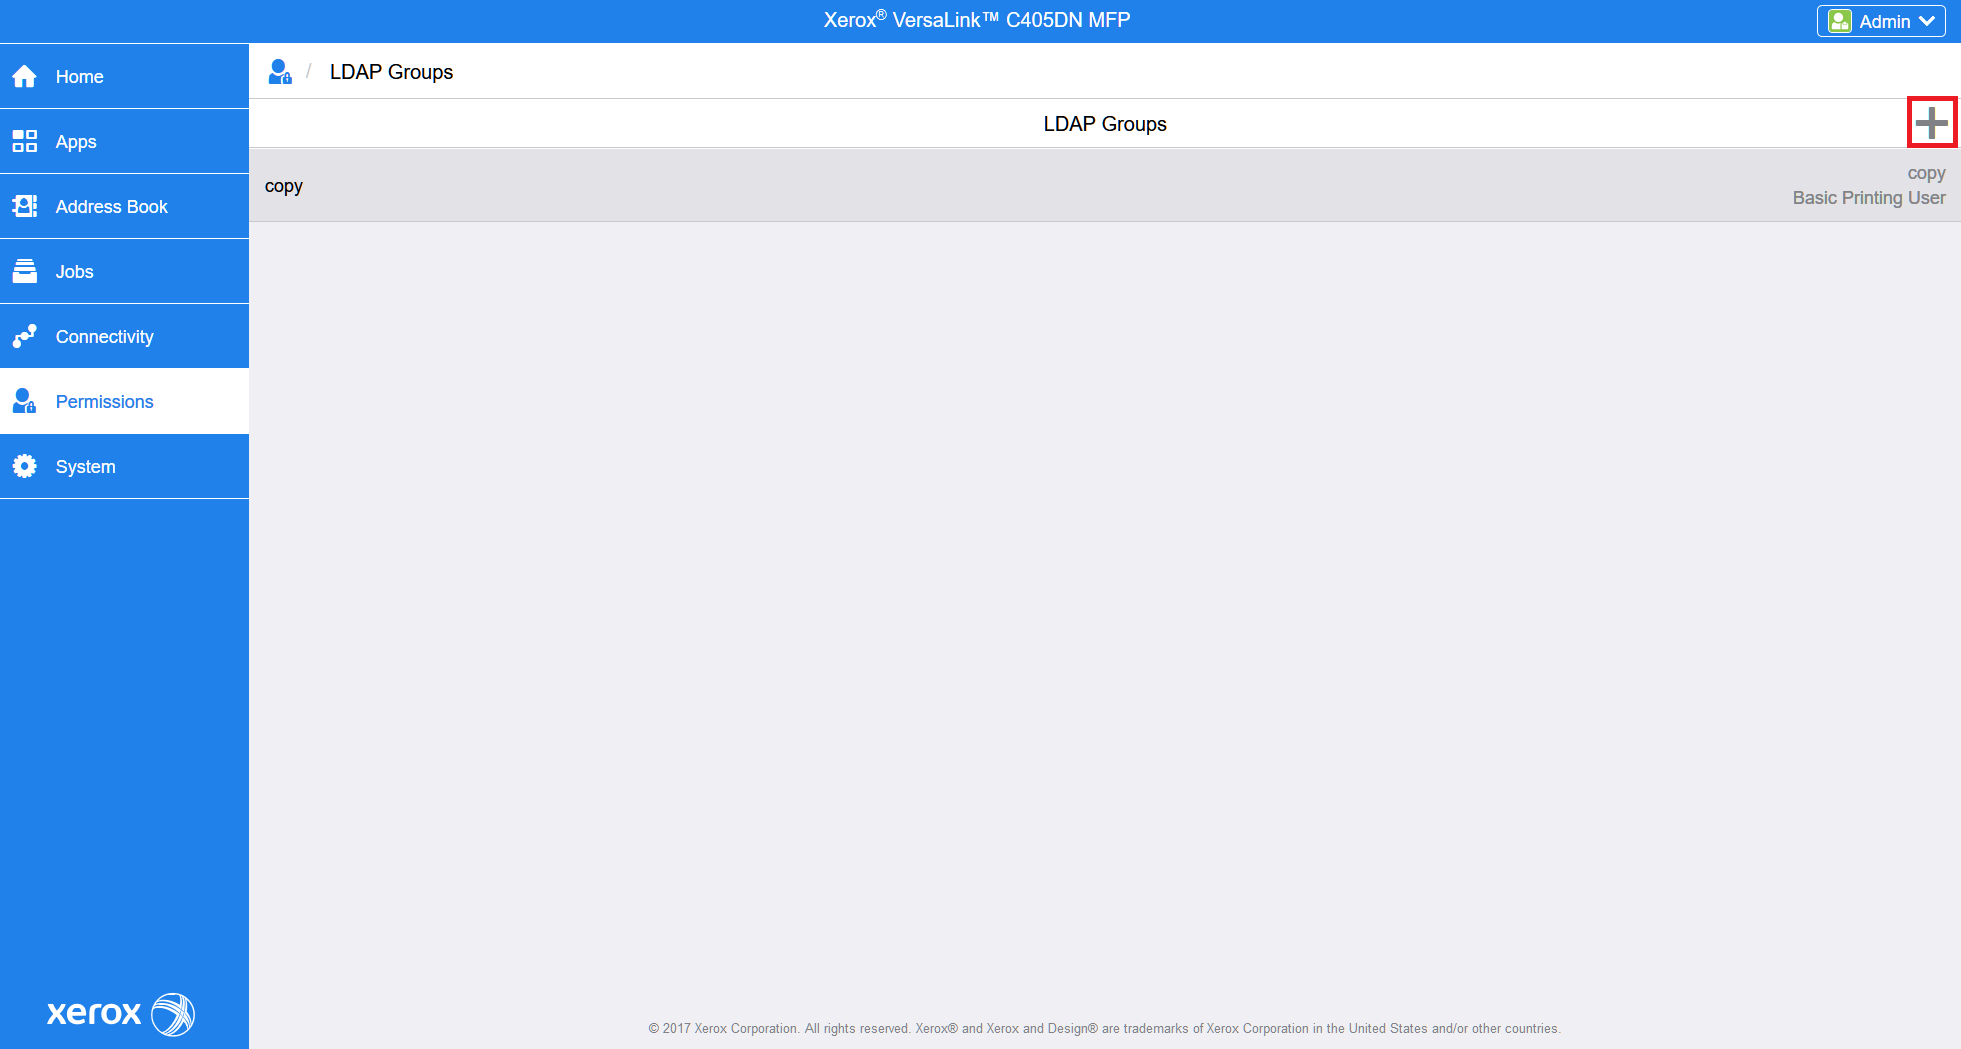
Add LDAP Group
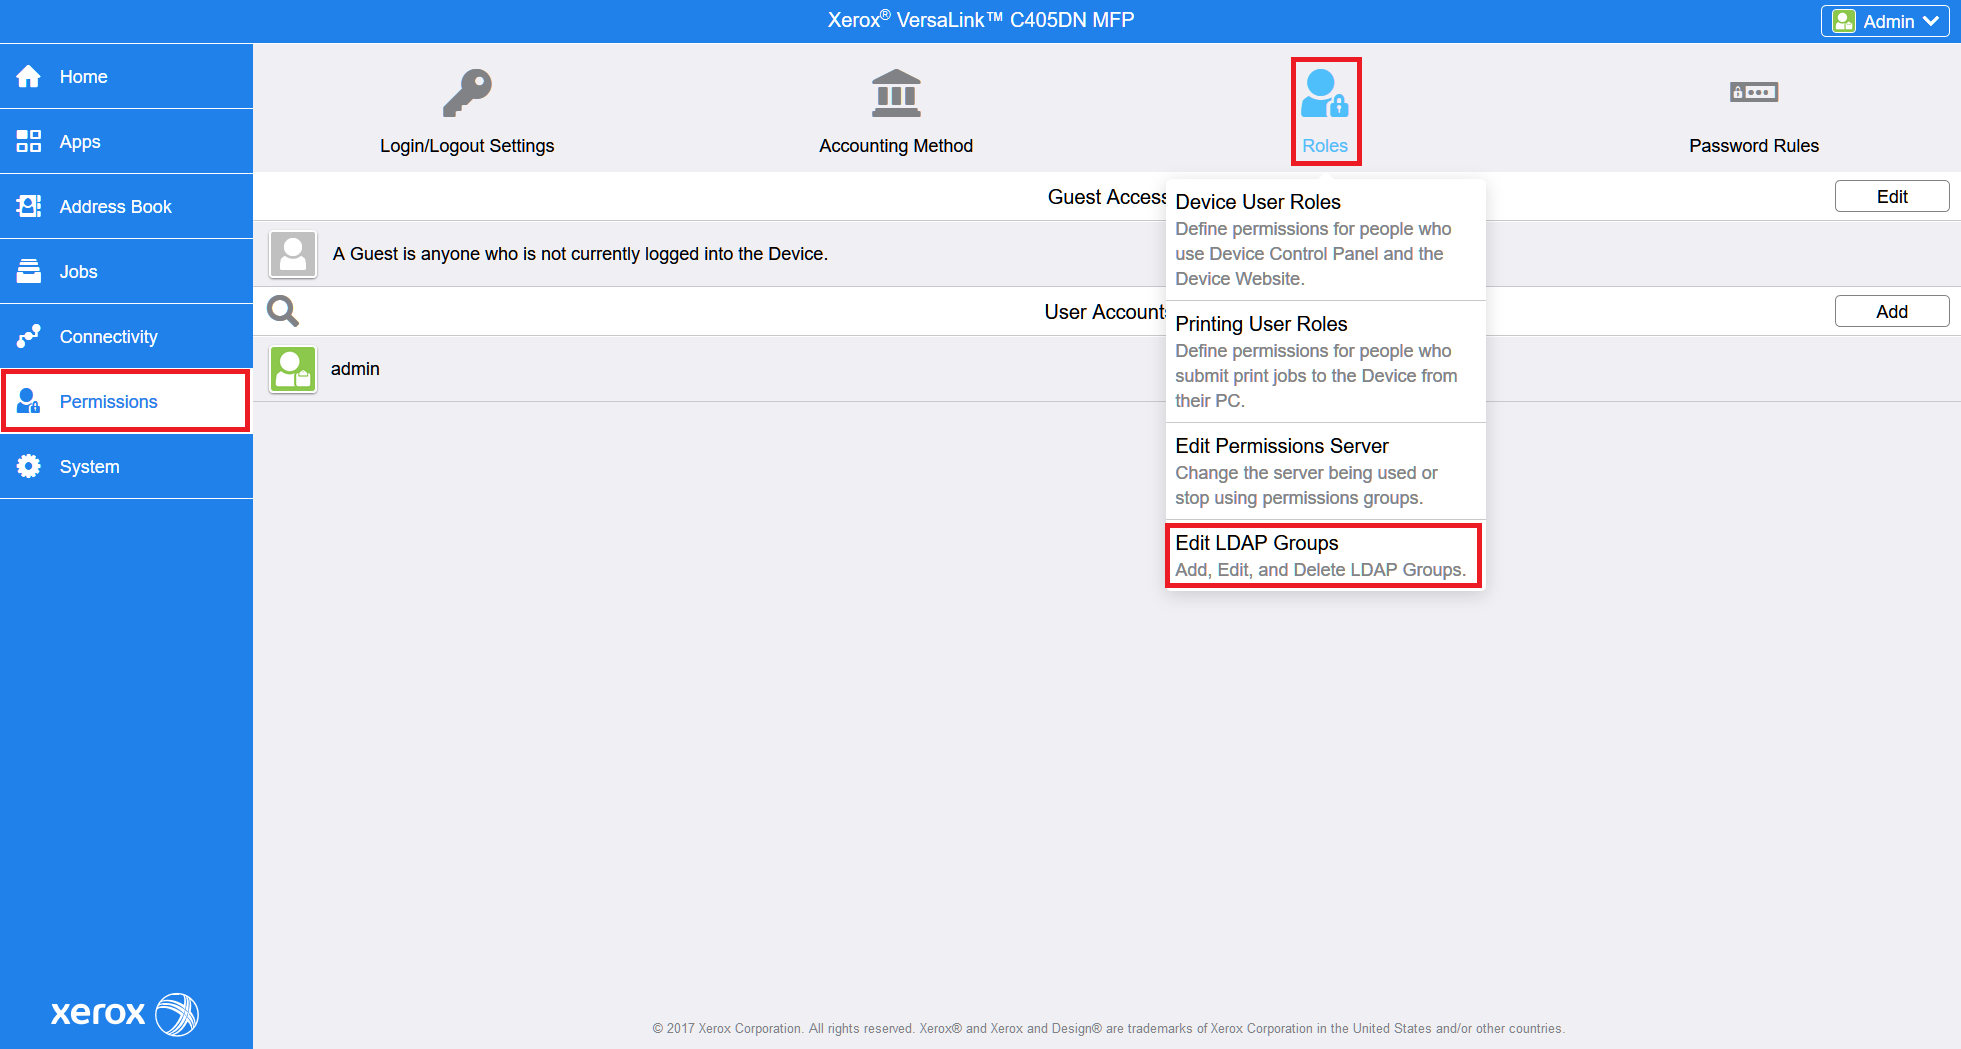
For the older printer models, go to Permissions > Roles and select Edit LDAP Groups.
Click
Fill in the search text and click 
LDAP server has to be configured to fetch the LDAP groups.
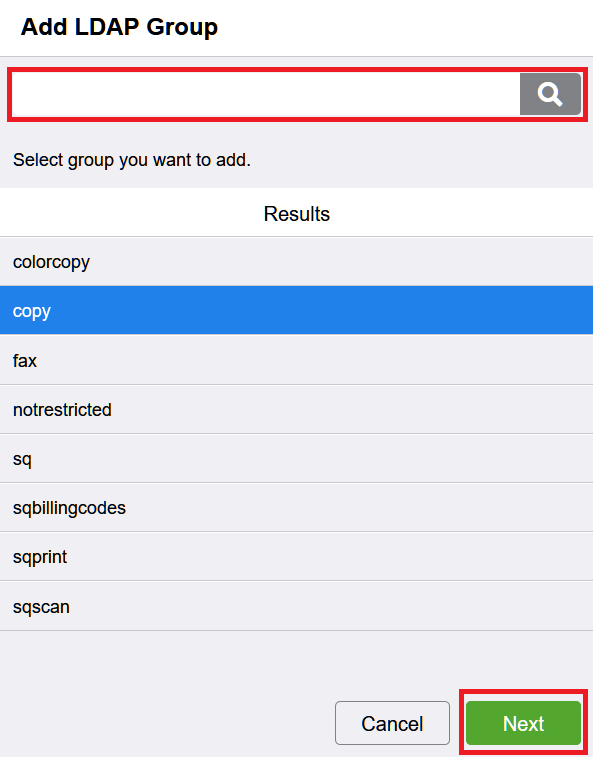
Select the previously created Device User Role and click Next.
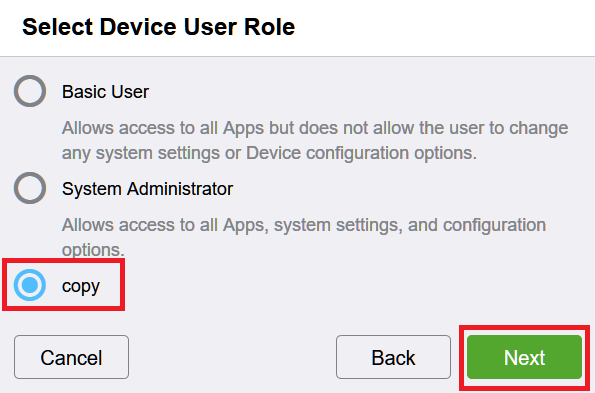
Select default Printing User Role and click Done.

For the newer printer models continue with the role creation or go to Login / Permissions / Accounting > Logged-In users and edit created group.
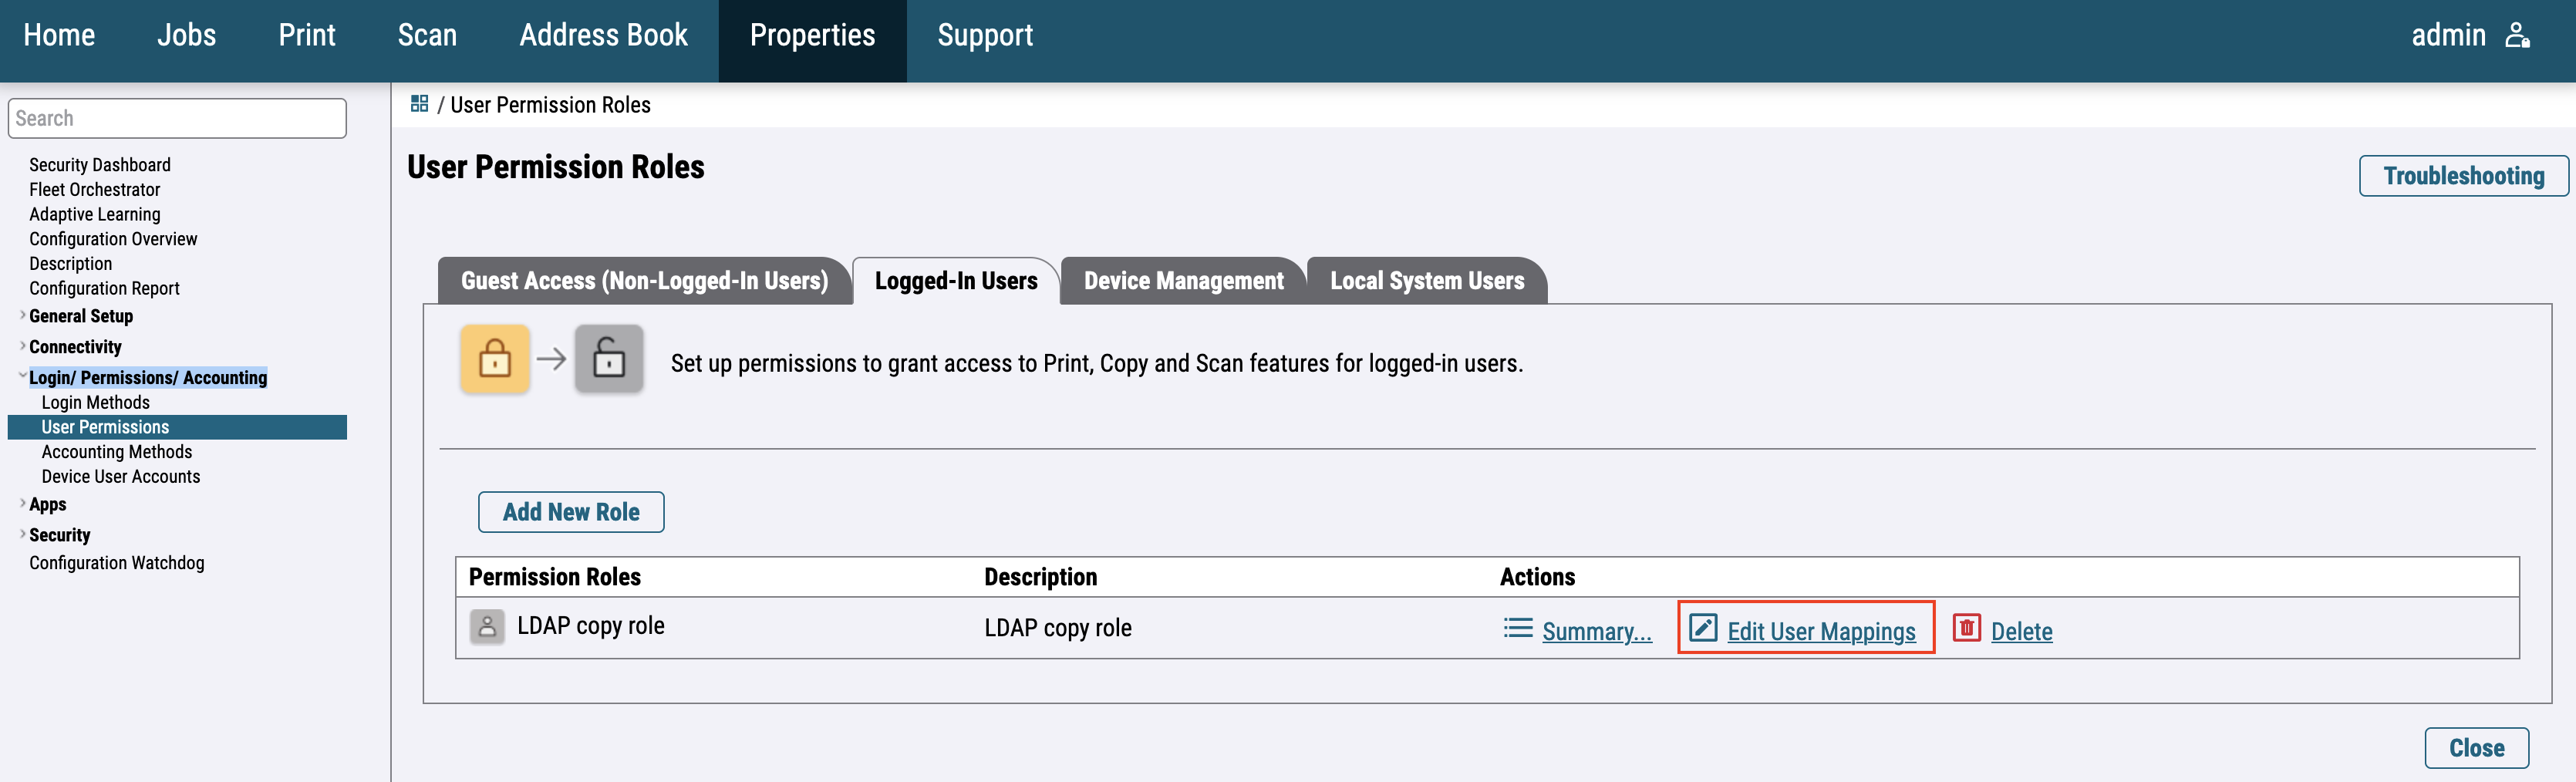
Assign LDAP groups and click on Apply.