
Introduction
This guide provides a simplified process for configuring Ricoh devices with YSoft SafeQ 6 using a Smart Operation Panel (SOP). The configuration steps vary depending on the device's SOP generation (G2, G2.5, or G3). This guide has been refined to address common points of confusion and to ensure all steps align with current security requirements.
The installation and configuration process depends on the device's SOP generation. You should contact Ricoh to determine the SOP generation of your specific device models.
-
SOP G3 (Supported from YSoft SafeQ Build 79 and higher): A part from the Pre-Installation Configuration steps, the configuration is handled automatically.
-
SOP G2.5: A part from the Pre-Installation Configuration steps, the configuration is handled automatically.
-
SOP G2: If Java is not turned on, remote configuration of the device is impossible, and the configuration must be done manually. The admin will be notified of this during the installation.
-
To enable Java on the MFD, please refer to Configuring Ricoh SOP - Enabling Java on G2 devices.
-
If Java is not turned on remote configuration is impossible, and the configuration must be done manually according to Configuring Ricoh SOP - Automated configuration steps.
-
Pre-Installation Configuration
Objective: To prepare the Ricoh MFD for the Embedded Terminal installation by configuring all necessary settings and certificates in a single, logical process.
You must log in as the Machine Administrator to the Ricoh MFD web interface (Web Image Monitor) for the following steps.
Follow all the configuration steps below to prepare the MFD for installation of YSoft SafeQ Embedded Terminal.
If you encounter any issues, please refer to Troubleshooting YSoft SafeQ Embedded Terminal for Ricoh SOP.
Device Date and Time setting
Ensure the MFD's date and time are synchronized with the YSoft SafeQ server. Using an Simple Network Time Protocol (SNTP) server is the recommended method.
-
Navigate to Configuration > Date/Time.
-
Set the time to match the YSoft SafeQ server time or specify automatic time configuration via the SNTP server and the Time Zone then Click OK to confirm the changes.

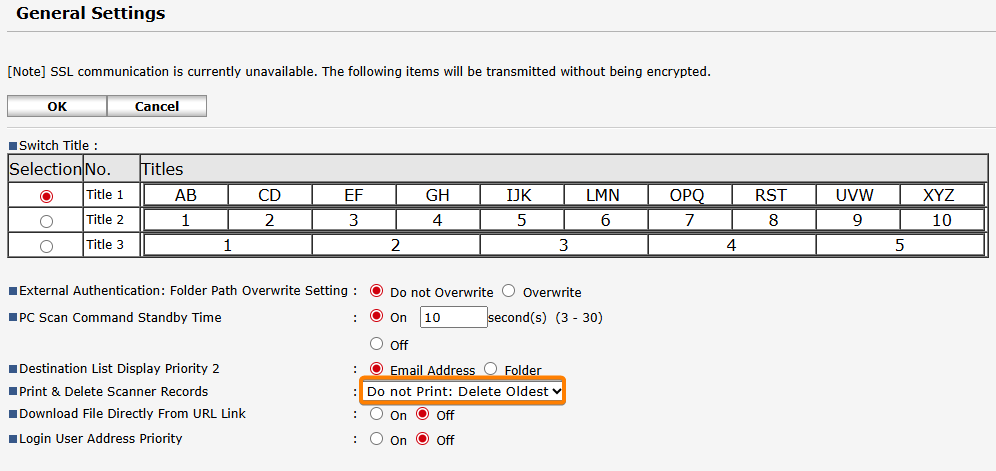
Preventing Scanning from Being Blocked due to scan logs
If the scanner records log becomes full, scanning will be disabled until the records are printed on the machine. The following steps show you how to configure the device to automatically delete old records, which prevents the log from filling up and blocking scanning.
-
Navigate to Device Management > Configuration > Scanner > General Settings
-
Change Print & Delete Scanner Records to Do not Print: Delete Oldest
-
Click OK to confirm the changes.
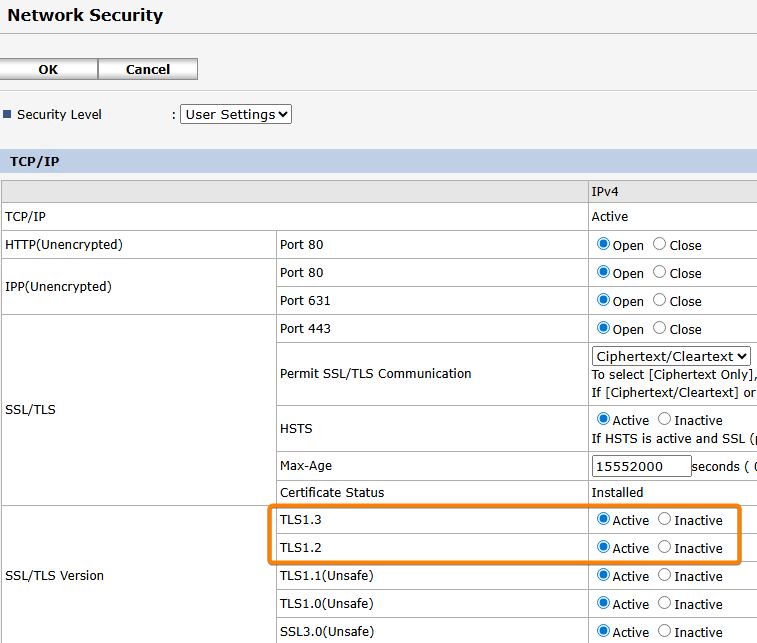
Verify SSL/TLS protocols enabled
-
Navigate to Device Management > Configuration > Network Security
-
Depending on the model verify TLS 1.2 and TLS 1.3 are enabled

Certificates Management
Install the MFD's device certificate and the Terminal Server's CA certificate. Both are essential for secure communication and are mandatory for all SOP generations.
The new version of RXOP library 3.8.8.1 (Used from SafeQ 6 Build 79) forces certificate validation during terminal installation. Ricoh offers a Certificate Enrolment Service to simplify the certificate task. This service can be found at https://www.ricoh-europe.com/software/certificate-enrolment-service/
Installing the MFD's Device Certificate
This is a unique digital certificate for the MFD to identify itself securely on the network. This is mandatory from SafeQ 6 Build 79. This requirement is due to an enhanced security approach from Ricoh. The Terminal Server must trust the MFD's certificate to successfully deploy the Embedded Terminal, otherwise, the installation will fail.
Certificate Requirements
-
The certificate must be signed by a trusted CA.
-
The Common Name should match the device's IP address or Hostname, depending on the address used to access the MFD's administration interface and the address configured in the SafeQ web interface.
-
The Subject Alternative Names must also contain the device's IP address, Hostname, or FQDN.
-
The CA certificate needs to be available in the SafeQ servers Local Computer's Trusted Root Certification Authorities (refer to System communication hardening for more information) for the Terminal Server's truststore.
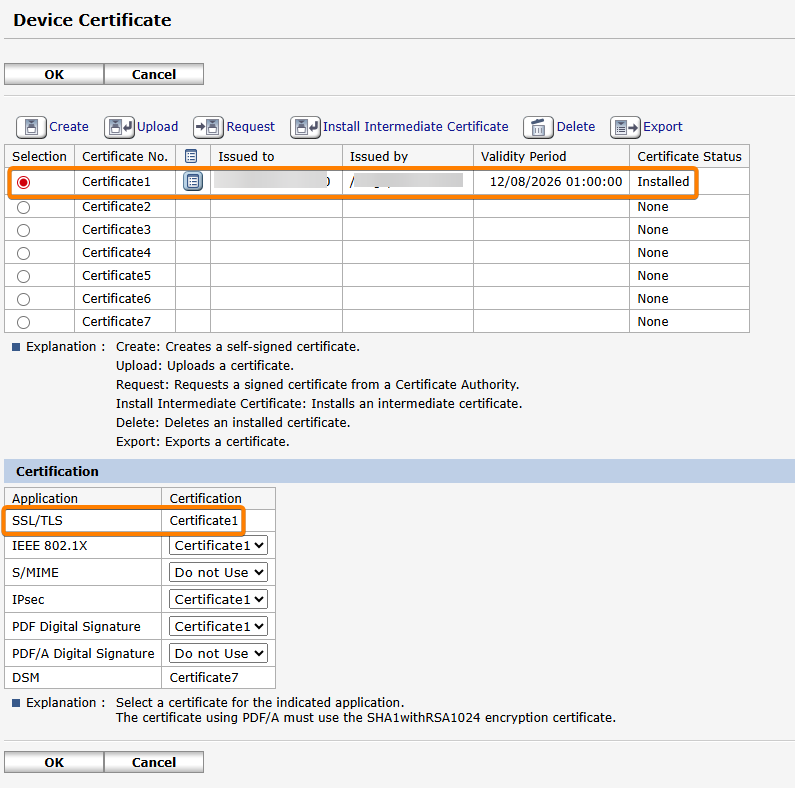
Installation Steps
-
Navigate to Device Management > Configuration > Security > Device Certificate.
-
Optional step - Generate a Certificate Signing Request (CSR) and use it to get a signed certificate from your Certificate Authority (CA) server.
-
Upload the certificate to the MFD and make it the main one
Installing the Terminal Server's CA Certificate
This certificate allows the MFD to trust the Terminal Server, ensuring a secure HTTPS connection. This is distinct from the MFD's device certificate and is mandatory for all SOP generations using a secure connection.
-
Manual Installation (via SD card or USB flash drive on some G3 models)
This is the recommended method because the automatic prompt is easy to miss and it might fail, when using SOP G3 devices and if Terminal Server uses a self-signed certificate or the CA is not trusted by the MFD.-
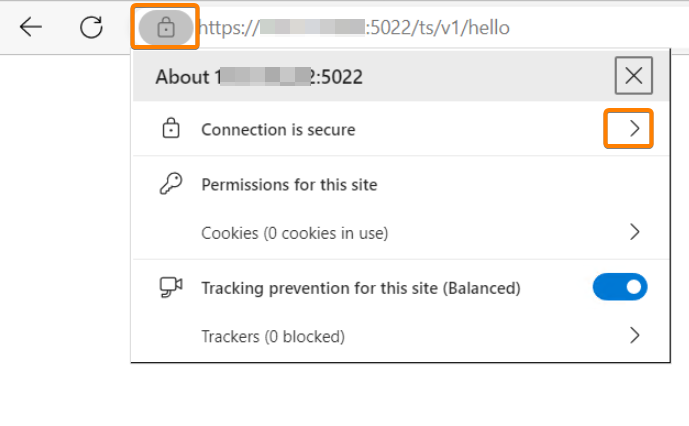
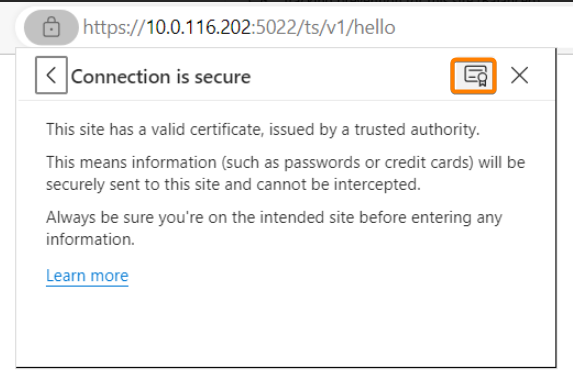
Obtain the CA Certificate using a Chromium web browser, go to the Terminal Server's address https://<domain_name>:5022/ts/v1/hello (Replace <domain_name> with Terminal Server IP address/domain).
-
Click on View site information (left of the URL bar) > Connection is secure / Certificate is valid
-
Click on Show certificate
-
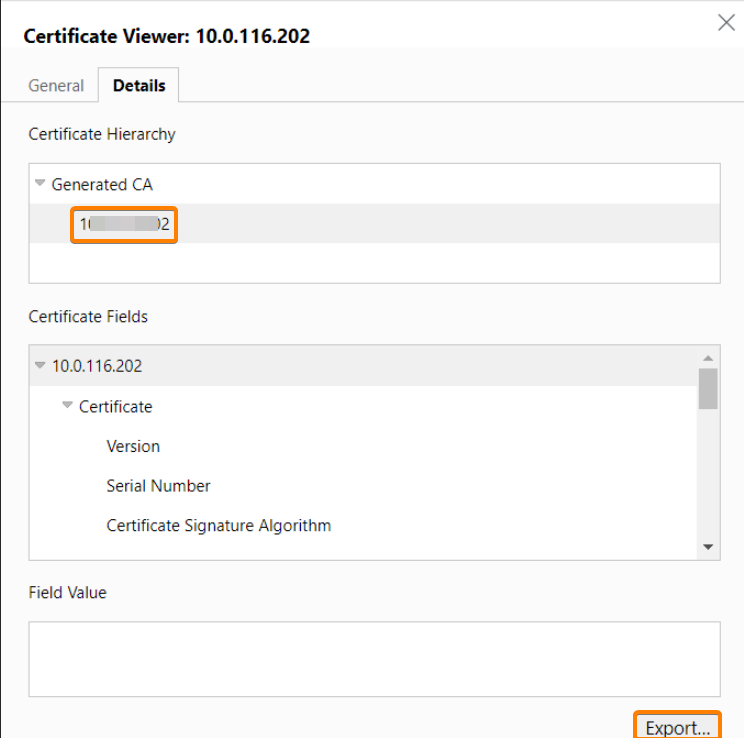
Open Details tab then Select the topmost certificate in the Certificate Hierarchy (e.g. "Generated CA") / Click Export
-
Save the .CRT file on a SD card.
-
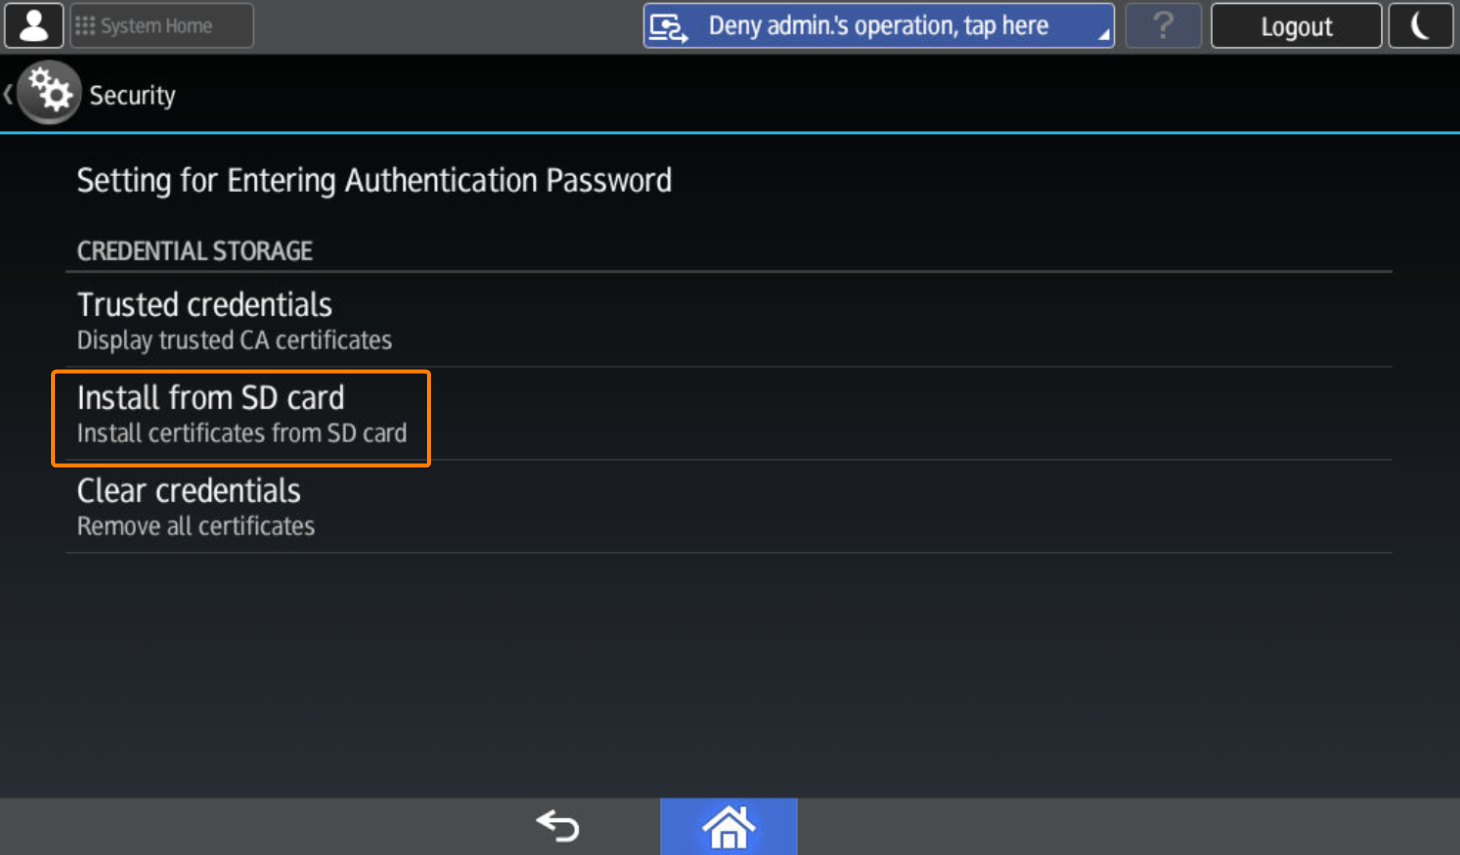
On the device panel log in as Machine Administrator
-
Navigate to User Tools > Screen Features > Security > Install from SD card
-
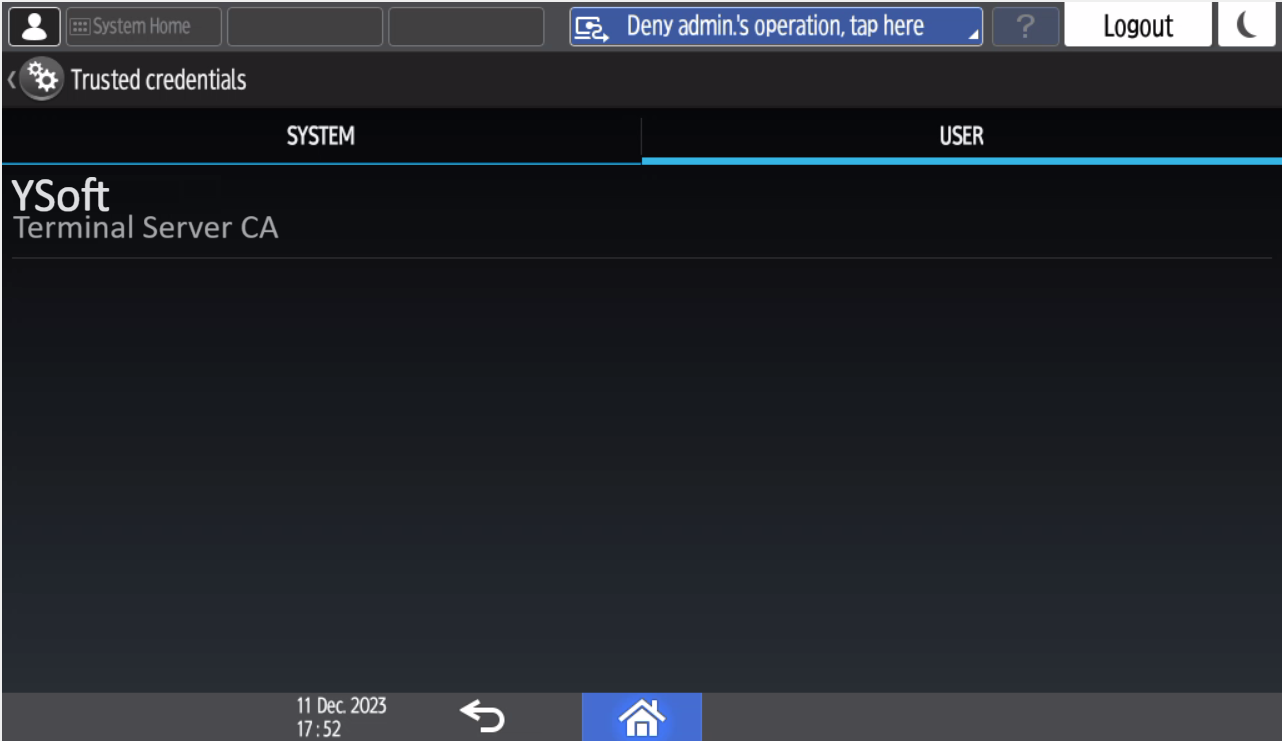
You can verify that the CA is installed under Trusted credentials
-
-
Automatic Installation
-
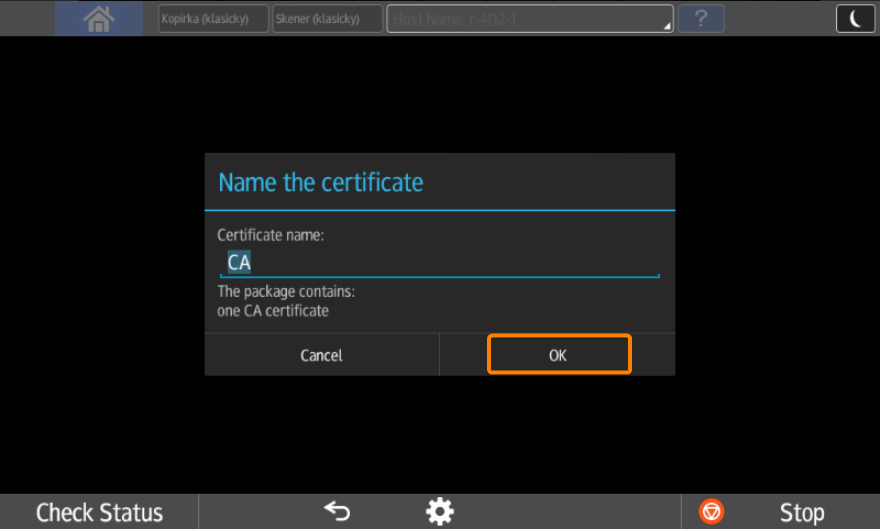
During terminal installation Terminal Server pushes its root certificate into the SOP application. However, it is not installed automatically. Administrator needs to confirm installation manually on MFD. SOP will display the following prompt:
-
Administrator needs to confirm certificate installation. The certificate name is set by default as a Common Name (CN) of the CA certificate, but it can be changed arbitrarily. If Administrator does not confirm certificate installation then the SOP application will display warning to users about invalid certificate (unless the certificate is signed with publicly trusted CA).
-
You can repeatedly launch this prompt by reinstalling terminal in the management interface (eg. if CA used for signing Terminal Server certificate is changed).
-
Note that this prompt will appear only if a certificate has not been installed before and SSL communication is enabled.
Setup card reader to be available from sleep mode
This ensures the card reader is available even when the device is in sleep mode
-
On the device panel log in as Machine Administrator (On newer devices you might need to Login to service mode on SOP panel)
-
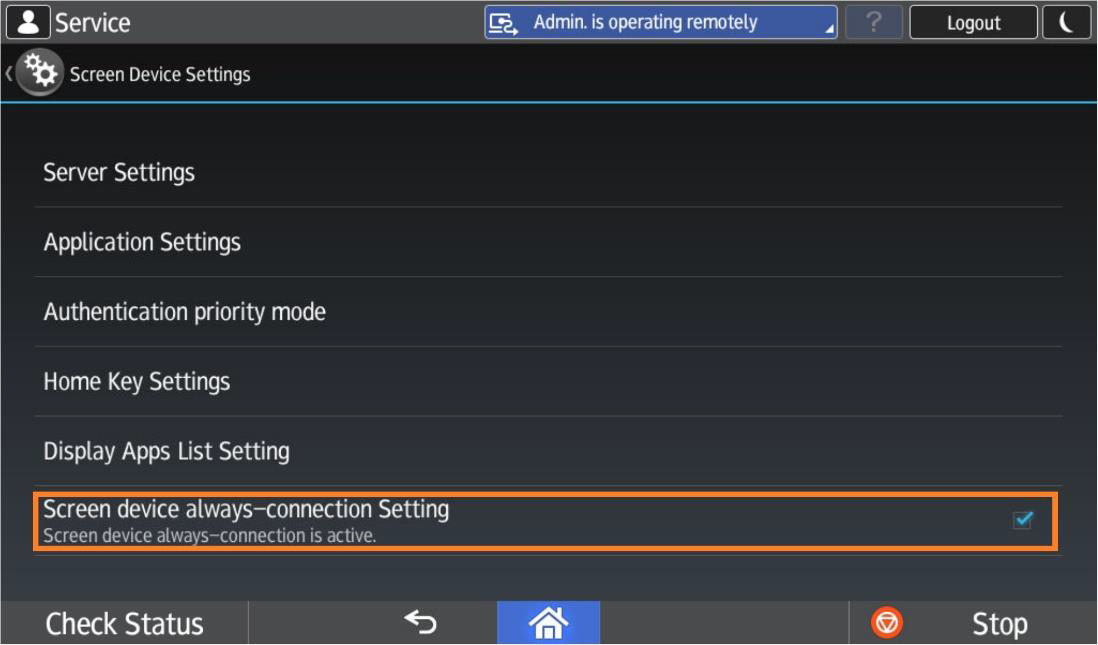
Navigate to Settings > Screen Features > Screen Device Settings
-
Turn Screen device always-connection Setting to true
-
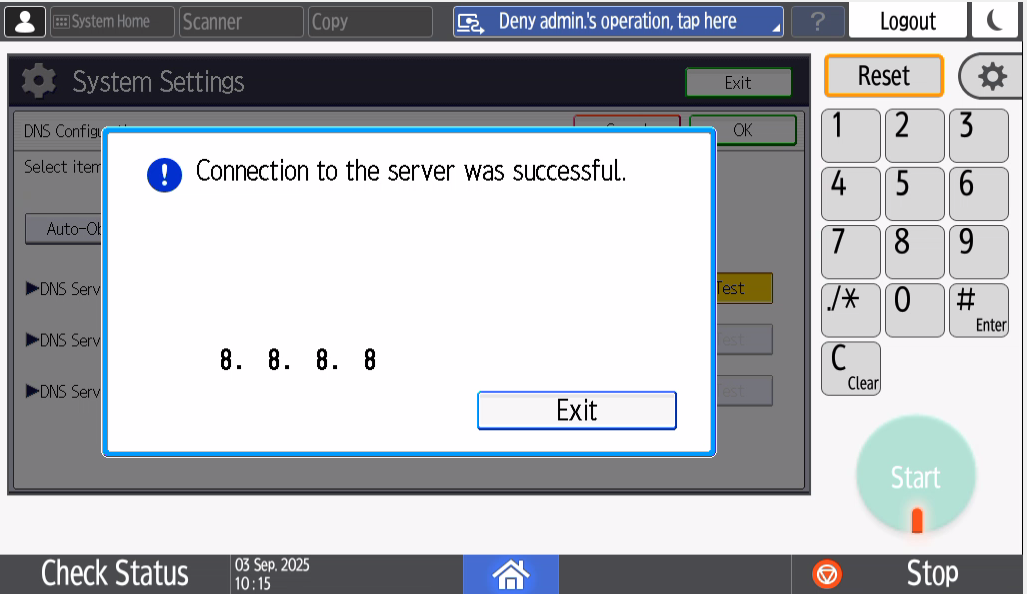
Verifying DNS Configuration on the Ricoh Device
Ensure the Ricoh MFD is configured with correct DNS server settings and can successfully reach the DNS server(s). Incorrect DNS configuration is a common cause of slow authentication and delayed device responses.
-
On the device panel log in as Machine Administrator
-
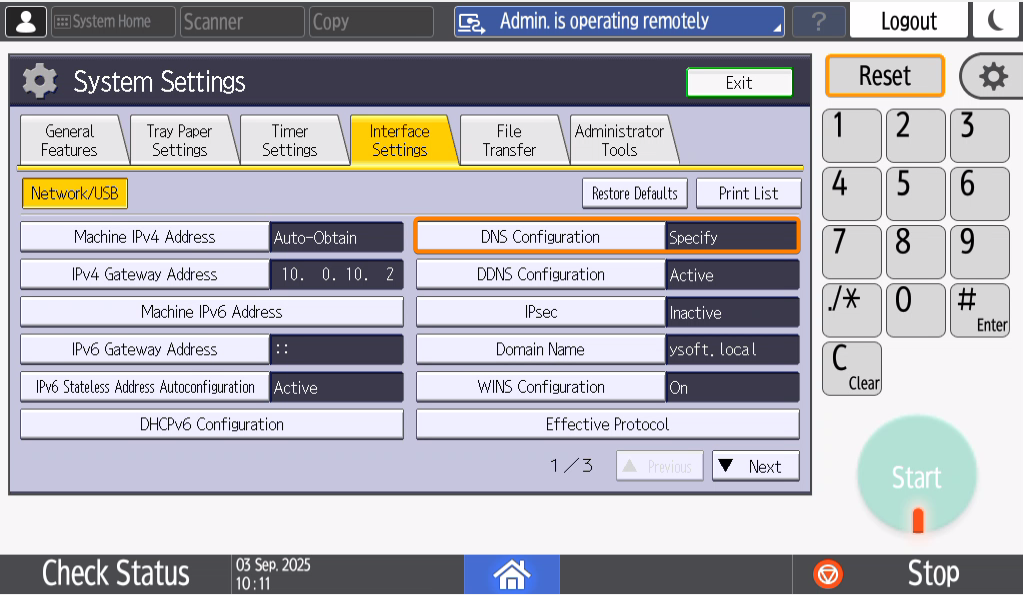
Navigate to Settings > Machine Features Settings > System Settings > Interface Settings > Select DNS Configuration
-
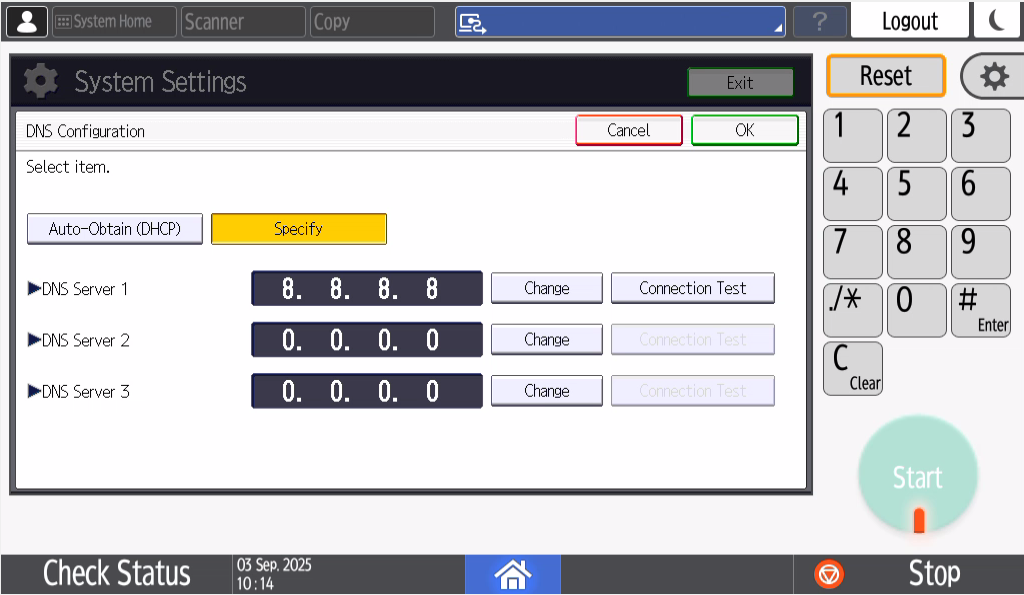
Verify DNS Server(s) are configured correctly and change it if needed
-
Press Test and verify the connection is successful to the DNS Server(s)
Optional Configuration & Advanced Settings
This section contains additional configuration steps that are optional but may be required depending on your specific environment and business needs. These settings include integrating payment systems, configuring third-party card readers, and other advanced configurations to enhance security and device functionality.
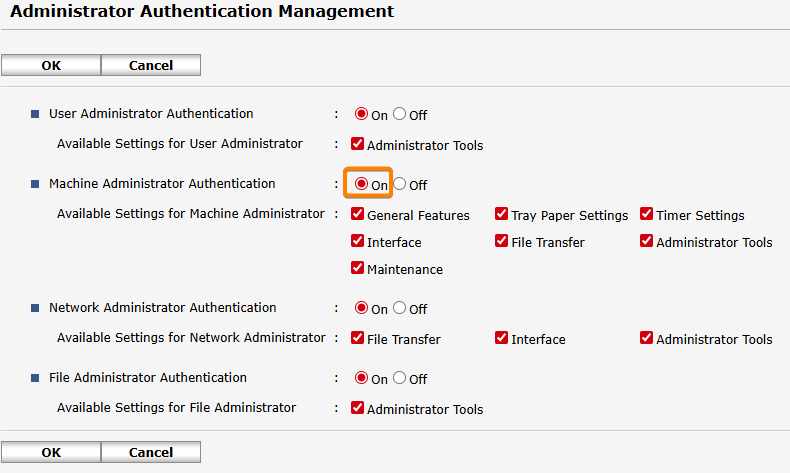
Enabling Machine administrator login
-
Navigate to Device Management > Configuration > Administrator Authentication Management
-
Set Machine Administrator Authentication to On.
Adjusting Installation Timeouts for the Terminal Server
These configuration options in the management interface are used to manage timeouts during the Embedded Terminal installation process. Adjusting these settings may be necessary if a device's reboot speed causes timeouts. All of the following configuration options are Expert level under the "Terminal administration" category.
-
tsCommunicationTimeoutSeconds: This is the request timeout for communications between the Terminal Server and the SPOC. This timeout, combined with tsCommunicationRetriesCount, affects how long a single Embedded Terminal installation can last before it is terminated.
-
Suggested value: 360.
-
-
tsCommunicationRetriesCount: This count determines how many times a communication should be retried if it times out or cannot be established.
-
Suggested value: 5.
-
The final maximum installation duration is calculated as tsCommunicationTimeoutSeconds * (tsCommunicationRetriesCount + 1). If this duration is exceeded, the installation will result in failure.
-
maxEmbeddedInstallationStatusAge: This is a separate timeout for a single installation step during the Embedded Terminal installation process. This timeout is completely unrelated to the timeouts above. If this time is exceeded, the installation process might not properly terminate in the management UI. In the background, however, the installation process is properly terminated and will not continue.
-
Suggested value: 20m.
-
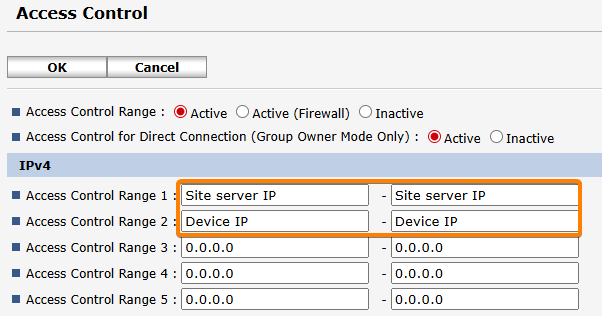
Setting up Access Control
If the MFD is configured to accept web traffic only from permitted IP addresses and networks (that can be set up in the Access Control panel on the device), in addition to adding the Site Server IP address the address of the MFD needs to be added as well. Otherwise, the installation will fail.
-
Navigate to Device Management > Configuration > Access Control
-
Configure the all the site servers IP’s and the device IP then Click OK to confirm the changes.
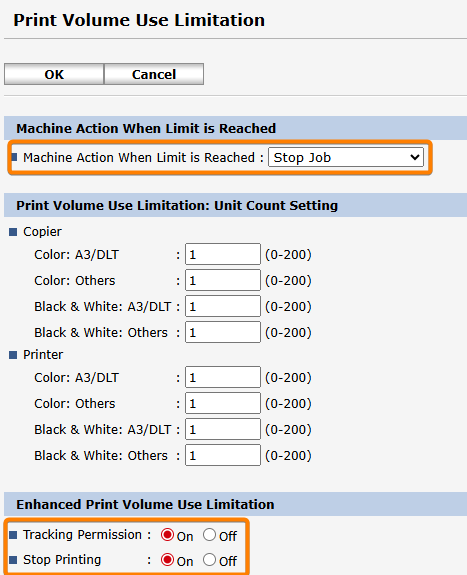
Print Volume Use Limitation for Payment System
If the payment feature is expected to be used on the machine, it is mandatory to set print volume use limitations settings.
-
Navigate to Device Management > Configuration > Print Volume Use Limitation
-
Set the Print Volume Use Limitation as follows:
-
Machine Action When Limit is Reached: Stop Job
-
Tracking Permission: On
-
Stop Printing: On
-
Click OK to confirm the changes.
-
-
On the device panel log in as Machine Administrator
-
Navigate to Settings > System Settings > Settings for Administrator > Authentication/Change > Administrator Authentication/User Authentication/App Auth. > Application Authentication Management
-
Enable all functions by switching them to On

-
Click OK to confirm the changes.
-
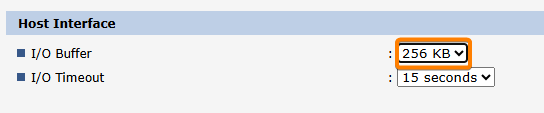
Configuring MFD to print with watermarks in Rule-based Engine (RBE)
-
Navigate to Device Management > Configuration > Printer > Basic Settings
-
Change Host Interface > I/O Buffer to 256 KB
-
Click OK to confirm the changes.
WARNING: RBE Watermark feature is only supported on PS printers.
Recommended configuration of shared Windows printer used for Secure queue (Pull Queue) and Direct queue
This section outlines the recommended configuration for a shared Windows printer used for secure and Direct queues. Following these recommendations can improve driver performance in environments where a single driver is used for multiple printers with varying feature configurations.
-
Printer Properties > Accessories
-
Configure accessories (such as punch units and finishers) to support all possible features.
-
Disable automatically update printer Information.
-
-
Printer Properties > Ports
-
Disable bidirectional settings.
-
Enable printer pooling, this feature can be enabled to mitigate Windows print job spooling bottleneck
-
To be able to perform Direct print when not using YSoft SafeQ FlexiSpooler, authentication has to be configured in Printer Properties and installed Ricoh driver.
-
Printer Properties > Advanced Options
-
Enable User Authentication
-
-
Printing Preferences > Detailed settings > Job Setup > Authentication
-
Set Windows Login Name (may depend on LDAP/accounts setting) and confirm all dialog windows
-
Using 3rd party card readers
If 3rd party card readers are used, the following configuration must be performed for every Terminal Server managing Ricoh SOP terminals so that they USB readers function correctly. This configuration will affect only Ricoh SOP MFDs other vendor MFDs are not affected.
Card reader configuration is done automatically during the installation process. By default, this process sets up the MFD to use YSoft USB Card Reader. If some 3rd party card readers are being used, the following configuration must be added to the Terminal Server configuration file located at <install_dir>\SPOC\terminalserver\TerminalServer.exe.config within the <appSettings> tags.
-
ricohSopSkipCardReaderConfiguration
-
By default, this value is set to false.
-
When set to true, the configuring the card reader step will be skipped during installation.
-
This is suggested when different types of card reader are used across Ricoh SOP MFDs.
-
-
ricohSopCardReaderVid
-
This references vendor ID of used card readers. The default value is 214C
-
This serves as a possible override, when one type of card reader is used across all Ricoh SOP MFDs
-
-
ricohSopCardReaderPid
-
This references product ID of used card readers. The default value is 0202
-
This serves as a possible override, when one type of card reader is used across all Ricoh SOP MFDs
-