
Configure access to Microsoft API using OAuth
To configure access to the Microsoft API, following steps are needed.
-
Register new application in the Microsoft Azure.
-
Create new client secret.
-
Add permissions for newly created app.
Steps are described in more detail in the chapters below.
For more information on registering applications, see https://docs.microsoft.com/en-us/azure/active-directory/develop/quickstart-register-app.
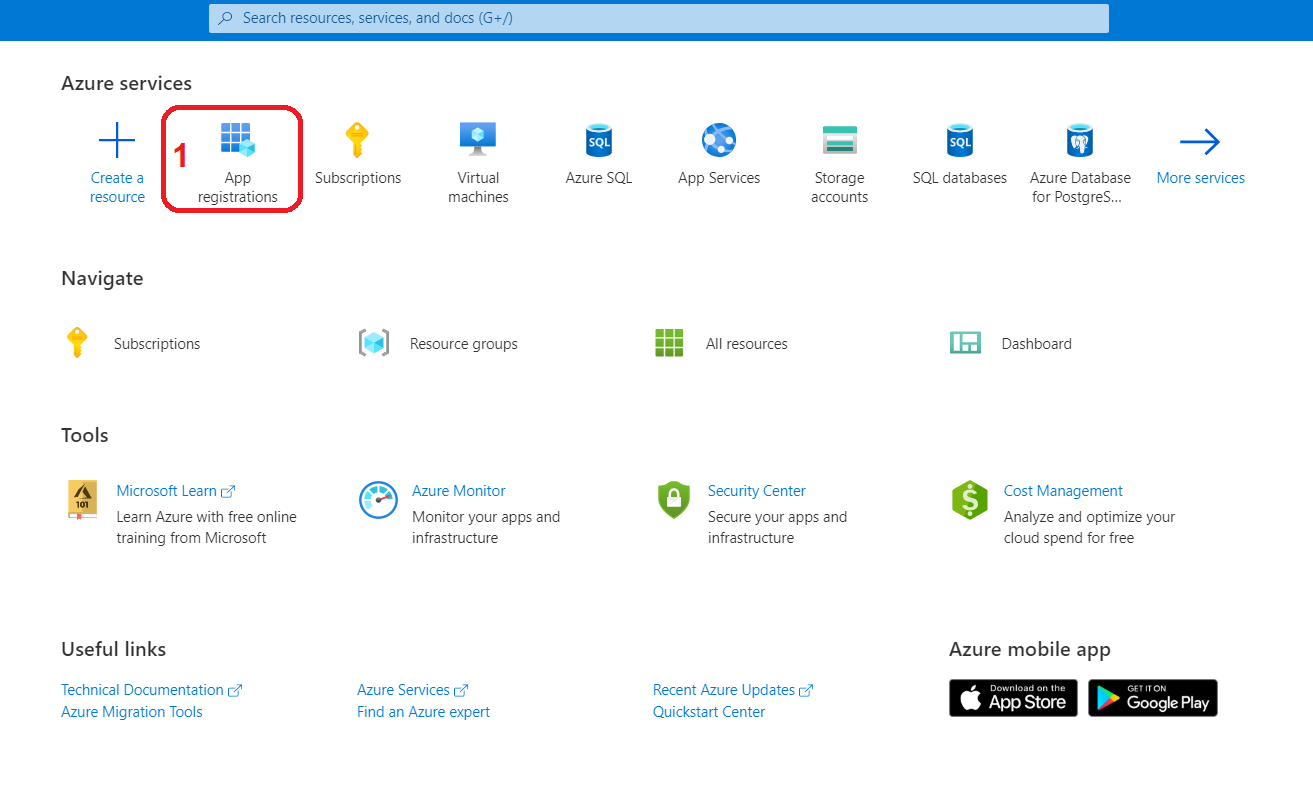
Registering new application
-
Go to the Microsoft Azure portal https://portal.azure.com/
-
Login with Microsoft account that will be used for application registration.
-
If you have logged to the Microsoft Azure portal for the first time, you will need to configure your subscription first.
-
Click on the App registration.
-
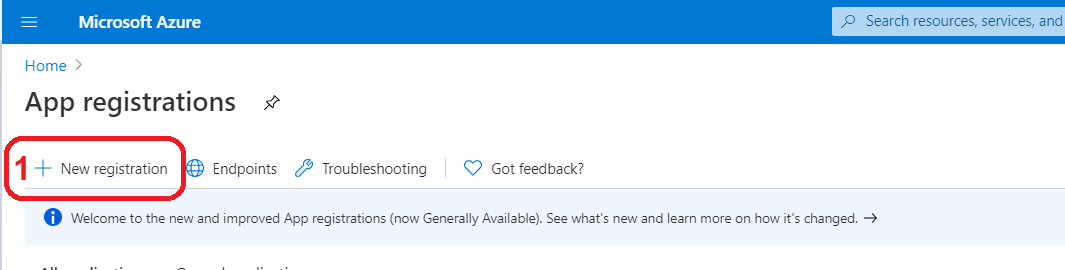
Click on New registration.
-
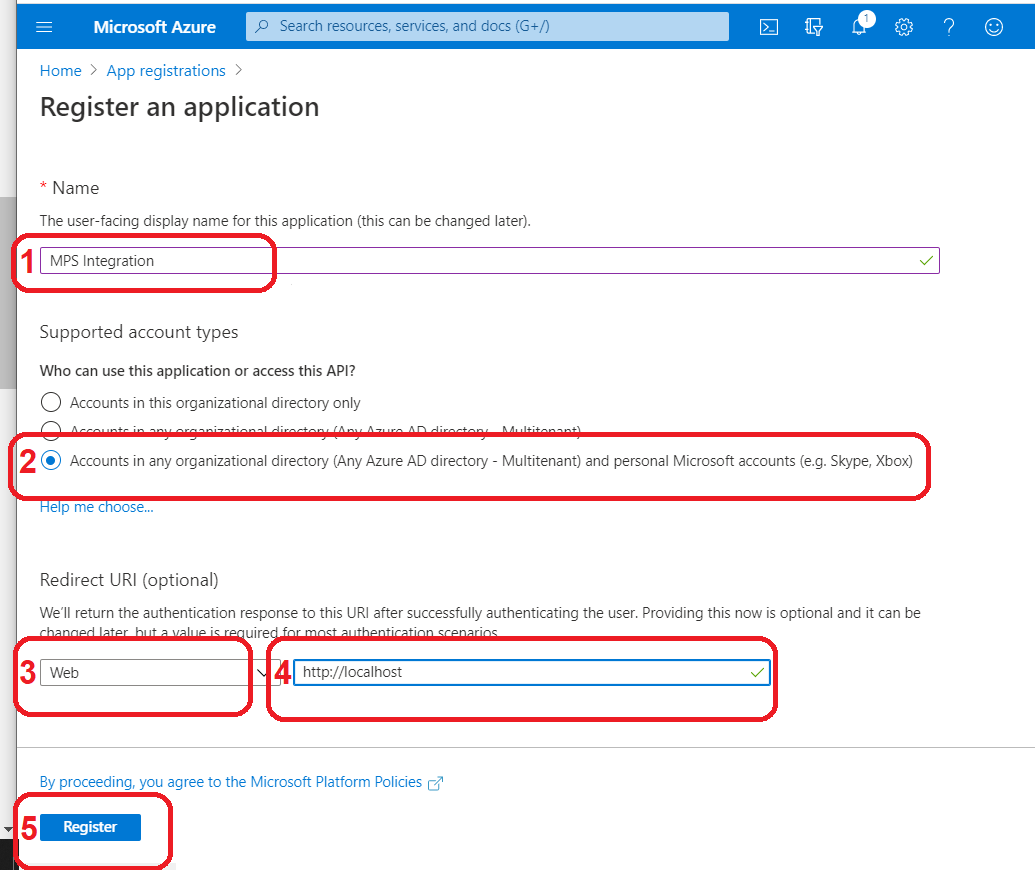
Fill in
-
Application name e.g. "MPS Integration"
-
Supported account types - select option according to what is needed. If the application is created only for one company, the first option is enough.
-
Redirect URI - select Web and in the text box, fill in the address where the application requesting the authorization is accessible. If authorization is started from the same computer where the application runs, http://localhost/ can be used. Additional redirect URIs can be added later.
-
Click Register
-
-
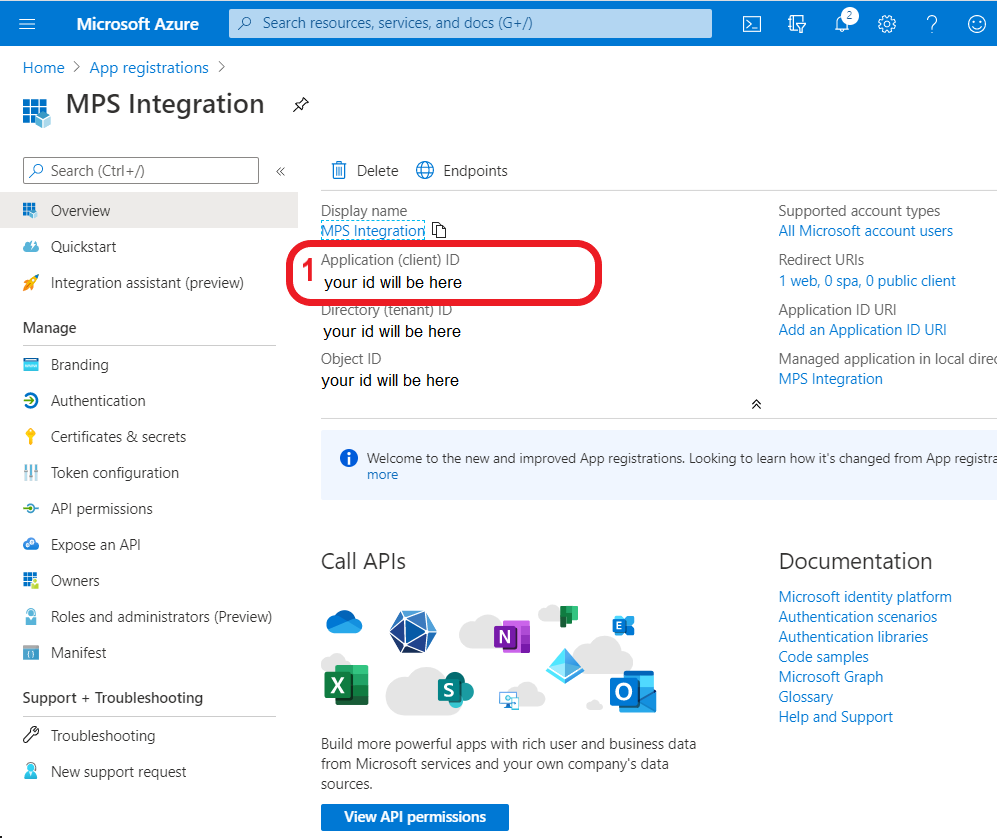
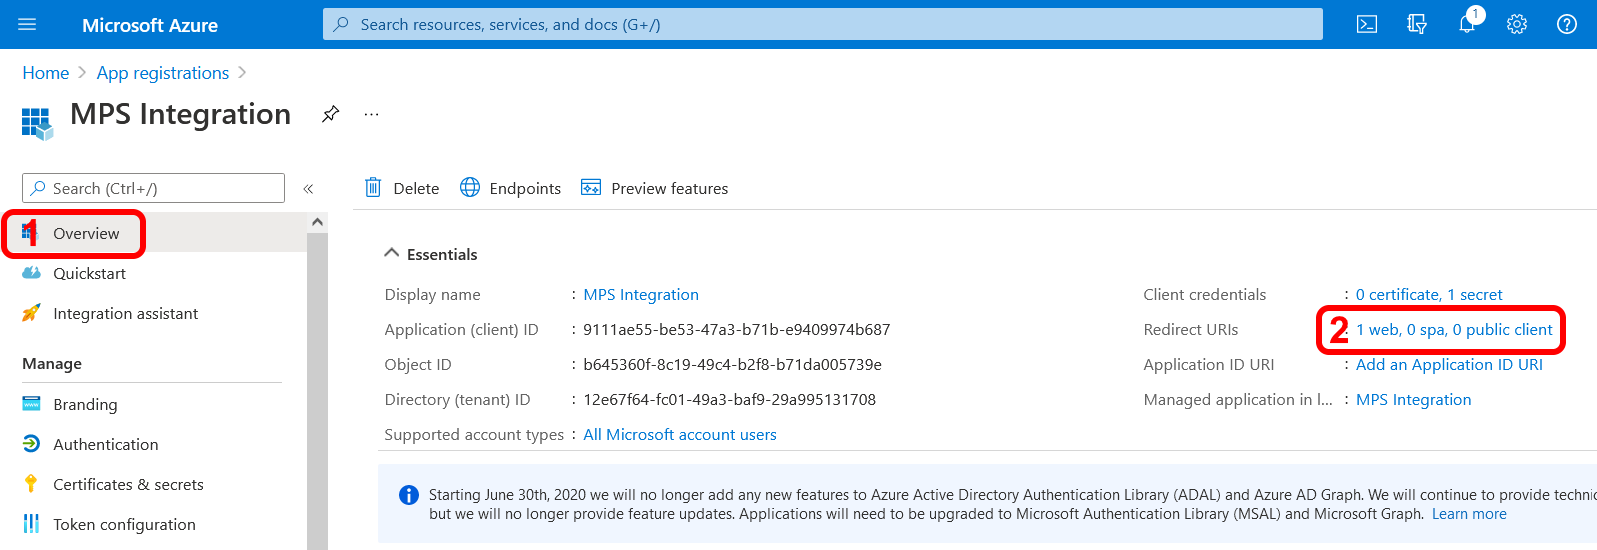
New application will be created. On the Overview page we can see Application (client) ID which will be used by SAFEQ app to access the Microsoft API.
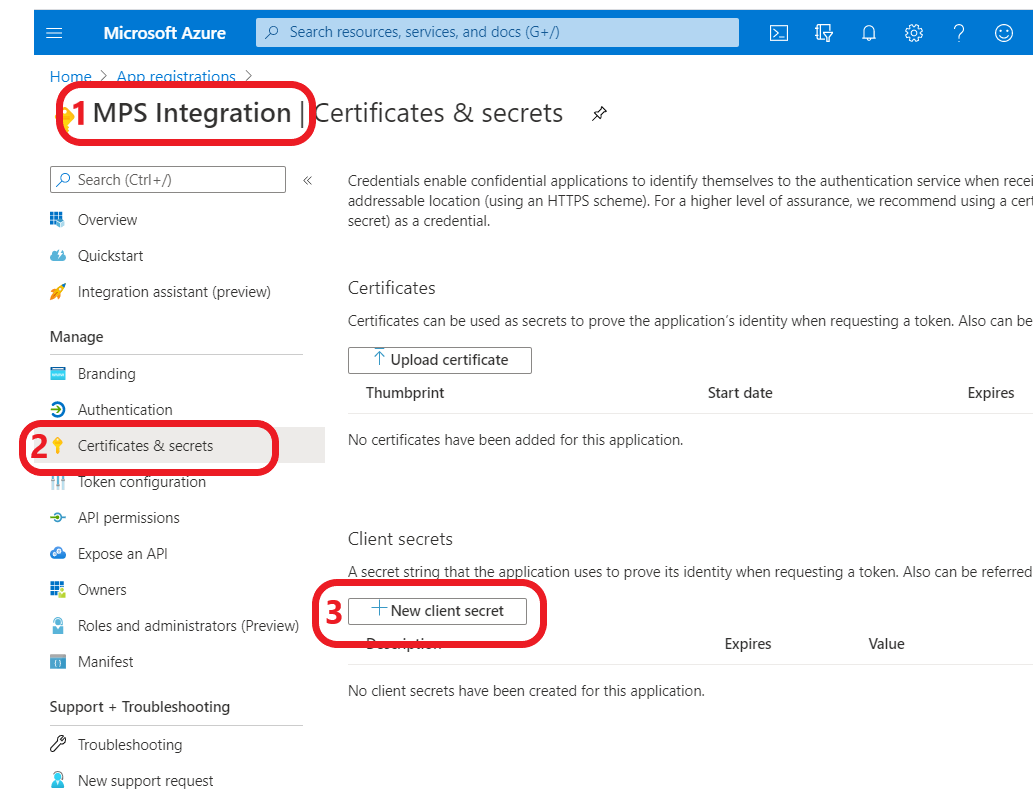
Creating client secret
Prerequisite: Follow instructions for Registering new application.
-
Make sure you are in the correct application.
-
Navigate to the Certificates & secrets using the sidebar menu.
-
Click on New client secret.
-
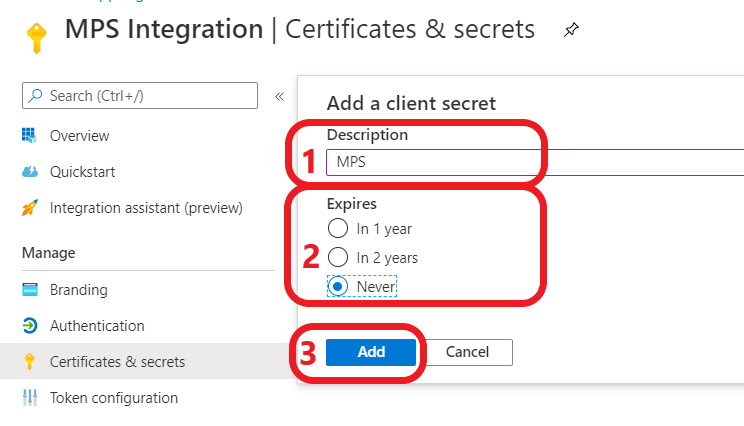
Fill in
-
Description e.g. MPS
-
Expires - select expiration time of the secret
-
Click Add
-
-
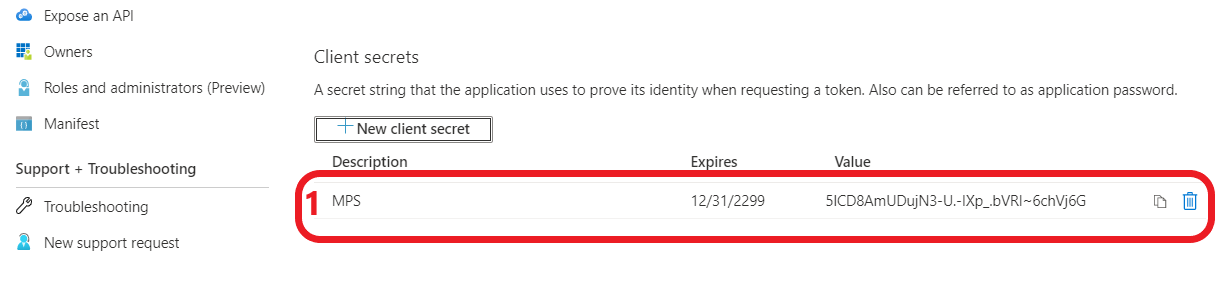
New client secret will be created. Copy your secret value to some temporary file as you will be not able to view it after you leave this page. Client secret will be used by SAFEQ app to access the Microsoft API.
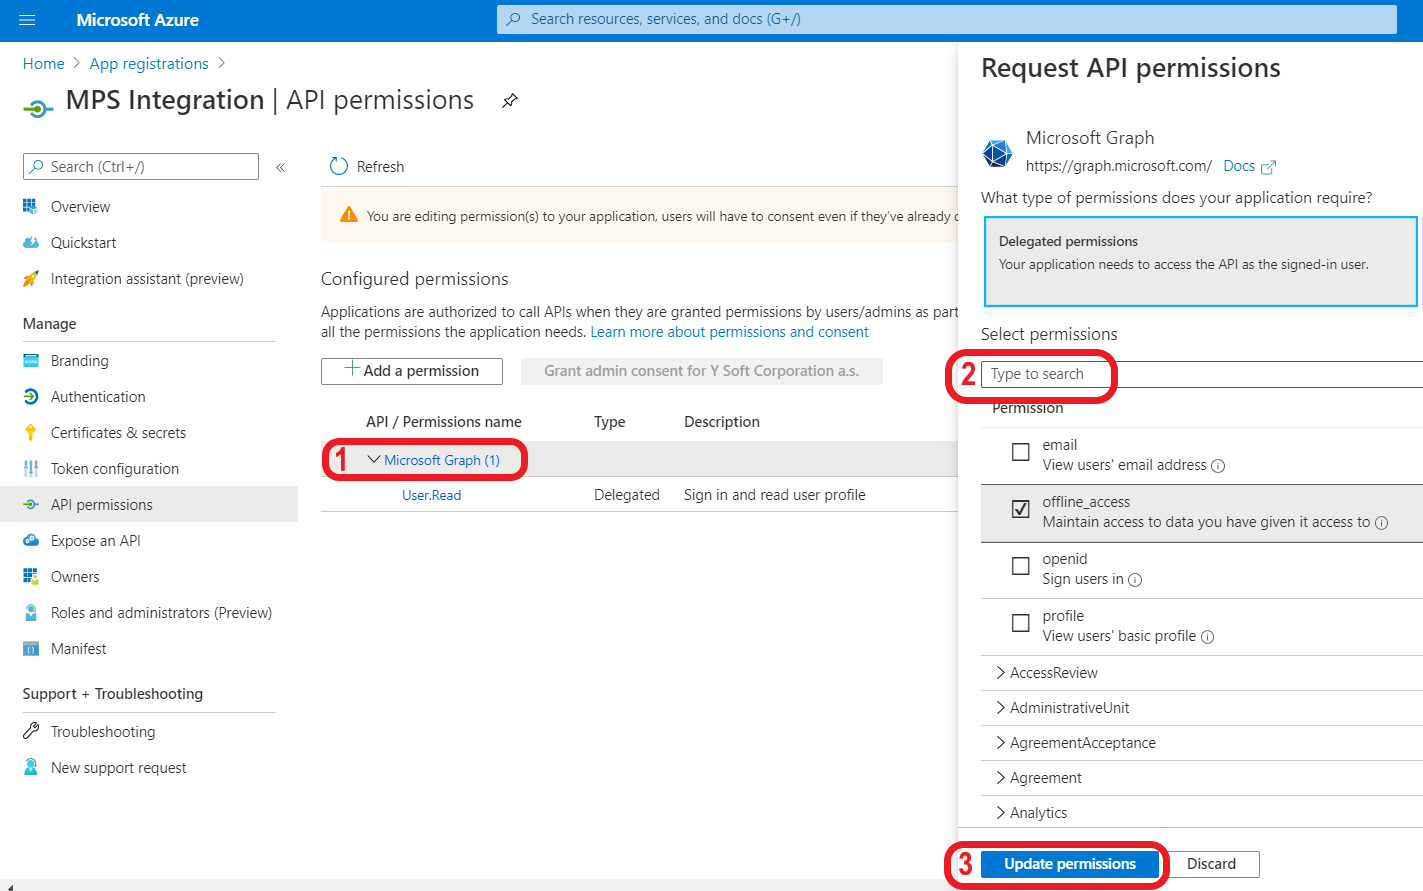
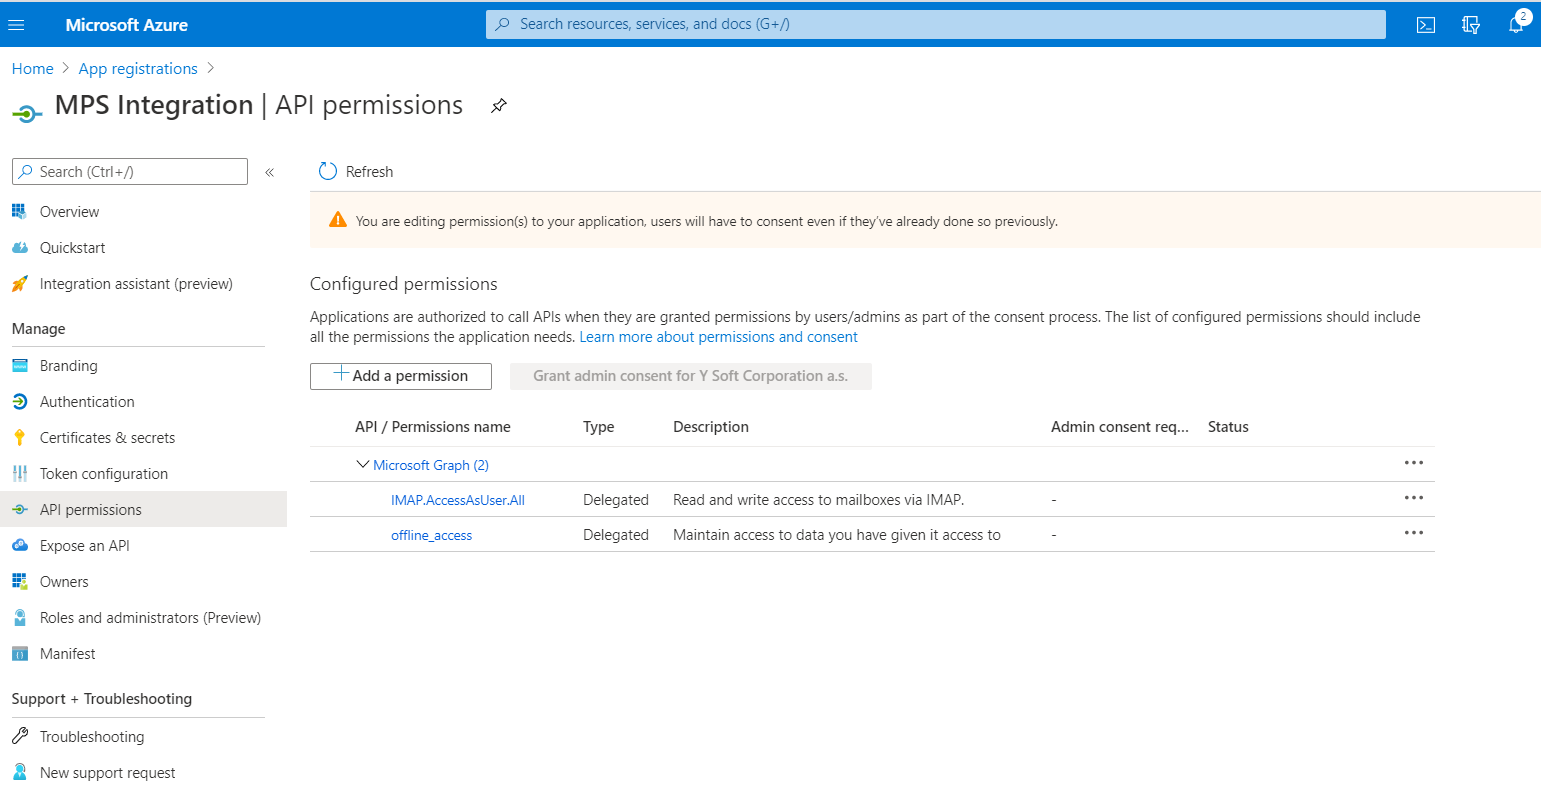
Adding API permissions
Prerequisite: Follow instructions for Creating client secret
-
Make sure you are in the correct application.
-
Navigate to the API permissions using the sidebar menu.
-
Click on Add a permission
-
Click on API to which we need an access.
-
Search for needed permissions and select them
-
Final Configured permissions should look similar to this.
Adding additional redirect URI
-
Make sure you are in the correct application.
-
Navigate to the Overview using the sidebar menu.
-
Click on Redirect URIs link.
-
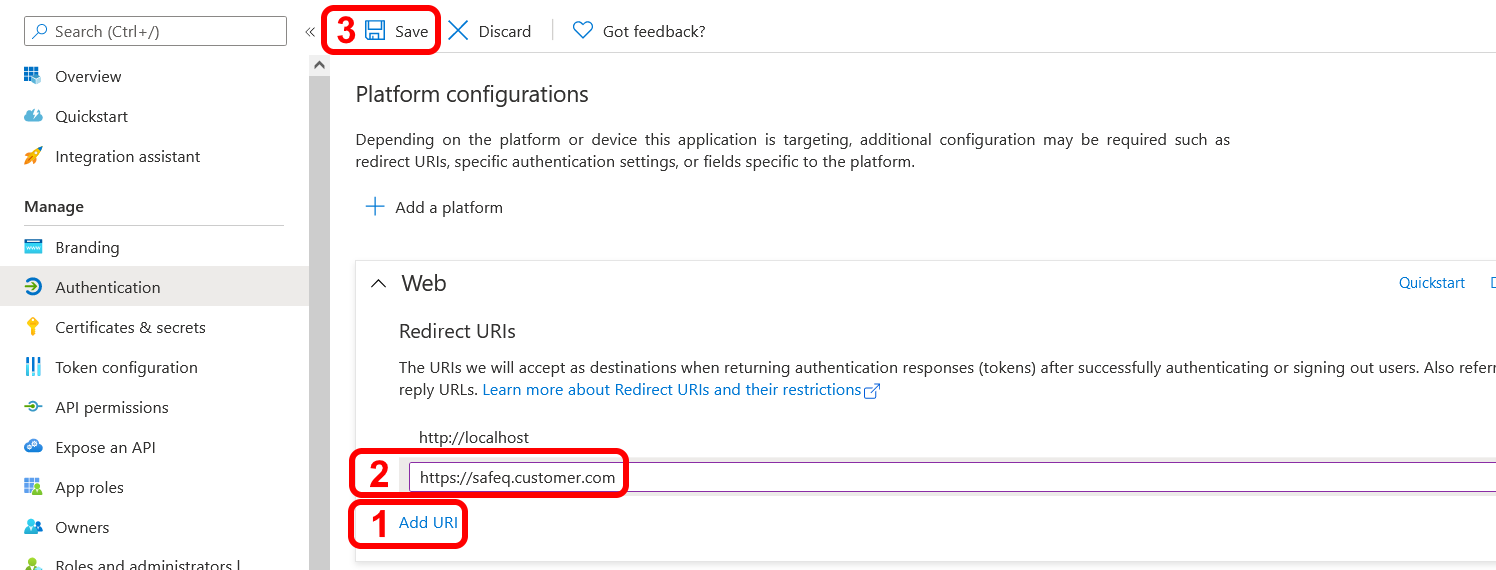
Click Add URI
-
Add a new URI.
-
Save the URI by Save button.
(Optional) Adding optional claims to share users first name and given name
-
Make sure you are in the correct application.
-
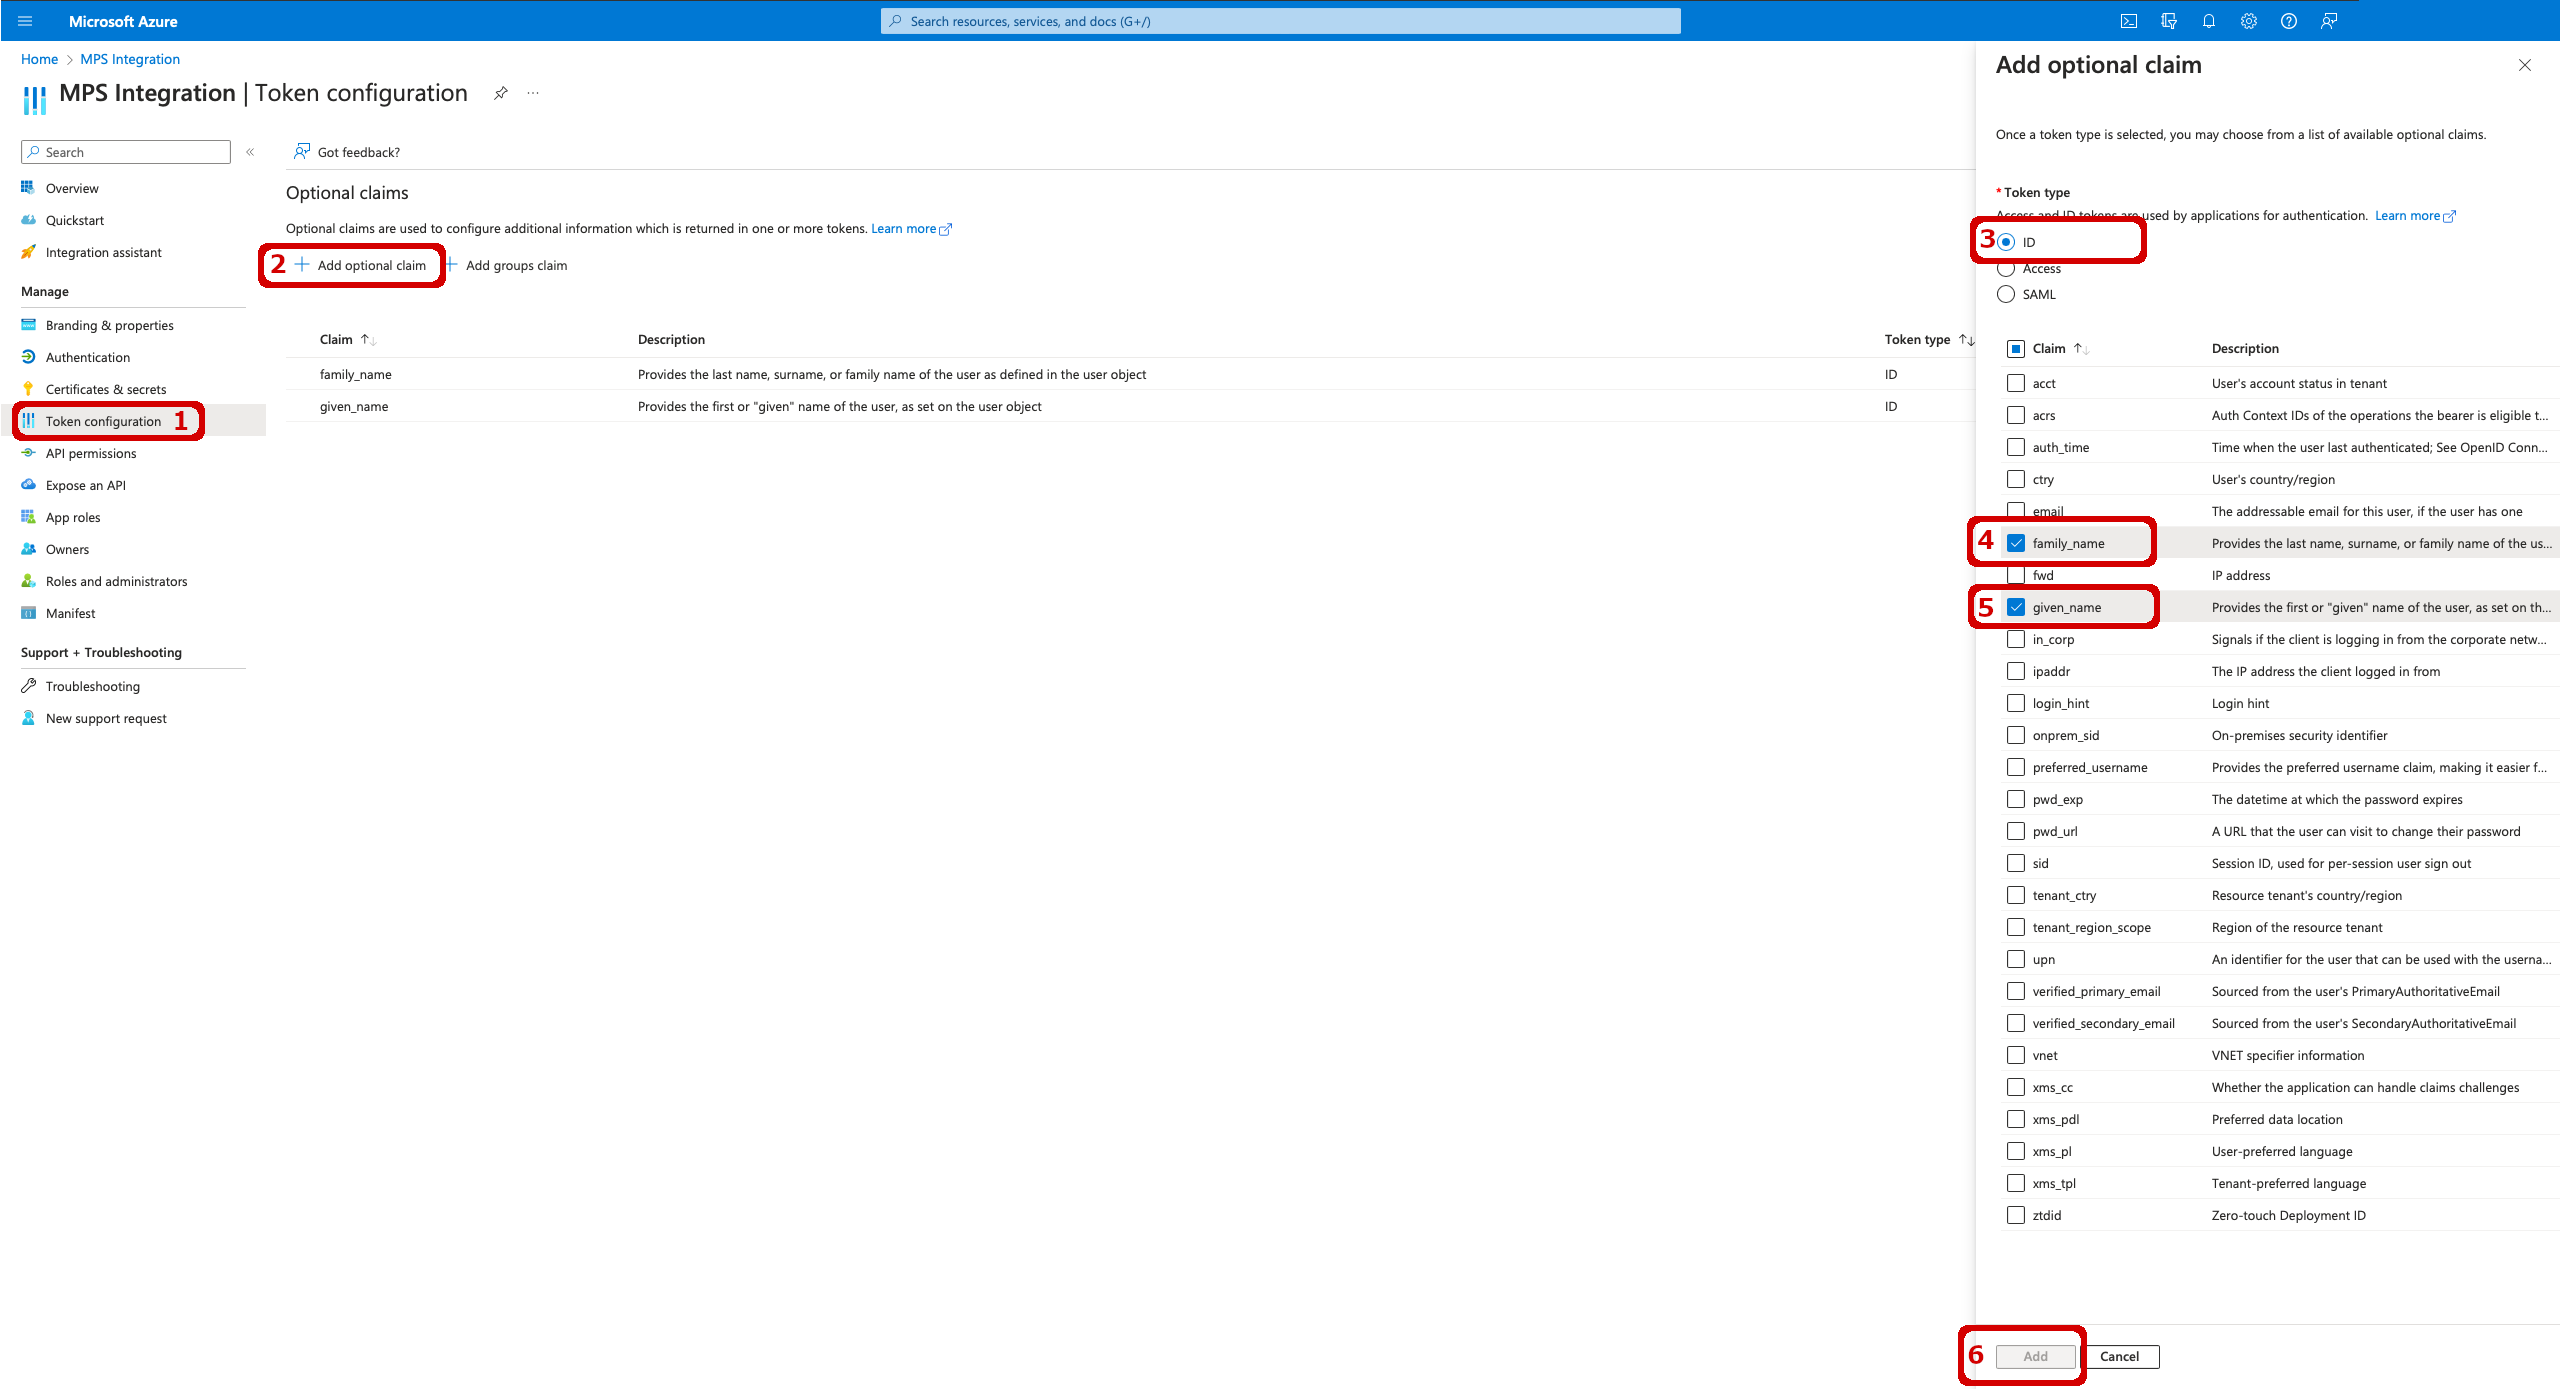
Navigate to Token configuration using the sidebar menu.
-
Click on Add optional claim, a sidebar menu will popup from the right side of the window.
-
Select Token type ID, then select family_name and given_name and click Add.
-
If necessary, configure additional API permissions to include the necessary scopes. By default, the Management interface requires these scopes: 'openid', 'profile', 'email', 'offline_access'. For this please refer to section Adding API permissions.