
This terminal was formerly called Ricoh Embedded Android (SOP). In the Embedded clients configuration in SAFEQ Cloud Web UI, it is called Ricoh Standard.
Pre-Embedded Deployment setup
This guide describes the prerequisites and implementation steps to successfully deploy an Android (SOP) embedded client on the Ricoh IMC device. The guide also describes how to configure the MFD to change the Login path of the user to the `PullPrint` app to lock the device from unauthorized use.
You must change the Y Soft local admin account to use a different username when compared to the Machine username / Embedded settings in the SAFEQ Cloud Portal, or the local machine admin will not be able to log in at the MFD.
Go to Users, select the Local Provider, and change the admin username to something else.
Before you begin, make sure your secondary gateway is configured according to Secondary Gateway mapping.
Enable Custom Authentication
Custom Authentication must be enabled on the device as a prerequisite for the SAFEQ Cloud `Pull Print` App to function.
As of version 3.14, these settings will be applied during deployment of the Ricoh SOP Embedded (Pull Print) client. Ensure the Secondary Gateway server is updated see Remote Update of Secondary Gateways.
If preferred, you can change these settings manually from the device service menu, please contact your local Ricoh service contact to access the device service menu.
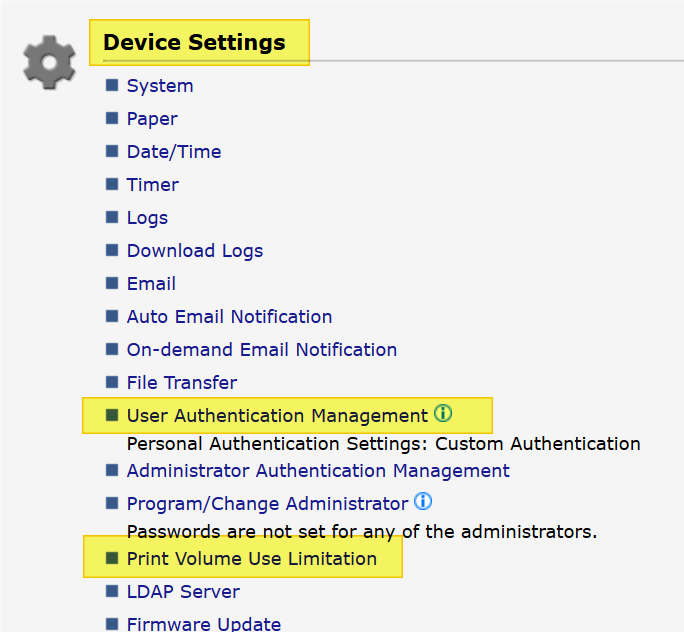
User Authentication Management, UAM
The SAFEQ Cloud Pull Print APP requires the device User Authentication Management (UAM) to be enabled.
Step one on the device Web Image Monitor (access WIM via the device IP from your web browser), log in as admin and navigate to >Configuration >Device Settings User Authentication Management. See below.
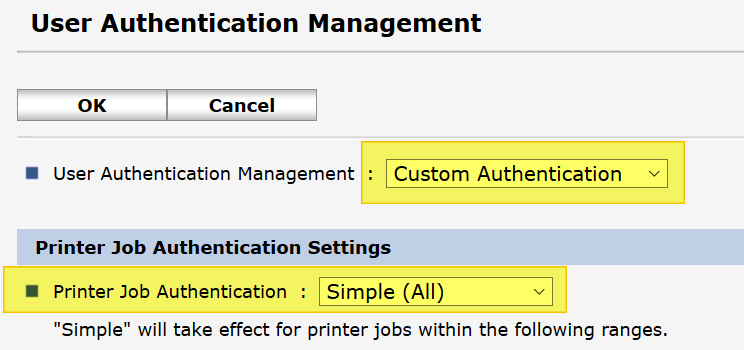
Select Custom Authentication in the dropdown. If not selected, it will not be possible to print and the job will spool and disappear from the Pull Print app without being printed. If the above setting in not visible for selection, please enable below.
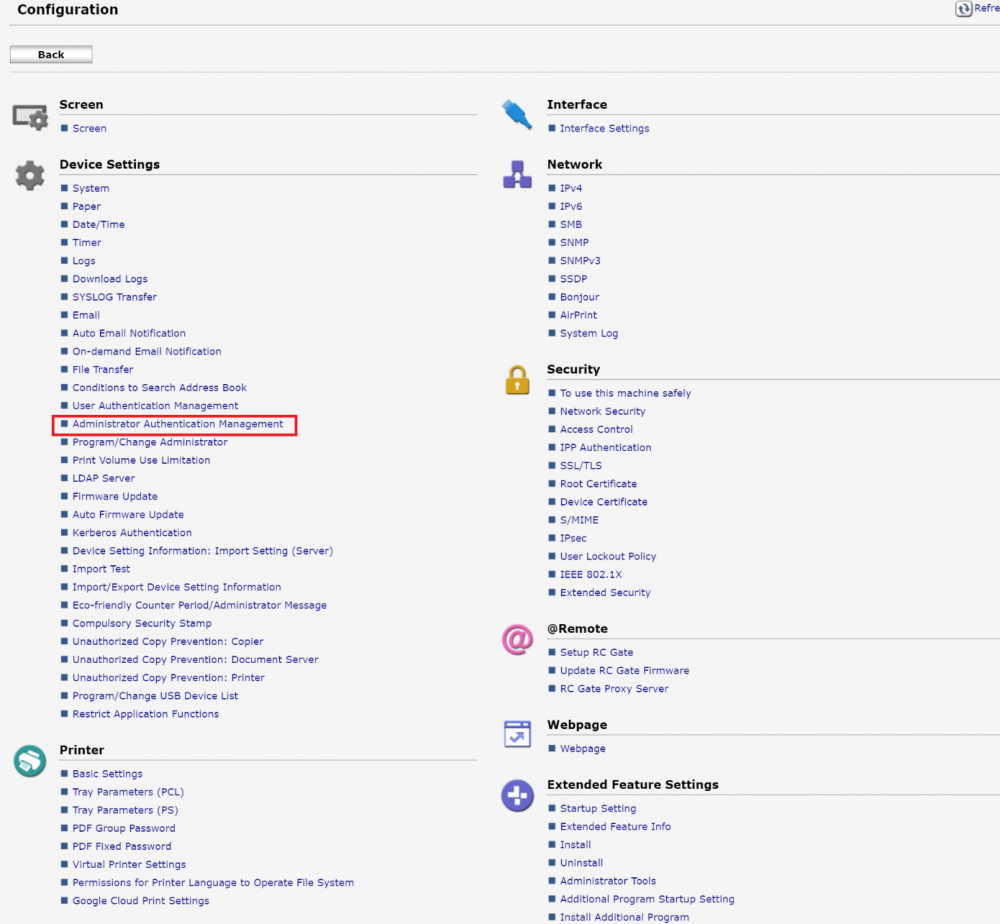
Device > Administrator > Authentication Management
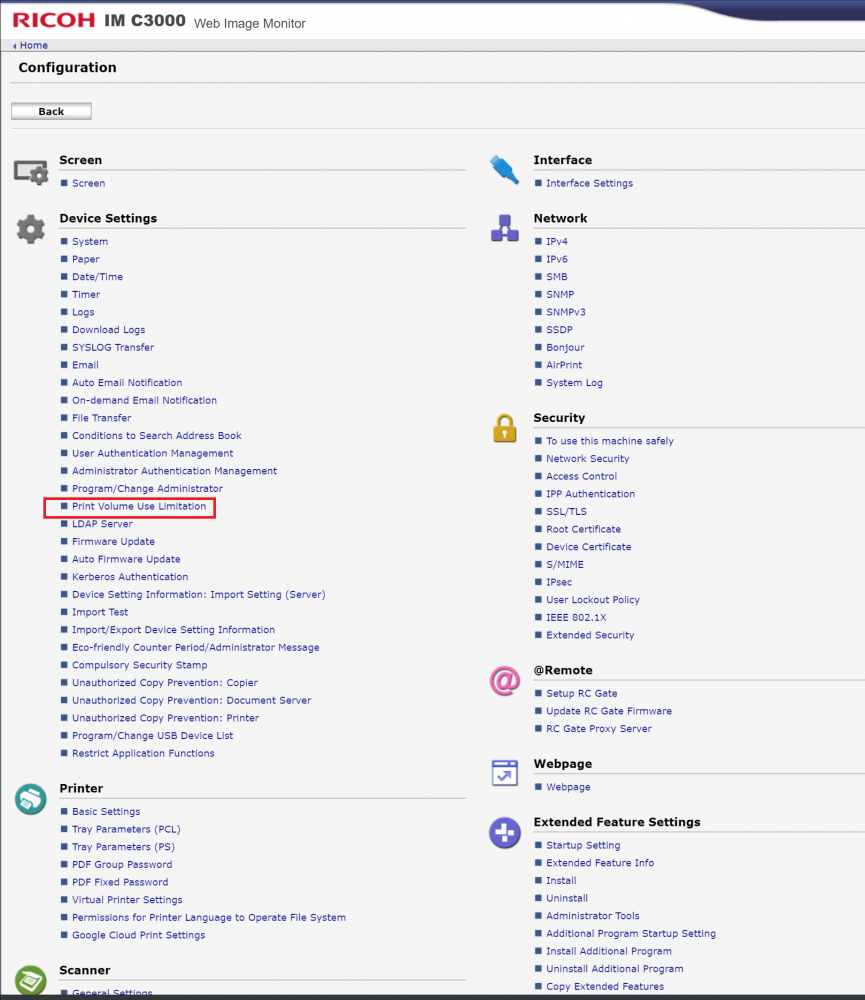
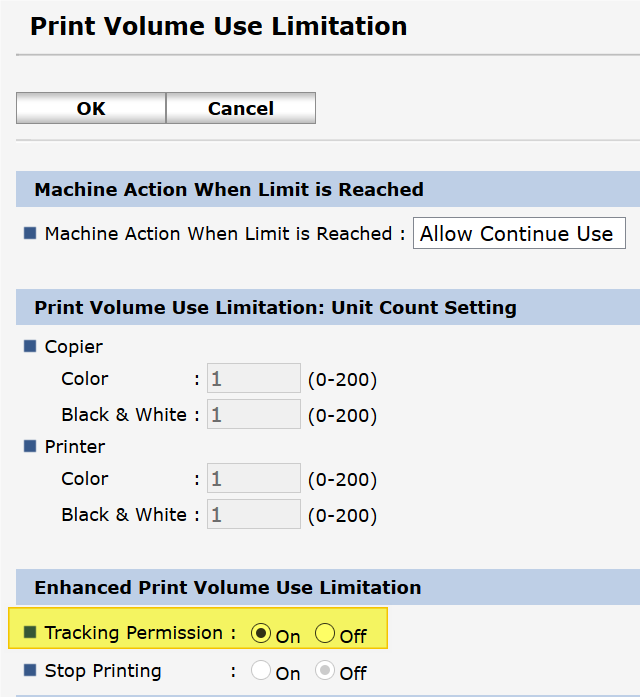
Tracking Permission needs to be set for Copy/scan Accounting
Configuration > Device Settings > Print Volume Use Limitation
To maximize the device’s security and prevent users logging in via SAFEQ Cloud Embedded App accessing Administrator’s functions, login to the device’s web page and go to Device Management > Configuration > Administrator Authentication Management
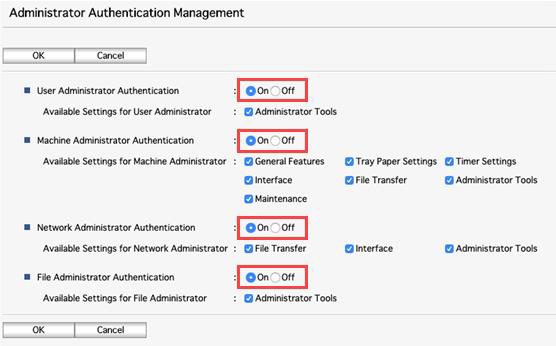
Click OK to save the settings.
Your Ricoh device is now configured and ready for use with the SAFEQ Cloud solution.
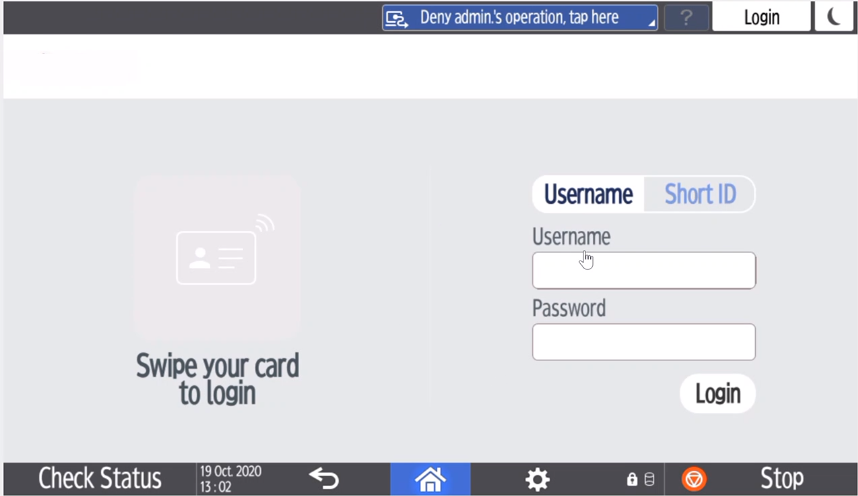
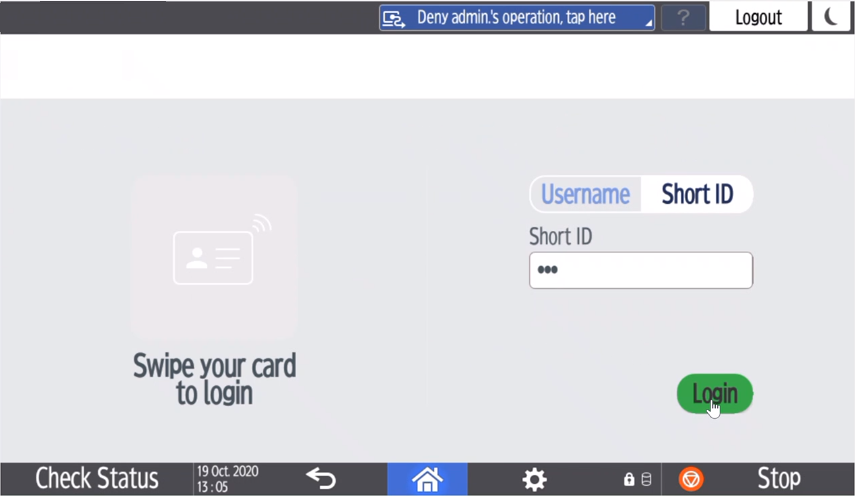
Android, login
You can login to the device using the username/password or Short ID:
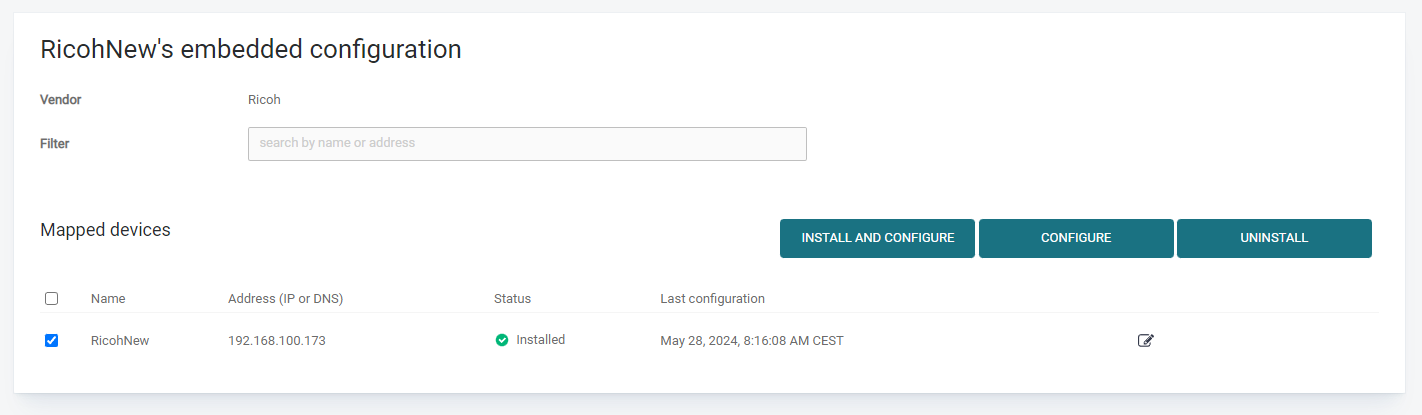
Installing the Embedded-on Ricoh Machine (SAFEQ Cloud Console)
Please be aware that all changes made during the application install, including the ones mentioned in the “Pre-Embedded Deployment setup” section, will not be reverted to their previous state / values after uninstallation. Following uninstall of the Ricoh SOP application, a factory reset must be done to revert to default settings.
Login into your SAFEQ Cloud Console and Setup the Printer and Embedded settings. Once you follow the below 2 steps Status on your Mapped Device must indicate “Installed”.
In order to have a successful deployment of the embedded it is required to have a non-empty password for the printer.
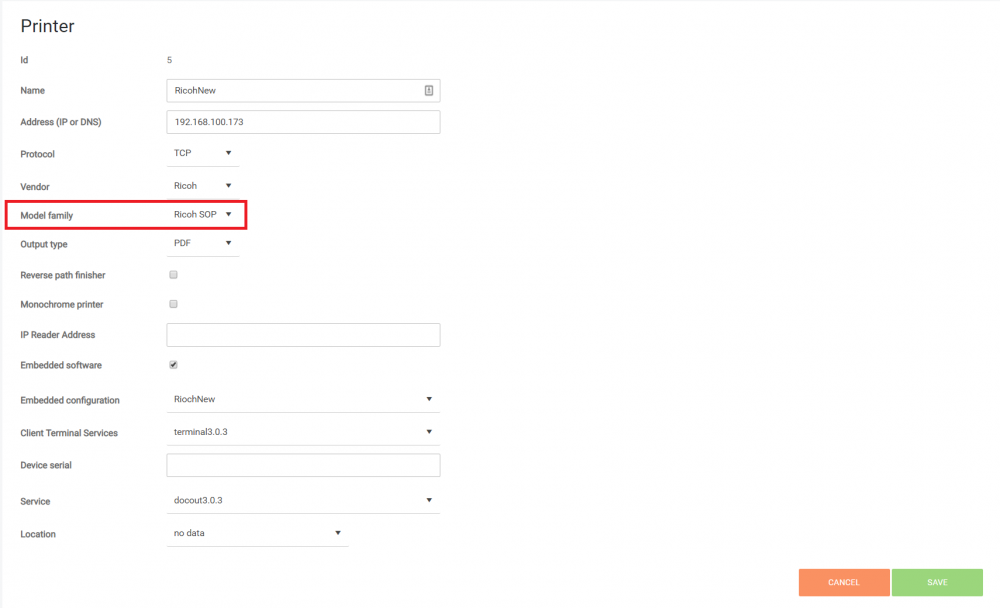

(Note – Please don’t use username “admin” as it might conflict with Native username “admin” set in the printer console)
Changing the login path to Pull
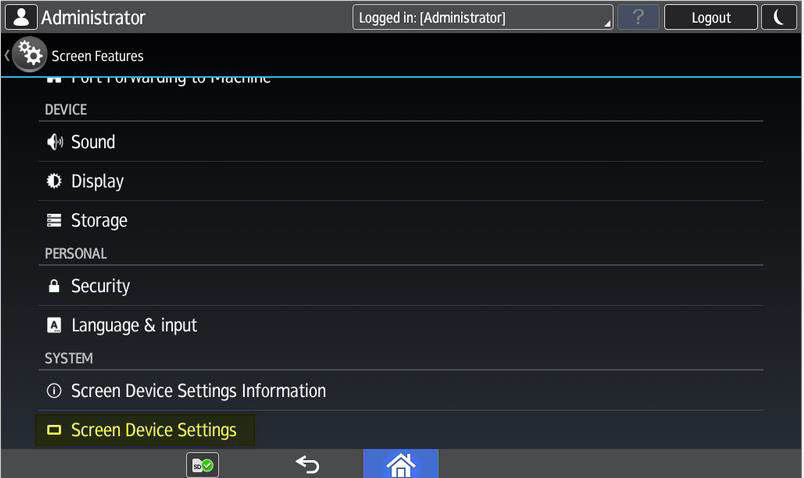
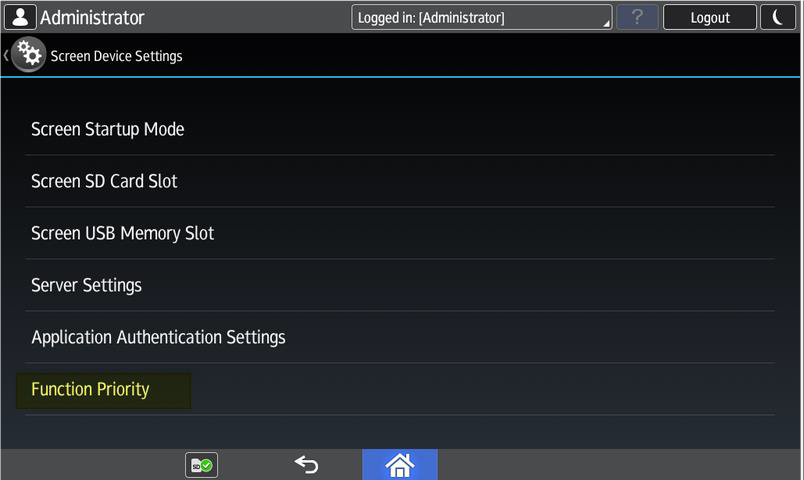
Login at the device and select User Tools > Screen Features
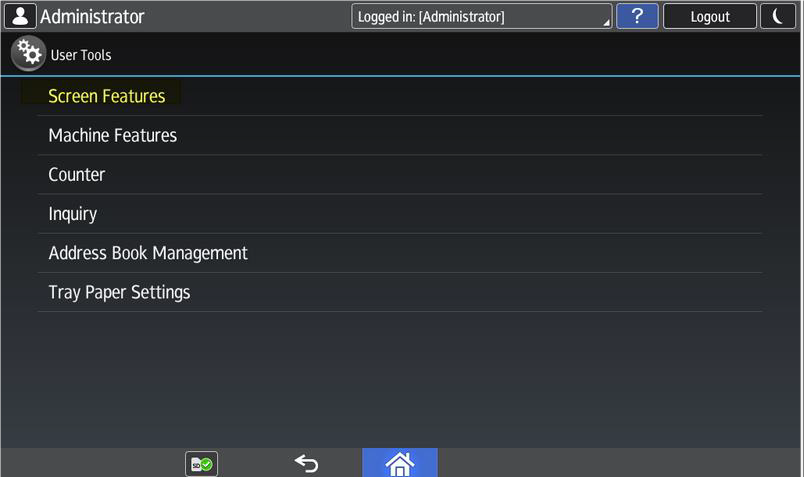
Select Screen Device Settings
Select Function Priority
Select the function you would like to be presented after login
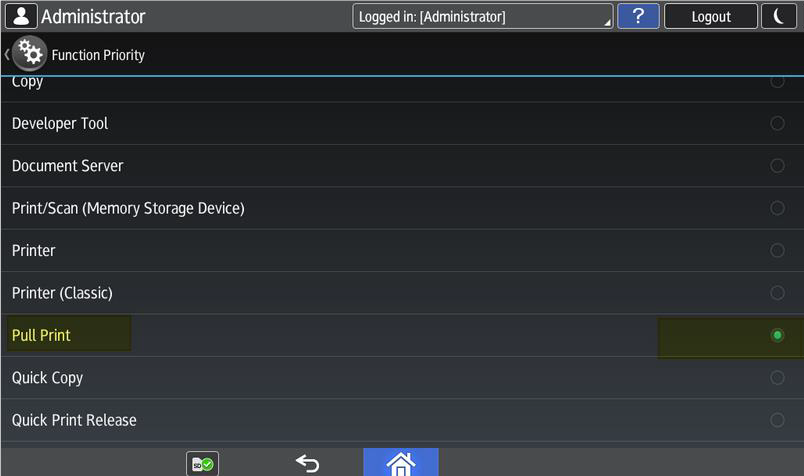
Next time the user Logs in he will be presented with the direct-pull print queue .
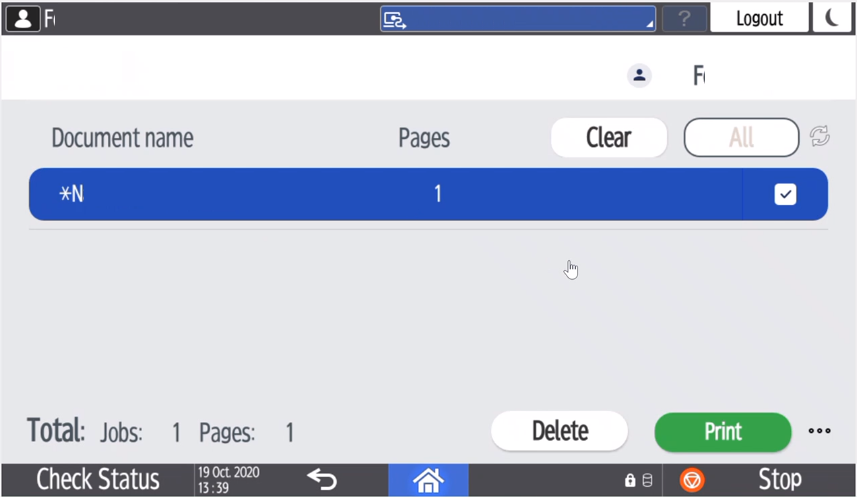
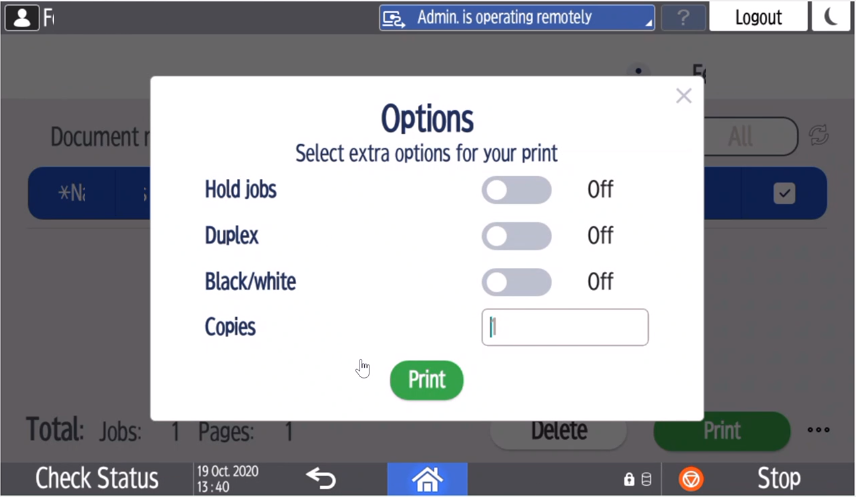
Print options can be changed by pressing ellipsis in the right bottom corner
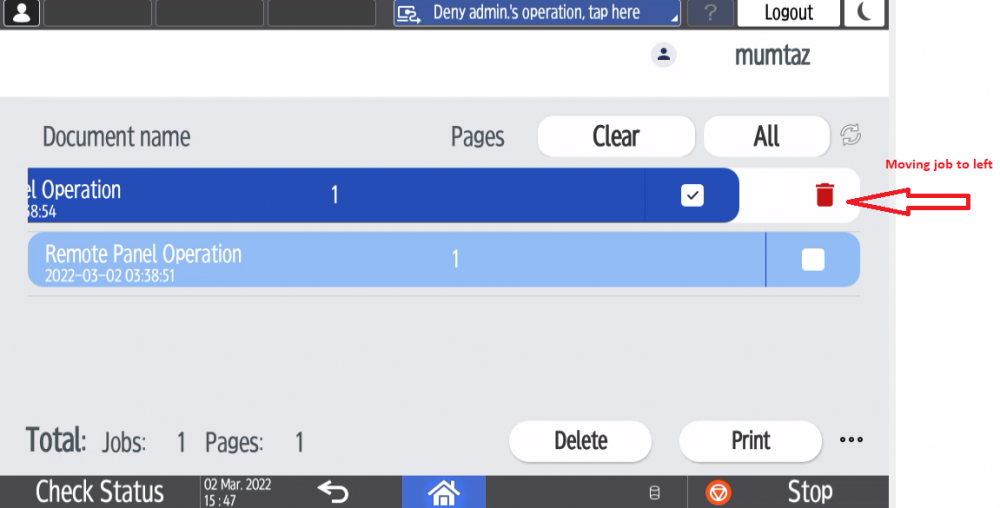
To delete or print a document, the corresponding buttons can be pressed. To delete the documents in the joblist, they can be flung left:
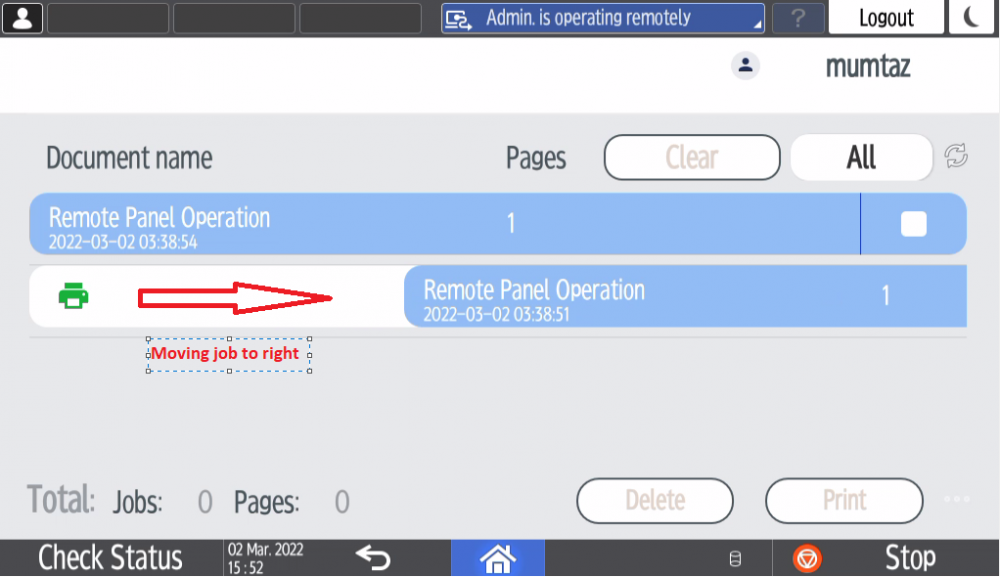
To print, they can be flung right:
To Lock The SOP Client
If you are using windows print servers with the Ricoh driver and bi-directional feedback on, then printing will stop after the service setting has been applied due to the MFD wanting a user value passed in the print stream
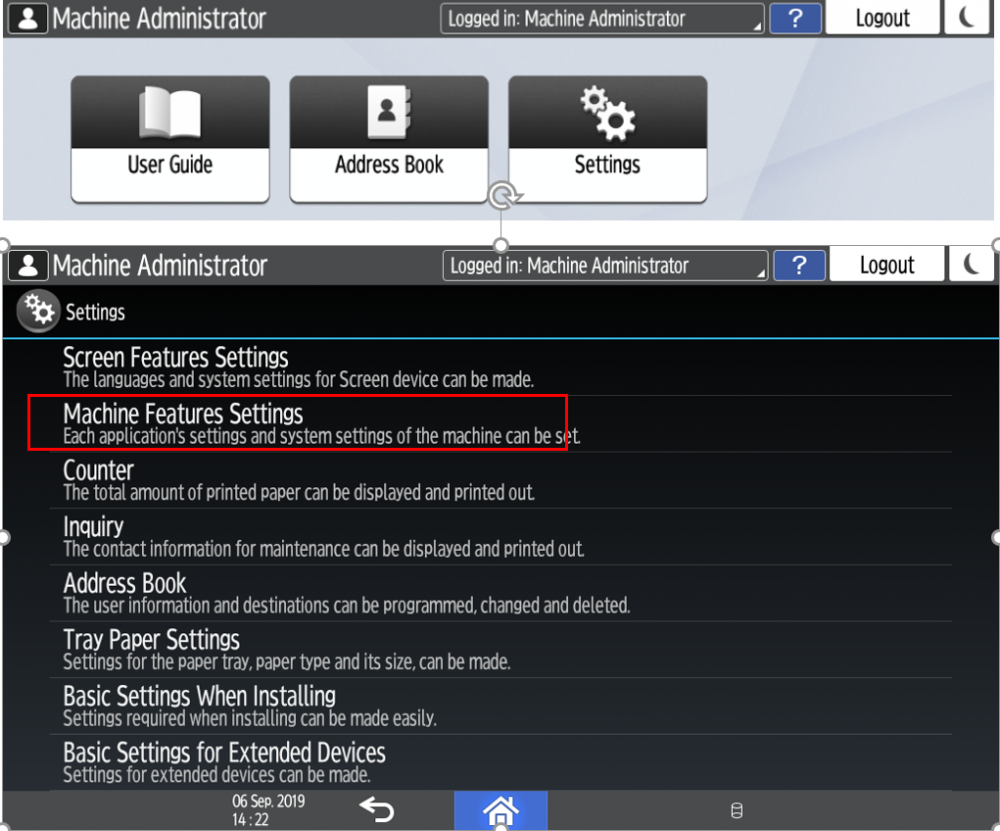
Login as machine administrator. Go to Settings > Machine Features Settings
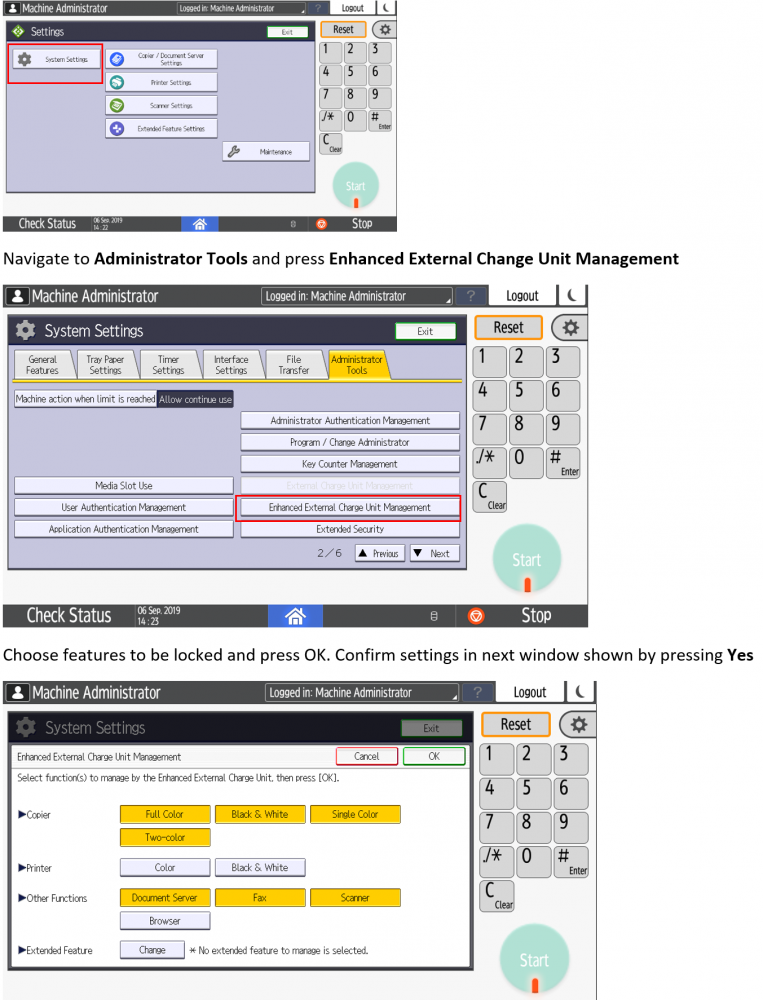
Note – Make sure though that you do not lock the print functions because the server will not be allowed to print. Also, Java should not be locked since that will prevent the users from unlocking the device
Card Reader Functionality
From the 3.14 version of SAFEQ Cloud the Ricoh Embedded has seen some changes to the cardreader. These changes both affect current installations and new installation.
The cardreader now has to be recognized as a Proximity Card Reader.
How to do this is explained here:
For existing installation these changes will take place when an install and configure is done from the SAFEQ Cloud Web UI.
For a more extensive manual please see this Knowledge-base Article
On SOP G2 devices
-
When the Y Soft Ricoh SOP application is installed and configured log ins as device admin.
-
Select ‘User Tools’
-
Enter ’Screen Device Settings Information’
-
Select ’External Interface Software Settings’
-
Select ’IC card Software Settings’ and select ’Proximity Card Reader’ Go back and select ’Proximity Card Reader Settings’
-
Reboot the Ricoh device
On SOP G2.5 devices
-
When the Y Soft Ricoh SOP application is installed and configured log ins as device admin.
-
Select ‘User Tools’
-
Select ‘System Settings’
-
Select ‘Network Interface’ on Left and then Scroll Down to ‘External Interface Software Settings’
-
Select ‘Proximity card reader’
-
Plug Card Reader In and Select Ok
-
Reboot the Ricoh device