
Target audience: Vendors.
This guide provides you with information on how to create a SAFEQ Cloud tenant for your customer.
Creating a new tenant (customer)
Relevant Products
Creating a new tenant (customer) is available in BREEZE PRINT BREEZE MFD PRO PRINT PRO MFD
-
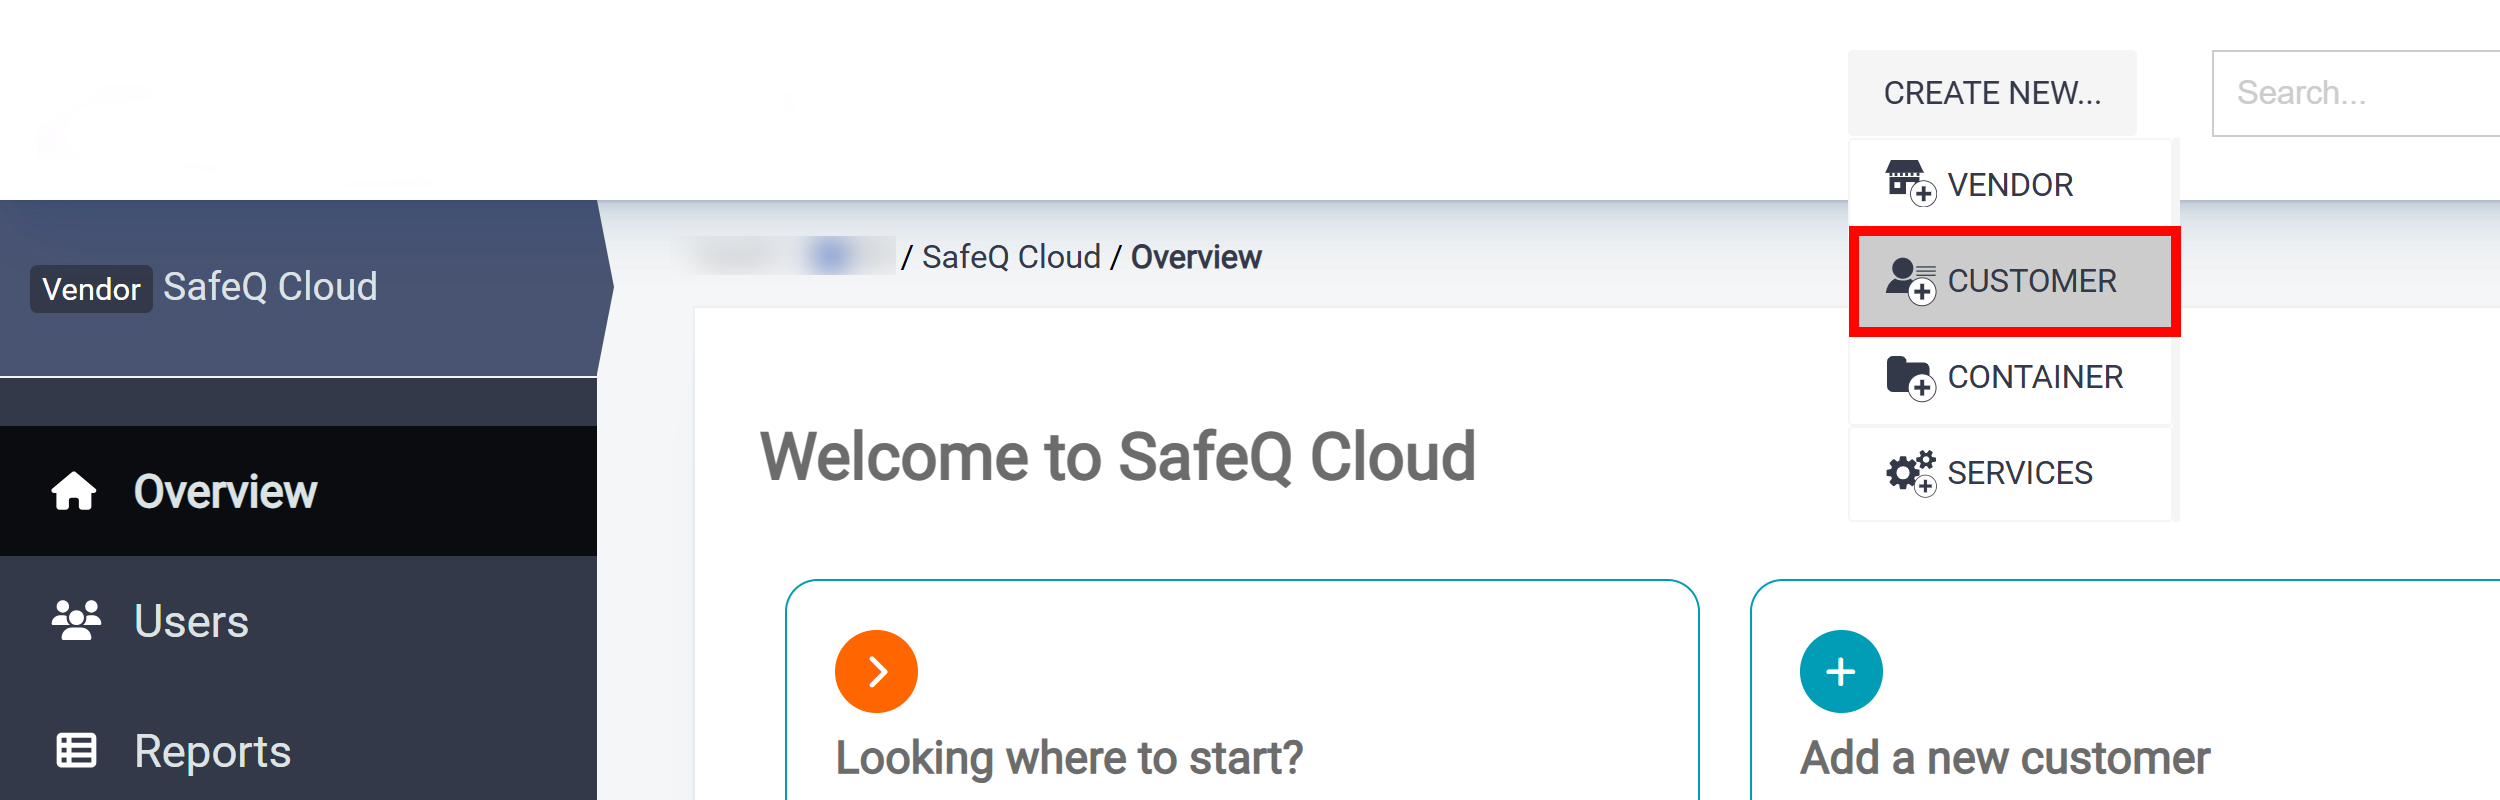
Log in to SAFEQ Cloud web UI using your vendor account.
-
Click Create new and select Customer.
-
Select the account type to be created:

-
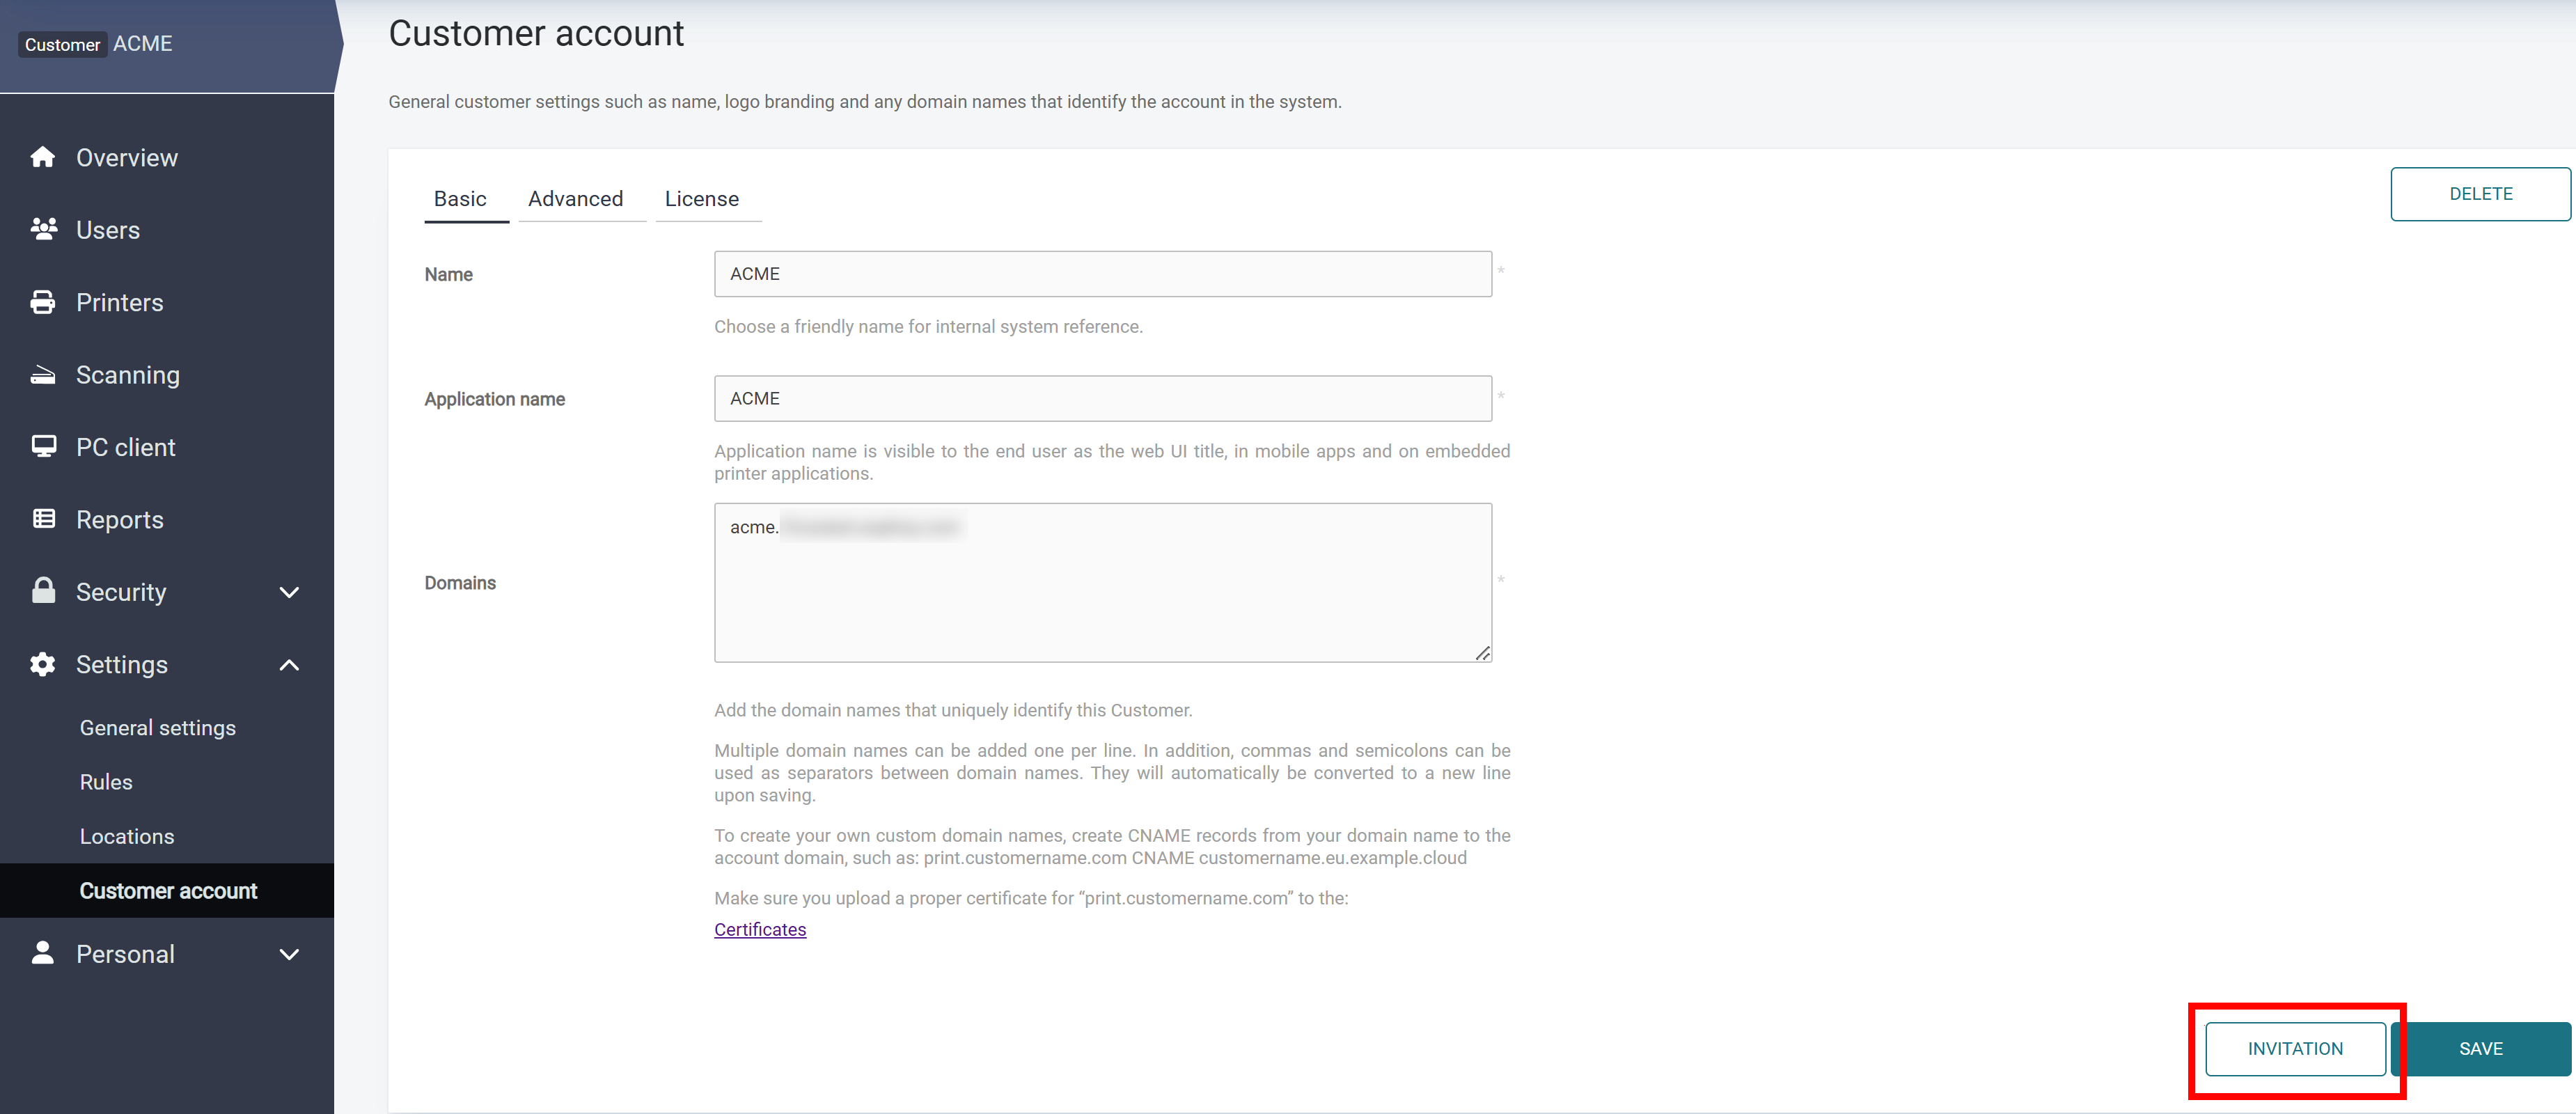
Fill in the following information:
-
Name – Set a name for the new customer.
-
Domains – The format is <customer>.<region>.ysoft.cloud
-
customer – Replace with the subdomain of the customer account in SAFEQ Cloud.
-
region – Data region. This must match with the region where your vendor account was created.
-
-
Application name – This name will be displayed when you hover over the tab with SAFEQ Cloud Web UI in your browser.
-
Default language – Select a language from the menu.
-
Default paper size – Select paper size from the menu.
-
OEM Logo – Upload a file with the customer's logo.
-
-
Click Save.
-
If SAFEQ Cloud is hosted by you as the vendor or by the customer as on-premise solution, enter the license key that you have obtained for the customer in the License section of SAFEQ Cloud Web UI.
-
Immediately after creating a new customer, you will see a new Invitation button on the Customer information page. Click the button.
-
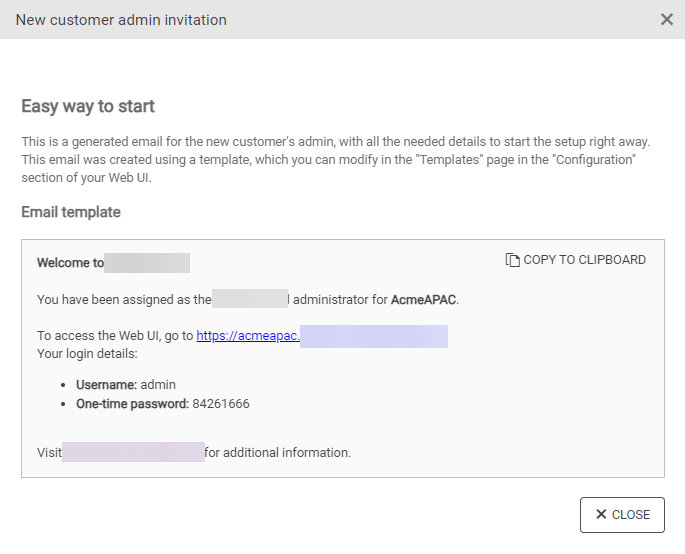
A window displaying a generated invitation to the customer admin will appear.
-
Copy the message to your clipboard and send it from your email client.
If you have agreed with the customer to do the configuration for them, log out from your vendor account, log in with the Customer admin account, and continue to Quick start for admins. If your customer will be using OMNI Bridge devices, see Setting up OMNI Bridge.
Editing the invitation message
-
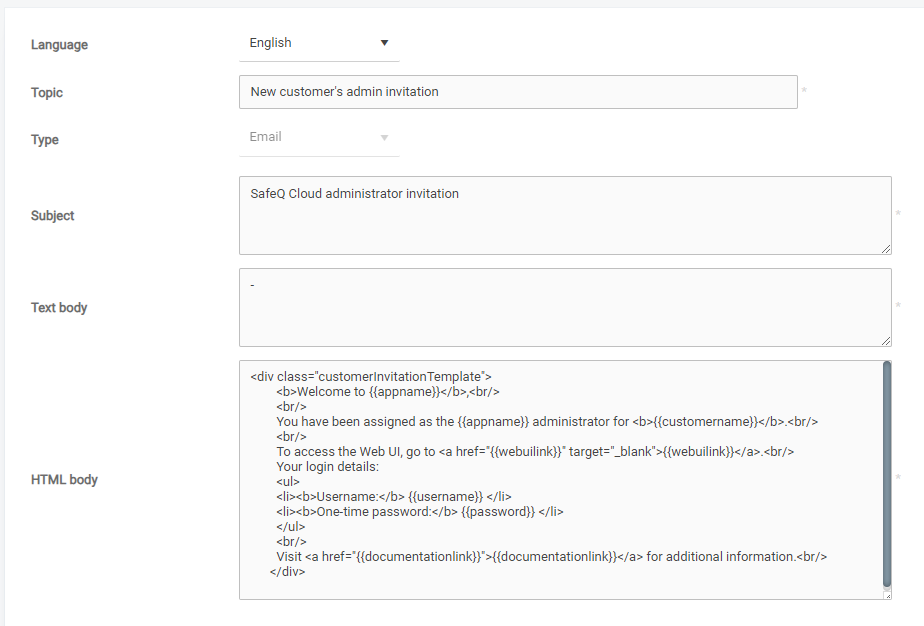
If you wish to edit the invitation message to the customer, go to Settings → General settings → Templates in your SAFEQ Cloud vendor account.

-
Click the edit icon next to New customer's admin invitation.
-
A new dialog window will open. Edit the Topic, the Subject, and the Body according to your needs. Note that the Body can only be edited in HTML to preserve the formatting.
-
You can use the following variables in the template:
Variable
Value
{{appname}}Name of the application based on the branding
{{customername}}Name of the customer
{{documentationlink}}Link to the documentation based on the branding
{{password}}One-time password generated for the admin user
{{username}}Name of the admin user
{{webuilink}}Link to the Web UI of the customer
The template name (Topic) is critical for the system to locate and display the correct template. If the name changes, the system may not find the template, and the "Invitation" button will not be shown. Ensure that the template name remains unchanged to avoid any issues.