
Relevant Products
Queues are available in breeze MFD pro print pro mfp
Embedded terminals are available in breeze MFD pro mfp
Mobile printing is available in breeze MFD pro print pro mfp
Releasing a print job at the MFD is available in breeze MFD pro mfp
Gateways are available in breeze MFD pro print pro mfp
The following is an outline of the basic steps to configure your SAFEQ Cloud. Your setup may differ according to what kind of queues, authentication, terminals, etc, you are going to use.
For more advanced concepts and settings, refer to the Admin guide, Reference documents, and Legacy documentation.
Prerequisites
Your tenant in SAFEQ Cloud is created, and you have received your username and password to log in to the SAFEQ Cloud Web UI.
Configuring authentication
SAFEQ Cloud supports the following types of authentication:
-
Local user authentication – you can create user accounts within SAFEQ Cloud. Users then log in to SAFEQ Cloud with these accounts.
-
Authentication to external directory – users log in with their existing user accounts from identity providers such as Microsoft Entra, Google, etc. This can be done via:
-
OIDC
-
Service account (Service access)
-
Client-side authentication
-
For details, see Authentication providers.
Example: Setting up Microsoft Entra authentication using the built-in OIDC
-
In SAFEQ Cloud Web UI, go to Users > Authentication.
-
Click Add.
-
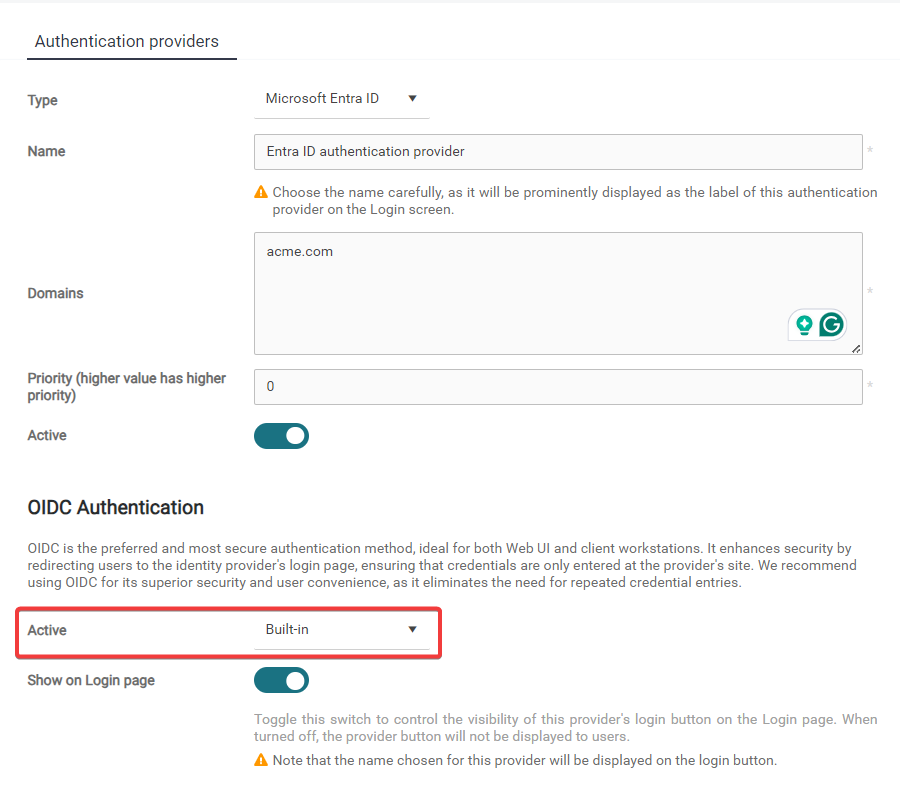
Fill in:
-
Name – Enter an internal name used for identifying the particular authentication provider configuration.
-
Type – Select Microsoft Entra ID.
-
Domains – Enter your organization's domain or domains. It should match “@domain” part of the users who will use it to authenticate to SAFEQ Cloud. For example, to allow user john.doe@acme.com to log in via this Authentication provider, enter the acme.com domain here.
-
Priority – A number that determines the order in which authentication providers will be called until one succeeds.
-
Active – If enabled, this authentication provider will be used for authentication.
-
In the OIDC Authentication section, enable the built-in OIDC by selecting Built-in from the dropdown list.
-
-
Click Save.
-
By default, every user logged in via this provider will have the Authenticated Users group assigned in Users > Access control section of SAFEQ Cloud. For more details, see Access Control.
For more information on Entra ID authentication, see Microsoft Entra authentication.
Adding a print queue
SAFEQ Cloud offers two types of print queues – Direct queues and Pull queues. A Direct queue sends the print job directly to the output printer. A Pull queue sends the job to the Storage Service in SAFEQ Cloud. When the user wishes to print, goes to an MFD with a SAFEQ Cloud terminal installed, and logs in, the MFD pulls the print job(s) from SAFEQ Cloud.
If you wish to use a direct print queue, the simplest way to add it is when registering your MFD. See the next section of this manual – Adding an MFD.
If you wish to use a Pull queue, perform the following steps:
-
In SAFEQ Cloud Web UI, go to Printers > Print queues.
-
Click Add.
-
In Name, enter the name of your queue.
-
In Queue type, select Pull print queue.
-
Click Save.
For more information, see Print queues.
Adding an MFD
If you wish to use Direct print queues, the only step you need to do is to register your MFDs. See Printers.
If you wish to use Pull print queues, your MFDs must have SAFEQ Cloud terminals installed. The installation method differs according to the MFD brand and according to the type of the terminal:
-
Pure cloud terminals (for MFDs that can connect to the cloud directly)
-
Terminals that require a SAFEQ Cloud secondary gateway in your network
See Embedded Terminals.
In general, the process always consists of:
-
Doing the MFD-specific setup in the MFD UI. Either directly at the MFD, or in the MFD's web interface. This is described in the guide for each brand in the Embedded Terminals section.
-
Creating the Embedded configuration for the particular brand of MFD. See Embedded Terminals' configuration.
-
Registering the MFD in SAFEQ Cloud Web UI. See Printers.
-
Installing the terminal on the MFD. Depending on the type of the terminal and the MFD brand, you can do this by one (or more) of the following options:
-
Deploying the Embedded configuration to the MFD from SAFEQ Cloud Web UI. See Embedded Terminals' configuration, section Deploying the configuration.
-
Installing the terminal via a command-line tool from your PC. See Terminal Deployment Tool.
-
Installing the terminal from the vendor's marketplace or app store. E.g. Konica Minolta or Ricoh.
-
Installing SAFEQ Cloud Client
SAFEQ Cloud Client is a desktop application that can be installed on end-user workstations to create print queues and install the SAFEQ Cloud universal driver automatically. For its features, see SAFEQ Cloud Client.
The Client can operate in two modes: Local storage mode and Gateway mode. For details, see SAFEQ Cloud Client overview.
Both modes can be used in the Pure Cloud printing scenario, but we recommend using the Local mode. In the Pure Cloud printing scenario, the Gateway mode has the following limitations:
-
Direct printing is not possible.
-
Releasing the print job from the Mobile application is not possible.
The following steps describe Quick installation (preconfigured installation without advanced options). For more details about the difference between Quick installation and Advanced installation, see Installing SAFEQ Cloud Client on Windows and Installing SAFEQ Cloud Client on macOS.
-
To download the latest version, log in to SAFEQ Cloud Web UI and go to Personal > My documents. Click the button corresponding to your operating system and save the Client installation file.
-
Run the saved Client installer file.
-
Follow the installation wizard. On the Installation Type screen, select Quick installation (you will only see this screen in the Windows installer. The MacOS installer does the Quick installation by default).
-
When the installation finishes, you will see a login screen in your web browser.
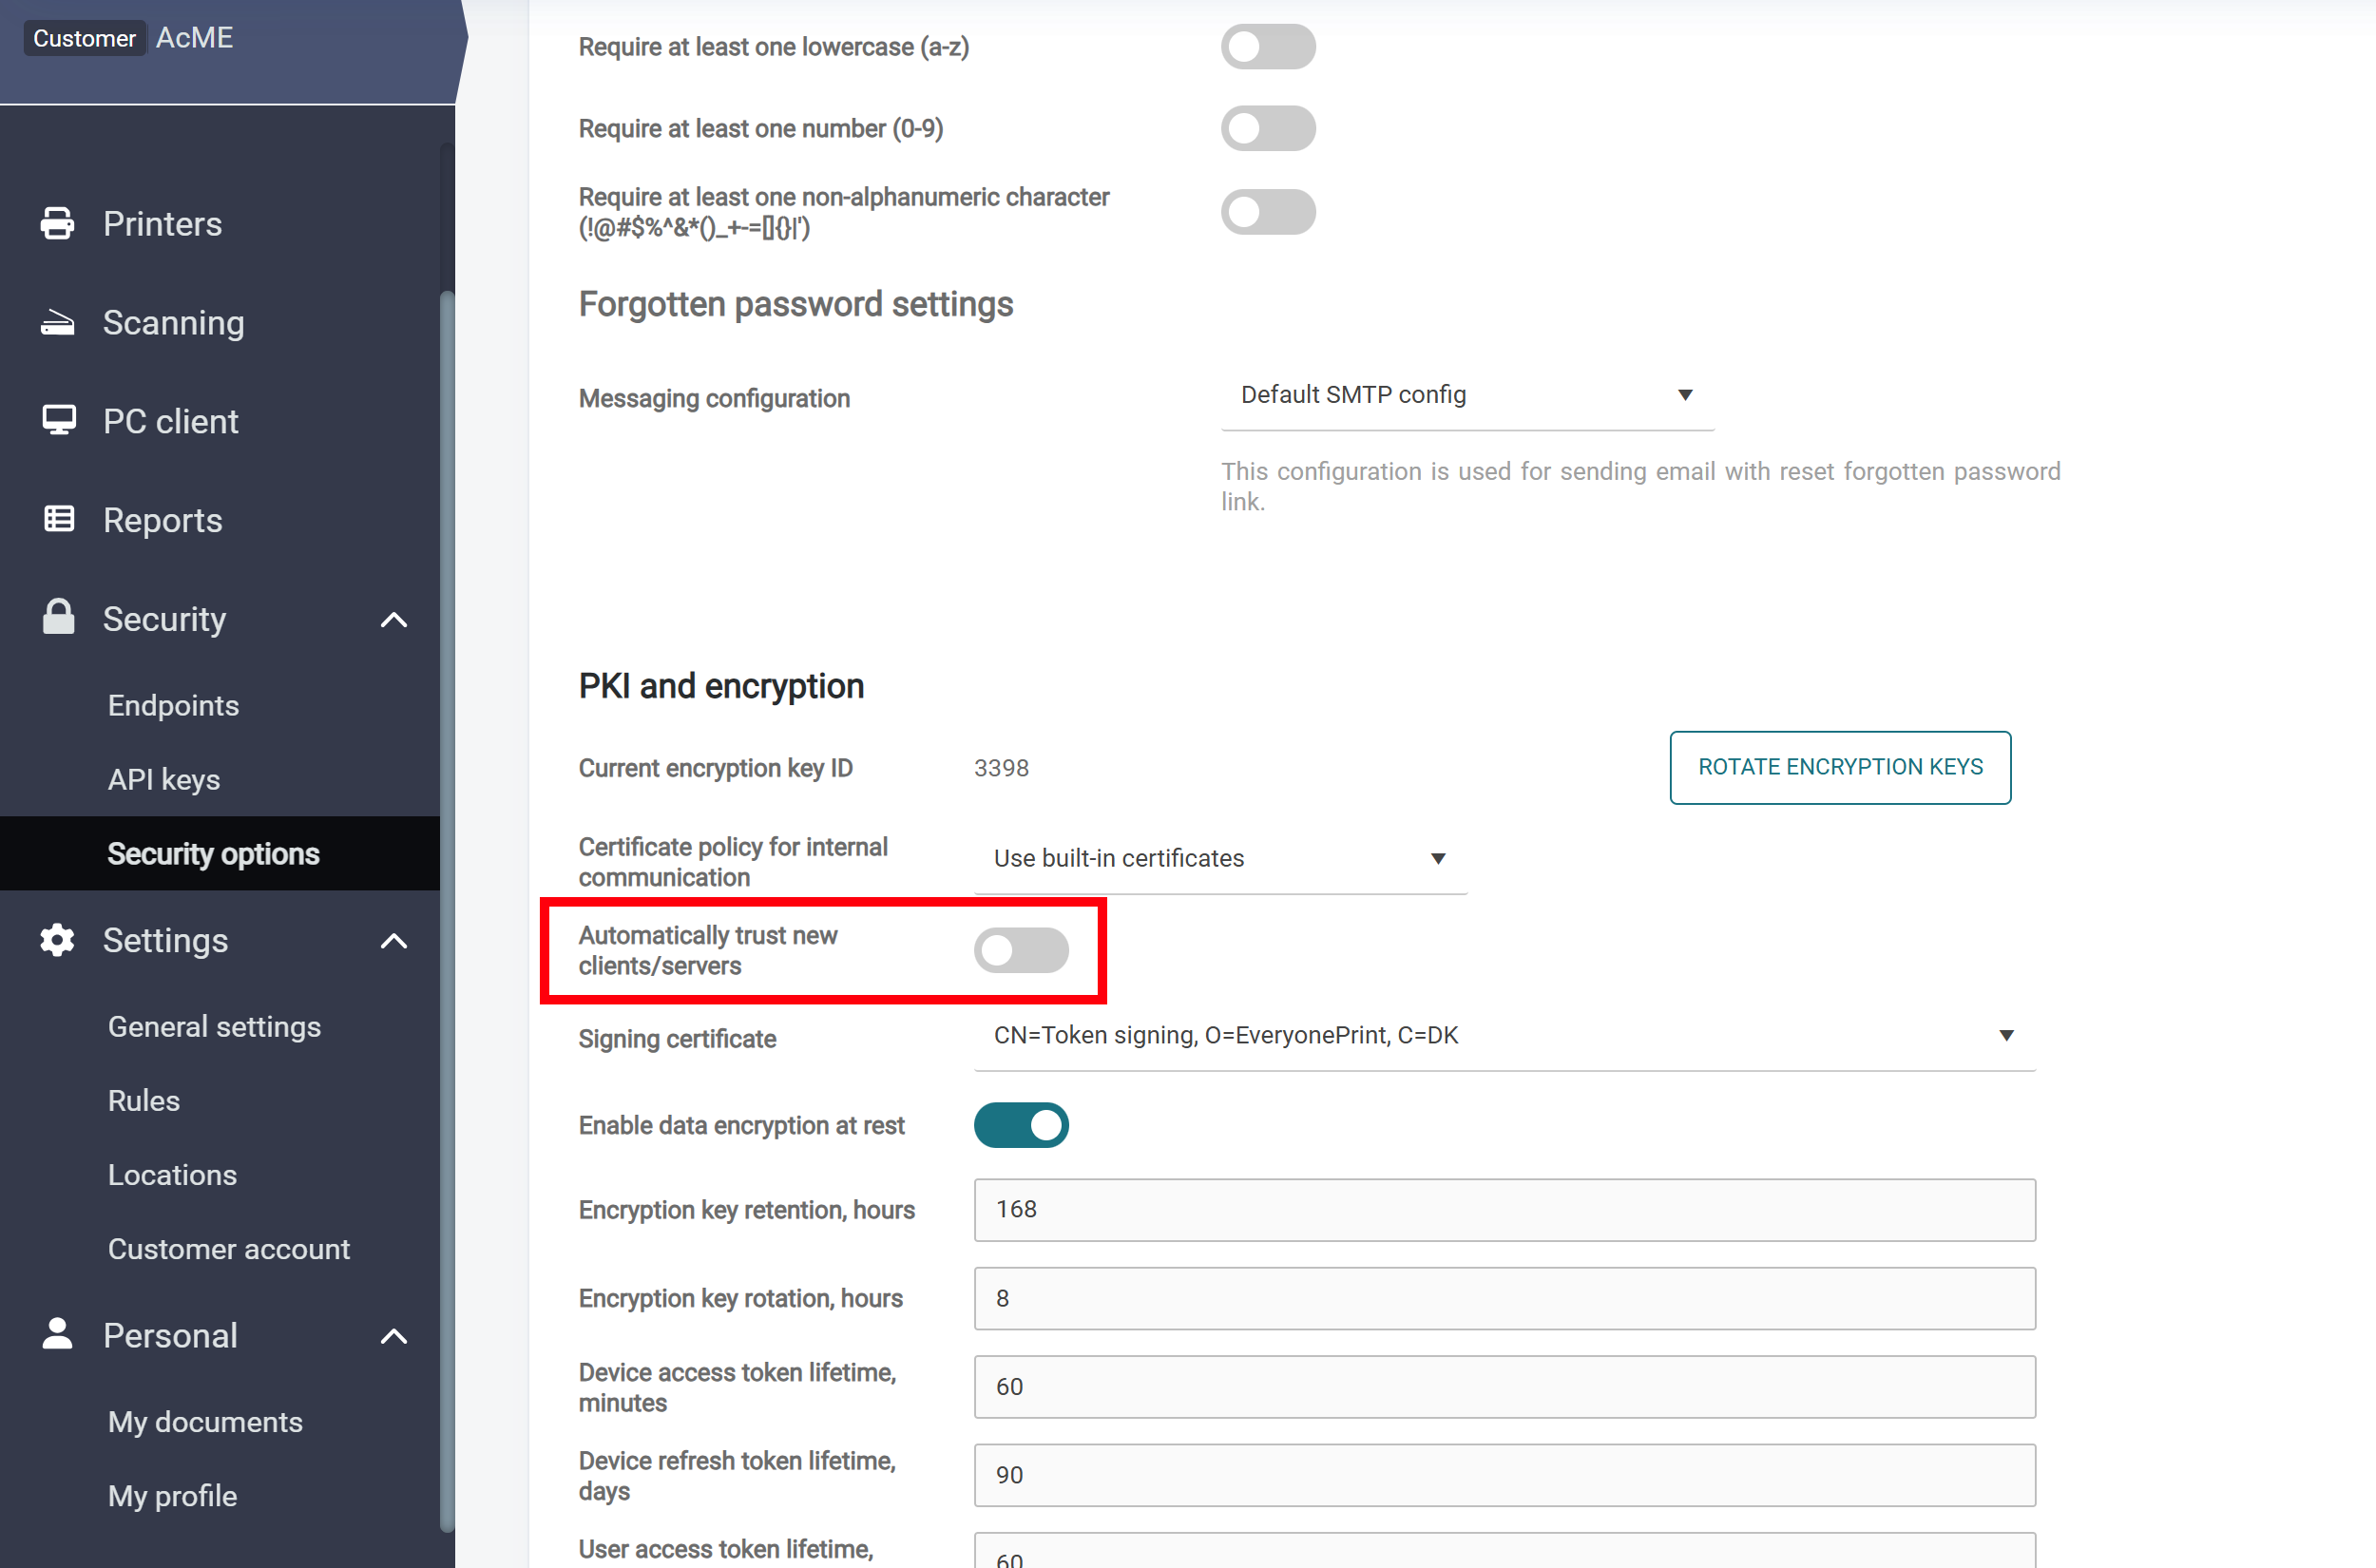
Note that if the option to Automatically trust new clients/servers is disabled in the PKI and encryption section under Security > Security options menu of SAFEQ Cloud Web UI, you will need to authorize each end user's SAFEQ Cloud Client in Security > Endpoints.
-
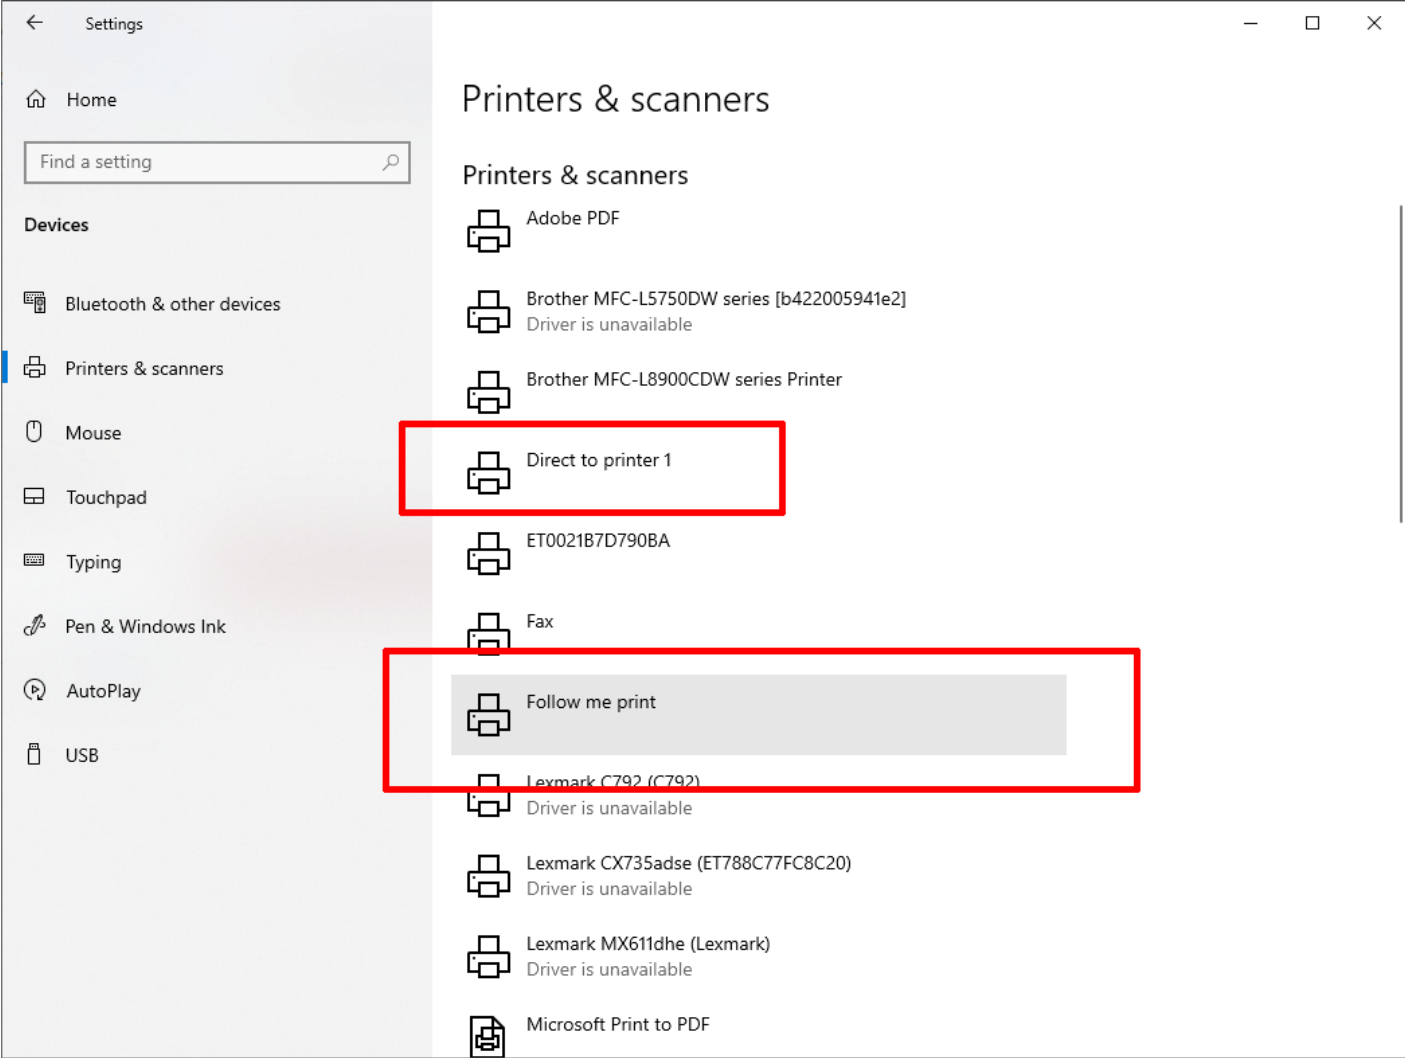
After you log in, the print queues you created in SAFEQ Cloud Web UI will be synchronized and visible in your Printers and scanners.
For silent installation and the available command line parameters, see Installing SAFEQ Cloud Client on Windows and Installing SAFEQ Cloud Client on macOS.
For deployment via Microsoft Intune, see Deploy SAFEQ Cloud Client using Microsoft Intune.
Mobile printing
-
Log in to SAFEQ Cloud Web UI.
-
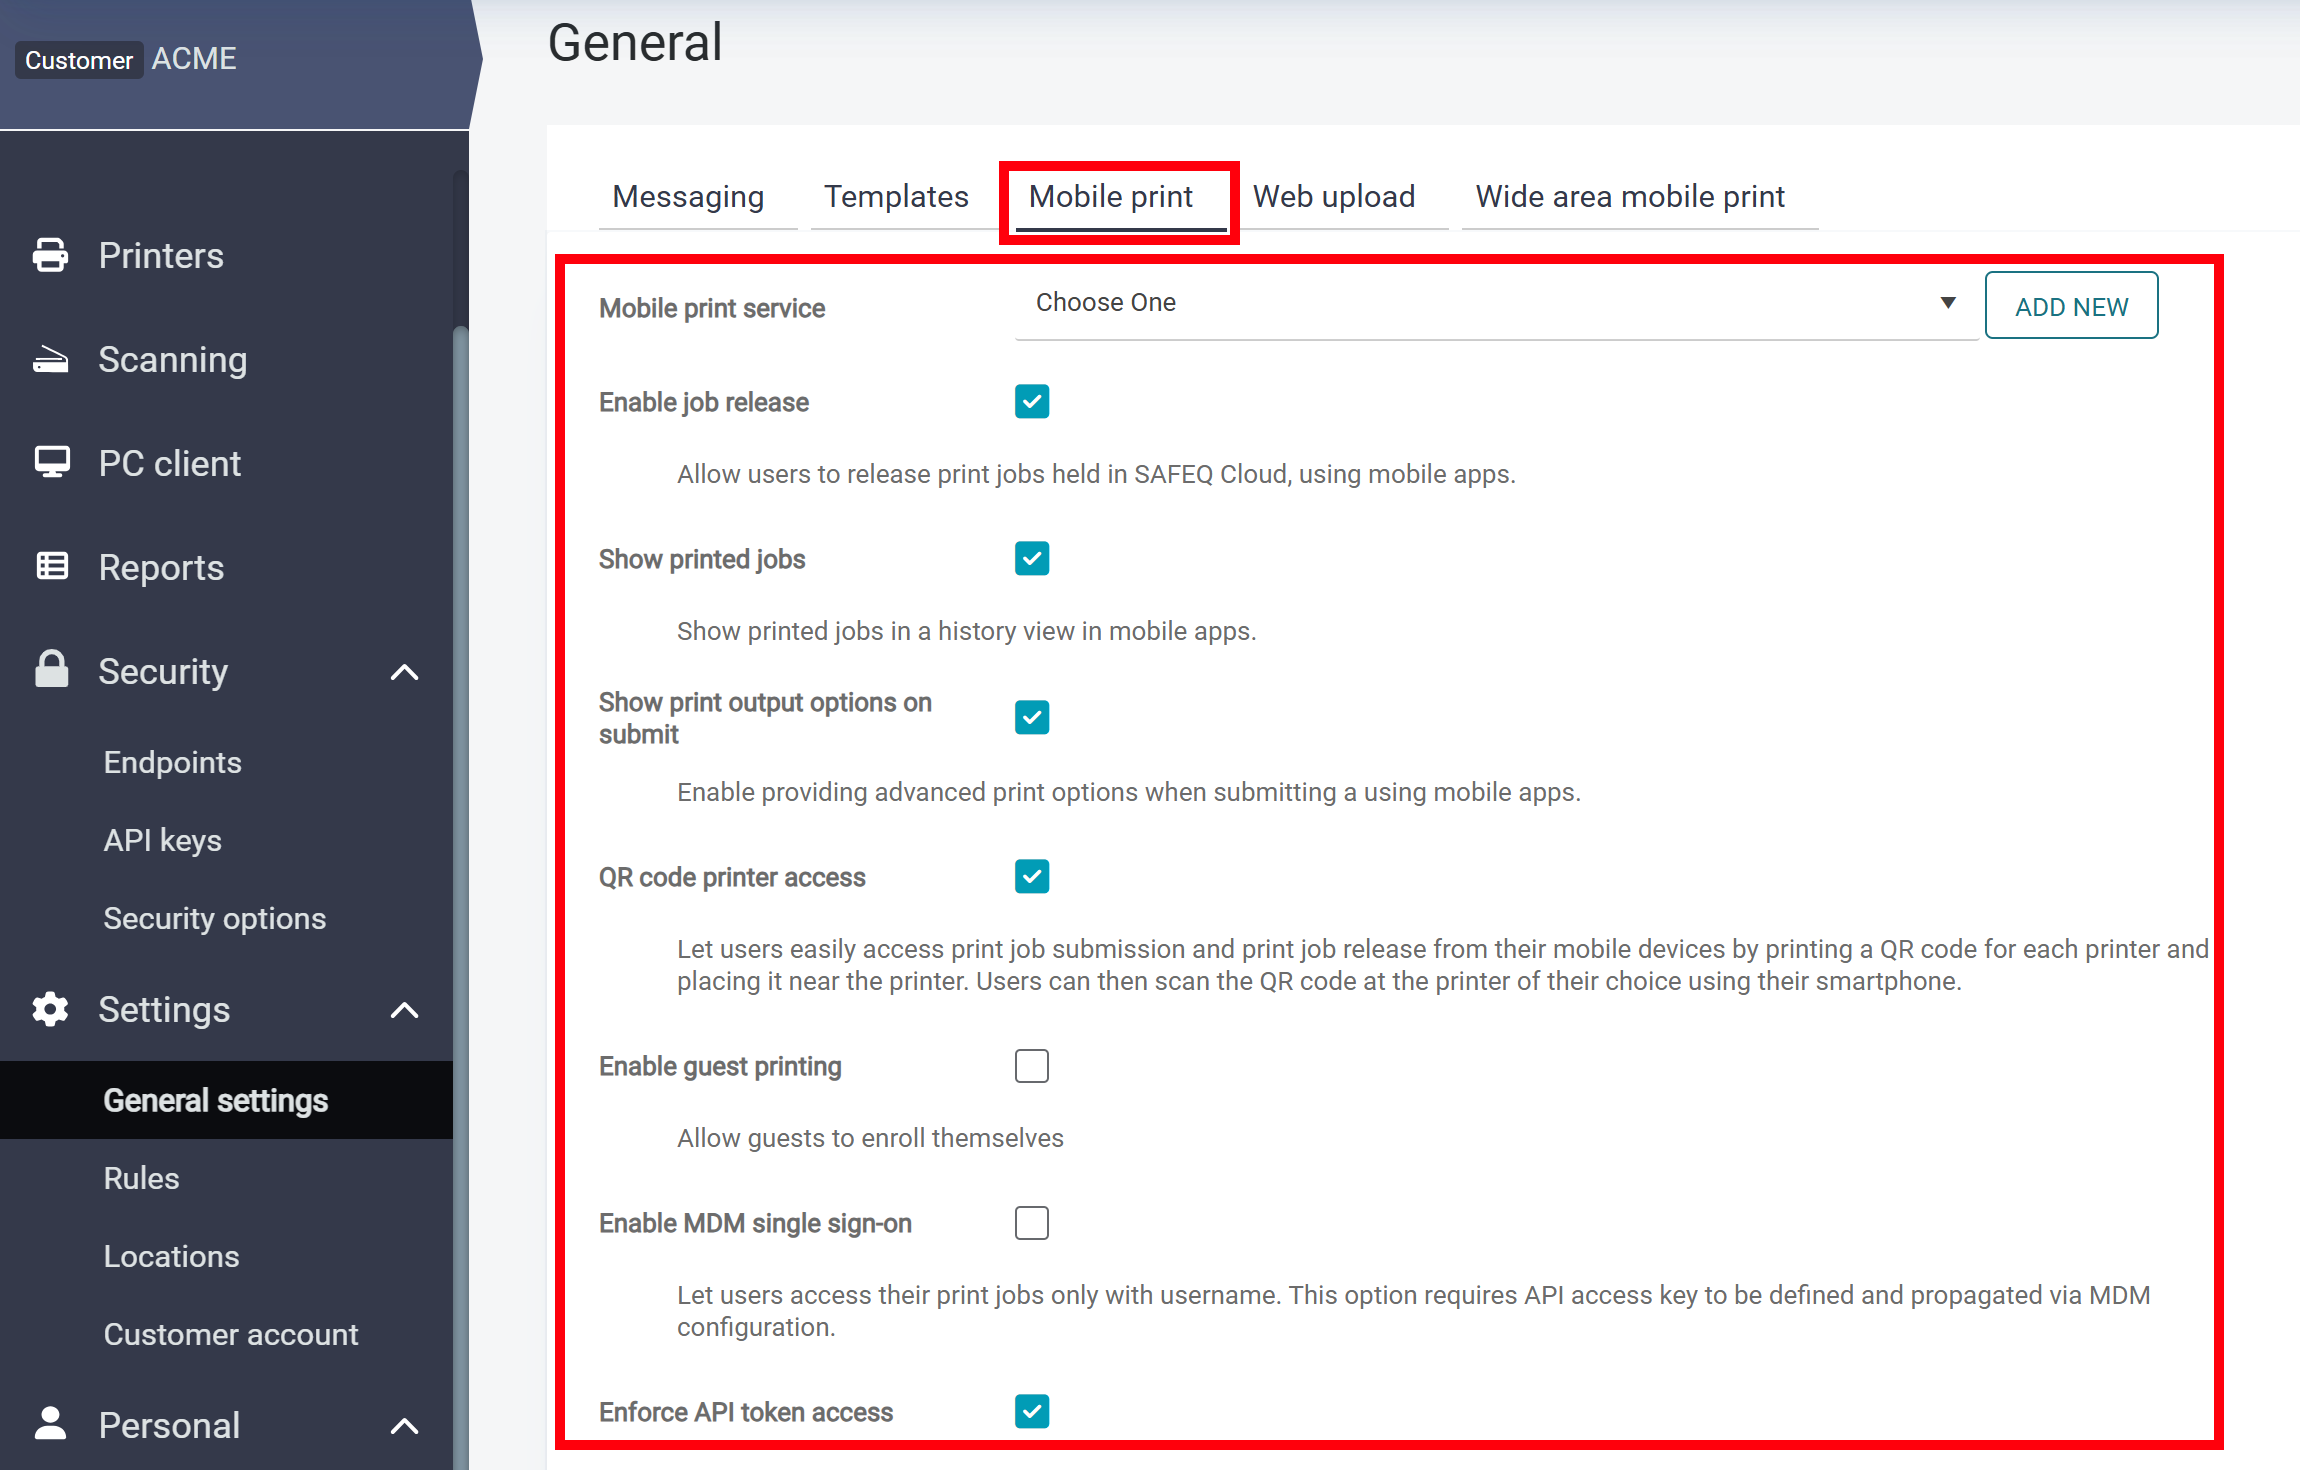
Go to Settings > General settings > Mobile print.
-
In Mobile print service, select mobileprint service. Leave the other settings at their default options.
-
Click Save.
-
Download the Mobile app using the links in Personal > My documents section. See My documents.
-
Submit your print job using the Mobile app.
For more information on how to use the Mobile app see Using the Mobile app.
Releasing a print job at the MFD
You can authenticate at the MFD via card, PIN (short ID), username/password, or combination of these methods.
For generating a PIN, see My profile.
For card self-registration at the MFD, see Card registration at the MFD.
After logging in at the MFD, you will see the My Quick Actions screen. Tap Print all or My print jobs.
Configuring a password policy
If you plan to use local user authentication, we recommend you to configure a password policy. See Password policy.
Gateways (edge devices)
With SAFEQ Cloud, you can use a gateway (secondary server) on your site to route traffic securely between the cloud and the MFDs. Using a local gateway, the print job data do not have to leave the company network, increasing security, responsiveness, and reducing Internet bandwidth. The gateway can be compared to simple devices routing data, such as network routers.
Our recommended option is the OMNI Bridge. For other options, see Gateway Guide.
For more information about YSoft OMNI Bridge, see Setting up OMNI Bridge.