
Relevant Products
Print queues are available in BREEZE mfp pro PRINT pro mfp
Embedded terminal templates are available in BREEZE MFD pro mfp
Connected to options are available in pro PRINT pro mfp
IP Reader address and Reverse path finisher advanced options are available in Breeze MFD PRO PRINT PRO MFD
Adding a printer
-
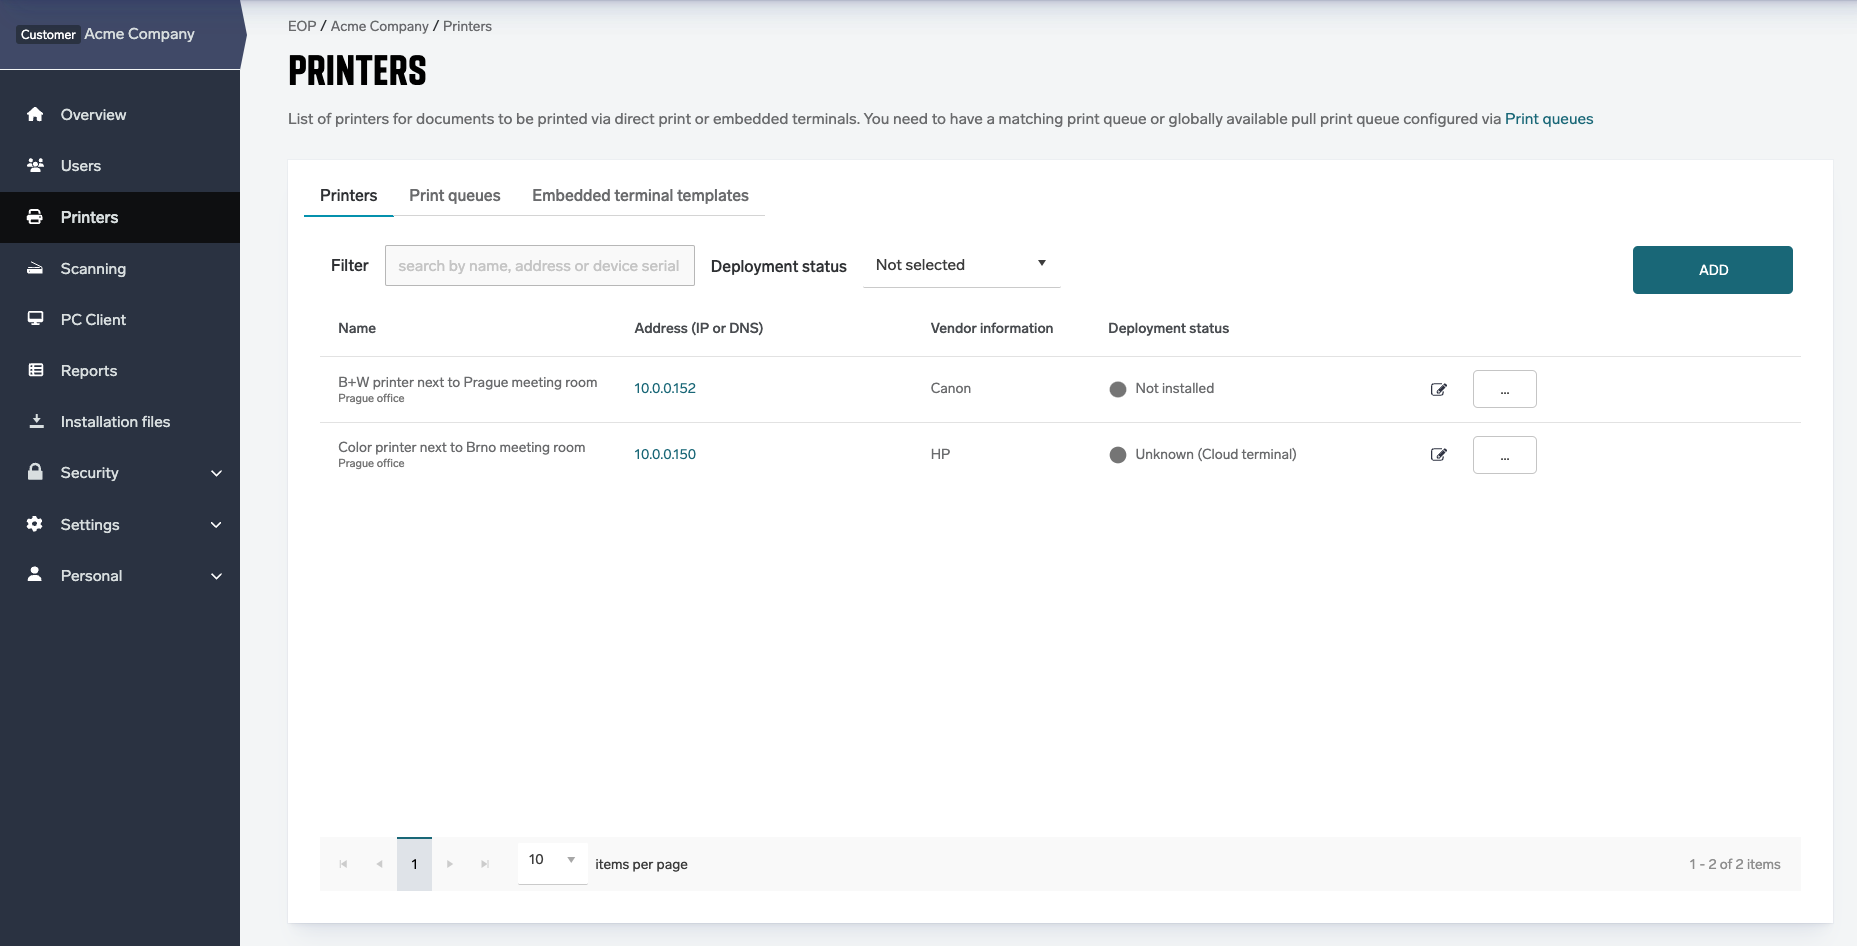
In the SAFEQ Cloud Web UI, click Printers.
-
The Printers list shows basic information for the MFDs configured for this account.
-
Click Add to add a new MFD. A dialog window will be displayed.
-
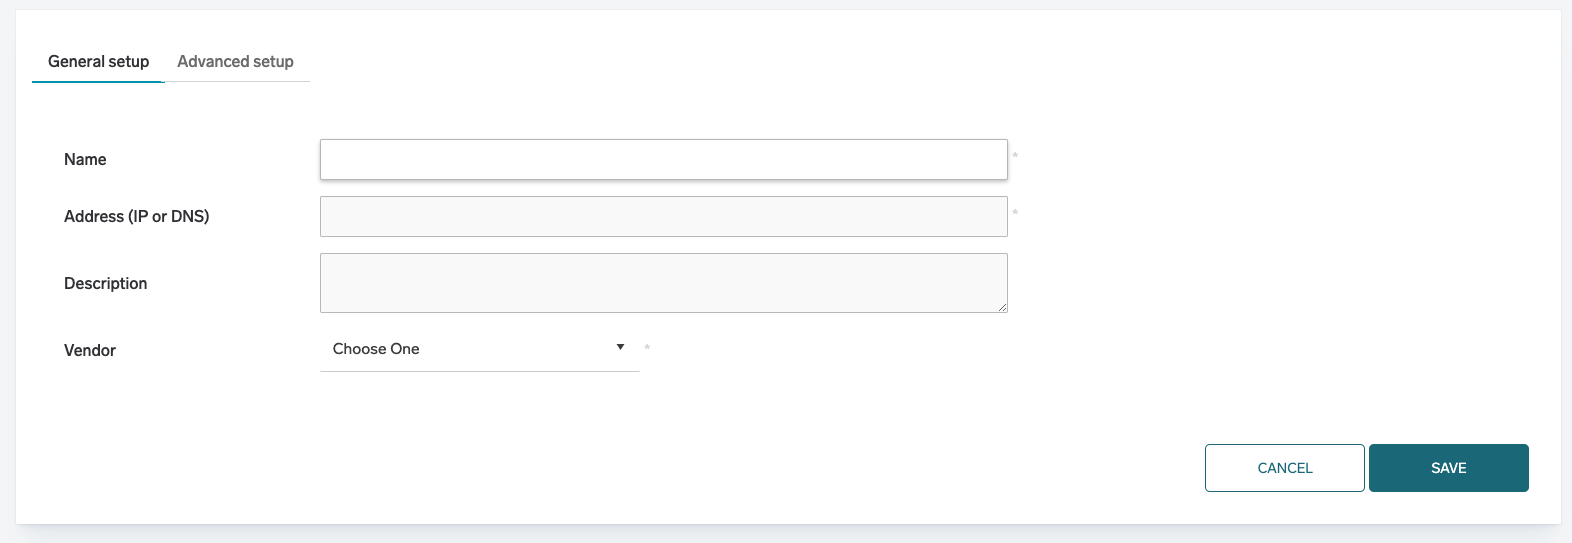
On the General setup tab, configure the following:
-
Name – A user-friendly name of the printer within the account.
-
Address (IP or DNS) – The IP address or hostname of the MFD in your network.
-
Description – Additional information about the MFD.
-
Vendor – Select the MFD vendor from the drop-down list.
SAFEQ Cloud uses the vendor type to determine how the print data stream should be translated from the Universal Driver.
If you don't want SAFEQ Cloud to optimize print jobs, or if you want to use a third-party driver, choose the option Other vendor; then the Print language property will be set to Raw and the job data will be passed to the printer unmodified.
-
-
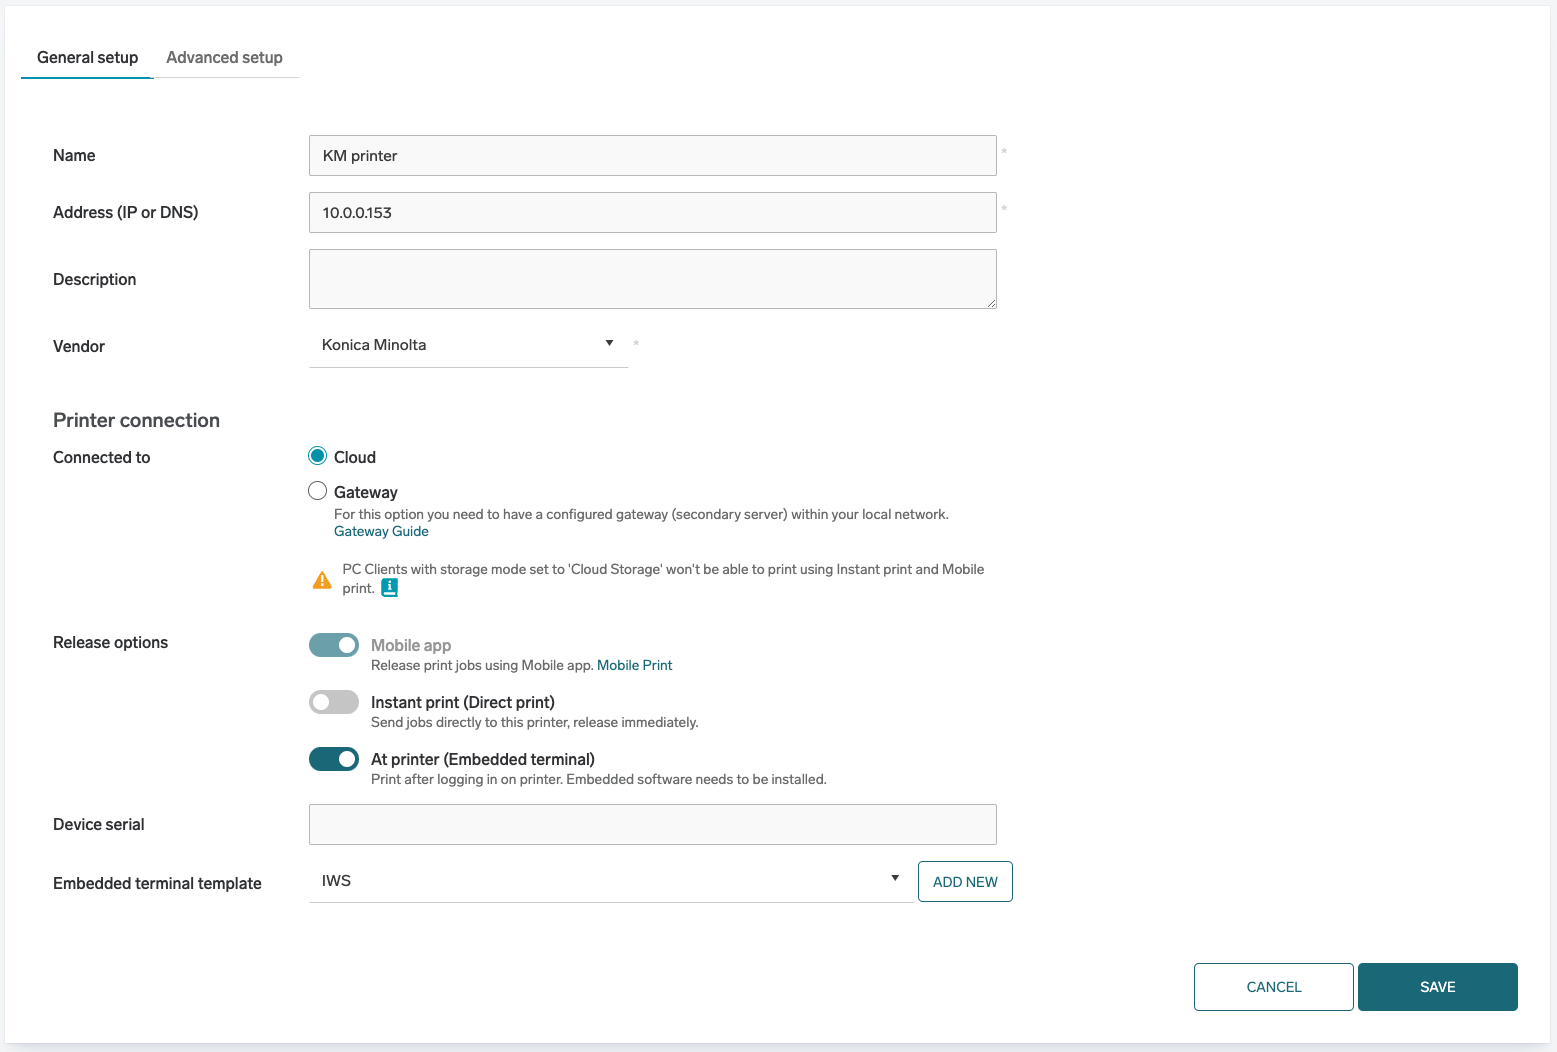
Once a vendor is selected, new configuration fields are displayed:
-
Connected to - Defines how the device is connected
-
Cloud - device is connected directly to the cloud
PC Clients with storage mode set to 'Cloud Storage' won't be able to print using Instant print and Mobile print when the Cloud option is selected. For details on the service setup, see SAFEQ Cloud Client configuration.
-
Gateway - For this option you need to have a configured gateway (secondary server) within your local network. If there is no gateway detected, this option is disabled.
-
Document output service (Available when the ‘Gateway’ option is selected under ‘Connected to’. For the ‘Cloud’ option, this service is selected automatically.) – Select the Document output service from the drop-down list. If no service exists, you can add it by clicking Add. The Document output service is responsible for delivering print job data to the MFD if there is no direct IP visibility from the PC clients to the MFD. Note that for direct print queues, this service must have direct IP visibility to the printer. For Print Roaming, the service can be the same as for terminal services, and the print job is always delivered in the most efficient way – either directly from the SAFEQ Cloud Client in case of visibility to the MFD, or downloaded from the selected service.
-
-
-
Release options - Defines how print jobs are released from the MFD.
-
Mobile app - Allows users to release documents from Mobile app. This option is always enabled.
-
Instant print (Direct print) – This option will automatically create a matching Print queue for the MFD. The default settings for this Print queue are: a name identical with the MFD, Direct (Push) Print queue type, linked to the Printer, available by default.
-
At printer (Embedded terminal) - This option allows you to configure the embedded terminal on the MFD, enabling users to release documents after logging in. Embedded software must be installed. The option is disabled (cannot be enabled) for vendors that do not support an embedded terminal.
Following configuration is available when this option (At printer) is selected:-
Embedded terminal template – Select the embedded configuration from the drop-down list. If no embedded configuration exists, you can add it by clicking Add. In that case, a new dialog window will appear. For details on the available settings, see Embedded Terminals' configuration .
-
Client terminal service (Available when the ‘Gateway’ option is selected under ‘Connected to’. For the ‘Cloud’ option, this service is selected automatically.) - Select the Client terminal service from the drop-down list. If no service exists, you can add it by clicking Add. Client terminal service deploys embedded terminal clients running on MFDs, and the service with which MFDs communicate for authentication, retrieving job lists, and other purposes. The MFD will communicate to the selected service that may be deployed in the cloud or hosted locally on an edge device.
-
-
-
-
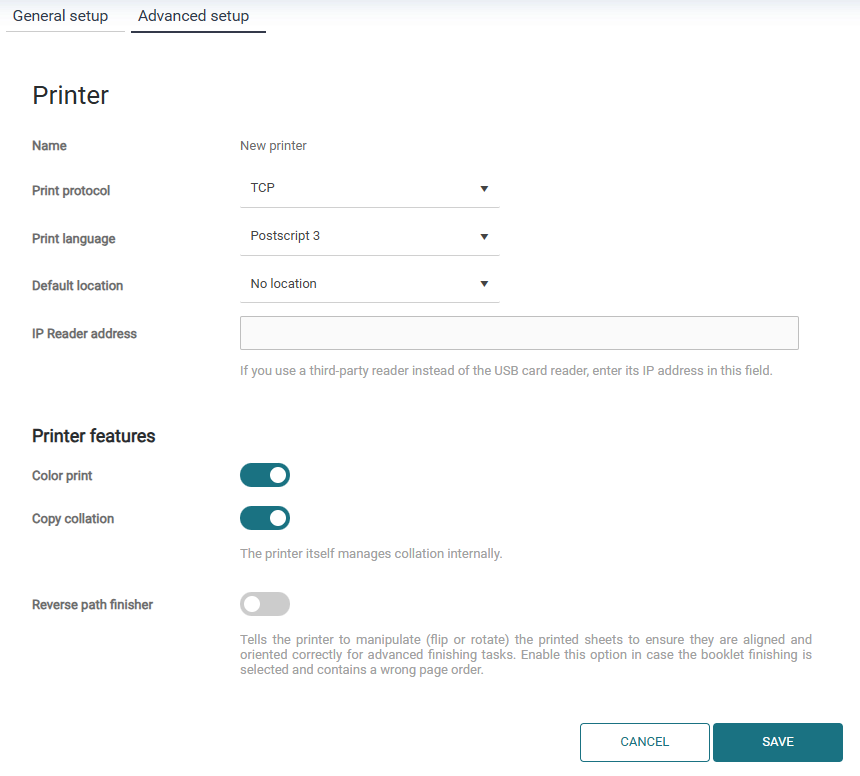
On the Advanced setup tab, configure the following:
-
Print protocol – Select the communication protocol to the MFD according to the following table:
Protocol
Usage
Notes
TCP (default)
Direct delivery to printer via TCP port 9100
SAFEQ Cloud has control over print process, show errors in the log
IPP
Direct delivery to printer via IPP protocol
SAFEQ Cloud controls delivery, supports both IPP and IPPS printing
-
IPP – If you wish to use IPP printing, enter the Printer IPP URL for the destination printer:
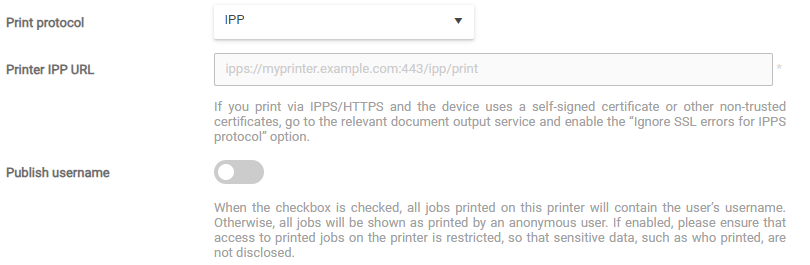
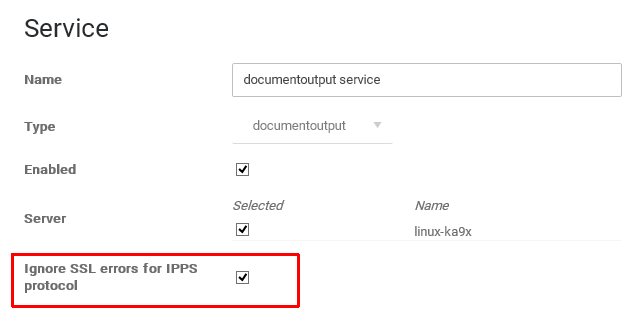
If printing via IPPS/HTTPS to the printer, and the device uses a self-signed certificate or other non-trusted certificates, go to the relevant Document Output service and enable Ignore SSL errors for IPPS protocol.
If you wish to send the username together with the print job, enable the Publish username option (available only for IPP). Note that in such case all jobs printed on this MFD will contain the user’s username. If you leave it in the default state (disabled), all jobs will be shown as printed by an anonymous user.If you enable Publish username, make sure that access to the printed jobs at the MFD is restricted, so that sensitive data, such as who printed what, is not disclosed.
-
Print language – Select the output type for the print job data. The languages listed are based on the vendor you selected and correspond to those supported by SAFEQ Cloud. Only select the Raw output type if you use a third-party print driver instead of the SAFEQ Cloud universal driver. In this case, the job data will be passed to the MFD unmodified. Select the other languages (Postscript2, Postscript3, PCL6, PDF, PWG raster or Universal raster, depending on availability) when using the universal driver for printing.
-
Default location – Select the MFD location. The selected location will also be assigned to the corresponding direct queue. If no location is set, SAFEQ Cloud will retrieve and display the inherited location of the parent node.
-
IP Reader address – If you use a third-party IP card reader instead of the USB card reader, enter its IP address in this field (for specific cases MAC address is also acceptable).
-
Color print – Enabled by default. If disabled, jobs will be forced to print in mono and the ability to print in color will be removed. If you want to control how a job is printed, use Rules - triggers and automation.
-
Copy collation – Enabled by default. When enabled, copy collation is handled by the MFD. When disabled, it is handled by the print driver. If your MFD doesn't support this function, disable it here. Note that this will make the advanced finishing options unavailable (for example, stapling and booklet) and increase the job size.
-
Reverse Path Finisher – Disabled by default. Instructs the MFD to manipulate (flip or rotate) the printed sheets to ensure they are aligned and oriented correctly for advanced finishing tasks. Enable this option if booklet finishing is selected and the pages are in a wrong order.
-
-
Click SAVE.
Other Printer actions
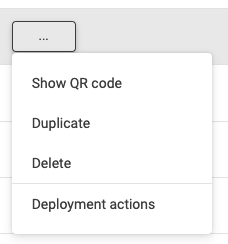
In the Printers list, click the edit icon or the three-dots button to access the following actions from the pop-up menu:

|
Edit Printer settings |
If you don't have the edit permission, settings are read-only. |
|
Show QR code |
Opens a pop-up to display the QR code for Mobileprint scanning (verify browser settings do not block pop-up) |
|
Duplicate |
Creates a duplicate of an existing printer configuration, where all settings are pre-populated to match the original. The only fields left blank or needing modification are the IP address (blank) and the printer name, which will automatically include a "Copy" suffix to differentiate it from the original. |
|
|
Delete |
Deletes a printer after the user confirms by clicking "OK" in a pop-up prompt. |
|
|
Deployment actions |
Navigates to the Embedded Configuration Deployment page, where deployment actions are available for a printer. This option is available only when an embedded configuration is assigned to a printer. |
Printer details
MFDs appear in the SAFEQ Cloud system tree as sub-nodes of the account. Selecting the MFD in the tree displays the sub-menu.
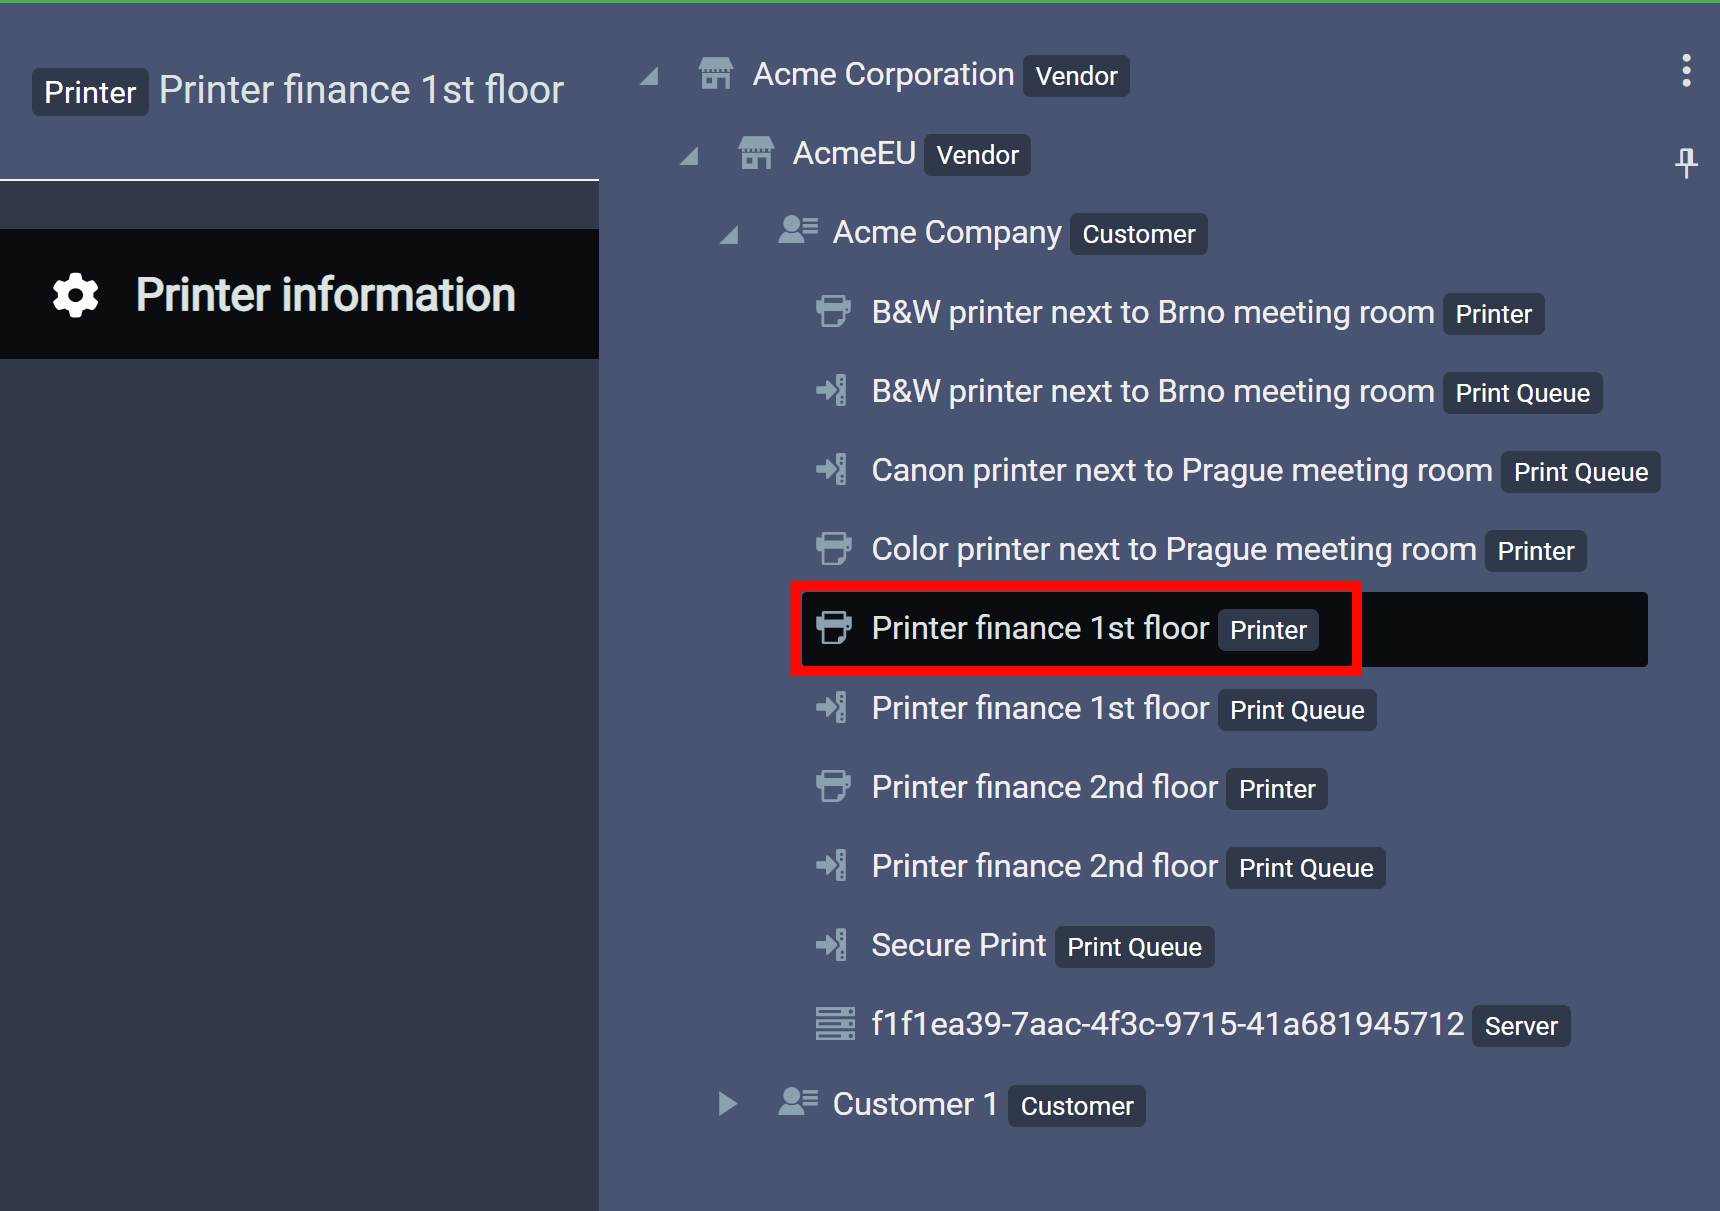
The details page consists of the following tabs:
-
General setup – Click this tab to edit printer settings, or delete the printer.
-
Advanced setup – Contains the settings described in the Adding a printer section.
-
Access control – Manage the permissions to access this MFD. For more details on Access control settings, see Access Control .
-
Document history – Displays a list of jobs, the job owner (user name), status, number of pages, and date/time for each job printed on the device.