
Relevant Products
BREEZE PRINT CLOUD ENABLED PRINT
Getting your customers up and running with SAFEQ Cloud is easier than ever!
Simply share the SAFEQ Cloud Wizard link with them, and they'll be guided through a smooth setup process that takes care of the following:
✨ Creating their tenancy
✨ Installing the PC Client
✨ Discovering printers on their network
✨ Setting up their administrator password
The link you share also decides which product the customer gets — a 30-day Breeze trial or a Cloud Enabled Print tenancy — so they land in exactly the right setup.
Ready to walk through it together? Let's dive in!
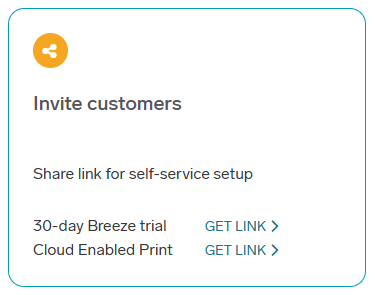
As a partner, you can create a specific link for your customer so they can set up their own tenancy and get up and running.
Where you'll find the link depends on which products you offer:
-
Breeze only — you'll see a single Invite customers to a 30-day Breeze trial tile. Click GET LINK to generate the trial link.
-
Cloud Enabled Print only — you'll see a single Invite customers to Cloud Enabled Print tile. Click GET LINK to generate the link.
-
Both products — you'll see a combined Invite customers tile with two separate options: a 30-day Breeze trial link and a Cloud Enabled Print link. Pick the one that matches what you're setting up for this customer, and click its GET LINK.
Each link already knows which product it's for, so your customer is guided into the right flow no matter where they start.
As a customer, you've been given your special link - think of it as your golden ticket to printing paradise! 🎫
You can follow the video below to see just how ridiculously quick and easy this whole process is, or if you're more of a "show me the details" person, scroll down for our step-by-step guide that breaks everything down!
You’ve clicked the link and you’re presented with the following page:
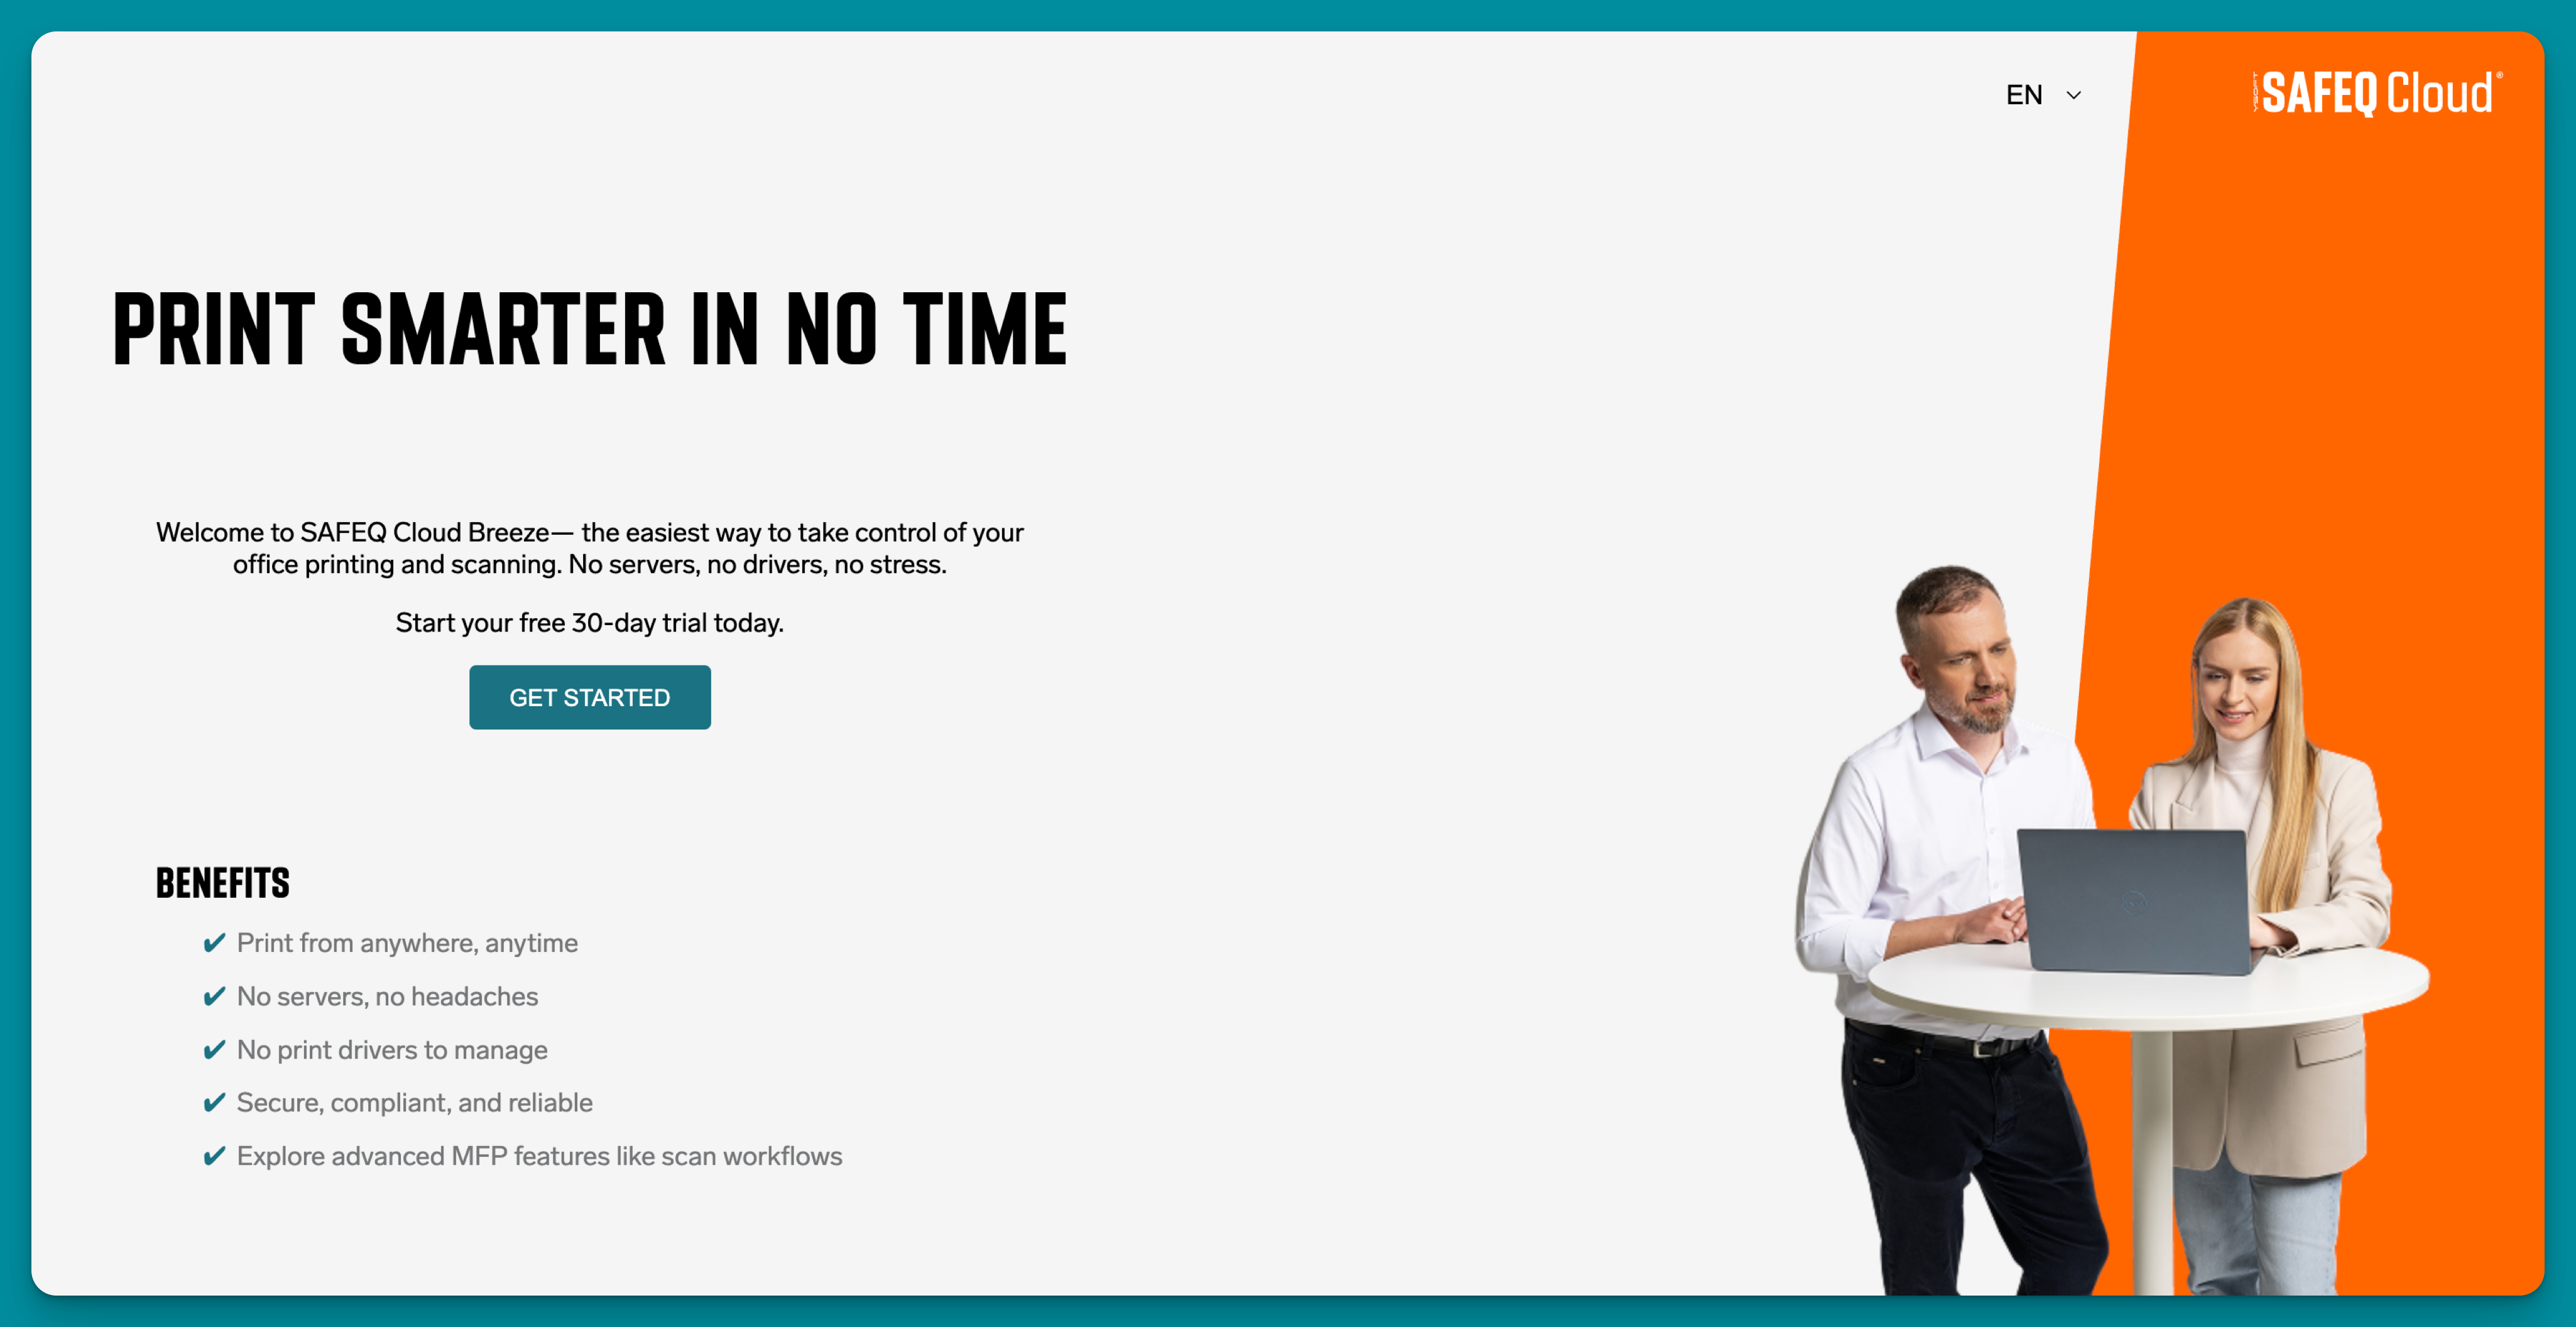
Click the GET STARTED button to start the wizard and create your new tenancy.
Step 1: Getting the Basics
First up, your customer will need to share just a couple of key details to get things rolling:
🏢 Account name - This becomes their unique tenancy and gets built right into their custom URL
📧 Email address - For all the important notifications and updates
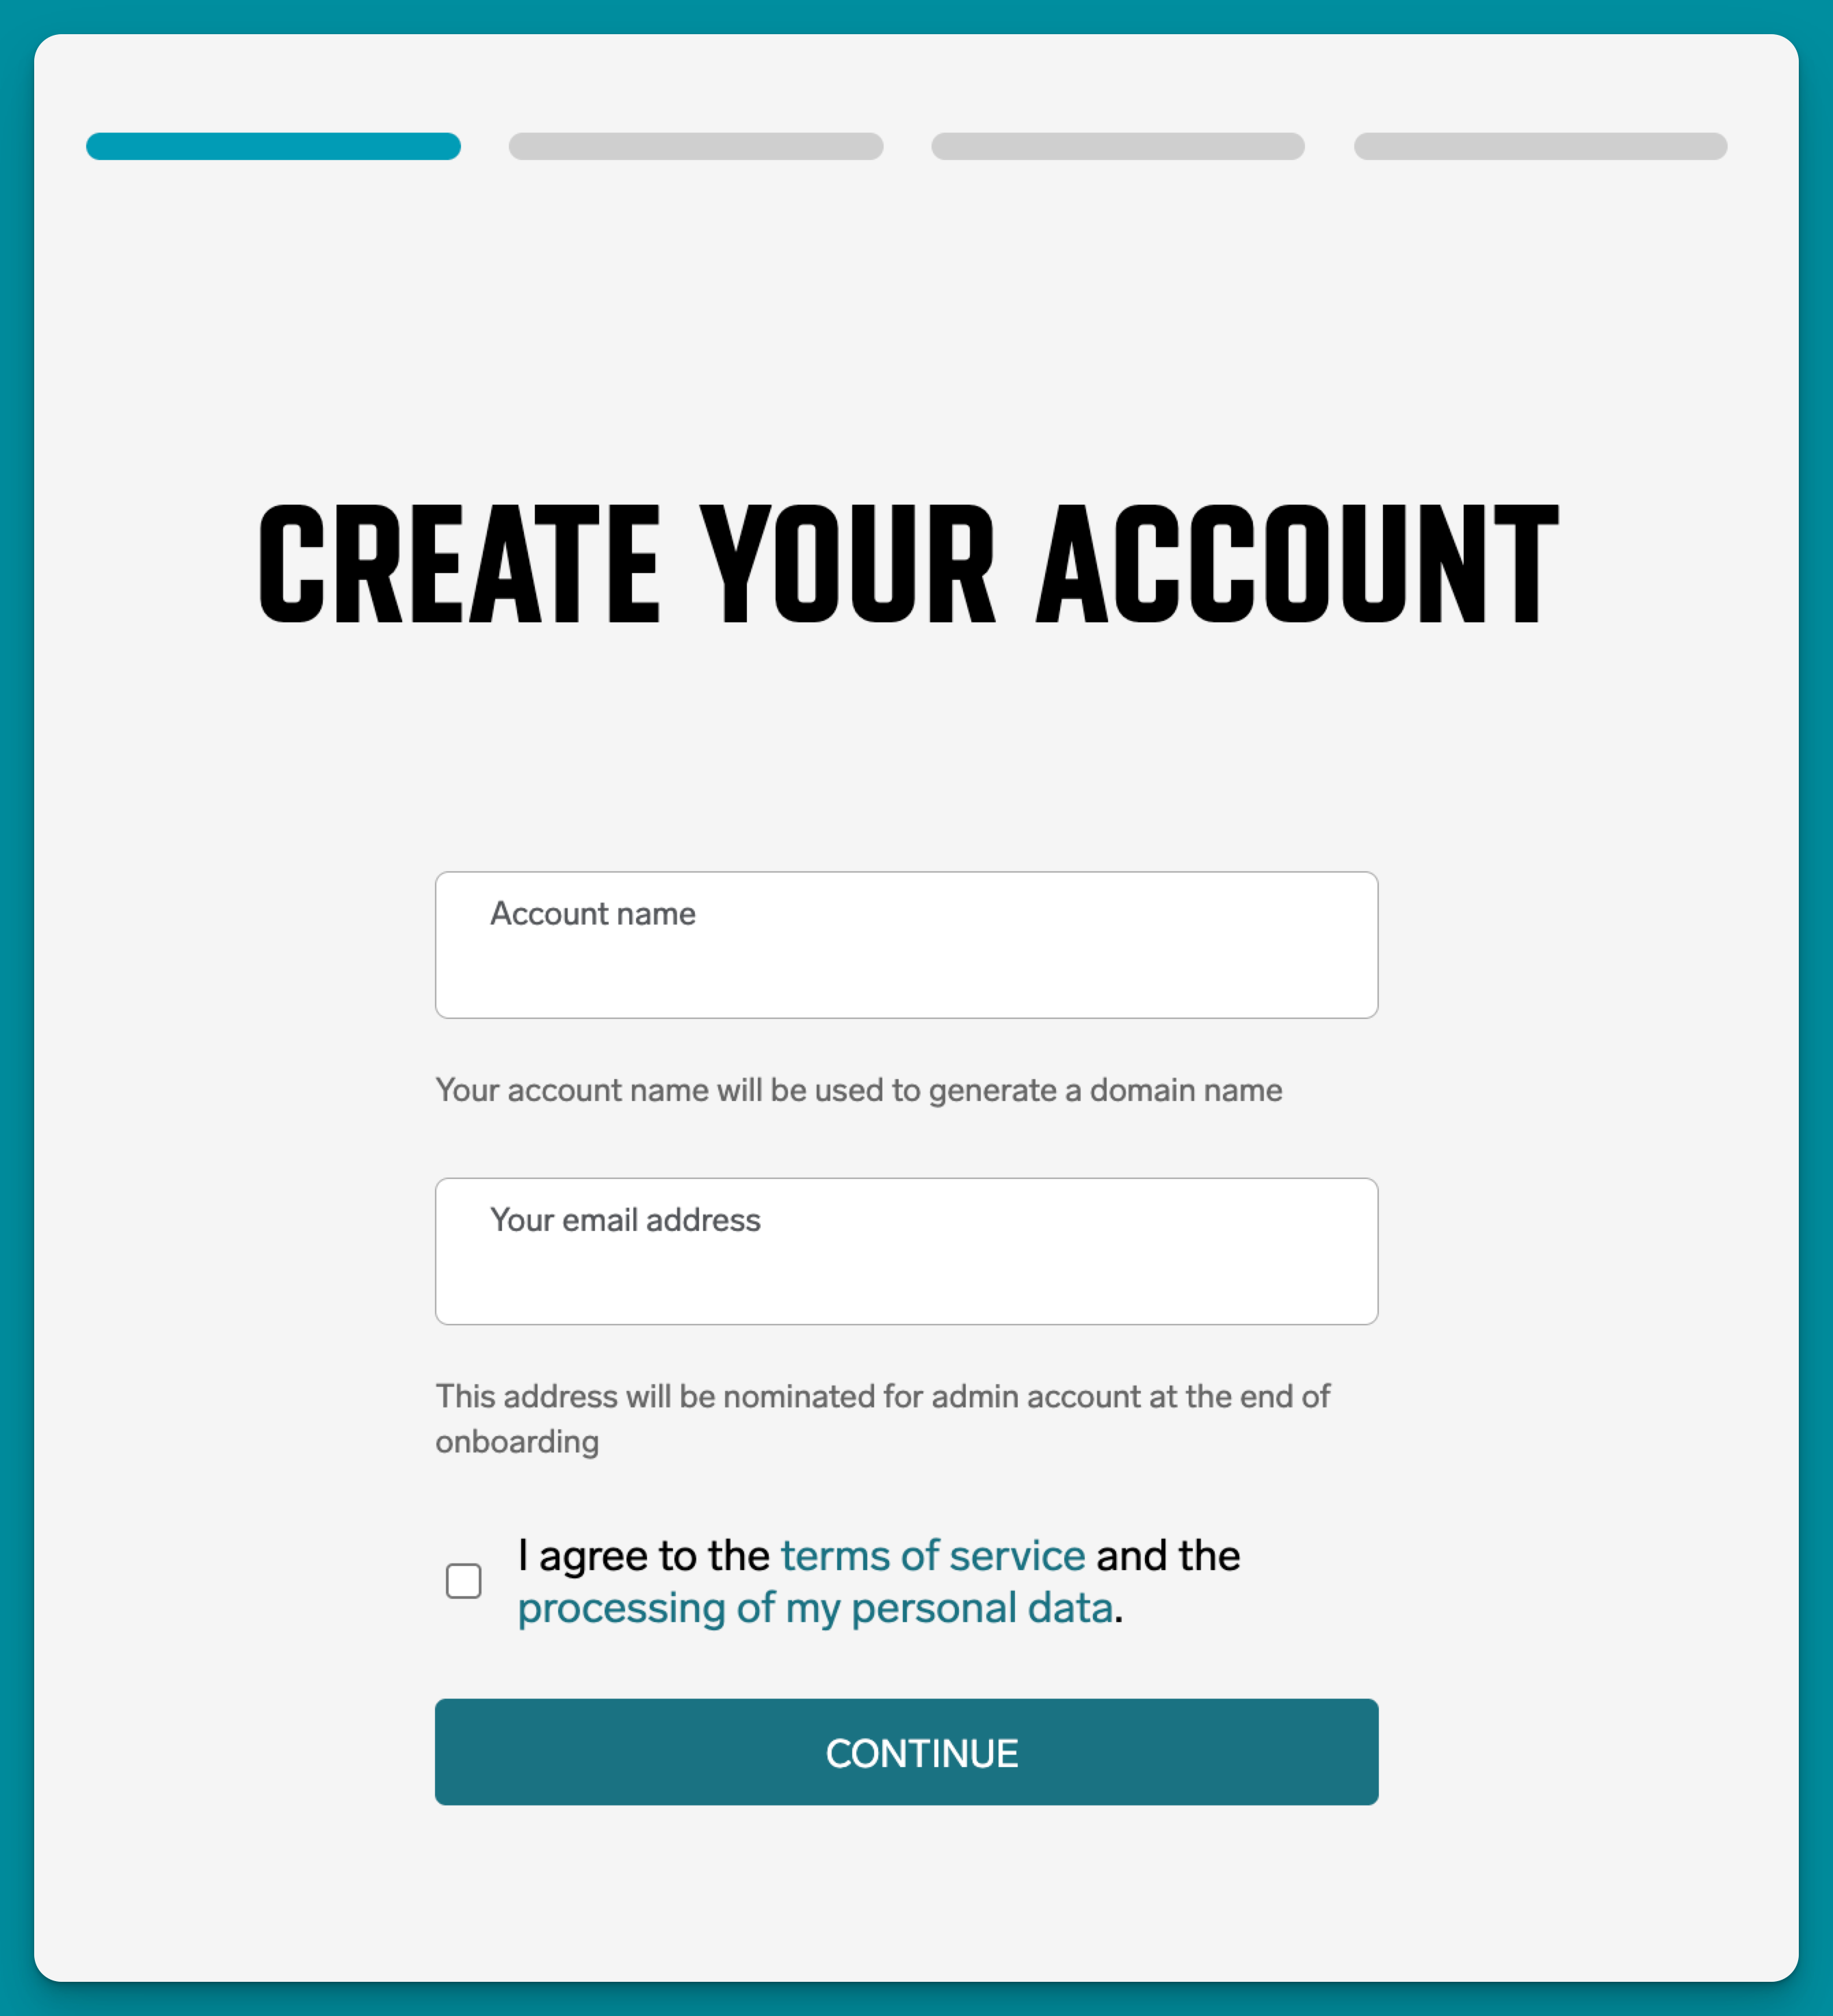
Before they can move forward, they'll also need to give a quick thumbs up to the terms of service and processing of personal data.
Once that's sorted, they're ready for the next step!
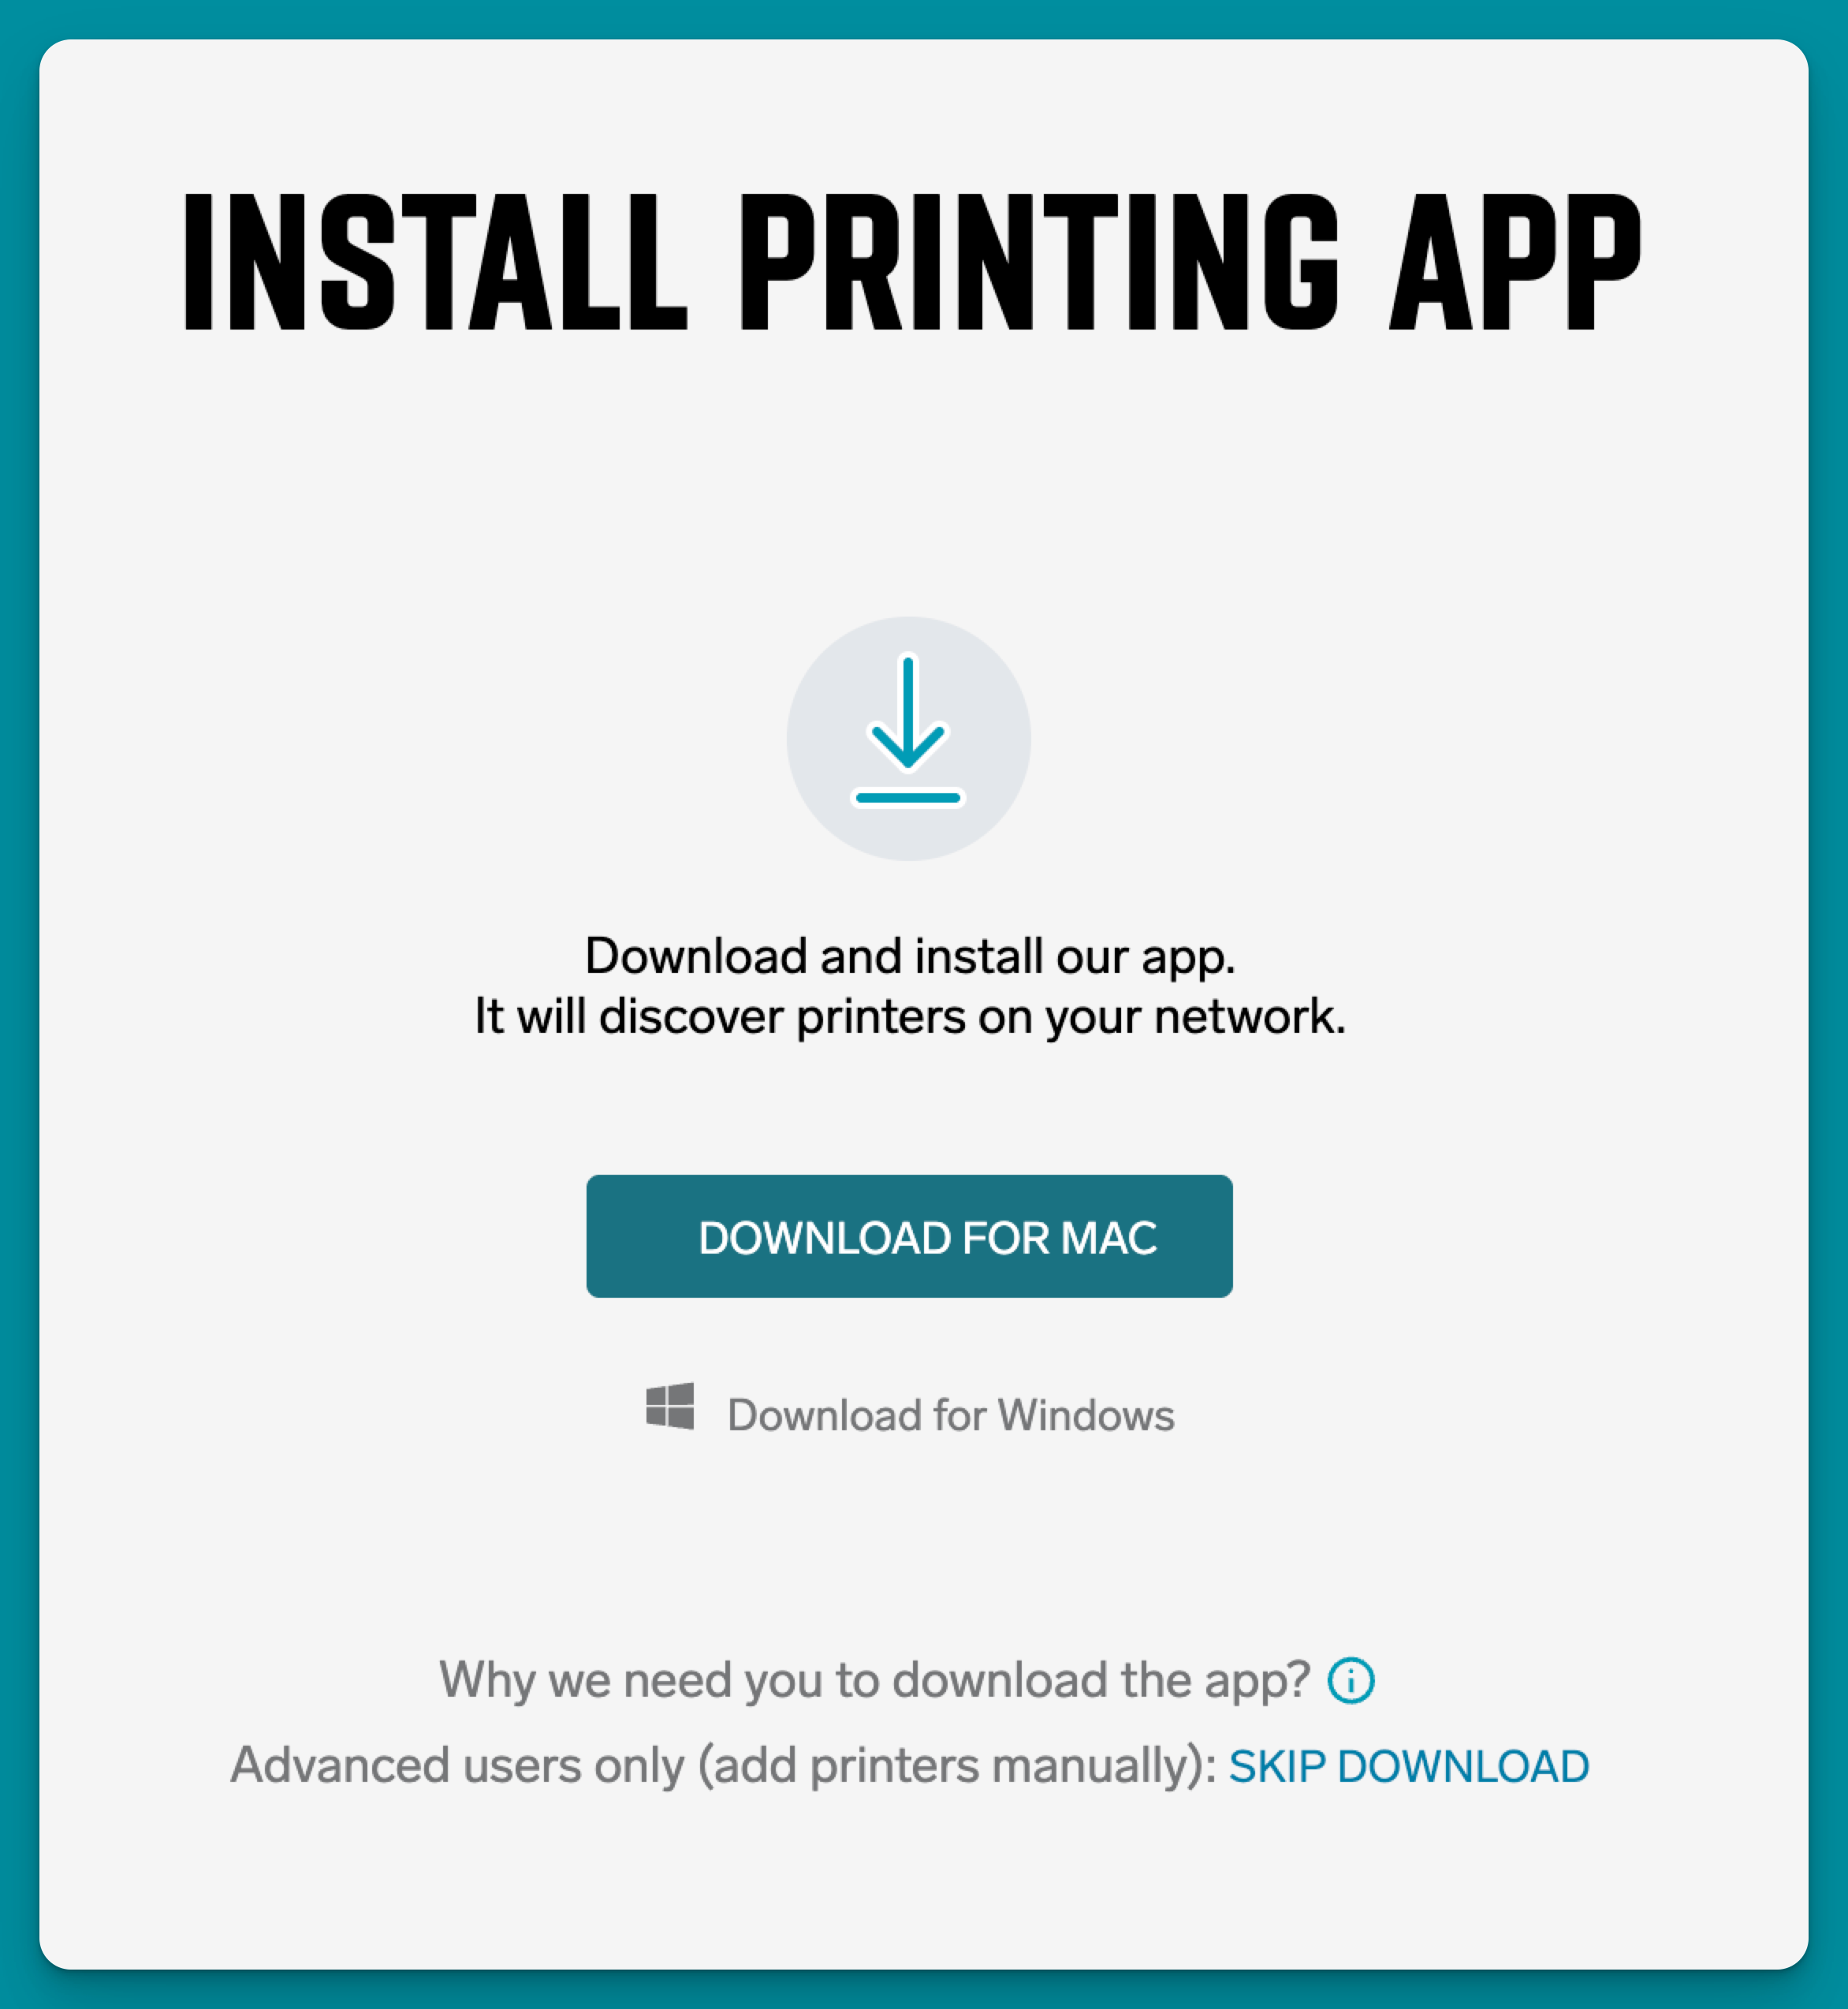
Step 2: Installing the PC Client
Now for the fun part! Your customer gets a personalized download link that's already configured specifically for their brand new tenancy - no manual setup required!
💻 Works on both Windows and Mac - whatever they're running, we've got them covered
🔗 One-click download - the link is pre-configured to their tenancy, so it's plug-and-play
Once they've installed the PC Client, it automatically logs in and greets them with a welcome splash screen.
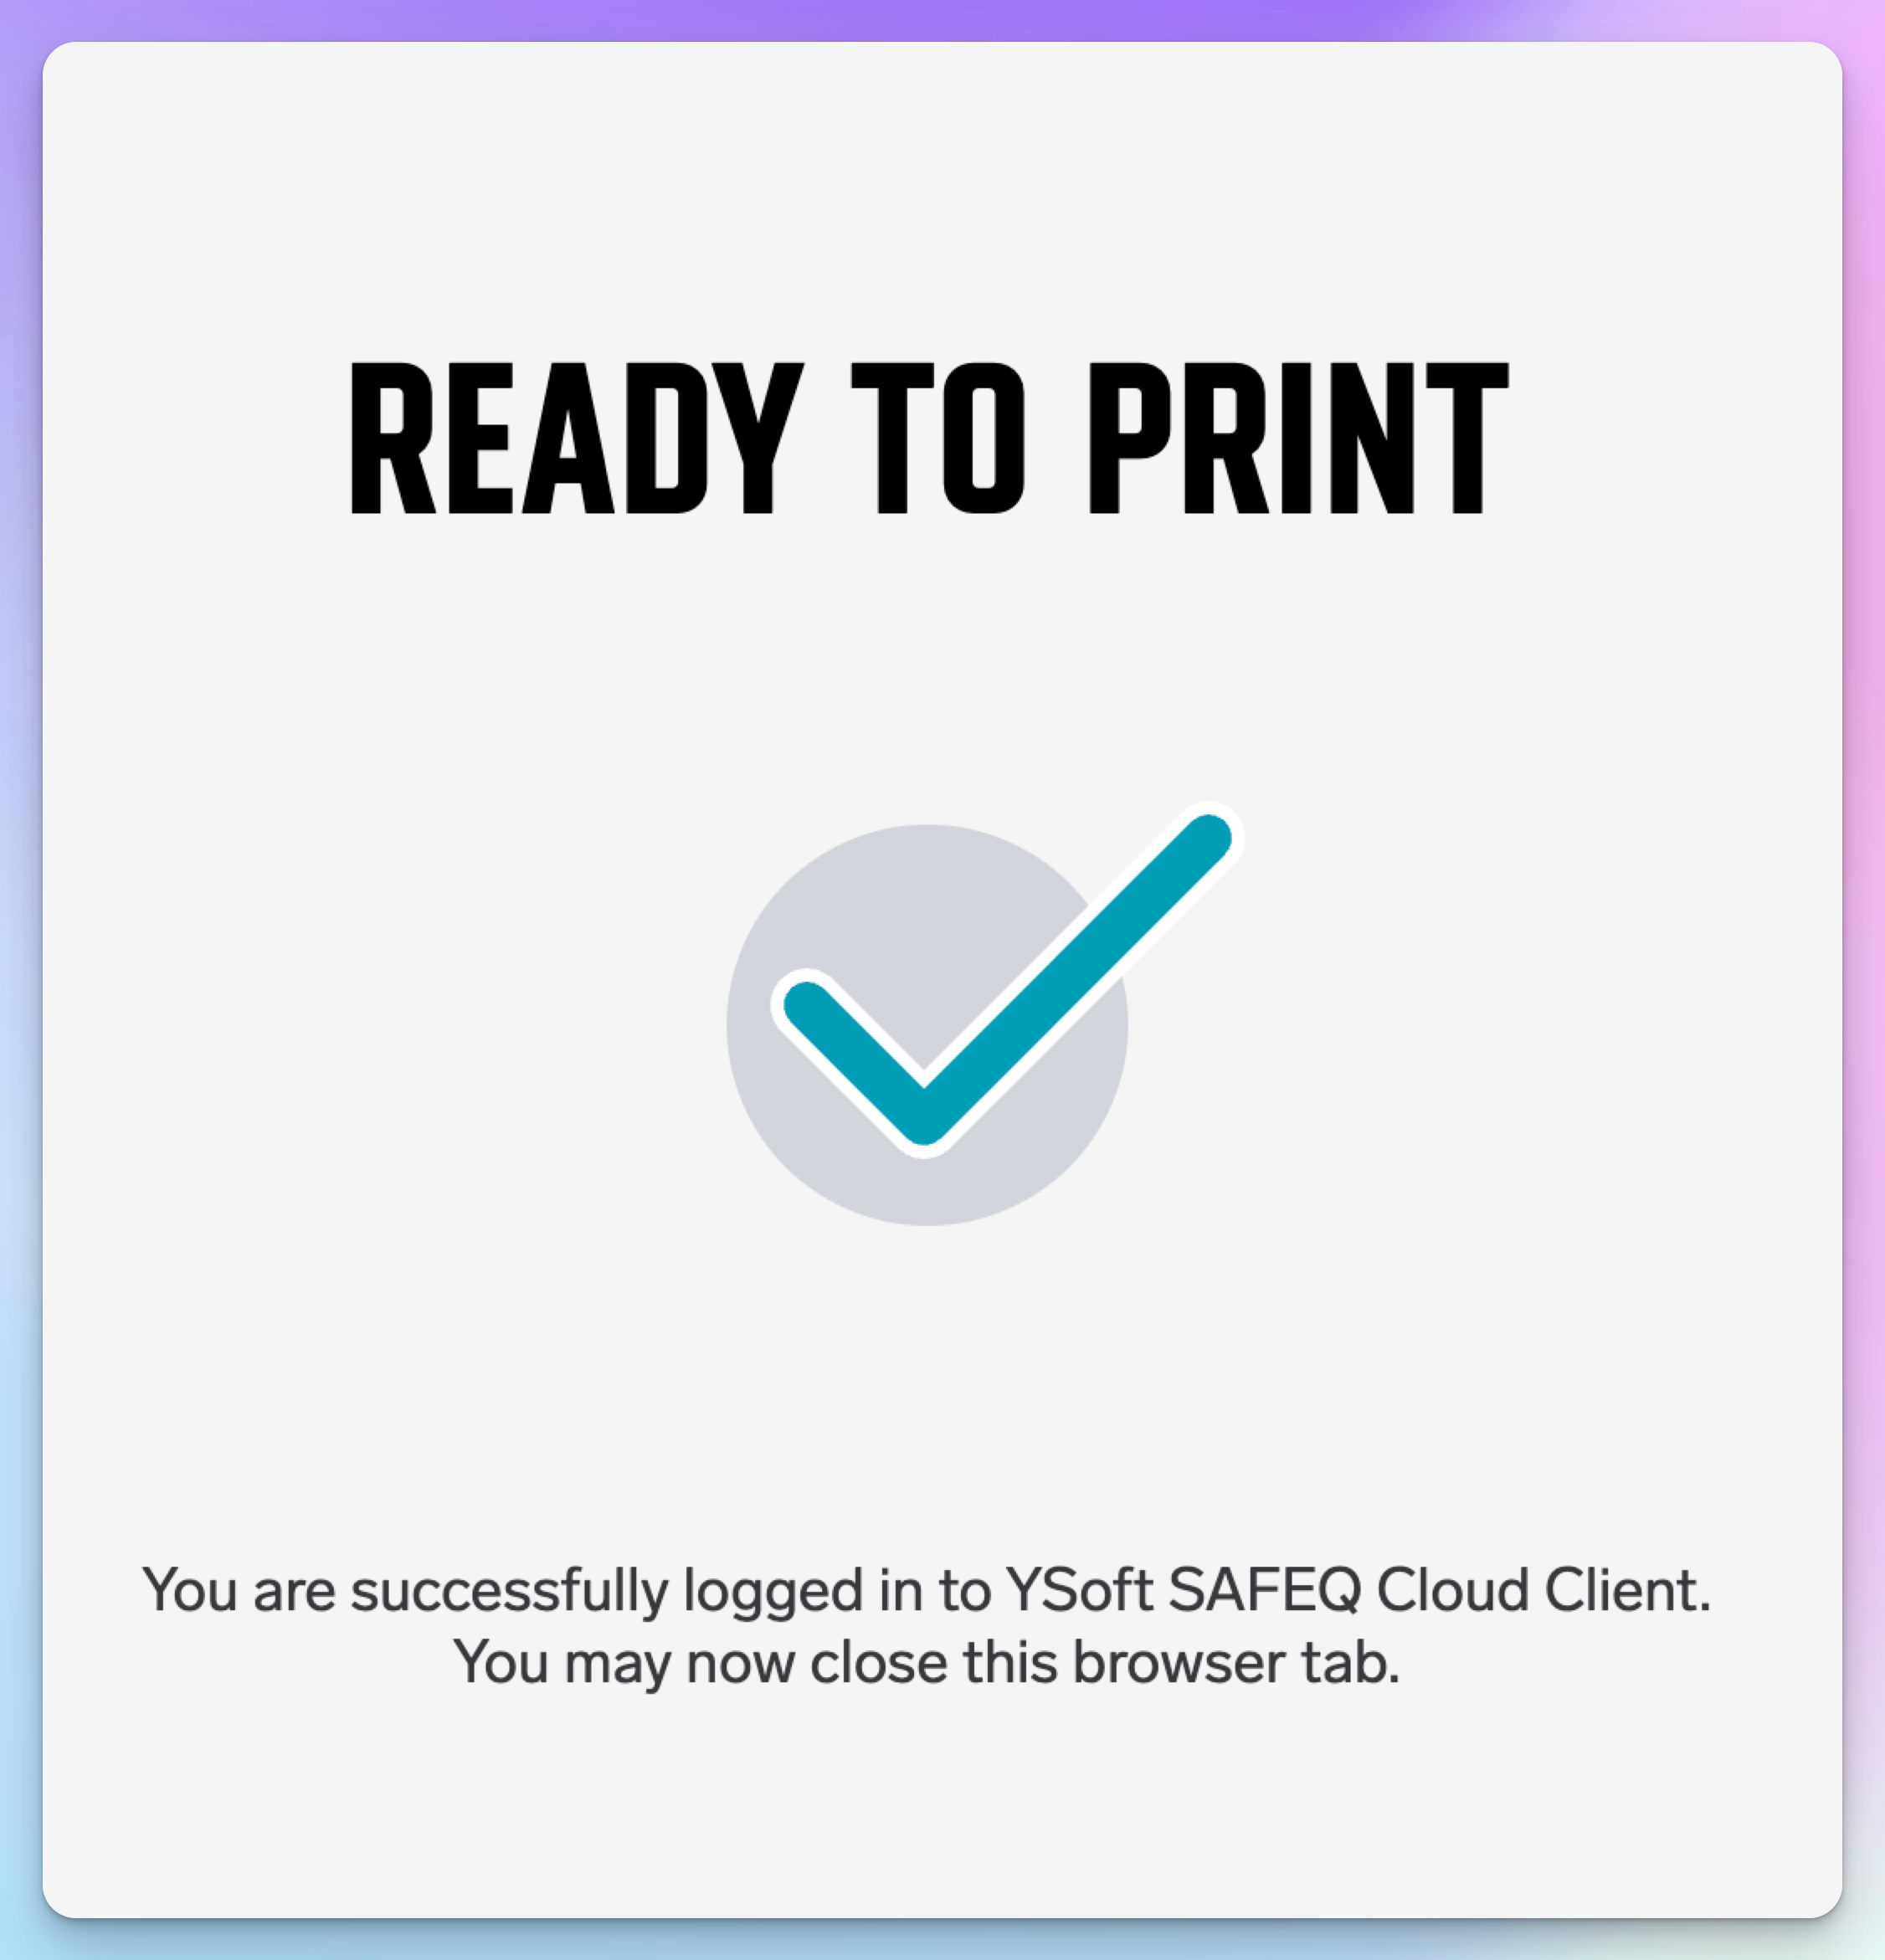
Simply close that window, and they're back at the wizard! The clever bit? The wizard has automatically detected that the PC Client installed successfully, so now they can hit that Continue button and move on to the next step.

The PC client is all that is needed to be able to print, no drivers, no servers, just a simple app that synchronises to the cloud.
Step 3: Almost There!
The wizard now discovers printers on the network, and your customer can select which ones they want to add right now. Don't worry if they don't catch them all - more printers can always be added manually later.
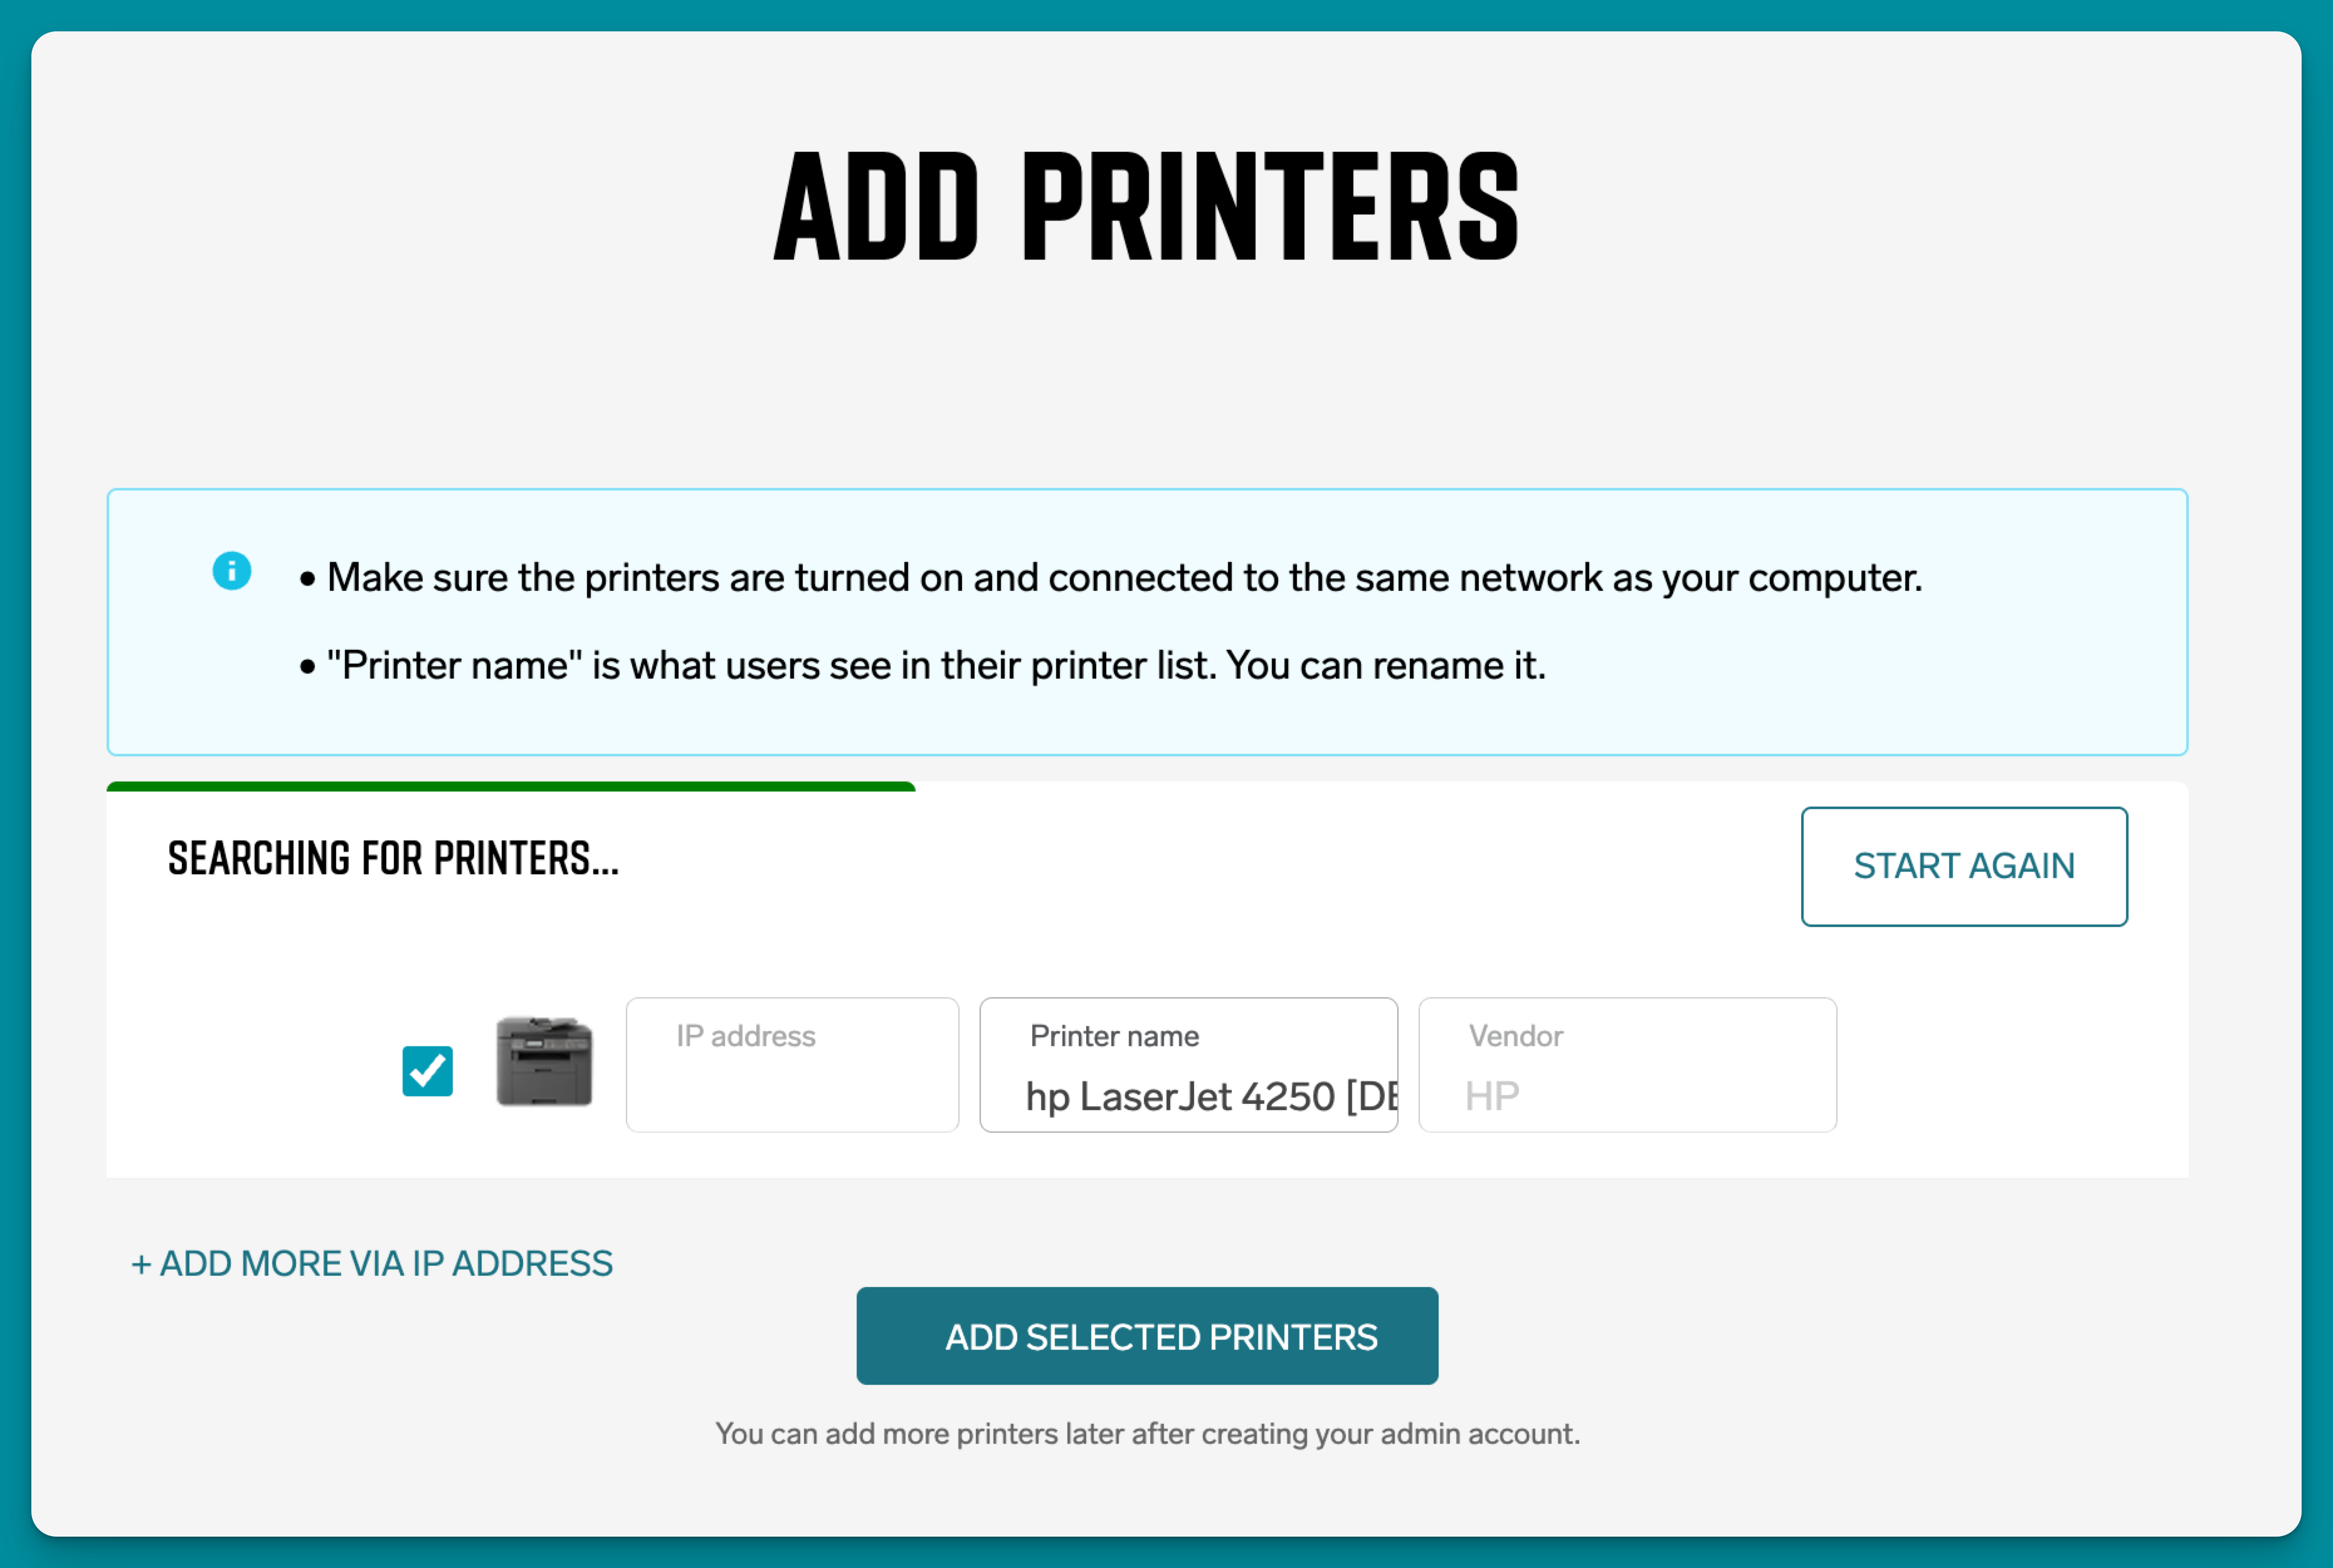
🖨️ Select discovered printers - pick the ones that are ready to go
➕ Add more later - no pressure to get everything perfect right away
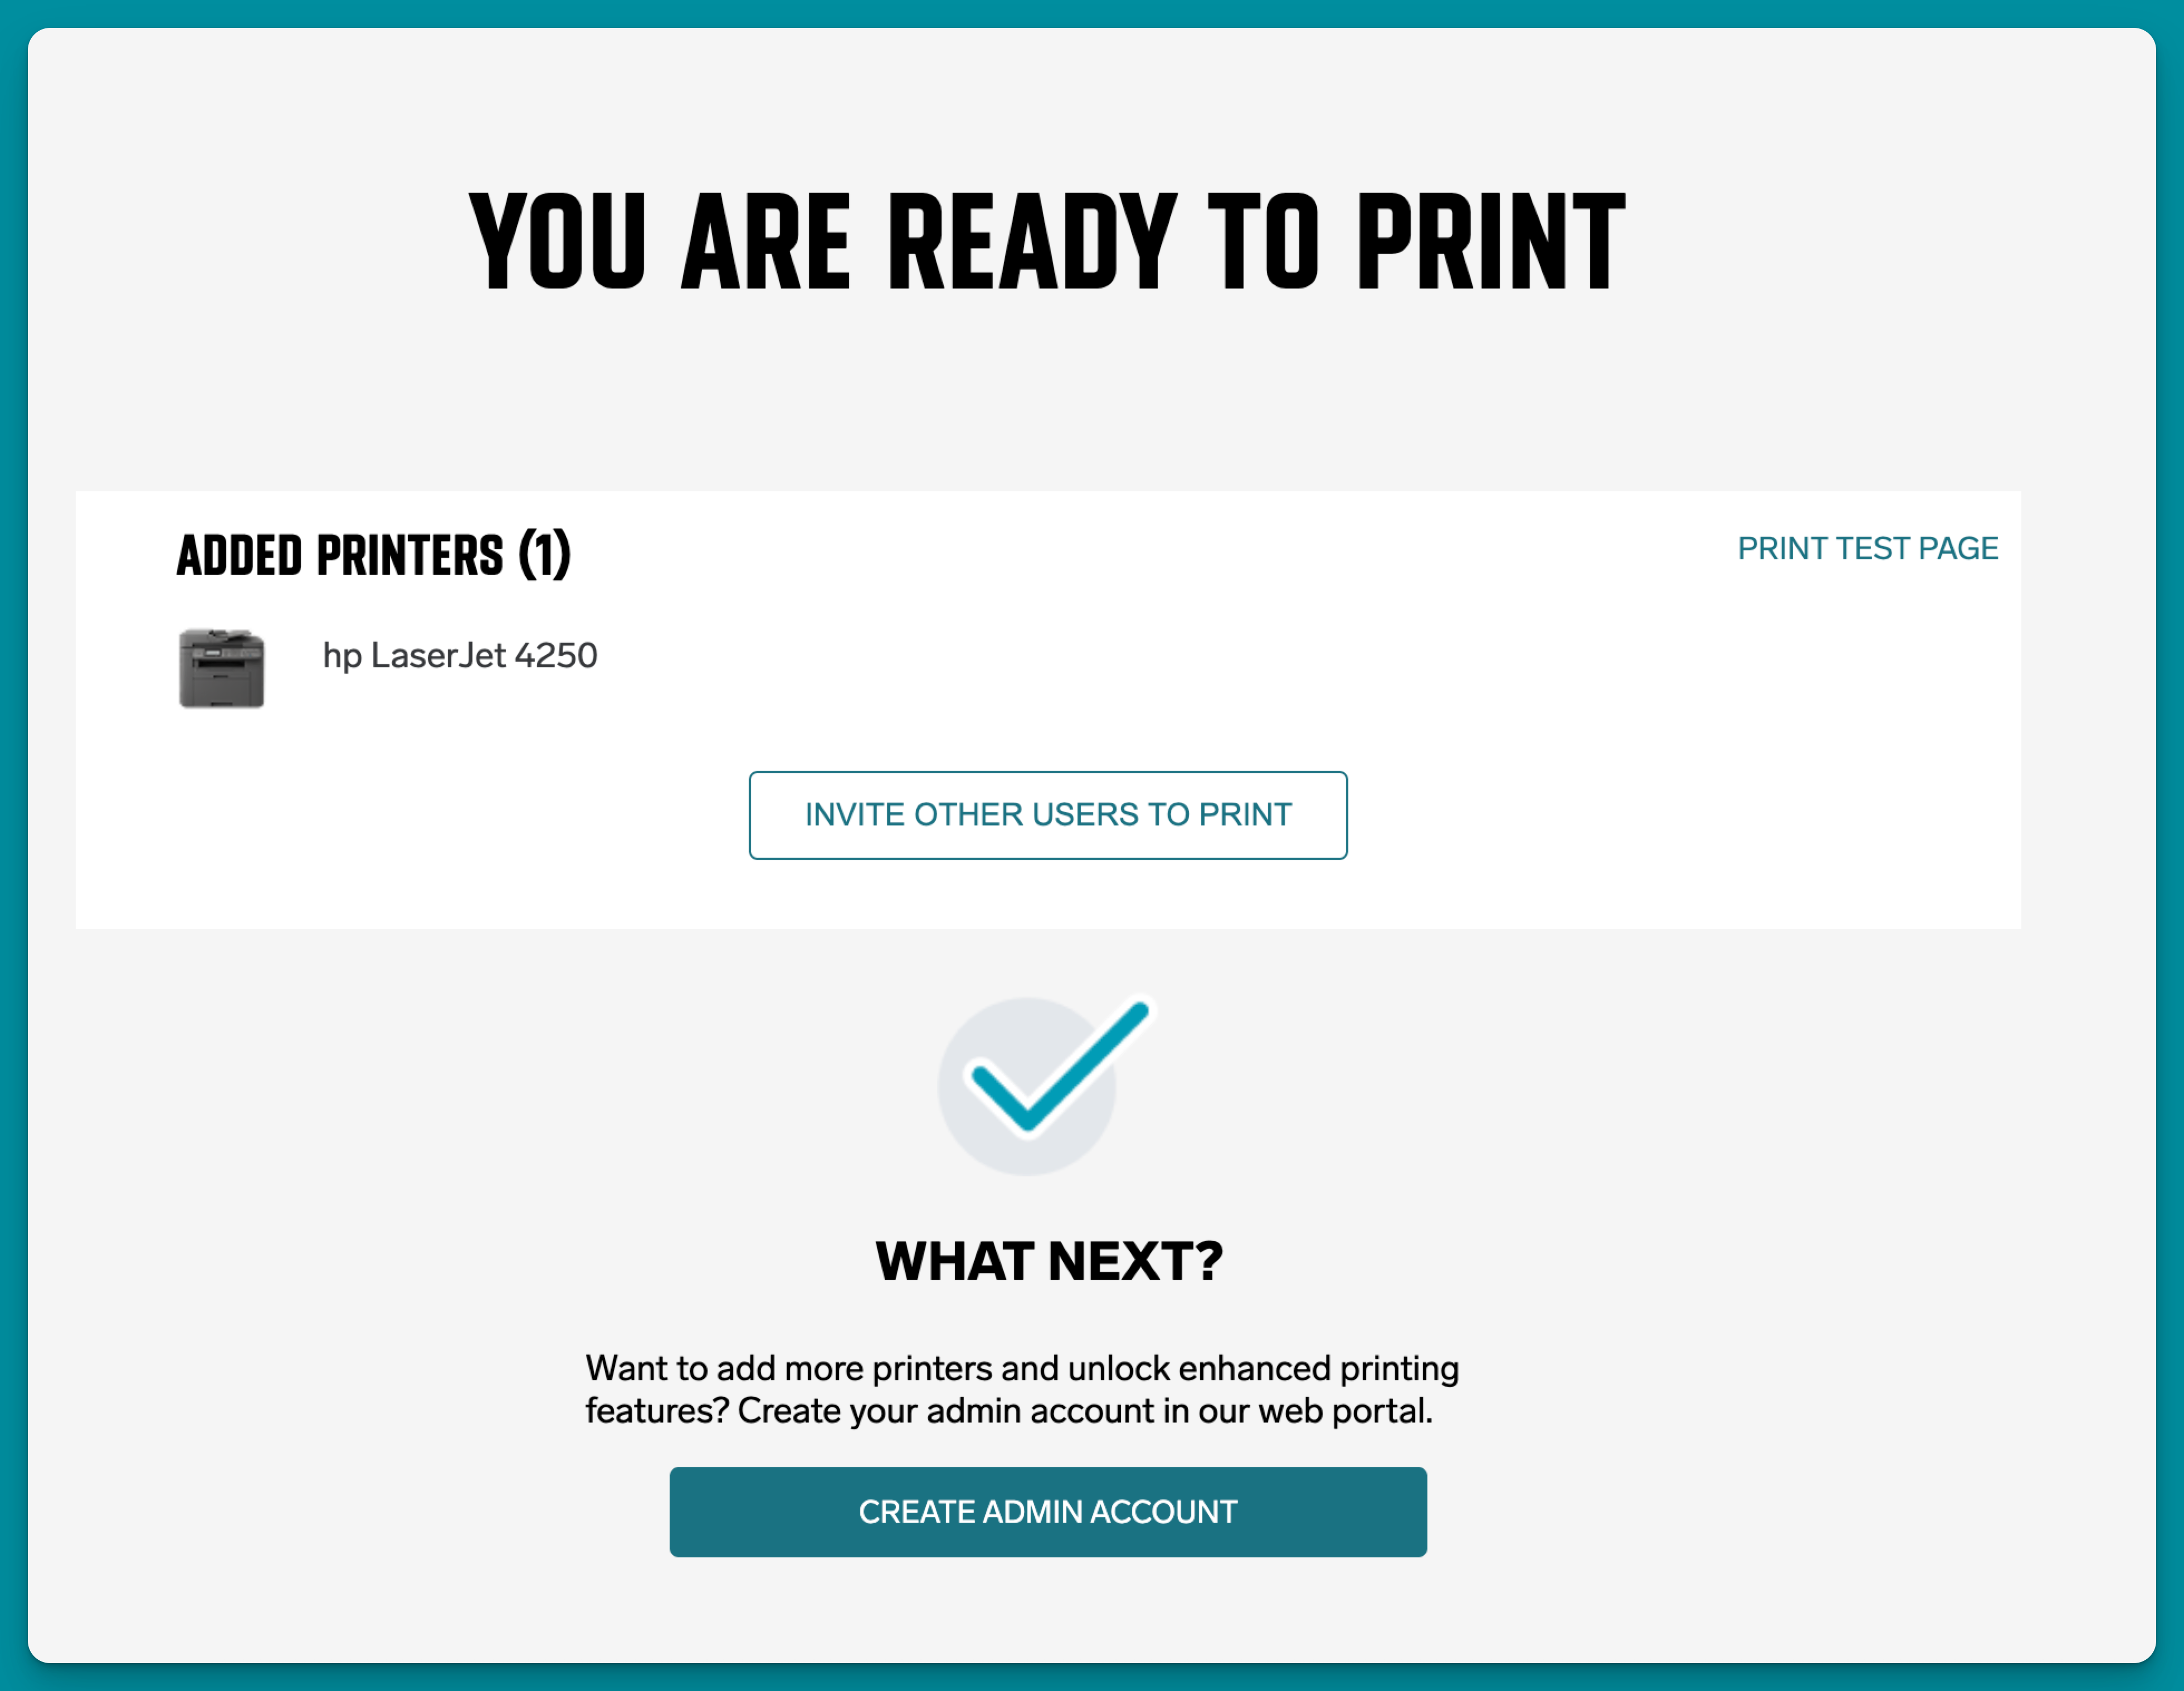
Once they've made their selections and clicked "Add Selected Printers," they can start inviting users to download the PC Client for their organization by clicking “Invite other users to print”. A link is generated to share with users to download the PC Client.
The final step is to create an admin account. Click “Create Admin Account” button to be taken to the following page:

The final touch? Creating an admin password. The system automatically uses the logged-on user's PC username as the admin username, so there's one less thing to worry about!
Configuring sign-up defaults (partner)
On the partner's General settings, the sign-up settings tab lets you set defaults for new tenancies. Its name reflects the products you offer:
-
Both products → Customer sign-up settings
-
Cloud Enabled Print only → Cloud Enabled Print sign-up
-
Breeze only → Breeze trial settings
The Enable public sign-up link option applies to Breeze only. When you offer both products it's labelled Enable public sign-up link (Breeze only) — anyone using the public self-service link always creates a 30-day Breeze trial, never a Cloud Enabled Print tenancy. Cloud Enabled Print tenancies are always created from an invite link you generate.
If you have any issues using the SAFEQ Cloud Wizard, please contact the partner who sent you the link to create your tenancy.