Prerequisites
-
Your secondary gateway is configured according to Secondary Gateway mapping.
-
Terminal Client service is created with the SAFEQ Cloud embedded terminal integration.
-
Document output service is created.
-
The sharp Embedded client is created. See Embedded Terminals' configuration.
-
A Printer is created (using above mentioned Terminal Client service, Document output service, and created Sharp Embedded Client). See Printers.
Installing and configuring the terminal
-
Log in as an administrator to the MFD web interface.
-
Go to System settings.
-
Click Sharp OSA settings.
-
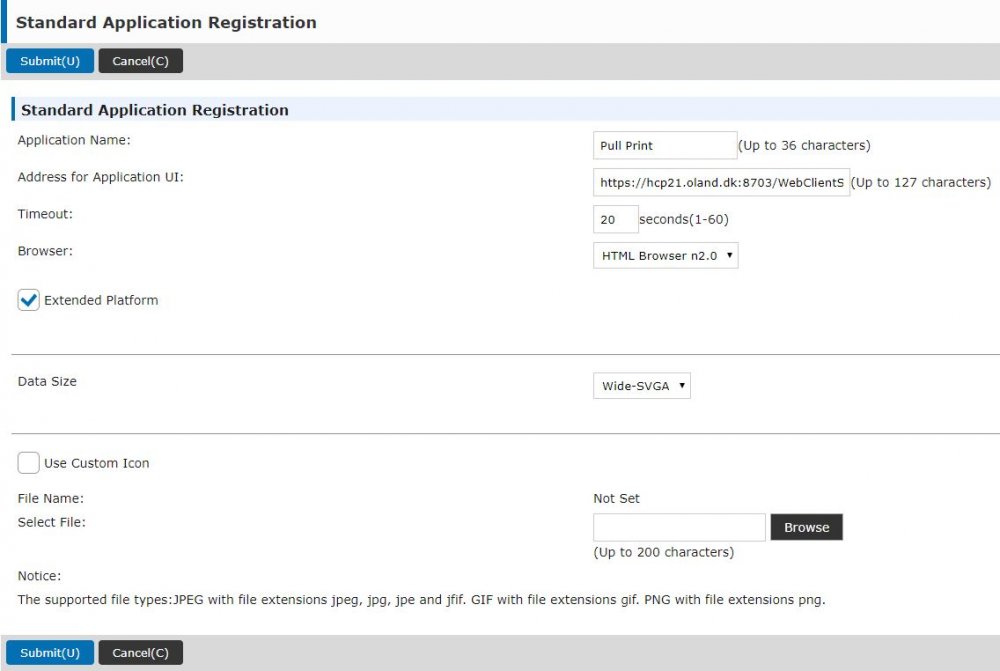
Click Standard Application Settings and click Add.

-
Enter a desired application name.
-
Enter the address for application UI as
https://‘server name’:8703/WebClientSharp/HomeAdapterServlet?addr=<MFD_adress>. Example:https://print.acme.com:8703/WebClientSharp/HomeAdapterServlet?addr=192.168.100.101.-
server name - The fully qualified domain name of the SAFEQ Cloud Gateway.
-
MFD_address - The IP address or hostname of the MFD.
-
addr - If the MFD is configured in SAFEQ Cloud Web UI using the IP address, this parameter is optional. If it's configured using the hostname, this parameter is mandatory.
-
-
Select Extended Platform.
-
Click Submit.
-
Click on External Accounting Application Settings.

-
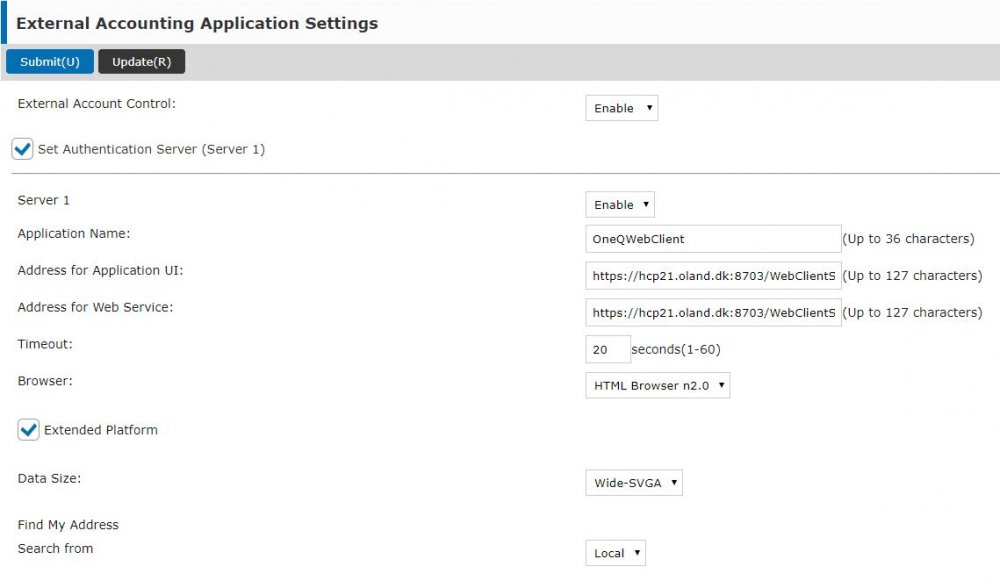
Enable External Account Control.
-
Select Set Authentication Server (Server 1).
-
Enable Server 1.
-
In Application Name, enter OneQWebClient.
-
Enter the address for application UI in the following format:
https://‘server name’:8703/WebClientSharp/LoginAdapterServlet?addr=<MFD_adress>. Example:https://print.acme.com:8703/WebClientSharp/LoginAdapterServlet?addr=192.168.100.101. -
Enter the address for Web Service in the following format:
https://‘server name’:8703/WebClientSharp/ws?addr=<MFD_adress>. Example:https://print.acme.com:8703/WebClientSharp/ws?addr=192.168.100.101.-
server name - The fully qualified domain name of the SAFEQ Cloud Gateway.
-
MFD_address - The IP address or hostname of the MFD.
-
addr - If the MFD is configured in SAFEQ Cloud Web UI using the IP address, this parameter is optional. If it's configured using the hostname, this parameter is mandatory.
-
-
Select Extended Platform.
-
Change Find My Address to Local.
-
Click Submit.
-
Restart the MFD.
-
If you haven't done so already, create the Printer and the Embedded configuration in SAFEQ Cloud Web UI. See Printers and Embedded Terminals' configuration. These settings are all that is needed to install and configure the terminal. You don't need to click Install and Configure from the SAFEQ Cloud Embedded Configuration.
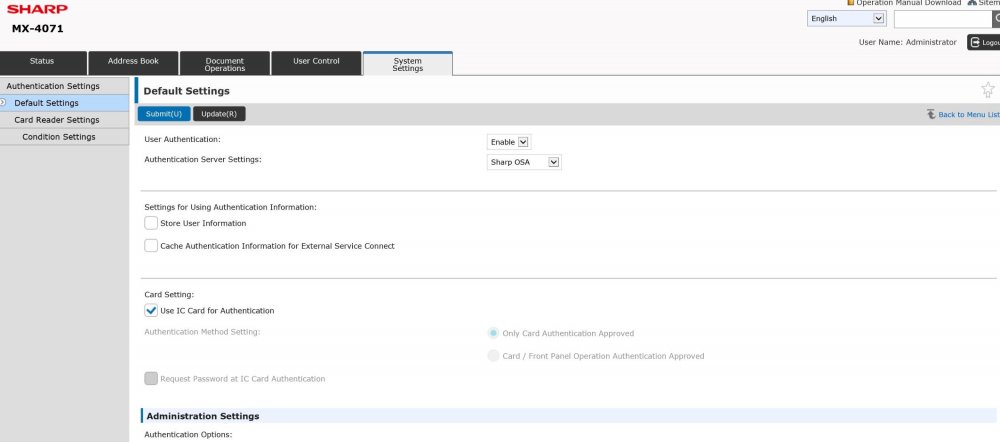
To deploy on newer Sharp devices like MX-4061 and MX-4071, configure also the following settings:
-
Go to Authentication settings > Default Settings.
-
Enable User Authentication.
-
Set Authentication Server Settings to Sharp OSA.
-
In the Card Settings section, enable Use IC Card for Authentication.

-
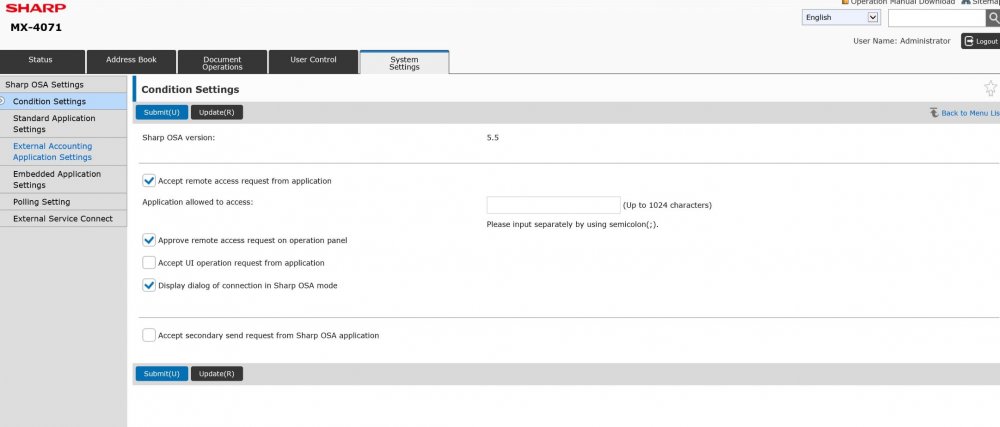
Go to the Conditions Settings and select all the options as shown in the screenshot.

-
If you wish to use a custom logo on the terminal, name the file with the logo logo.png and place it in
/opt/safeqcloud/conf/sharp.
