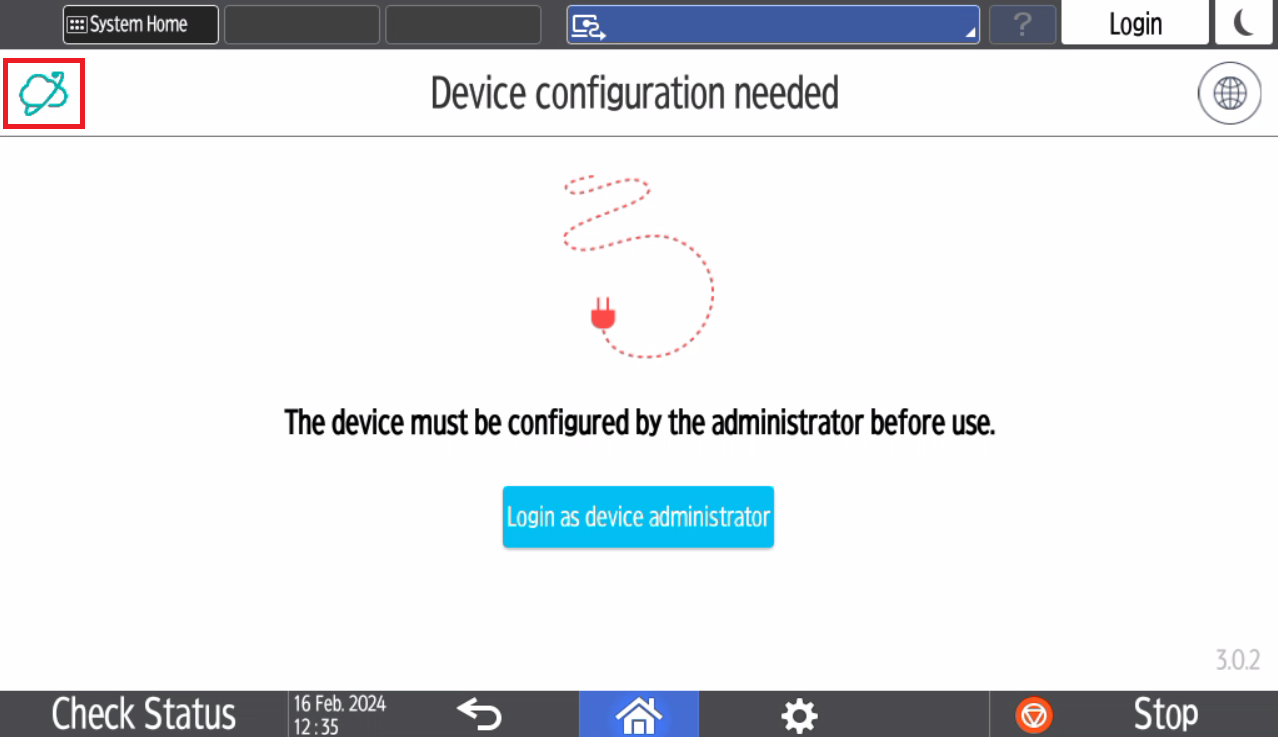
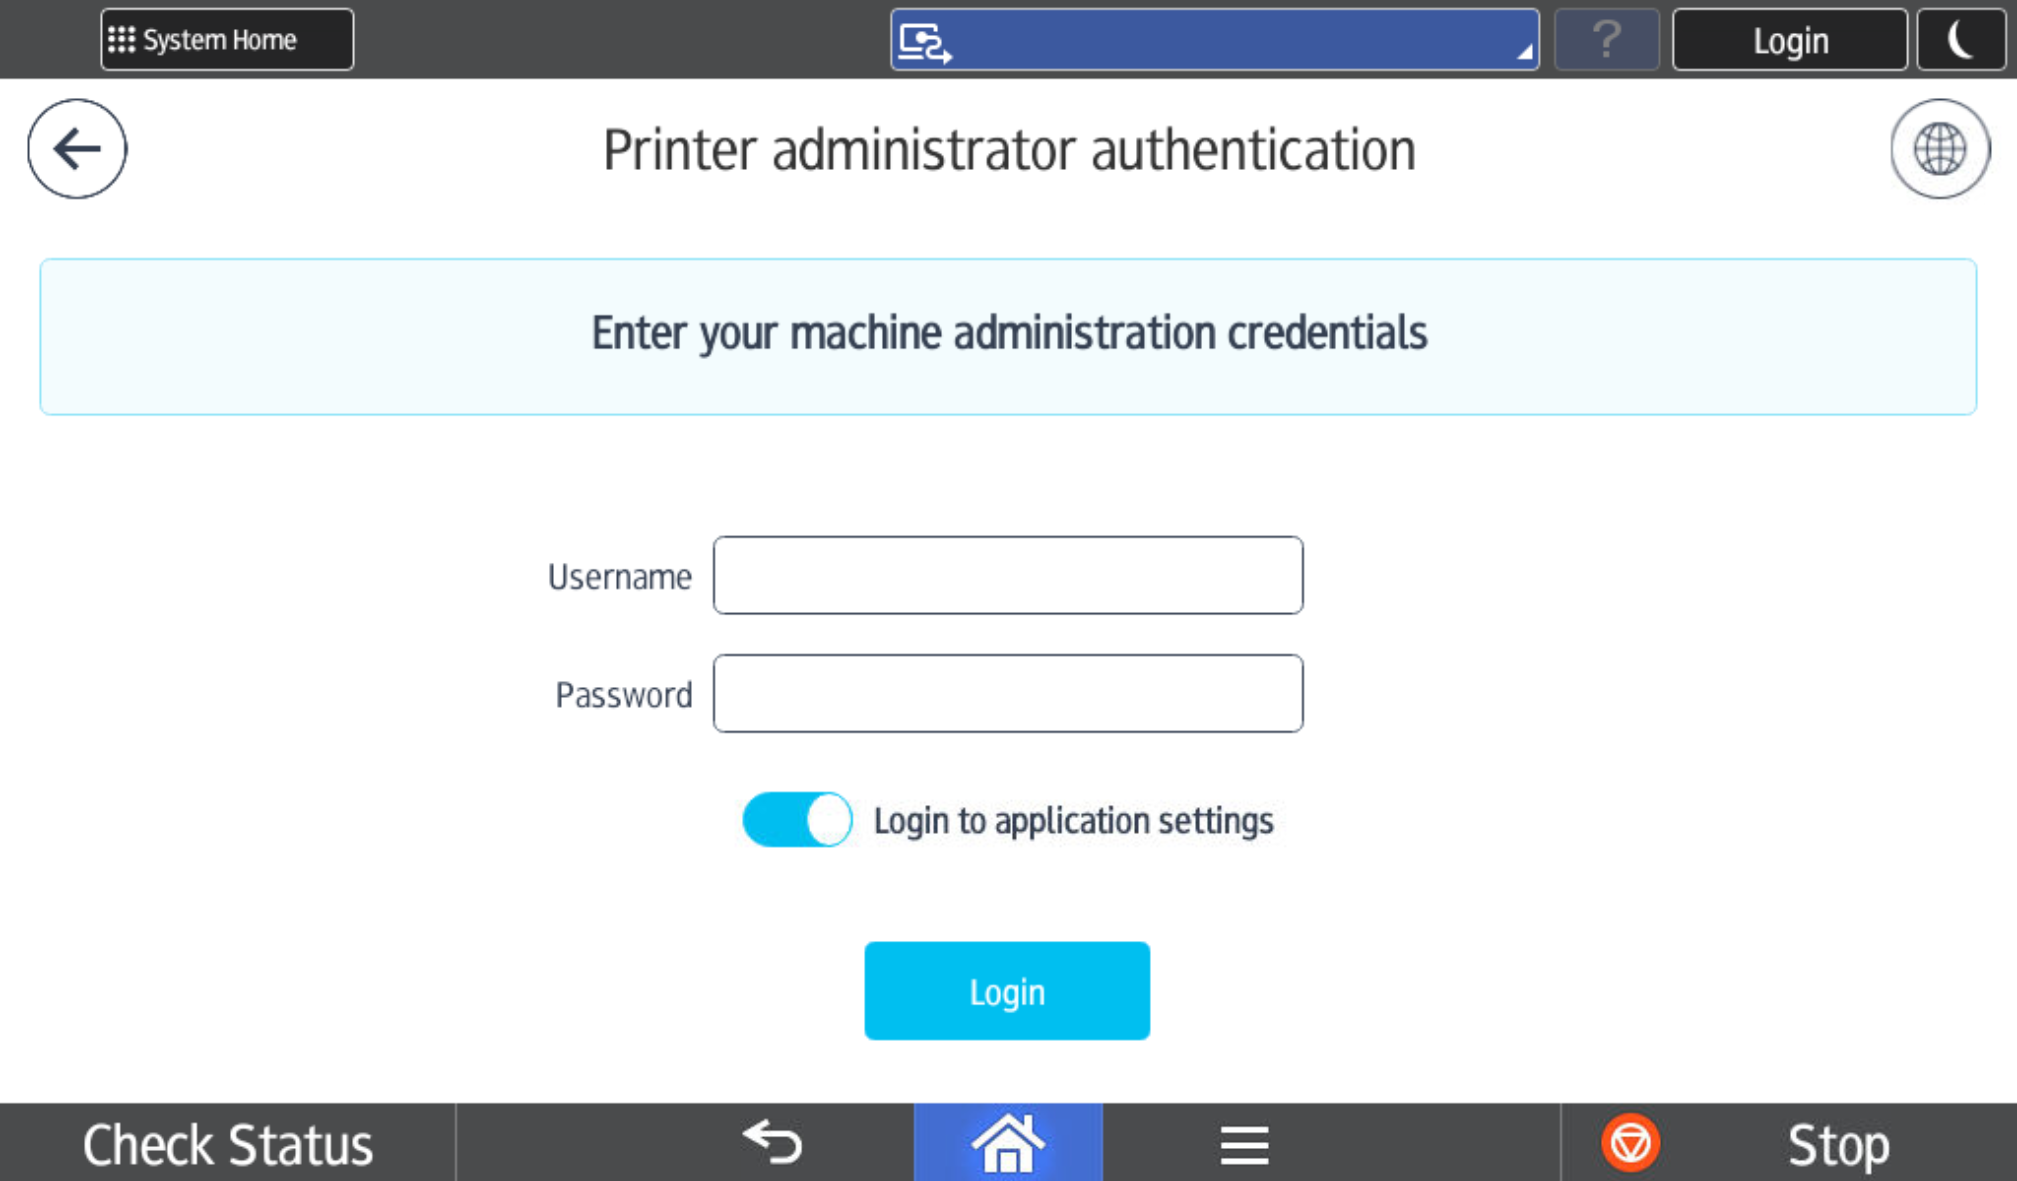
Logging in as machine administrator
After the terminal installation, if you need to log in at the MFD as machine administrator, perform the following steps:
-
On the Authentication screen or device code flow screen or an error screen, tap and hold the logo in the upper left corner for at least 5 seconds.
-
Enter your admin credentials.
Manual application configuration
You need to configure the terminal manually only if you haven't set the Customer domain and API key via the Terminal Deployment Tool or by configuring the terminal from the SAFEQ Cloud Web UI.
-
Login as machine administrator to application settings (see section Logging in as machine administrator above).
-
Update Customer domain or API key. Note that the API key field cannot be saved empty.
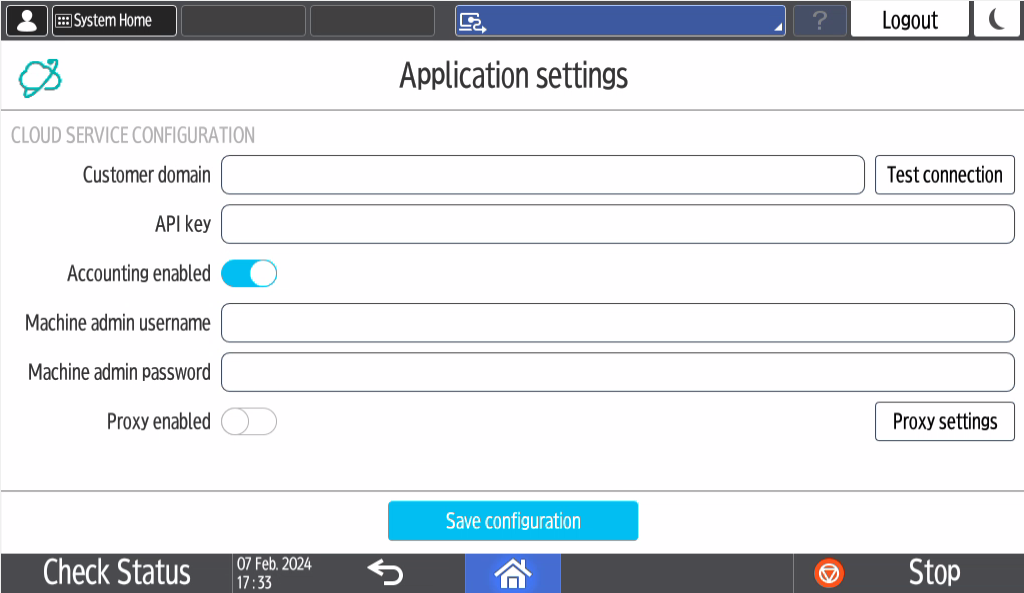
How to obtain the API key: Log in to the SAFEQ Cloud Web UI and go to Security > API keys. Click Add. Copy the key value and click Save. For more information, see API access keys. -
Tap Test connection.
-
If needed, enable accounting.
-
Fill in the machine administrator username and password. It will be used for accounting based on the device counters and for address book management. Without it, accounting will not work and the address book will display entries from previously logged users.
-
-
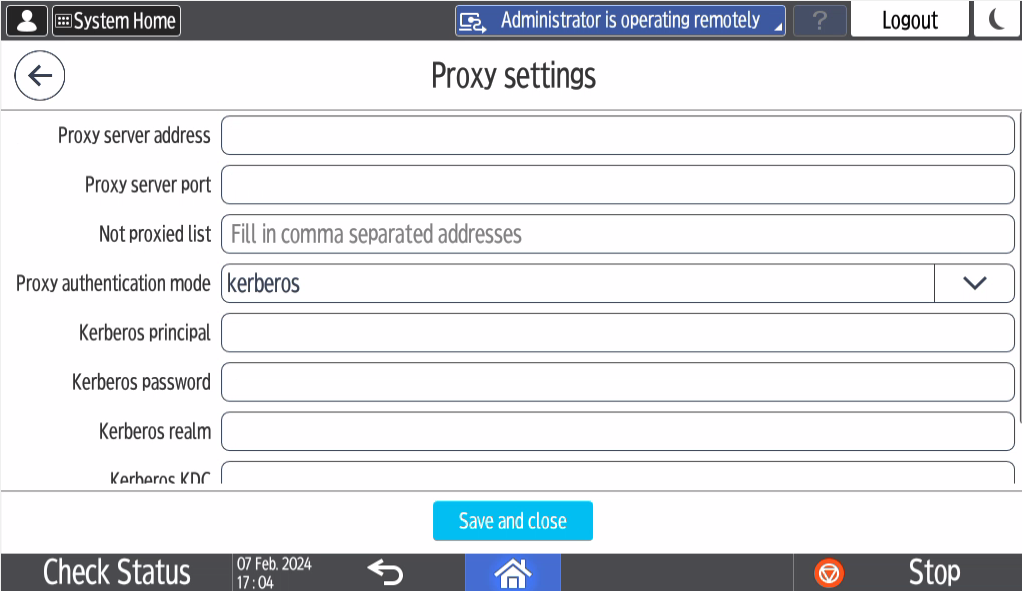
If you wish to use proxy, tap Proxy settings.
-
Fill and save the proxy settings.
-
Back in the main menu, enable proxy.
-
Tap Save configuration.
-
The identity management URL will be updated after the Customer domain change automatically.
-
Log out.
Manual device configuration
The following steps are done automatically during the installation.
Manual configuration is needed:
-
If you installed the Cloud Terminal from Ricoh Application Site.
-
On G2 machines without Java enabled (the administrator is informed about this during the installation).
-
If the remote configuration fails due to an unexpected error (the administrator is notified about this situation during the installation).
Configuring USB Card Reader
Configure the card reader in System Settings
-
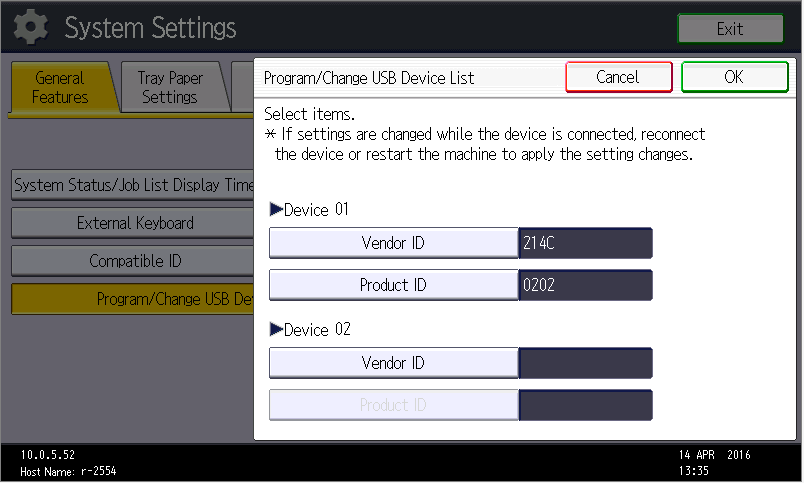
Navigate to System Settings > General Features > Program/Change USB Device List.
-
Under Device 01:
-
If you have a YSoft card reader, enter values for Vendor ID: 214C and Product ID: 0202 (keyboard emulation mode).
-
If you have a card reader from another manufacturer, you can find the Vendor ID and Product ID in Compatible Card Readers.
-
Set up card reader in Smart Operational Panel
-
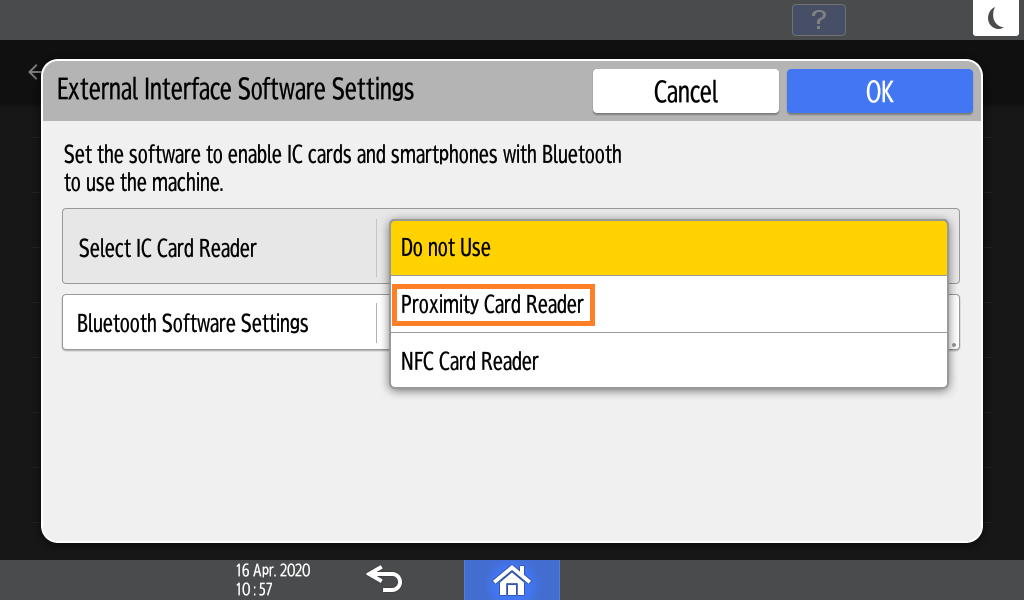
Navigate to User Tools / Settings > Screen Features > Screen Device Settings > IC Card Bluetooth Software Settings / External Interface Software Settings > Select IC Card Reader.
-
Select Proximity Card Reader.
-
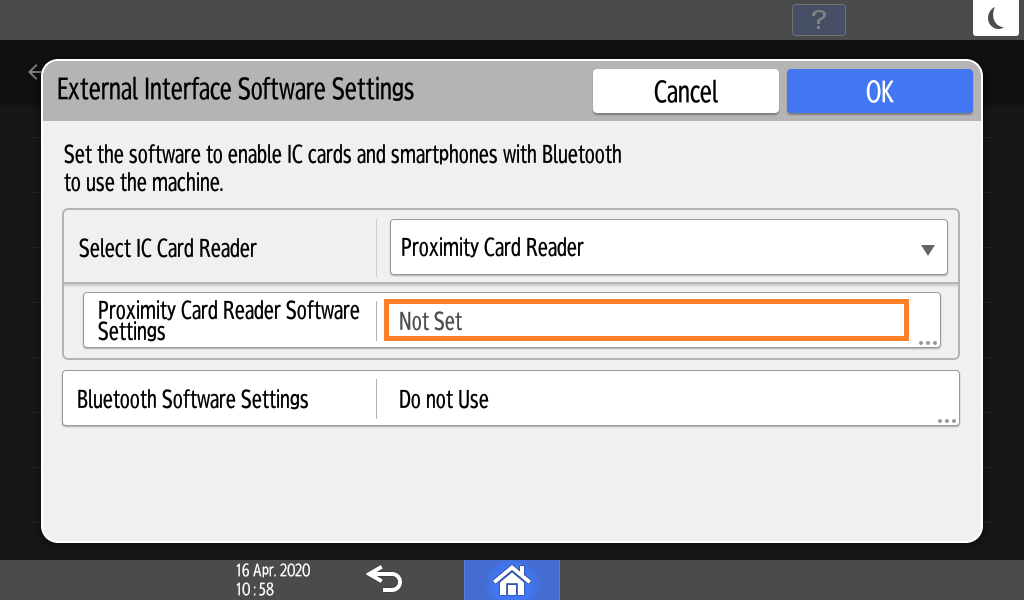
Go into Proximity Card Reader Software Settings.
-
The following screen will appear:
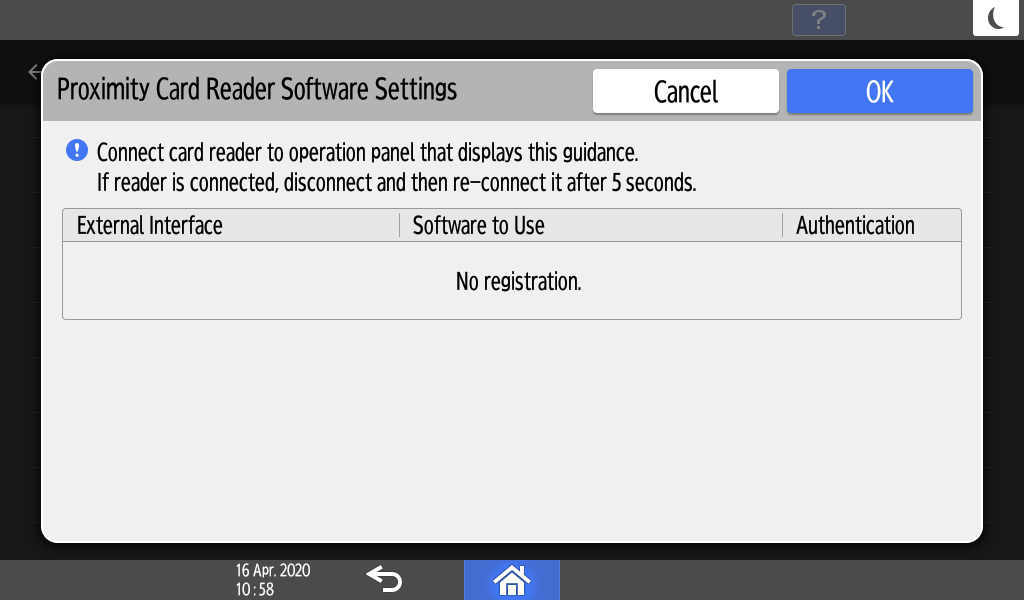
-
Connect or reconnect a card reader to USB on the Smart Operational Panel.
You can use only Smart Operational Panel USB – either a visible one or a hidden micro-USB through an adapter. The card reader will not work with MFD ports (on the back or on the side of the device).
-
Check the settings, confirm the change, and restart the MFD.
Service menu settings
The firmware update should be updated to the latest version. Ask your Ricoh technician to configure the settings for the terminal application for you.
Authentication settings in Web Image Monitor
-
Go to the Ricoh MFD web interface (Web Image Monitor).
-
Log in as an administrator.
-
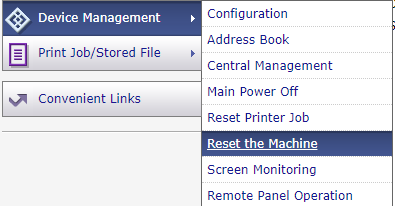
Under Device Management > Configuration, change the following settings so the authentication application will be displayed:
-
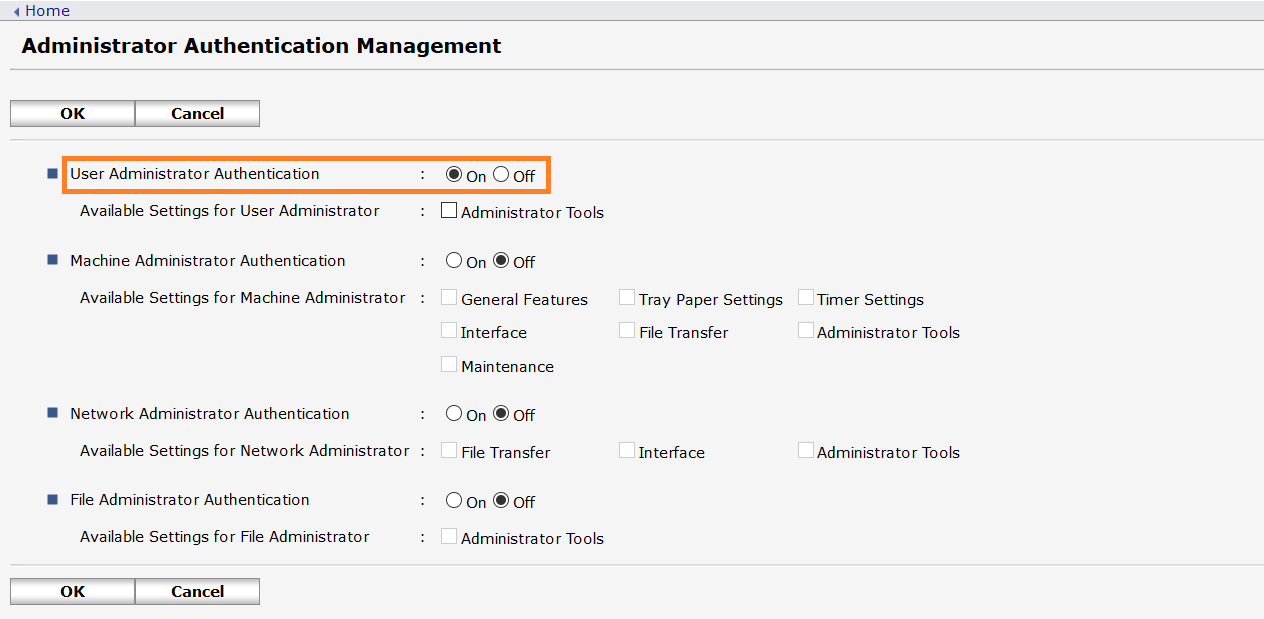
In Administrator Authentication Management, set User Administrator Authentication to On.
-
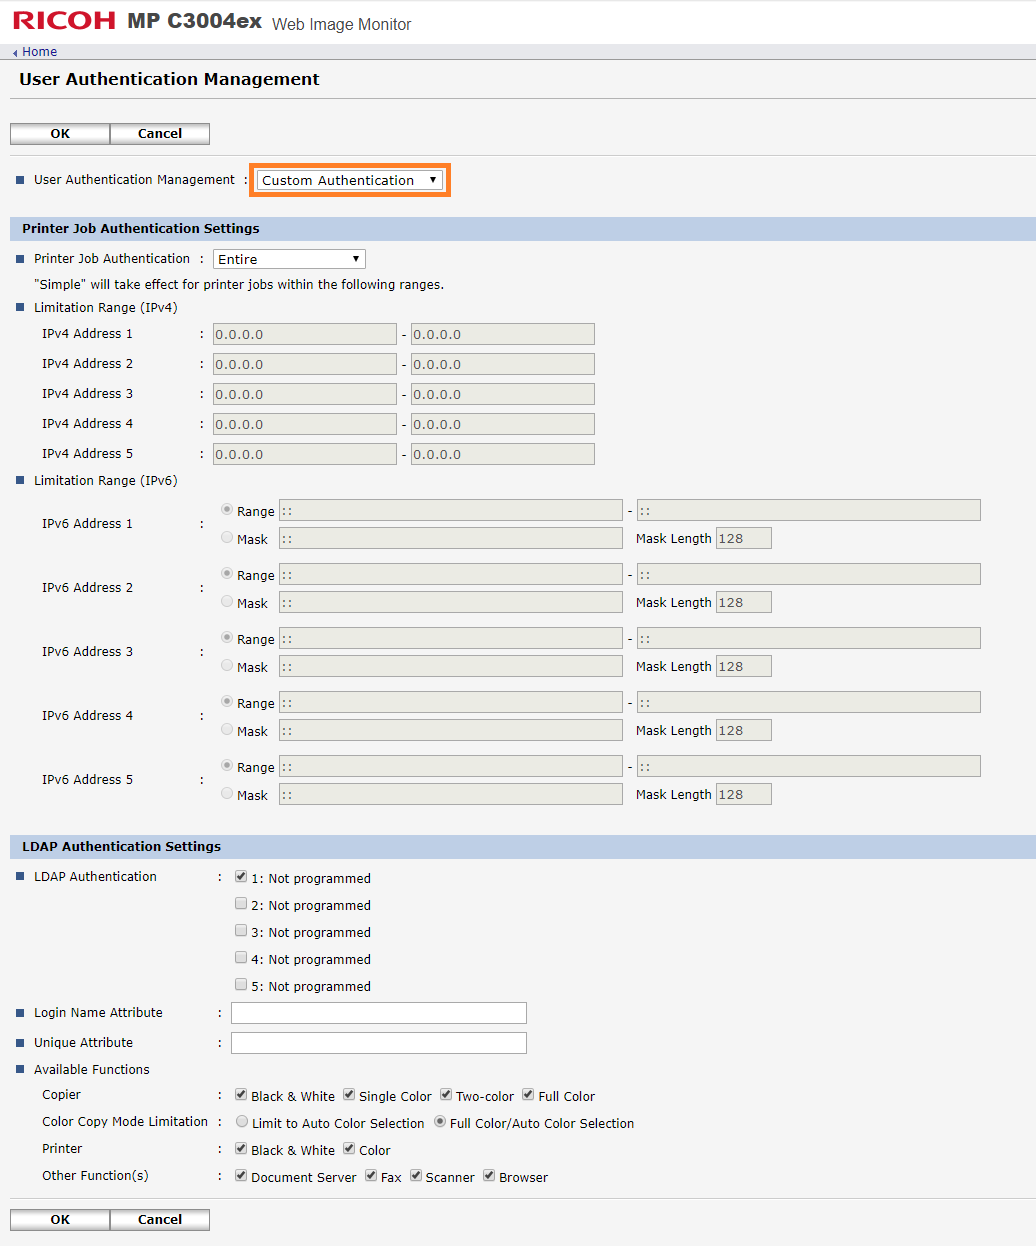
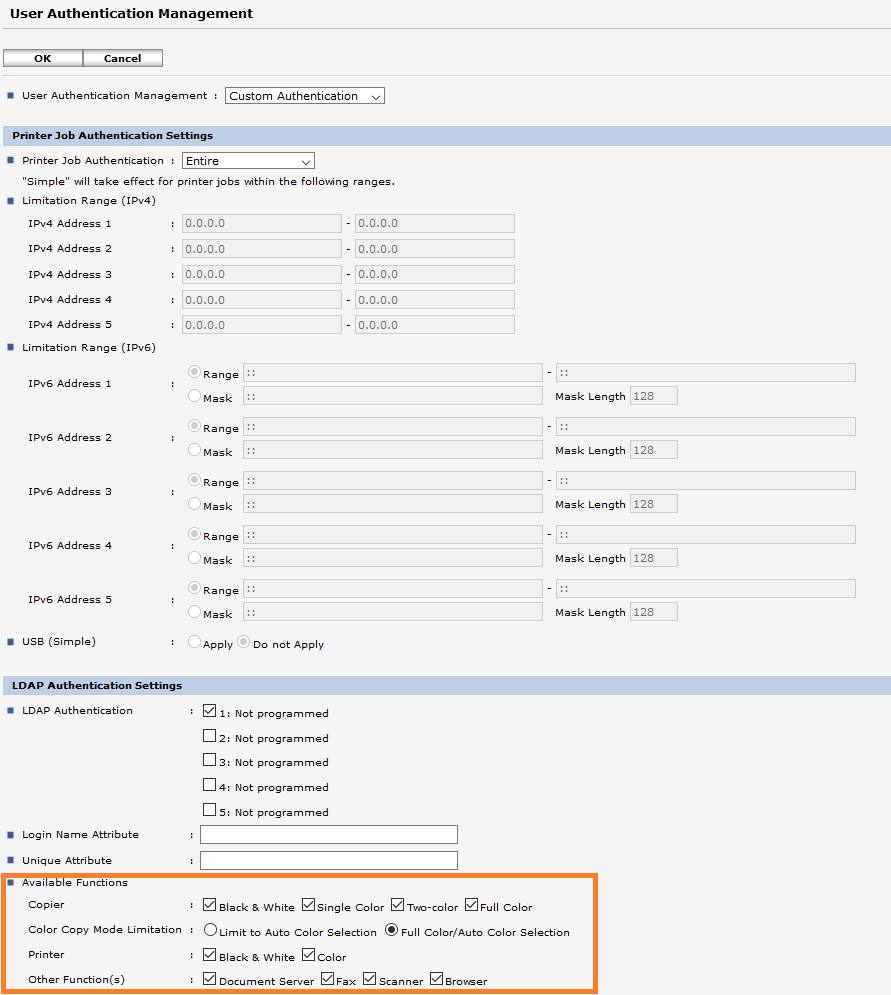
In User Authentication Management, set User Authentication Management to Custom Authentication.
-
In User Authentication Management, check that all functions are enabled.
-
-
Restart the device. You may use Reset the Machine in WIM.
Set appropriate timers
Terminal inactivity timeout is a value for the user's automatic logout. It is defined for Cost centers and can be specified per user. This feature is currently not supported by Ricoh SOP.
The default value on MFD is automatically set to more than 3 minutes. It can be manually changed after installation.
-
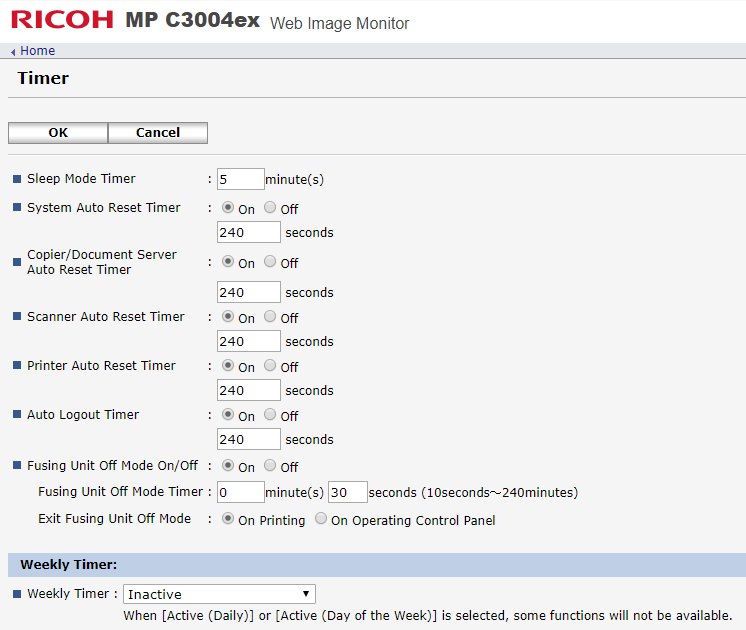
Login to WIM (Web Image Monitor) as machine administrator.
-
Under Device Settings, navigate to Device Management > Configuration > Timer.
-
As default set all timers higher than Terminal inactivity timeout (so for default Terminal inactivity value, set all values to more than 3 minutes). Most of the timers can be turned off if they are not needed.
Scan journal settings
For the users to always be able to scan, we recommend you setting the following scan journal deletion strategy:
-
Log in to WIM (Web Image Monitor) as machine administrator.
-
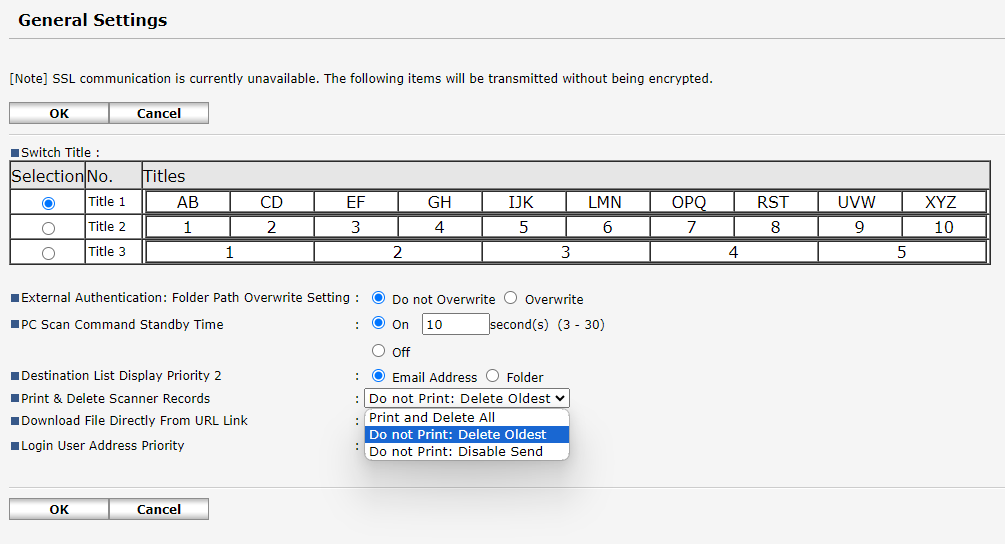
Go to Device Management > Configuration > Scanner > General Settings.
-
Set Print & Delete Scanner Records to Do not Print: Delete Oldest.
-
Alternatively, you can change this by setting SCAN_SETTINGS__PRINT_DELETE_SCANNER_JOURNAL SP option to 1.
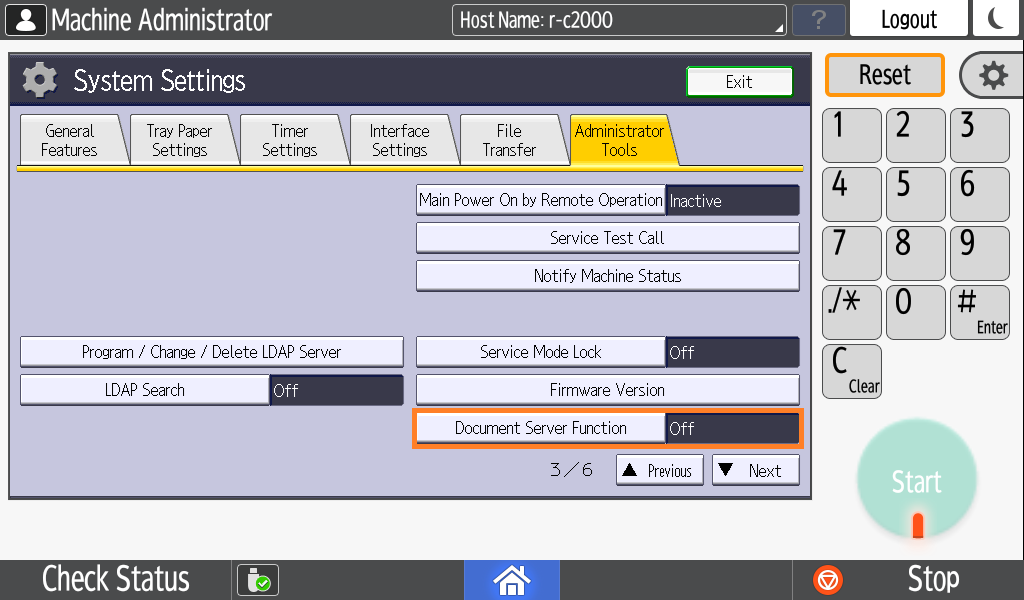
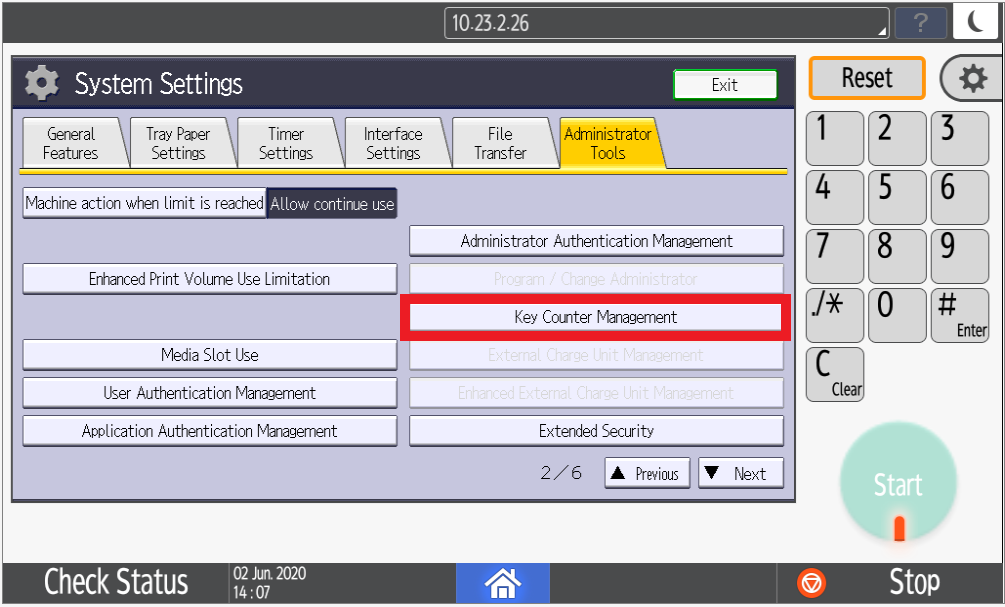
Key Counter Management settings on the MFD
-
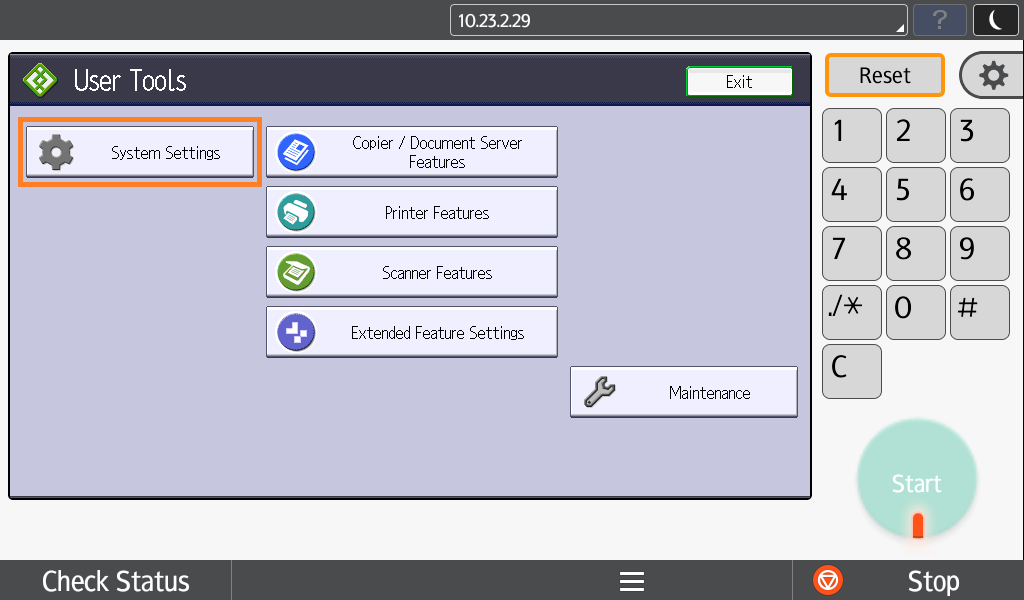
Go to User Tools on MFD.

-
Select Machine Features.
-
Go to System Settings.
-
Go to Administrator Tools. Use the Previous or Next buttons to locate the Key Counter Management setting.
-
Unblock all functions.

-
Set Document Server Feature to Off.