
The following guides provide step-by-step instructions on how to configure and enable HTTP authentication on YSoft SafeQ FlexiSpooler. FlexiSpooler Server HTTP authentication adds access protection to YSoft FlexiSpooler servers, before YSoft FlexiSpooler client will access YSoft FlexiSpooler server, user is required to authenticate using credentials. Please note, authentication is not changing job owner, also it doesn't matter whether the server is spooling or not. At this moment, only Azure Active Directory authentication is supported.
In order to enable Azure Active Directory HTTP authentication, follow the next steps:
-
Add YSoft SafeQ FlexiSpooler Client application into AD
-
Login to your company Azure account
-
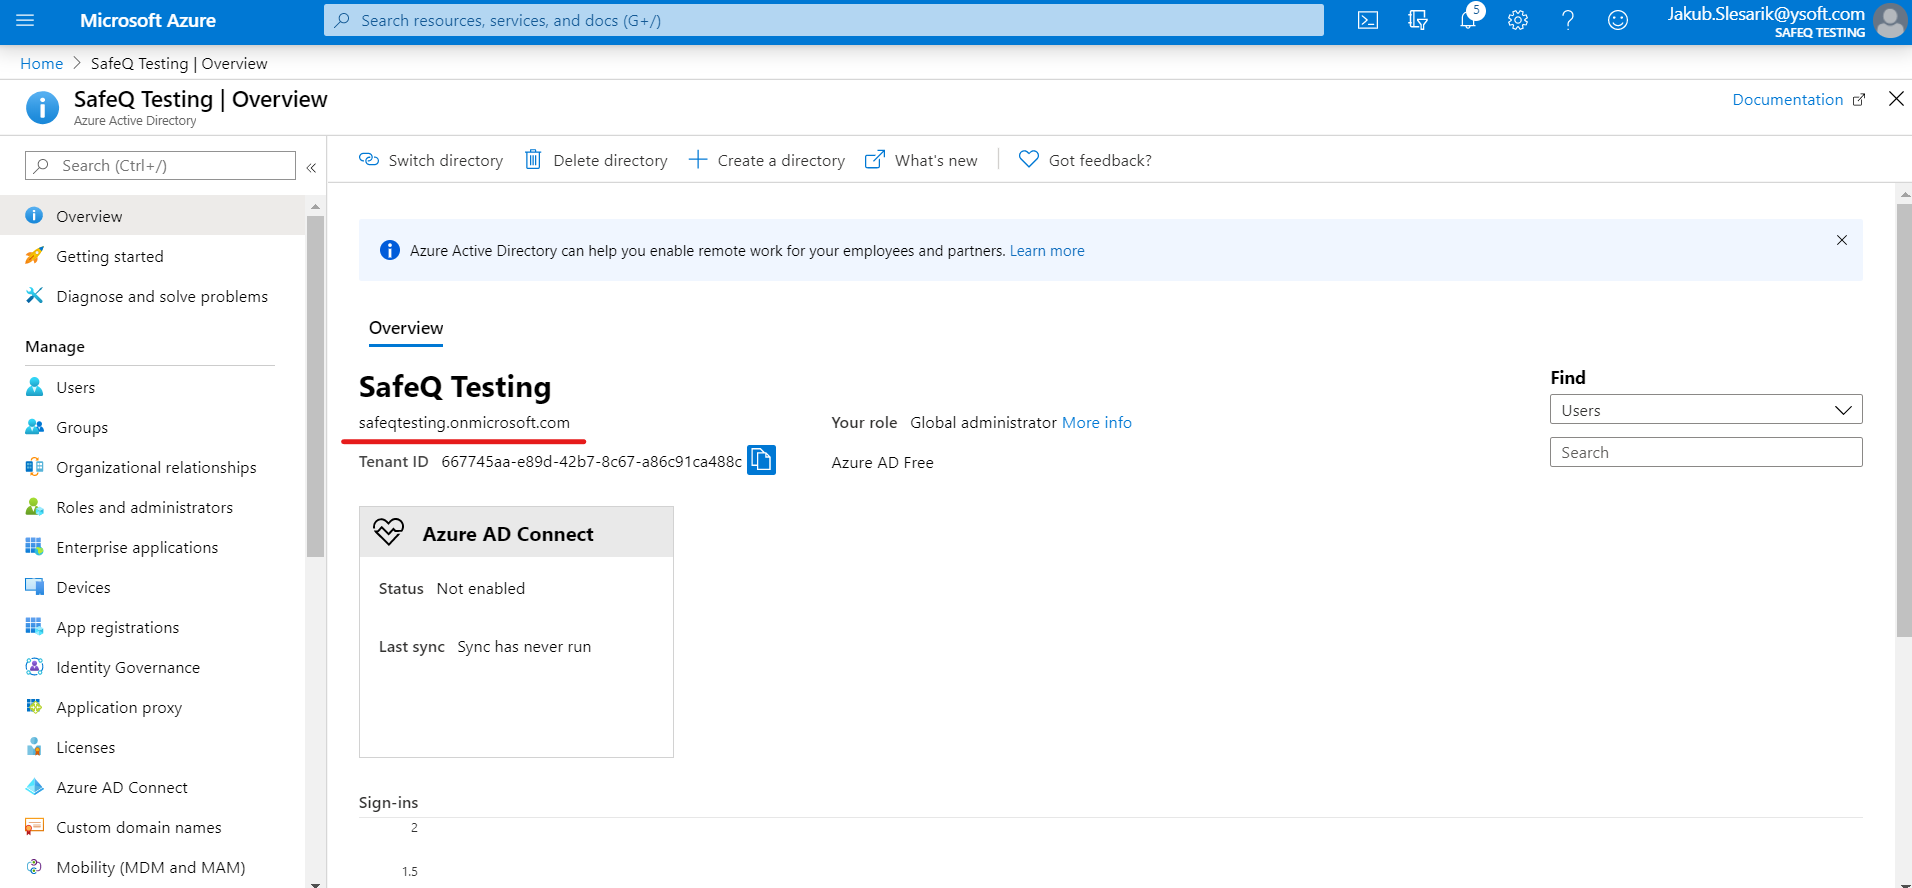
Select your Active Directory
[data-colorid=trbhuowmgp]{color:#201f1e} html[data-color-mode=dark] [data-colorid=trbhuowmgp]{color:#e1e0df}[data-colorid=hnyhf7qofy]{color:#323130} html[data-color-mode=dark] [data-colorid=hnyhf7qofy]{color:#cfcecd}[data-colorid=ilrvm4bwyr]{color:#323130} html[data-color-mode=dark] [data-colorid=ilrvm4bwyr]{color:#cfcecd}[data-colorid=nzrfcwad7e]{color:#323130} html[data-color-mode=dark] [data-colorid=nzrfcwad7e]{color:#cfcecd}[data-colorid=vckc8nczjd]{color:#323130} html[data-color-mode=dark] [data-colorid=vckc8nczjd]{color:#cfcecd}[data-colorid=es0efldg4i]{color:#201f1e} html[data-color-mode=dark] [data-colorid=es0efldg4i]{color:#e1e0df}Open App registrations Tab and click New registrationFill in Name: for example YSoft SafeQ FlexiSpooler ClientChoose Platform configuration: Client ApplicationRegister Go to application AuthenticationAdd platform and select Mobile and desktop applicationsCheck https://login.live.com/oauth20_desktop.srf as a redirect URIConfigure
-
-
Add YSoft SafeQ FlexiSpooler Non-Spooling Server application into AD
-
Login to your company Azure account
-
Select your Active DirectoryOpen App registrations Tab and click New registrationFill in Name: for example YSoft SafeQ FlexiSpooler Non-Spooling Server Choose Platform configuration: Web APIRegisterGo to application Expose an APISet Application ID URI, which identifies the application, for example: https://safeqtesting.onmicrosoft.com/flexispoolerserverGo to application BrandingSet Home page URL to the same value as Application ID URISaveGo to Expose an APIPress Add a scopeScope name: Job.ReceiveWho can consent?: Admins onlyAdmin consent display name: Receive JobAdmin consent description: Receive JobAdd Scope
-
-
Set permission for YSoft SafeQ FlexiSpooler Client to access YSoft SafeQ FlexiSpooler Non-Spooling Server
-
Open YSoft SafeQ FlexiSpooler Client application registration in company's Active Directory
-
Find section API permissions and click Add a permission
Switch to APIs my organization uses filterSelect YSoft SafeQ FlexiSpooler Non-Spooling Server and check all APIs, keep Delegated Permission selectedAdd permissions -
Grant admin consent for your domain, e.g. by pressing Grant admin consent for SafeQ Testing button
-
-
Find configuration for YSoft SafeQ FlexiSpooler Non-Spooling Server
-
Open YSoft SafeQ FlexiSpooler Client application registration in company's Active Directory
-
Find and store somewhere (for example notepad):Application (client) IDRedirect URI
-
Go back and open YSoft SafeQ FlexiSpooler Non-Spooling Server application registration in company's Active Directory
-
Find and store:
-
Application ID URI
-
-
Go to App registrations tab of company's Active Directory
At the top, click on button ENDPOINTSFind and store OAuth 2.0 Token Endpoint (v1) -
Store Active Directory's Tenant > company's instance of AD; for example, if AD is named SafeQ Testing, AD Tenant is safeqtesting.onmicrosoft.com
-
-
Create and save configuration
-
You should have stored 5 required configuration valuesApplication (client) IDRedirect URIApplication ID URI OAuth 2.0 Token Endpoint (v1)AD Tenant
-
You can now create configuration values for spooler.config, stored in YSoft SafeQ FlexiSpooler Non-Spooling Server
JavaScript"azureNativeClientRedirectUri": "https://login.live.com/oauth20_desktop.srf", "azureNativeClientId": "de711fde-11aa-4910-9f15-d5e853129efc", "azureApplicationIdUri": "https://safeqtesting.onmicrosoft.com/flexispoolerserver", "azureActiveDirectoryAuthorizationEndpoint": "https://login.microsoftonline.com/2573df81-c00d-4172-8ce7-9deb6e7252b9/oauth2/token", "azureActiveDirectoryTenant": "safeqtesting.onmicrosoft.com", "httpAuthenticationMethod": "azureActiveDirectory"
-
And append spooler.config, so the final config looks like:
JavaScript{ "jobStorePath": "JobStore", "isServer": "true", "azureNativeClientRedirectUri": "https://login.live.com/oauth20_desktop.srf", "azureNativeClientId": "de711fde-11aa-4910-9f15-d5e853129efc", "azureApplicationIdUri": "https://safeqtesting.onmicrosoft.com/flexispoolerserver", "azureActiveDirectoryAuthorizationEndpoint": "https://login.microsoftonline.com/2573df81-c00d-4172-8ce7-9deb6e7252b9/oauth2/token", "azureActiveDirectoryTenant": "safeqtesting.onmicrosoft.com", "httpAuthenticationMethod": "azureActiveDirectory" }
-